Autumn

Gather Decor

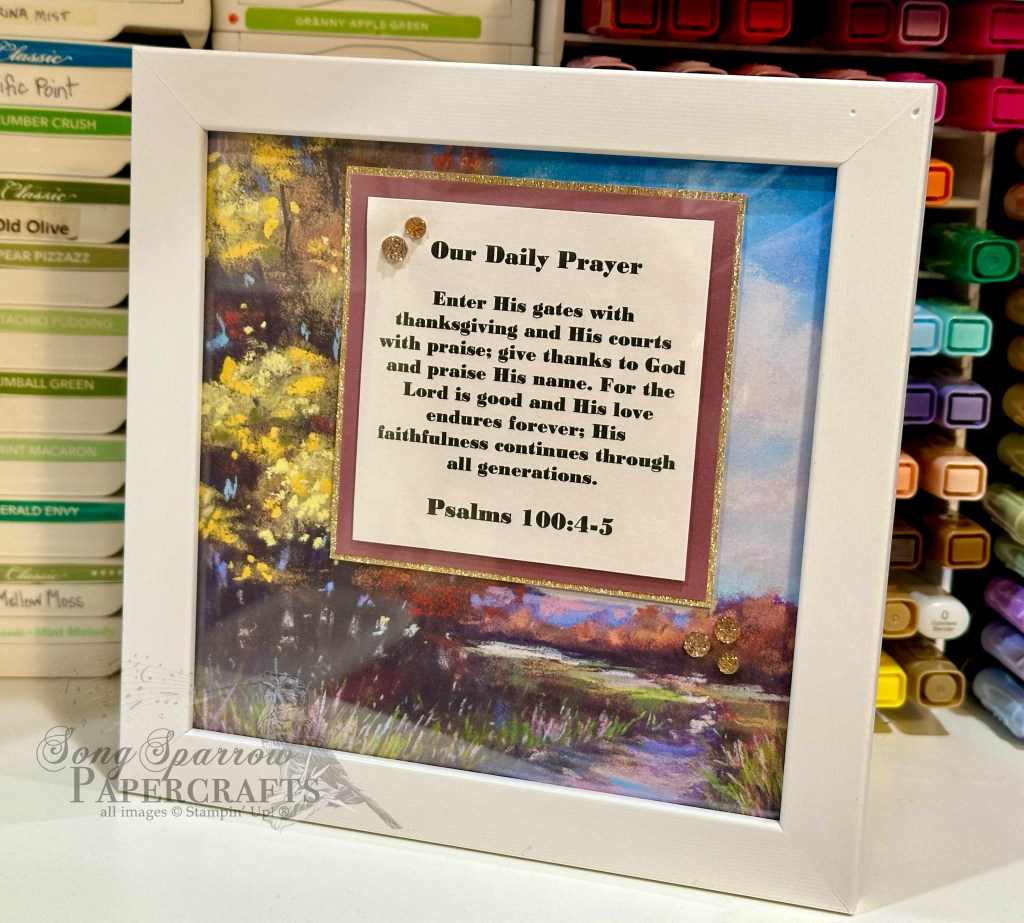
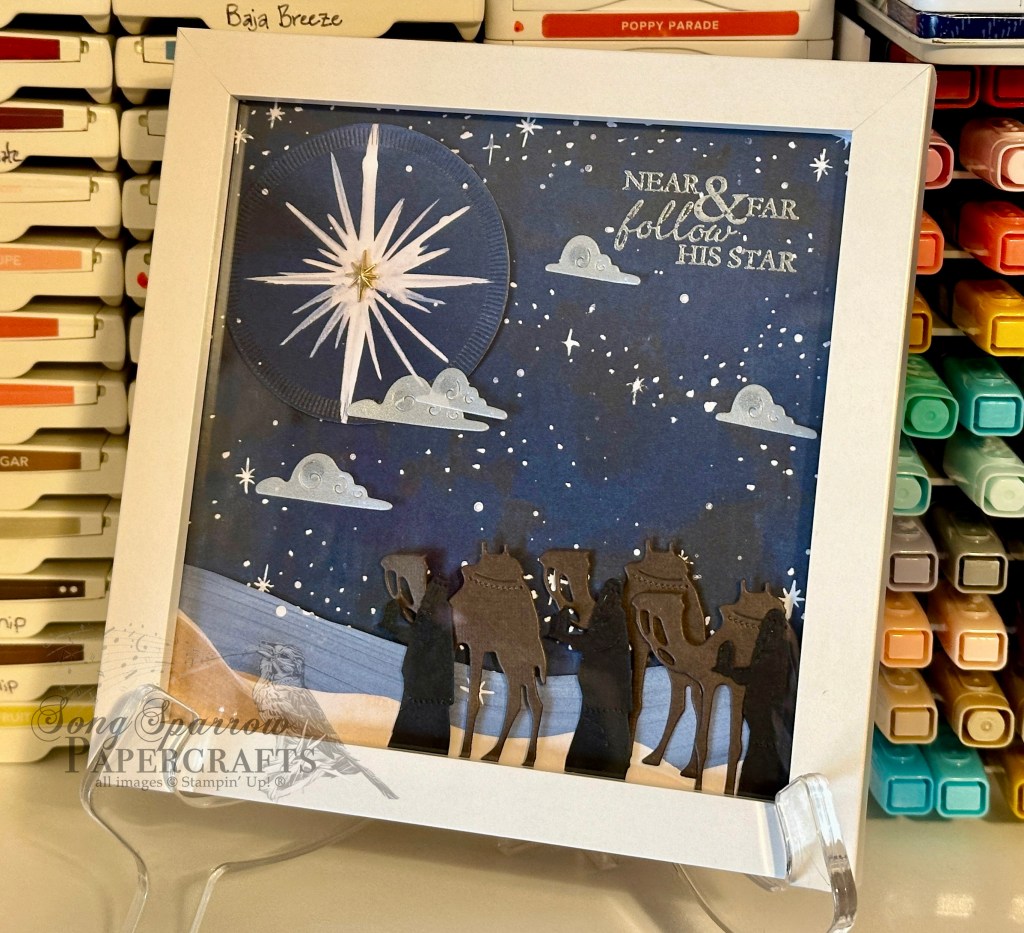
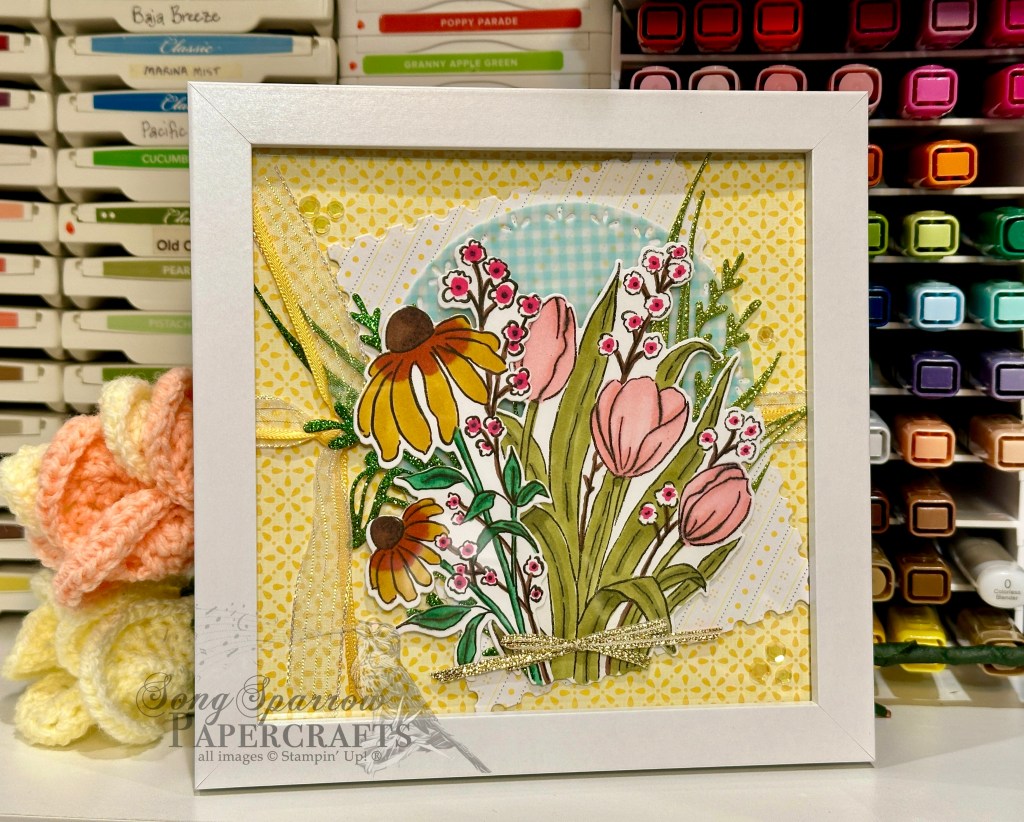
We’re rounding out this week’s design series with some home decor. I have a craft show in a couple of weeks, and I’m still working feverishly to prepare all of the things I have on my display wish list. Last year was the first year I offered home decor items, and they generated a lot of interest.

Today’s design is inspired by a recent post on the Stampin’ Up! official Instagram page. I, of course, put my own twist on it. And isn’t that the best thing about inspiration?! So let’s dig in and see how this comes together.

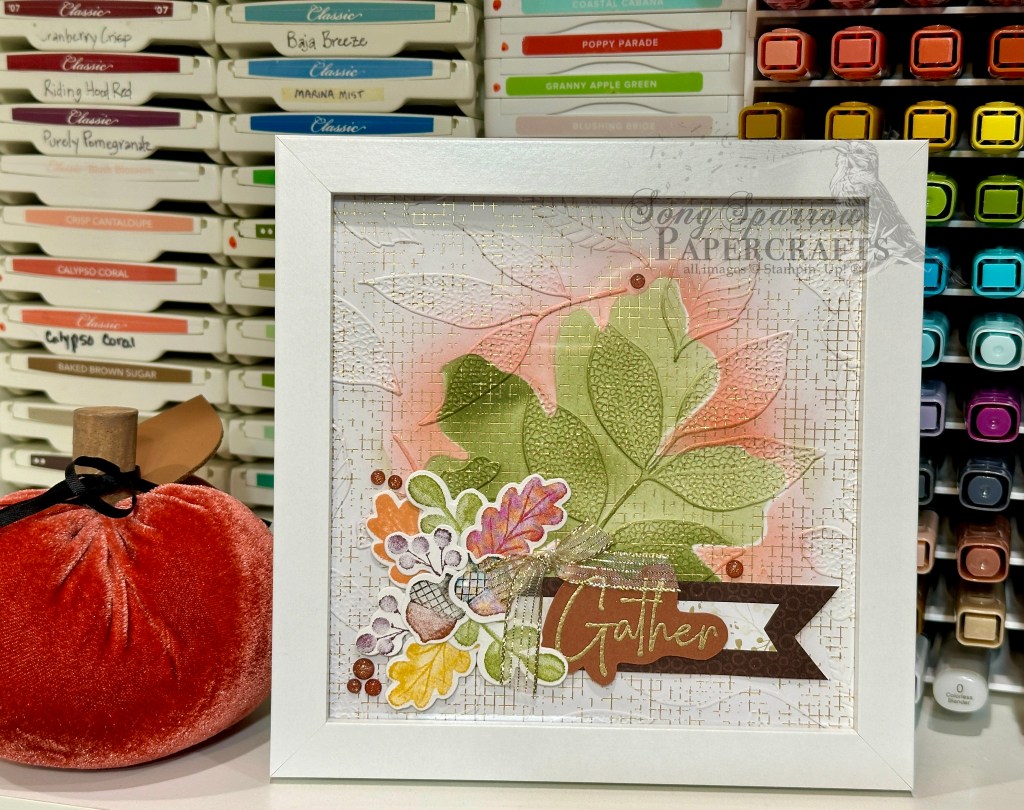
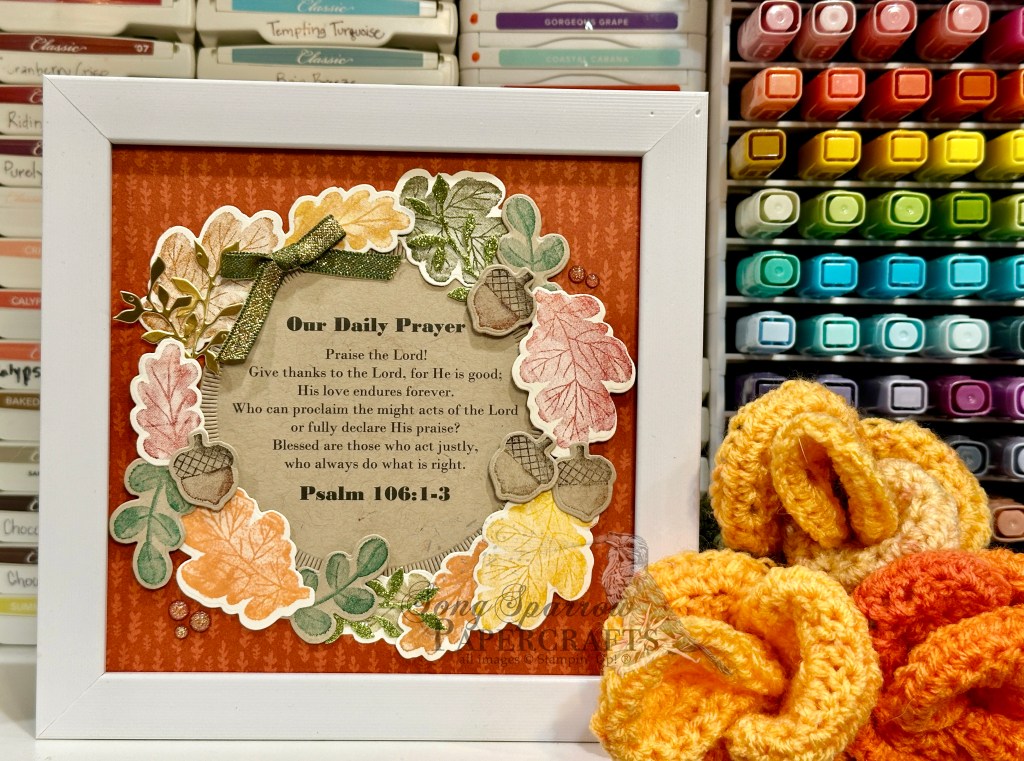
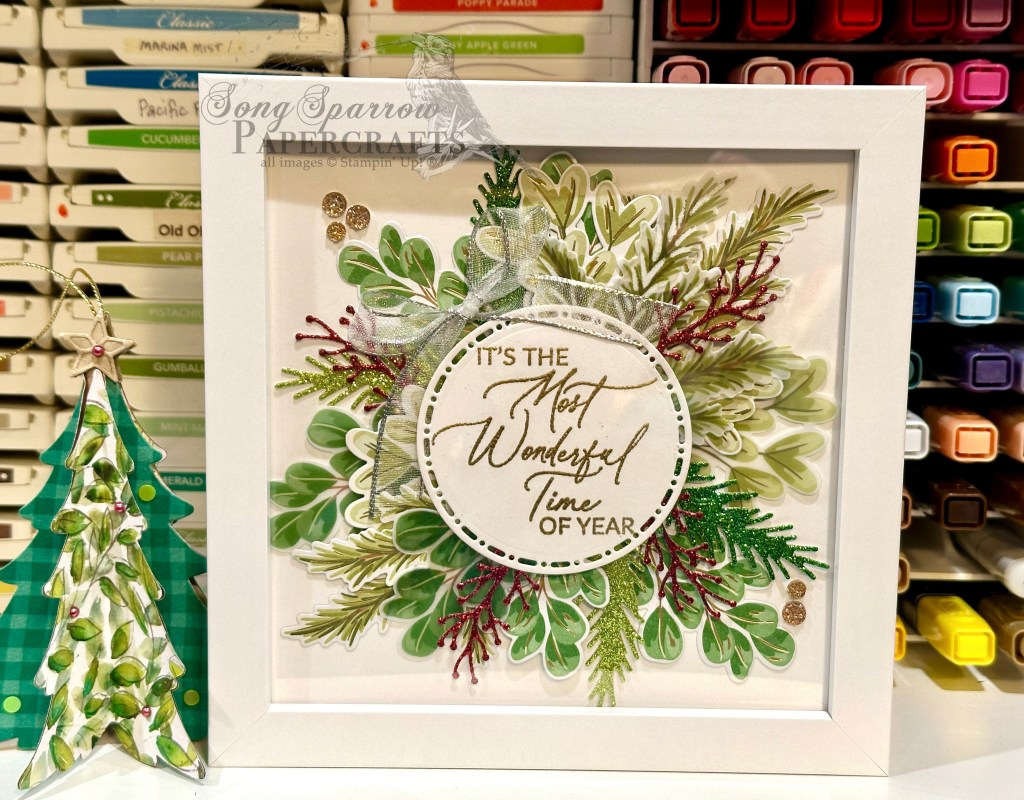
This is a 6×6 frame I found on Amazon. So we get started with a 6×6 card base. HINT: Before you fully commit to your layout, be sure that it shows through the frame as you intend. I neglected this step this time so my Cajun Craze base – that was supposed to be a small border around the focal panel – doesn’t show at all. *womp-womp*

The focal panel base is a sheet of the gold foil hashed patterned paper from the Nature’s Sweetness paper pack. I decided to use the retired Changing Leaves embossing folder to create the background texture because I wanted the pattern to more closely tie with the image theme. The focal image is an image rub using blending brushes.

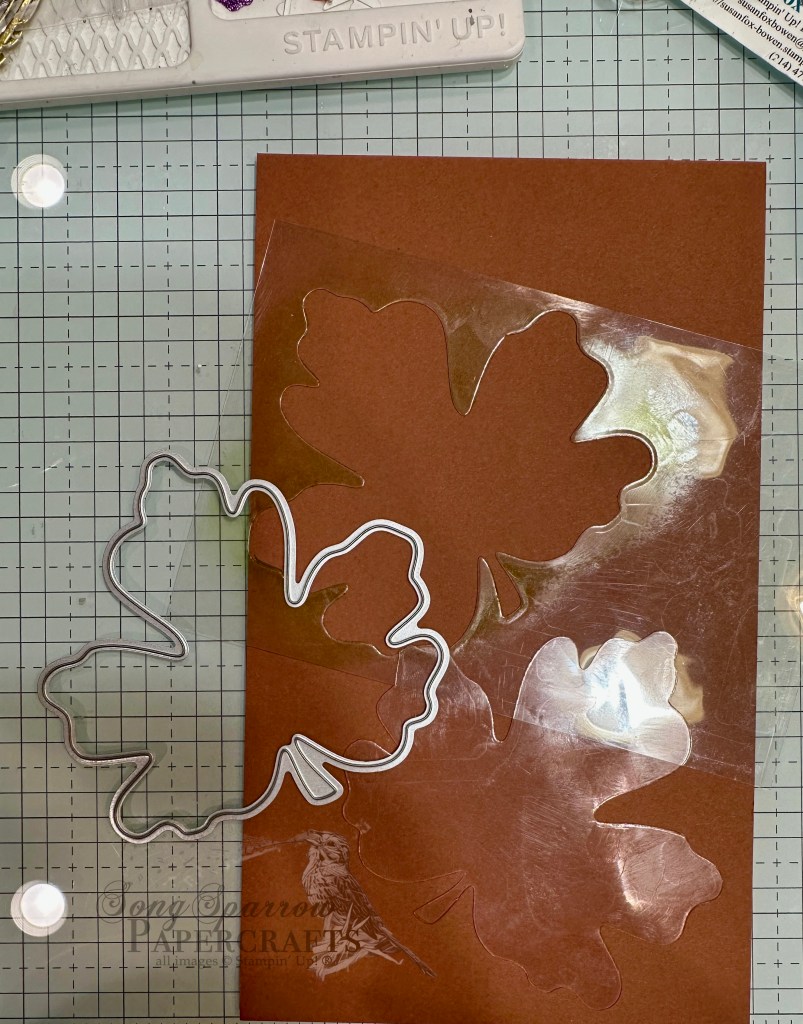
I decided to create a mask and negative that I could use more than once using some of the acetate sheets I had saved in my stash. When I unpack my acrylic stamps, I always save the thicker acetate sheet to use for shakers and window cards later on. It’s the perfect thickness for a mask and negative too! I used the larger leaf from the Gathering Moments dies to cut through the acetate. I used both pieces to create my focal image. The negative creates the center image, which is rubbed in Mossy Meadow, and then the shape is used to create the highlight around the leaf image, which is rubbed in Flirty Flamingo.

The sentiment panel has several layers. The backdrop is a banner created from two strips of the Gathering Together patterned paper. The sentiment from the Gathering Moments set is stamped in Versamark on Cajun Craze and then heat embossed in gold. I cut around the sentiment using paper snips. The fall foliage arrangement on the left is created using the Gathering Moments images and dies. We finish up with a bow of gold striped iridescent ribbon and some Cajun Craze & gold dots.

I hope you’ve enjoyed this week’s series. I’ll be in and out over the next two weeks as I prepare for the big educational program at the office and then head off to the woods for a little family fall break get-away. But I have new goodies arriving that I hope to be able to show you so don’t go too far!

Product List
Coming Soon · Gathering Together · Online Exclusives

Give Thanks

Happy rainy Saturday, crafty friends. Here in N. Texas, it’s the perfect day to spend in the craft room as we sit and enjoy a cup of tea while listening to the pitter-patter of the raindrops falling and soft (or not-so-soft) rumbles of thunder.

We’re rounding out our design series this week which has featured sneak peeks of upcoming Online Exclusive releases of Gathering Together and Beautiful Pumpkins that will be live in my shop on Tuesday! Today, we’re using the Gathering Together suite to create a lovely home decor project. If you’ve followed me for any length of time, you have maybe seen a post or two here and there about our family table prayers. And today’s featured project is a fall refresh for our framed prayer.

I’m continuing to use the 6×6 tabletop frame I bought off Amazon. I used a sheet of the Gathering Together patterned paper as the backdrop and cut it down to 6×6 to fit in the frame. Everything gets started with the selected scripture we’re using as the prayer. I used my computer to type it up and print it onto Crumb Cake cardstock and then cut it out using the Spotlight on Nature dies. It’s adhered in the center with dimensionals. Using the Gathering Moments stamps, I stamped both large and small leaves in a variety of colors onto Very Vanilla cardstock and then used the coordinating dies to cut them out. I also stamped some fronds of greenery and acorns onto Crumb Cake cardstock then diecut them with the coordinating dies from Gathering Moments set. I arranged these around the circular sentiment panel to create a wreath and adhered them all at varying heights with a combination of tear-n-tape and dimensionals. For some pops of sparkle, I cut some leafy fronds from gold foil paper and Old Olive glimmer paper using the Peace on Earth dies (another Tuesday release) and tucked them in and around the fall foliage wreath. I added a small bow of Mossy Meadow & Gold ribbon at the top and finished things off with a few Cajun Craze foil dots.

What do you think? All in all, this comes together really quickly. It’s really striking in person, and I’m super pleased with how this turned out. I think I’m going to make a few more to display in my booth at an upcoming craft show.

Next week, we’re going to jump ahead just a little and have a Christmas sneak peek as I show you some fabulous goodies that will be available to you in Tuesday’s release. I hope you’ll drop in and see what’s in store!

Products used in today’s project:
6×6 frame
Very Vanilla, Crumb Cake cardstock
Gathering Together (coming Tues), Old Olive glimmer (retired), gold foil DSP
Gathering Moments stamps & dies (coming Tues)
Peace on Earth (coming Tues), Spotlight on Nature dies
Mossy Meadow & gold ribbon
Cajun Craze foil dots (coming Tues)
Dimensionals
Adhesives

L2S Group Instahop

Take Me to the Beach

We’re cruisin’ into Thursday like we’ve got somewhere to go! And here in North Texas, things are beginning to really heat up and feel like summer. School is out, the mercury’s rising, and pools are open for fun. What about you? Are you feeling the summer vibes yet?

This week, we’re using the crafty stash to create 3D projects. And today’s project is a little something for my office. I needed a seasonal update for my frame scene that I keep on my side table, so I decided to create a little summer escape that features the Notes & Totes bundle.

Our scenes starts with a sheet of the Thoughtful Journey 6×6 paper. I chose a sheet that had a nice sky look to the top of the paper, knowing that I would be covering the bottom portion of the paper with a combination of ocean and sand. I chose a sheet of the Bright & Beautiful paper pack to create the ocean waves. The reverse side of the confetti sheet had the perfect shade of blue with wave-like patterns, and I tore several strips so I could really capture the movement of ocean waves. I adhered two of the wave layers directly to the backdrop while popping up the waves in the foreground to create a sense of depth to the scene. To create the sand in the foreground, I chose a sheet of Crumb Cake and used the Notes & Totes detail stamp to stamp the grain pattern. The strip of sand is tucked behind the waves to give the look of the waves lapping onto the shore.

From here, I begin building the scene. We get started with a small bit of white picket fencing on the right side of the scene to give the illusion that we’ve walked down to the beach. The Notes & Totes dies do all the heavy lifting here as we work to create our scene in the foreground. I used Timid Tiger and Strawberry Slush for the shells and starfish. Our beach bag has a custom pattern created by stamping the small florals in Pretty in Pink onto the white bag. I did a little paper piecing for the lotions, water bottles, and sunglasses. And the towel is created by rolling up a sheet of the striped pattern from the Bright & Beautiful paper pack. A combination of In Color flat pearls, two tone sparkle gems, and shimmer foam stars add the last bit of twinkly details.

What do you think? Does this scene invoke the sounds of Take Me Away and make you dream of a beachy get-away?

Today’s card is a part of the Luv 2 Stamp Group Instagram Hop, which goes live at 9 AM Pacific Time (PST).  Click here to head over to my Instagram feed at 9 AM Pacific/11 AM Central and check out what the other demos in our L2S Group have created for you today! 

Product List
Holidays

Happy Easter

Hallelujah! Christ is Risen!

Happy Easter Sunday, everyone. As we find the grave empty today, we begin the season of Pentecost which calls for a little update to our family prayer.

If you’ve followed me for any length of time, you have heard me talk about our daily family prayer. In the last six months or so, I introduced a new prayer traditional where we recite a chosen scripture as our prayer over dinner. And as the seasons on the church calendar change, we have changed our scripture to recite over dinner. So as we move into the season of Pentecost, I’ve selected a new prayer and have updated our table display.

I’ve been using the same simple 6×6 frame that I picked up on Amazon and simply changing out the insert as we’ve moved along. I copy and paste a scripture into my Word file on my computer and print it out on a 4×6 sheet of white cardstock and then use a die to cut it out. Here I’ve used a sheet of the Thoughtful Journey designer series paper as my background and cut out the scripture using the Textured Notes dies. I adhered the prayer to the bottom of the patterned sheet with dimensionals and then scattered some of the purple sequins for some extra pizzazz. So all in all, a super simple design that packs just the right punch.

Next week, we have a new design theme. We’re going to tiptoeing through the flowers, and I hope you’ll come along!

Products used:
6×6 frame (Amazon)
Thoughtful Journey DSP
Textured Notes dies
Purple sequins
Dimensionals

No Stamp Design

Holy Week Scripture

If you’ve followed me for any amount of time, you may remember me mentioning our daily family prayer. Our daily family prayer is a selected scripture that is appropriate for the season on the church calendar or even just the time of year. I rotate these scriptures periodically, in particular as we enter different seasons in the church (liturgical) calendar. What I love most about this is that we ultimately memorize the scripture because we’ve said it each day. So as I’m choosing scriptures, I try to bear that in mind and choose scriptures that I think are important for us to take with us each day.

As we enter Holy Week, it’s time for a new family prayer and that means a new layout for our prayer frame. The 6×6 frame is from Amazon.

For the Holy Week prayer, I chose a darker backdrop that felt most appropriate for the significance of this upcoming week. This happens to be a sheet of the Everyday Skies paper. I printed the scripture on a quarter sheet of white cardstock and then cut it out using one of the Countryside Corners dies. I trimmed it slightly to reduce the white space on top and bottom. I then used the same die to cut the mat from a sheet of the purple Silver Foil specialty paper using the die extension method. I wrapped some Blackberry Bliss & gold metallic ribbon and linen thread around one end of the mat before adhering the sentiment on top with dimensionals. I used dimensionals to adhere the sentiment panel to the patterned paper and then added a few two tone sparkle gems for just a touch of moody sparkle.

Do you do anything special to mark the seasons?

Product List
January Mini Catalog

Florals Decor

It’s been a super busy day, but I’ve managed to squeeze in just a little time for this super fun home decor item using our feature products for this week – the Floral Delight paper and vellum packs. For this springish design, I chose to pair up our lovely papers with the Mixed Florals stamps & dies. A perfect combo, don’t you think?

We get started by cutting a 6×6 backdrop from the yellow star-patterned Floral Delight paper. I wanted to break up the yellow background with something softer to serve as the backdrop for our focal images and decided on the white diagonal patterned paper from the Floral Delight paper pack and paired it with the blue gingham from the Floral & Gingham vellum pack. I used the Perennial Postage dies to cut the focal panel backdrop and the Spotlight on Nature dies to cut the vellum panel. I tied a combo of iridescent striped trim and Daffodil Delight satin ribbon around the base before adhering the diecut pieces with dimensionals. I stamped each of the larger floral bunches from the Mixed Florals stamp set on white cardstock and then diecut with the coordinating dies before coloring with my Stampin’ Blends. For a more realistic look, I always try to pull photos of flowers as the basis for how I color my images. I also diecut grass fronds from both of the greens in the Festive glimmer paper pack using the Mixed Florals dies and tucked these behind both floral bunches. I tied some gold trim around the flowers before adhering them to the focal panel with dimensionals. A scattering of the yellow shiny sequins adds another layer of subtle sparkle to finish things off.

I hope you’ve enjoyed having a look at all of the different ways you can create beautiful designs with the Floral Delight paper packs. Next week, we’re going to focus on some love-themed designs as we prepare for Valentine’s Day.

Products used in this design:
6×6 frame (Amazon)
Basic White cardstock
Floral Delight, Floral & Gingham vellum, Festive glimmer DSP
Mixed Florals bundle
Spotlight on Nature, Perennial Postage dies
Stampin’ Blends
Iridescent striped trim, gold trim, Daffodil Delight satin ribbon
Shiny sequins
Dimensionals
Adhesives

Product List
Christmas

Advent Prayer

We’re already halfway through the first week of December. I’m still working through Christmas lists and holiday to-dos. What about you?

Today, I’m sharing an update to our family dinner prayer. A month or so ago I shared the story of how this got started for our family. This is such a terrific practice, not only to hide the Word in our hearts, but to give us new and fresh ways to reframe each day — no matter how well or how poorly the day has gone. I challenge you to adopt something similar for your family and see how it begins to change things for you.

We get started with the same 6×6 frame from Amazon. Our backdrop for our scripture this month is a sheet of the (very sadly now-retired) One Horse Open Sleigh designer series paper. I printed the scripture on a quarter panel of white cardstock and then diecut using the Radiating Stitches dies and mounted on the background panel with dimensionals. I added a few snowflakes and rhinestones basic jewels for a little sparkle. I’m storing all of the prayers we aren’t using in a 6×6 paper pocket envelope (also an Amazon find) so they’ll be ready to use again.

Products used in today’s featured design:
6×6 frame (Amazon)
One Horse Open Sleigh DSP (retired)
Basic White cardstock
Snowflake assortment
Rhinestone basics jewels
Dimensionals

Christmas · Holidays · L2S Group Instahop

Most Wonderful Time

Happy Thanksgiving, everyone! Our family has so very much to be thankful for this year. Most importantly is that we’re all here to celebrate together. After my husband’s very serious health crisis early in the year, we do not take for granted that he is here and he is healthy and recovering!

A quiet holiday week at work has turned out to be quite busy, and so once again, I’m mostly playing catchup this week. But I’m thankful to have a job that I really enjoy and that provides for my family. Even if it does cut into my favorite hobby! *wink-wink*

And speaking of my new job, I wanted to create a little festive holiday art that I could display in my bookshelf. And so today’s project uses the ever so lovely Seasons of Green and Gold Suite of products to create the festive 6×6 framed project. This is a simple white frame that I purchased on Amazon.

We start with a 6×6 piece of white cardstock as the base for our greenery spray. The greenery is diecut from the Season of Green & Gold patterned paper and Graceful Greenery vellum using the coordinating Golden Greenery dies. I also mixed in a few green Festive Glimmer paper sprigs for a pop of sparkly fun. Our pops of red are also diecut from Festive Glimmer paper but use the small sprig from the Changing Leaves die set. The greenery is adhered to the white cardstock in varying layers, which are created with dimensionals. The sentiment from Greetings of the Season is heat embossed in gold on white cardstock and diecut with the Spotlight on Nature die set. A ribbon of silver and white sheer ribbon dresses the sentiment panel with some shimmer. And drusy embellishments in the corners catch the eye and move it across our decorative piece. I really love how this turned out and can’t wait to put it out in my office!

Today’s card is a part of the Luv 2 Stamp Group Instagram Hop, which goes live at 9 AM Pacific Time (PST).  Click here to head over to my Instagram feed at 9 AM Pacific/11 AM Central and check out what the other demos in our L2S Group have created for you today! 

Product List
Thankful

Meditation on Thanks

Happy Stampin’ Up Online Exclusives release day, everyone! Have you checked out the new goodies in the store yet? In addition to the new Online Exclusives, two new kits also launched today. So much exciting stuff!

This week, our projects are revolving around the theme of thankfulness. And today, we’re getting started with a home decor item and, for grinsies, I thought I would share a little backstory on how this particular project came about.

Each evening before dinner, we have the kiddo recite a blessing. We’ve gone through a number of them over the years. Most recently, we have been meditating on a scripture and that scripture has become our prayer over meals. I made a little decorative table placard that had our prayer printed. A happy little side effect of this practice has been that we’ve all now memorized that scripture. So we’re going to periodically change the scripture we use to pray over our meals. Today’s project is our new daily prayer.

The frame for today’s project came from a Luv 2 Stamp group get-together project, but I have found similar 6×6 frames on Amazon. I used a sheet of the lovely Splendid Autumn designer series paper as the backdrop for our daily prayer. I typed up our prayer on the computer and printed on a sheet of white cardstock and then cut it down to size. The prayer is matted in Moody Mauve shimmer paper and textured gold specialty paper. The scripture is mounted to the mounts with dimensionals and then the full panel is adhered to the background panel with dimensionals. I added a few Drusy embellishments near the prayer to draw the eye and add another element of sparkle.

For me, this particular project was about keeping things pretty simple because the prayer was the most important part of the project. I think it turned out nicely. And I’m looking forward to creating a rotation of prayers that we will use.

Tune in tomorrow for another take on our thankfulness theme.

Products used in today’s card:
6×6 frame (find them on Amazon)
Splendid Autumn DSP
Moody Mauve shimmer paper
Textured gold specialty paper
Drusy embellishments
Dimensionals
Adhesives

Gifting

Home Decor

It’s been a tremendously busy week. I’ve been working away in the craft room as I’m down to the wire for my craft booth items. Today is setup day and tomorrow is booth day!

Today, I’m popping in to share another fun giftie that will be available in my shop — home decor items. On one of our recent virtual team events, we made a framed project and I just fell in love with the idea.

And as with most things I prefer to undertake in the craft room, projects don’t have to be overly complicated to have a WOW factor. Today’s sample is a Christmas project using the O Holy Night suite. This set of products retired last year and I’m still super sad about it! This particular project is a combination of patterned paper and diecut elements — most of them are repeated images. A simple bit of layering with dimensionals builds a gorgeous scene of the wisemen on their journey to find Jesus.

For those of you who have been following along over the last week and expressed some interest in the lip balm box, I was able to carve out a little time to make a video and PDF tutorial to walk you through putting a box together.

Next week, I’ll be popping in with a preview of my favorite soon-to-release Online Exclusive bundle. It’s otterly adorable! *wink wink*