Holiday Mini Catalog · L2S Group Instahop

Tidings of Home

Howdy, friends! Welcome back. It’s hard to believe it’s already Thursday, although Monday & Tuesday definitely felt like Thursday & Friday. *chuckle*

I had some grand plans for a 3D project for today but ultimately figured out that I needed to devote more time to it in order to get it just right. So I hope to bring that to you over the weekend. Today, we’re getting another look at the Neutral Noel suite of products to include the awesome dies and embossing folder. And to add that touch of razzle dazzle in line with our design theme this week, we’re also using some of the new holiday hot foil products. So let’s dive in and see how this beauty comes together.

To start, I have to give props to the inspiration behind this card design. I’m CASEing a catalog CASE by Stamping Beauty NZ (follow her over on Insta!). Honestly, the catalog sample did not stand out to me like her card did. I love the neutral color palette and the overall feel of the card. But as I usually do when (theoretically) CASEing a card, it’s never truly a copy and stamp exactly situation. I always take liberties from the inspiration.

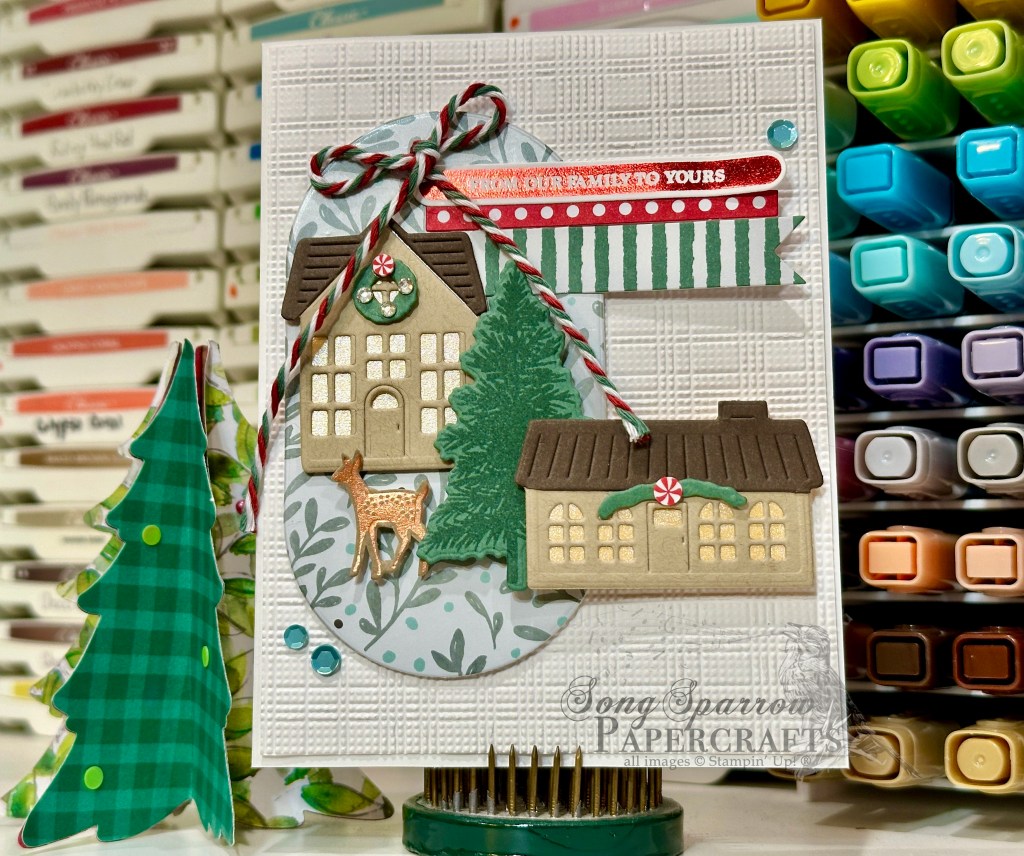
So we stick to the (mostly) neutral color palette here with a base of white cardstock. And our background panel of white is machine embossed with the new Soft Linen embossing folder. I punched things up a bit with the backdrop panel for the focal section by using a sheet of the All Wrapped Up foiled paper and cut it with the oval die from the Welcome Noel set. And the focal elements is where things get creative.

I paper pieced several houses diecut with the Welcome Noel dies from a combination of Crumb Cake, Early Espresso, and Golden Glow pearlized paper. I just love the soft glow in the windows provided by that pearlized paper! We dress up our houses with some holiday greenery cut from Peaceful Pine paper using the evergreen deco pieces in the Welcome Noel die set and add some peppermints and rhinestones. Next up, we prepare our large spruce tree by stamping tone-on-tone on Peaceful Pine cardstock and diecutting using the Welcome Noel bundle. Our little deer comes from the new Graceful Evergreen Deer hot foil bundle. The deer is foiled in copper and then diecut with the coordinating die. Using all of these elements, we build our scene on our focal panel with dimensionals to create depth of scene.

We finish off our card design with our holiday sentiment panel. It combines two ephemera banners from the Season of Celebration pack and the hot foil sentiment from the new Twinkling Tidings bundle foiled in red. Adhere them at the top of our scene with a bow of the new holiday baker’s twine, add a few sequins, and voila!

Today’s card is a part of the Luv 2 Stamp Group Instagram Hop, which goes live at 9 AM Pacific Time (PST).  Click here to head over to my Instagram feed at 9 AM Pacific/11 AM Central and check out what the other demos in our L2S Group have created for you today! 

Tomorrow things will be getting spooky as we continue our tour of the new products launching next week! I hope you’ll drop by!

Products used in today’s card:
Basic White, Early Espresso, Crumb Cake, Peaceful Pine CS
In Color pearlized SP, All Wrapped Up (coming in Sept) DSP
Season of Celebration ephemera (coming in Sept)
Noel Tidings, Graceful Evergreen Deer, Welcome Noel, Twinkling Tidings dies (coming in Sept)
Twinkling Tidings, Graceful Evergreen Deer hot foil bundle (coming in Sept)
Copper & red foil (coming in Sept)
Softly Woven EF (coming in Sept)
Rhinestone basic jewels, Real Red peppermints, sparkle sequins
Seasonal baker’s twine (coming in Sept)
Dimensionals
Adhesives

Coming Soon · Holiday Mini Catalog

A Beautiful Christmas

Howdy, folks! Welcome back. Have you melted into a puddle yet? Man, the heat this summer is something else. I know, I know. We Texans are used to summers being extra when it comes to heat. But this particular summer is EXTRA extra. Maybe it feels particularly bad because the last couple of summers have been mild by comparison. Not sure, but I’m placing my vote for an early fall! Anybody else?

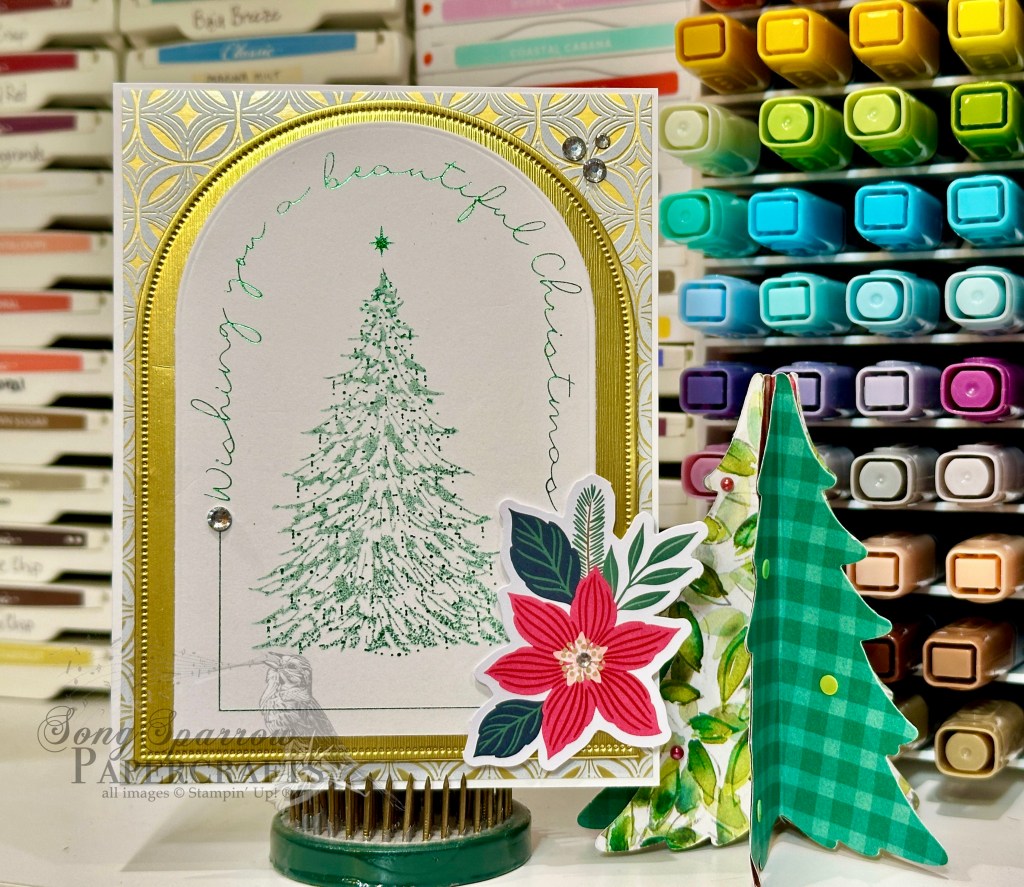
On the upside, I guess you could say that the heat is forcing us all to find productive things to do inside, which is magic words in the ears of any paper crafter! So as we’re dreaming of cooler weather, I’m pulling out the Christmas sparkles. There are SO many good things hitting the store next week. And today’s razzle dazzle card has a little bit of it all — Neutral Noel foiled paper, Season of Celebration ephemera, and the Twinkling Tidings hot foil bundle.

We keep things pretty simple so that our focal panel takes center stage here and get started with a base of white cardstock. The background panel is a sheet of the beautiful Neutral Noel foiled paper. Our focal panel starts with the Twinkling Tidings image hot foiled in green. We add the tree image by stamping over the tree with Peaceful Pine ink and then cut out our panel with the arched die from the coordinating Twinkling Tidings dies. A larger arch is cut from textured gold specialty paper using the Everyday Arches dies. A beautiful sprig of evergreen and poinsettia is added to the bottom corner of the panel with dimensionals. And then we finish things off with a few rhinestone jewels.

This one is sooo beautiful in person. It’s difficult to capture all of the glints of light you see from the foiled elements. Tomorrow I’ll be taking a little crafty break to get ready for the team blog hop on Thursday where I have grand plans for a bigger 3D project to share. We have a busy day slated for the office tomorrow also, so we shall see if my grand plans come to light. I hope you’ll drop by because I’ll have something to share either way.

Products used in today’s card:
Basic White CS
Textured Gold & Neutral Noel (coming in Sept) DSP
Season of Celebration ephemera (coming in Sept)
Everyday Arches dies
Twinkling Tidings hot foil bundle (coming in Sept)
Green foil (coming in Sept)
Peaceful Pine ink
Rhinestone basic jewels
Dimensionals
Adhesives

Coming Soon · Father's Day

Always There

Welcome back, everyone! So glad you chose to stop by today. This week, were taking a random tour of the myriad of projects on my desk as I’m in the throes of creating product for an upcoming craft show and am also thinking ahead to both Mother’s Day and Father’s Day.

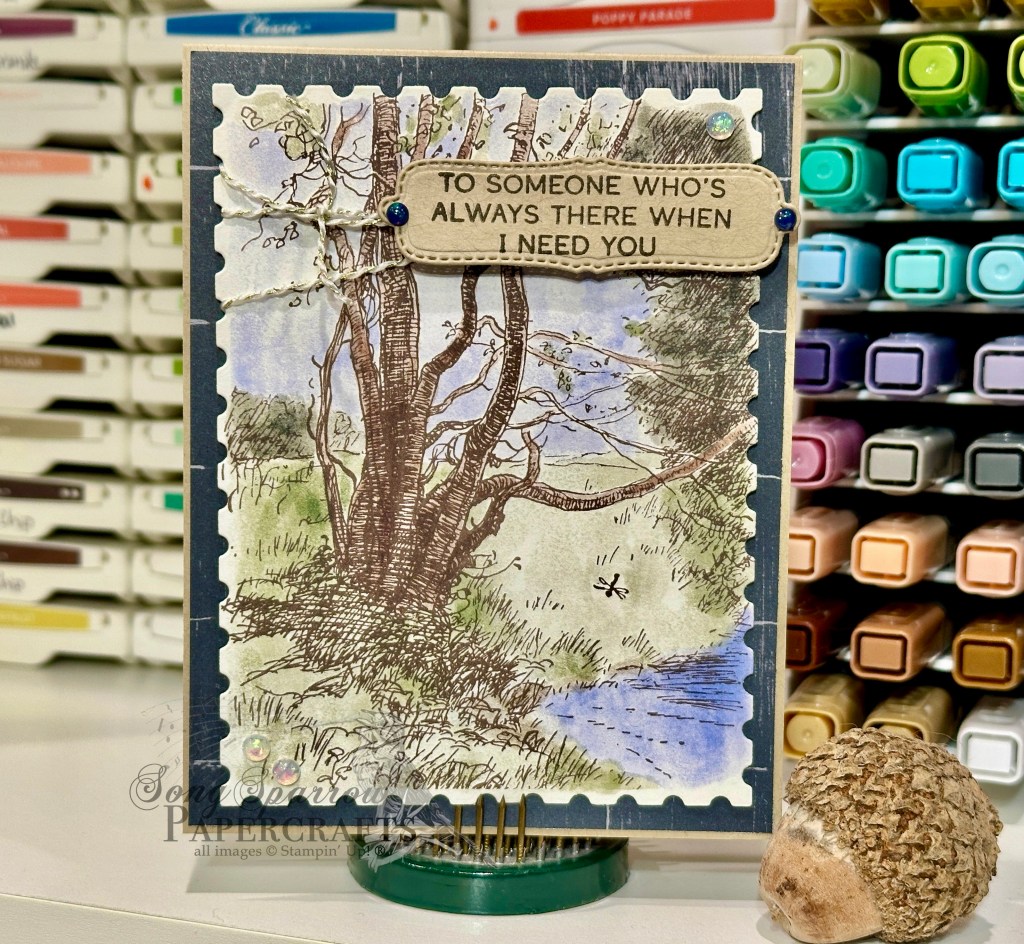
Today we’re using the brand new Silly Old Bear patterned paper (that will release next week) to create this Father’s Day card. I love the ready-made panels that are included in this paper pack. There are two separate sheets that give you instant card panels when cut apart.

We get started with a base of Crumb Cake cardstock for this one. The background panel is a sheet of the Nature Walk paper. I love the subtle grid pattern that this sheet provides. The Silly Old Bear paper gives us our focal panel, which is cut out with the largest Perennial Postage die. The focal panel is wrapped in gold and white baker’s twine before it’s mounted on our background sheet with dimensionals. The sentiment is from the Sweet Words & Labels set is stamped on Crumb Cake in Early Espresso and then diecut with one of the coordinating dies. We finish things off with some iridescent opal rounds for a hint of twinkle.

I hope you’ll hop back by tomorrow to check out a very special fun fold design!

Products used in this card:
Crumb Cake cardstock
Nature Walk, Silly Old Bear (coming soon!) DSP
Perennial Postage dies
Sweet Words & Labels (coming soon!) stamp & die bundle
Early Espresso ink
Opal rounds
Gold & white baker’s twine
Dimensionals
Adhesives

Christmas · Gifting

Gift Set Box

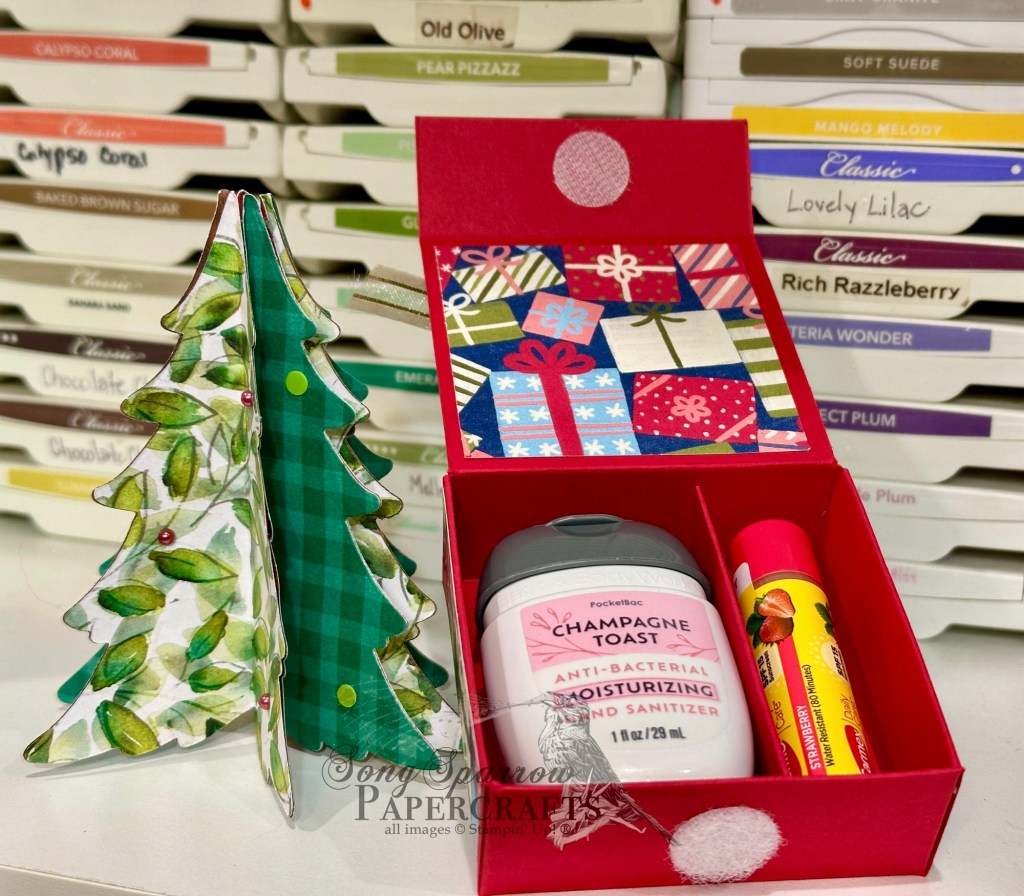
Hi, friends, and welcome back. This week, I’m taking you along on a journey of handmade gifting. And today we have a very special gift box.

As I prepare for craft fairs — and also just for my own gifting purposes — I like to find new ways to package items that make great stocking stuffers or small gifts. In years past, I’ve made separate little packages for lip balms and hand sanitizer, but this year I thought it would be fun to find packaging that combines them into a little gift set. And here we are!

I wish I could claim credit for creating this box from start to finish, but I’m terrible at creating 3D items on my own. I just don’t think dimensionally like that. But I’m a wicked template follower and I found a great template over at Stampin’ Gala that I adapted to make this adorable gift box.

This box uses a sheet of 8.5×11 paper for the box and a quarter panel for the inside divider. And then it’s decorated with patterned paper and whatever embellishments you might like to dress it up. Here, I’ve used just a simple bow. But it looks equally as snazzy to make little popped up panels with ephemera and the like.

I’m still feeling pretty under the weather. Turns out I have the flu. So needless to say that has very much slowed down my crafting this week. Assuming I start feeling a little better, I hope to bring you another gifty project and to get the PDF tutorial for this cute box posted. Not sure if that will be tomorrow or Friday. We shall see how it goes.

Christmas · Gifting

Custom Gift Bags

Welcome back, friends. I’ve been under the weather the last several days, which is really cutting into my crafting time. Because quite frankly, I don’t feel like crafting. *gasp* I know — I can’t even believe I said it either.

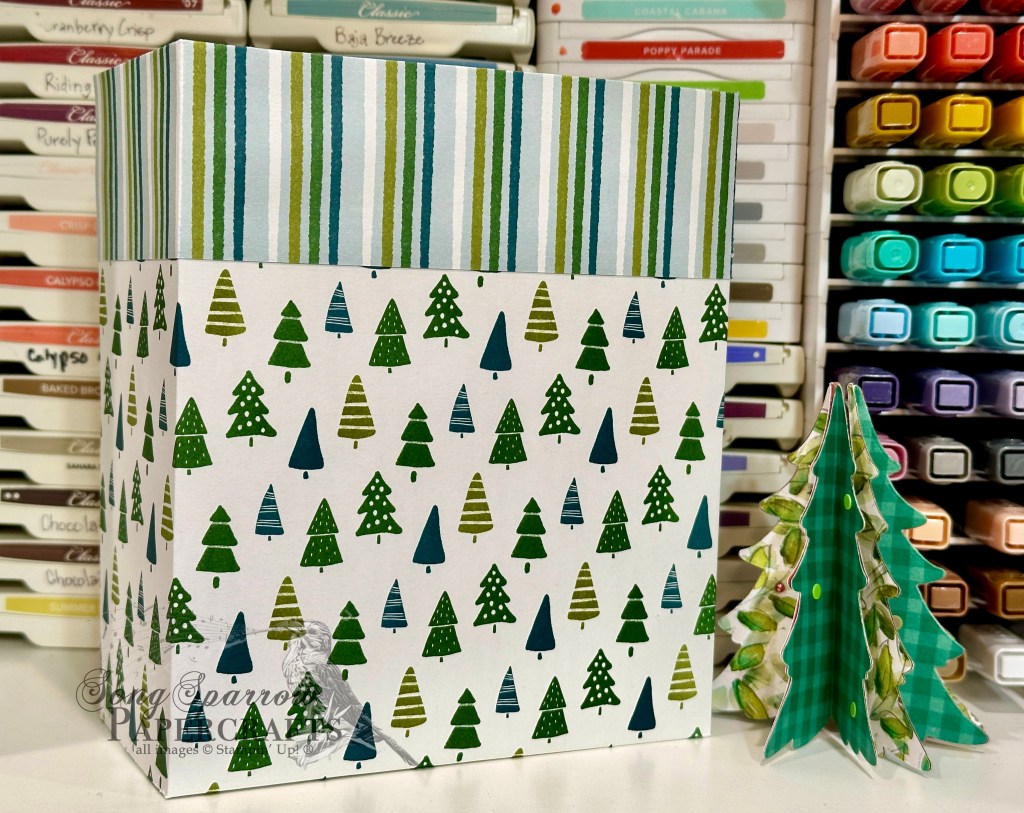
Luckily I had made some fairly decent progress on office gifties and I’ve been able to share those projects with you. I’ll be giving my coworkers gift bags filled with handmade goodies. And today you’re getting a look at the gift bag shell. Why just a shell? Because I’ll be putting all the finishing touches on once all of the giftie goodies are tucked inside.

I learned how to make an assortment of gift bag sizes from my upline Patty Bennett. This particular bag uses 2 sheets of 12×12 patterned paper. I happened to pull from some of my favorite retired paper packs to make my gift bags. These come together quickly and easily and I love being able to coordinate all of the items in the bag! I’ll show you the finished product once I get all of them finished. Hopefully I’ll be well enough to finish them before our office party on Thursday!

Tune in tomorrow as I show you a super cute gift set in a handmade box!

Christmas · No Stamp Design

Joy of Christmas

Happy Saturday, everyone! Who all is frantically trying to get all of those last-minute Christmas list items done this weekend? *raising hand* It’s been a busy one today as we’ve squeezed in all sorts of things, including (finally) getting our outdoor decor set up. And now I’m frantically working in the craft room working on gifties for friends, coworkers, and loved ones and still whittling away at the Christmas card stash in hopes that I might at least get them in the mail by Christmas Eve……

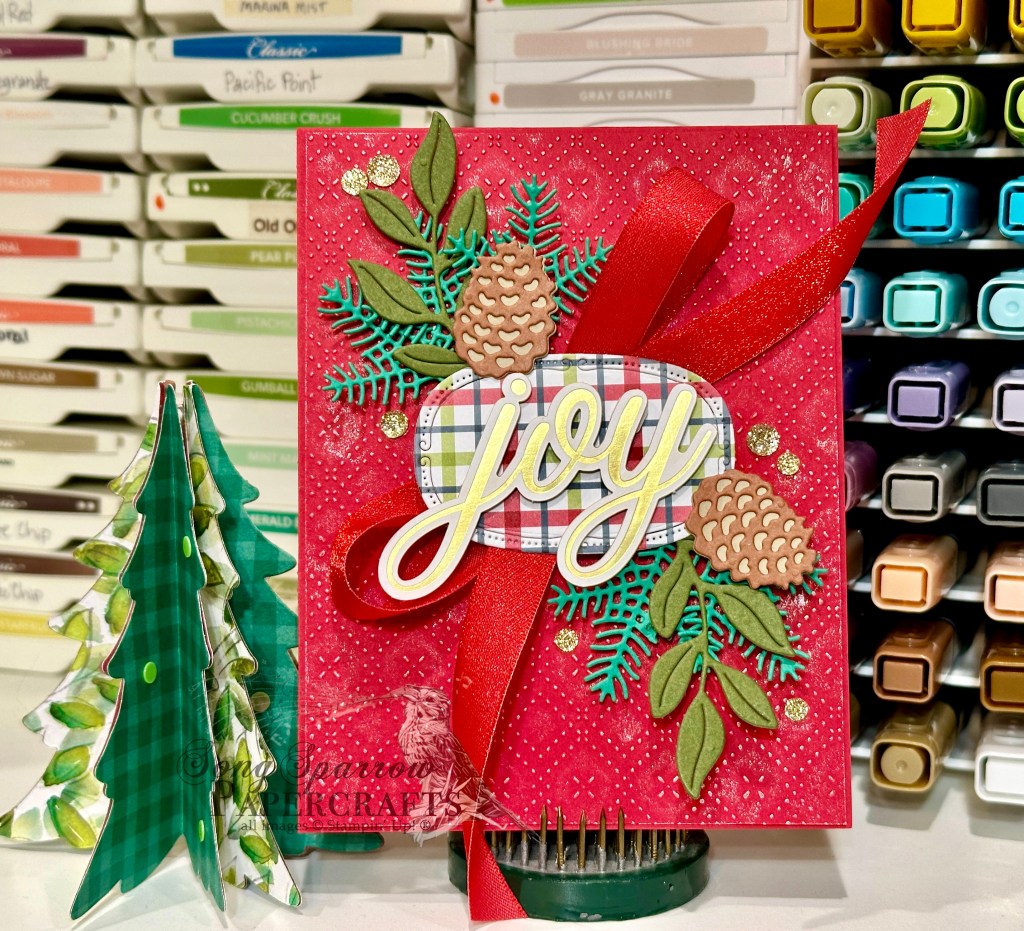
So this week we’re working through the crafty stash to put together some (mostly) simple holiday cards. Today’s design is by far the most detailed design so far, but I would still say it only took about 15 min to put together once I got everything situated. We’re pairing up the new Beautiful Pattern embossing folder with the Delicate Pines dies to create this lovely card full of joy!

I was inspired by a card I saw over at Stampin’ Fancy Friday, and I just ran with it from there. We get started with a base of Real Red cardstock. Our focal panel is a quarter sheet of red that is machine embossed with the Beautiful Pattern embossing folder. I went over the embossed panel lightly with some metallic ink to really make the embossing pop. You could easily use paper with a white core, but I like the sheen & sparkle from the metallic ink rub myself. Our sentiment panel takes center stage here with lots of detailed elements and pops of holiday color. The joy sentiment is from the Greetings for You ephemera pack and is mounted on a panel of Traditions of Christmas plaid paper diecut with one of the smaller Traditional Labels dies. We mount the sentiment panel with dimensionals on top of a bow of Real Red shiny ribbon, along with winter evergreens cut from Shaded Spruce and Mossy Meadow cardstock and pinecones cut from Crumb Cake and Pecan Pie cardstock using the Delicate Pines dies. We finish it all off with a scattering of gold glitter dots.

With the template done, this card will come together much more quickly each time since you can cut lots of greenery pieces, pinecones, and sentiment panels all at once. I really love how this turned out and can already think of some variations that I plan to do for my personal stash.

I hope you’ll join me next week. I’ll still be in full-on Christmas mode as I work to finish the card stash and continue making gifts and gift tags.

Product List

Christmas · No Stamp Design

Merry Through the Branches

TGIF, everybody! I’m not sure if I feel like this week whizzed by or if I feel like it dragged. I guess it kinda depended on the day. All is I know is that I’ve been in race mode to get back home every day to hide all of the boxes that Amazon delivered. *snicker* Anybody else?

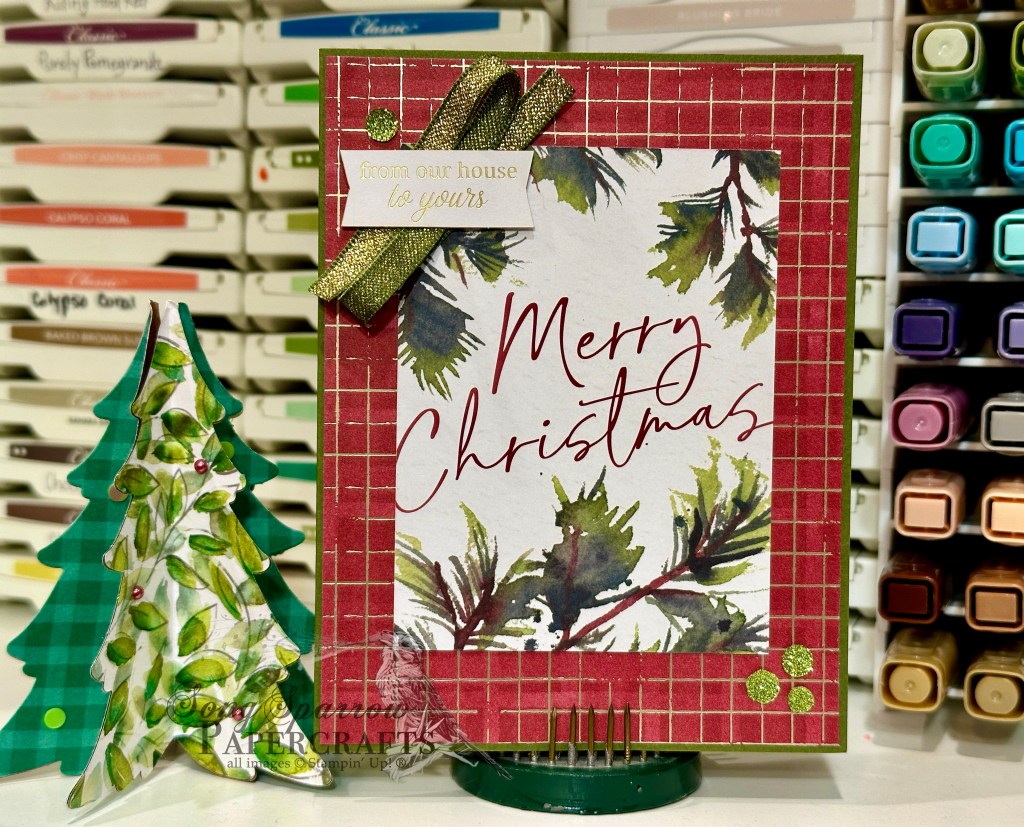
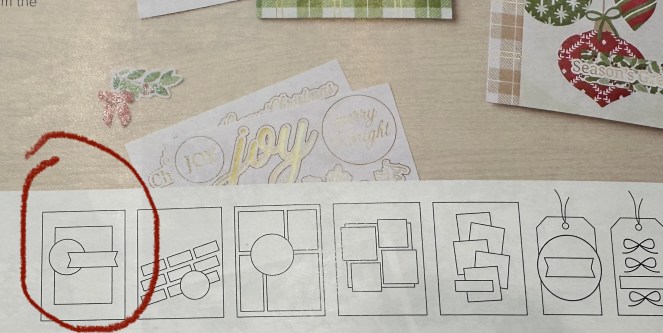
Well, I’m still whittling away at my holiday card stash in hopes that I’ll have enough cards made to send out to at least half of the annual mailing list. We shall see how many I can turn out this weekend. One thing that really helps when you get in a crunch is finding easy designs, and that’s exactly what we’ve been up to this week. And today we’re pairing up the Joyful Days Memories & More cards with the Regal Distressed Patterns paper and using a sketch from the Holiday Mini catalog to create this simple card. Let’s check it out.

The inspiration for today’s clean & simple card layout comes from the first sketch in the Holiday Mini catalog. We get started on our card with a base of Mossy Meadow cardstock to tie in the evergreen needles in our focal image. I pulled the small evergreen Merry Christmas card from the Joyful Days Memories & More card pack to serve as the focal image and sentiment. We dress it up just a touch with a secondary sentiment from the Greetings for You ephemera pack that is layered on top of some Mossy Meadow & Gold ribbon. We finish off our pops of coordinating green elements with some sparkly glitter dots in opposing corners.

This card comes together in less than 5 minutes flat! Another perfect addition to the arsenal of make-it-quick designs. I hope you’ll drop in tomorrow to see what else I can pull together from the holiday product stash. I’m thinking we’ll dig into the dies tomorrow, but we’ll see where the crafty muses take me once I lay out the options.

Product List
Christmas · No Stamp Design

Tree of Cheer

Welcome back, friends! I’m sure glad you’re here. Christmas is right around the corner and I’m trying to catch up up on my holiday card-making. One of the funny things about papercrafters is that we often spend a lot of time making holiday goodies but rarely is it for ourselves. Such is the case particularly when you make the holiday craft fair circuit. But I’m making some progress this week and you get to tag along.

This week, we’re making some clean & simple cards that are easy to reproduce. Today we’re pulling out the Joyful Days Memories & More card pack and pairing it with the Christmas Tags & More paper to create another festive holiday design.

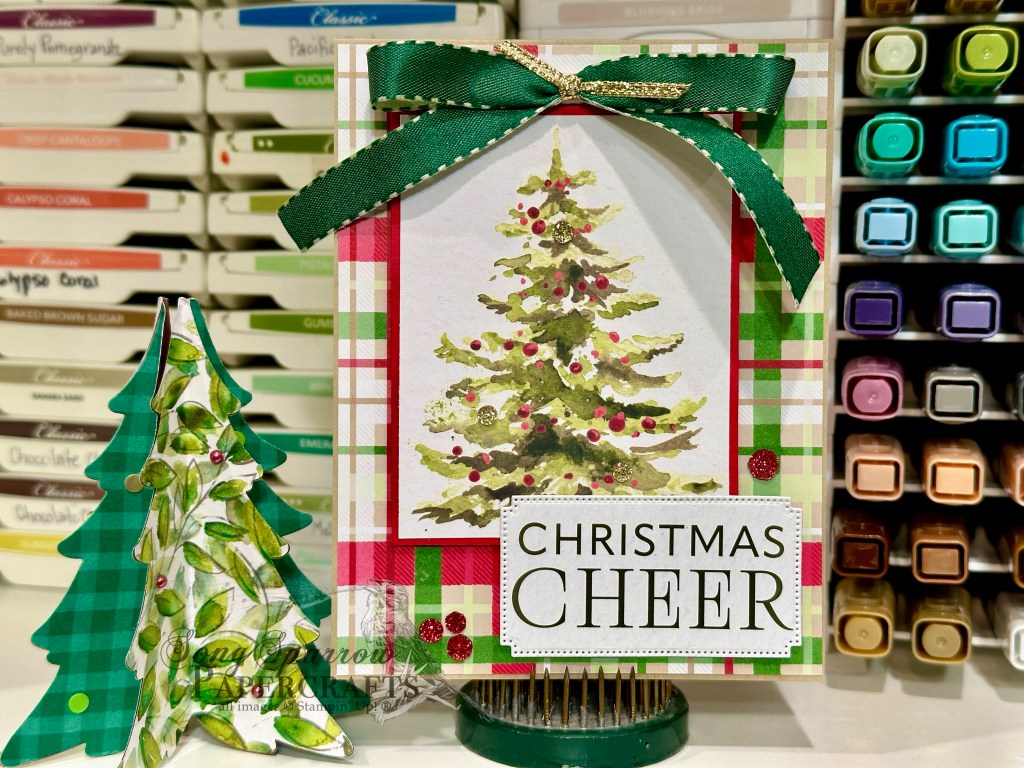
We get started with a base of Crumb Cake cardstock. The lovely holiday plaid paper from the Christmas Tags & More pack serves as our background panel. The small tree card from the Joyful Days Memories & More pack is our focal panel, which is matted in Real Red to help it stand out against the plaid backdrop. I pulled out one of my favorite retired die sets — Autumn Leaves — to cut the sentiment from another of the Joyful Days cards. I find that these days are ones I turn to a lot when I’m need the perfect rectangle panel. And today we use the extension method to get it to the perfect size to cut out the sentiment from the center of the small card. The focal panel and sentiment are mounted together and adhered to the card front with dimensionals. Using a combination of Shaded Spruce & Sea Foam ribbon and gold trim, I create a festive bow to hang at the top of the tree. We finish things off with some bits of festive sparkle with a scattering of gold and red glitter sequins.

I hope you’ll drop back in tomorrow to see what else we can create with our holiday crafty stash!

Product List
Christmas · No Stamp Design

Plaid Tidings

Welcome to hump day. Midweek. Middle of the road. It always seems like the weeks go more quickly as we get into December. Is it just me?

This week we’re whipping up some super quick Christmas cards. And today I’m still hanging out with the Christmas Tags & More pack and getting a closer look at the and more part, in particular, as the tags take center stage.

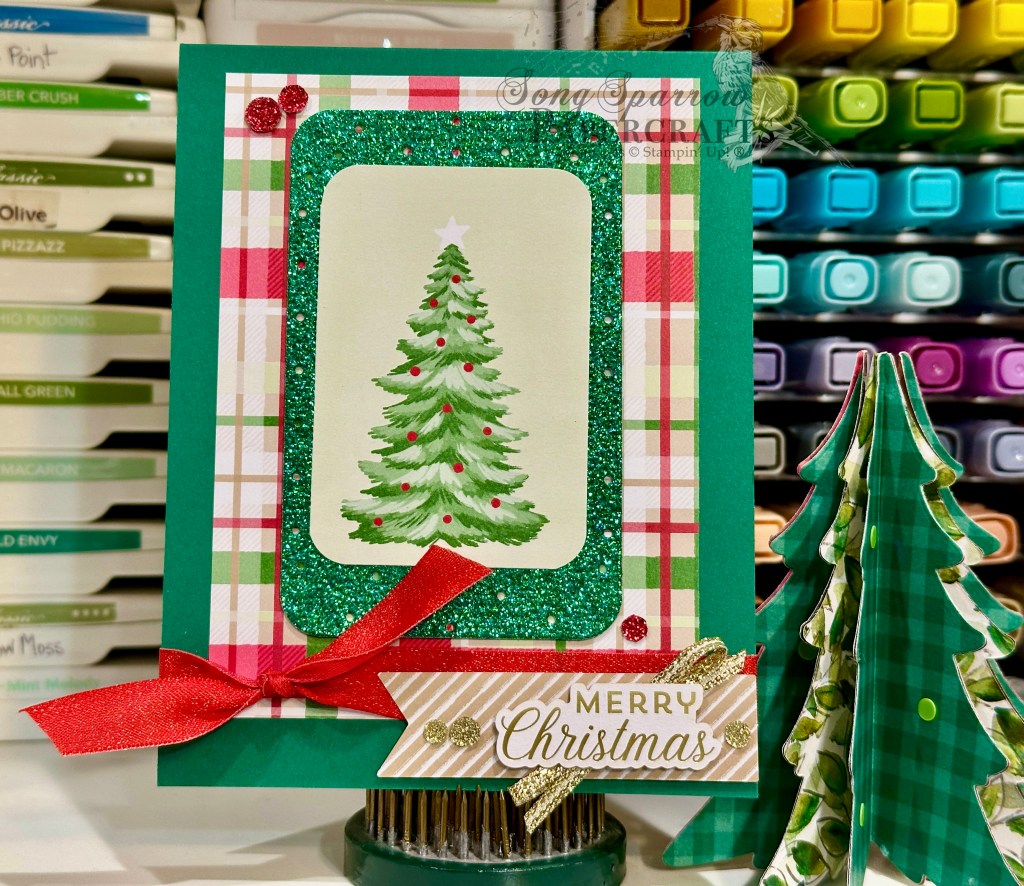
Today’s card gets started with a base of Shaded Spruce cardstock. The Christmas plaid paper from the Christmas Tags & More pack serves as our festive backdrop for the main attraction. The focal image is the Christmas tree tag from the pack that has been cut with one of the smaller dies from the Sentimental Framing set. A larger die from the same set gives us our dazzling spruce glimmer mat, which really helps our tree pop against the plaid. Our sentiment — from the Greetings for You ephemera pack — sits atop a twist of gold ribbon and a banner of Crumb Cake stripes. The bow of Real Red shiny ribbon and festive sequins scattered across the front finish things off with the perfect amount of holiday twinkle.

I hope you’ll tune in tomorrow as we pair up some more fun holiday goodies from the crafty stash to make another quick and easy card for the holiday card list!

Product List
Christmas · No Stamp Design

Baubles and Bows

Welcome back, everyone. I don’t know about you, but today was a Monday disguised as a Tuesday — whew! But luckily I worked ahead in anticipation of a tight schedule today.

This week, we’re making clean and simple Christmas cards for my holiday mailing list. Today’s card combines a little old and some new to create this festive design as we pair up the retired Take a Bow paper with the Christmas Tags & More paper pack.

We get started with a base of Crumb Cake and use a sheet of the retired Take a Bow paper to serve as our focal panel base. I chose the sheet of ornaments from the Christmas Tags & More paper pack as the focal panel. I added a bow of gold trim to dress up the center ornament. And from there we’re just adding a sentiment and some embellishments. The sentiment from the Greeting for You ephemera pack sits on top of a small panel of holly and ivy paper with a sprig of holly and ivy on the side to coordinate. This are all popped up with dimensionals to draw our eye to the sentiment section. A few Old Olive glitter sequins in the corner add the perfect pop of color and sparkle.

This is another no-stamp design you can turn out in five minutes or less. And when you’re pressed for time to get those holiday cards in the mail, that’s the perfect answer to a more personalized holiday greeting!

The kiddo has a basketball game tomorrow, but I’m hoping I’ll be able to steal a few minutes to make and share another fun clean and simple holiday card with you!

Product List