Well, the last several days have been far busier than I anticipated and so we’re playing a little catch-up here on the ol’ blog. I recently returned to a full-time job, and I’m finding it a little challenging to balance family time and my most favorite side gigs. I’m sure there are many of you who understand, especially when your family time includes sports activities that your kiddos have chosen to play.

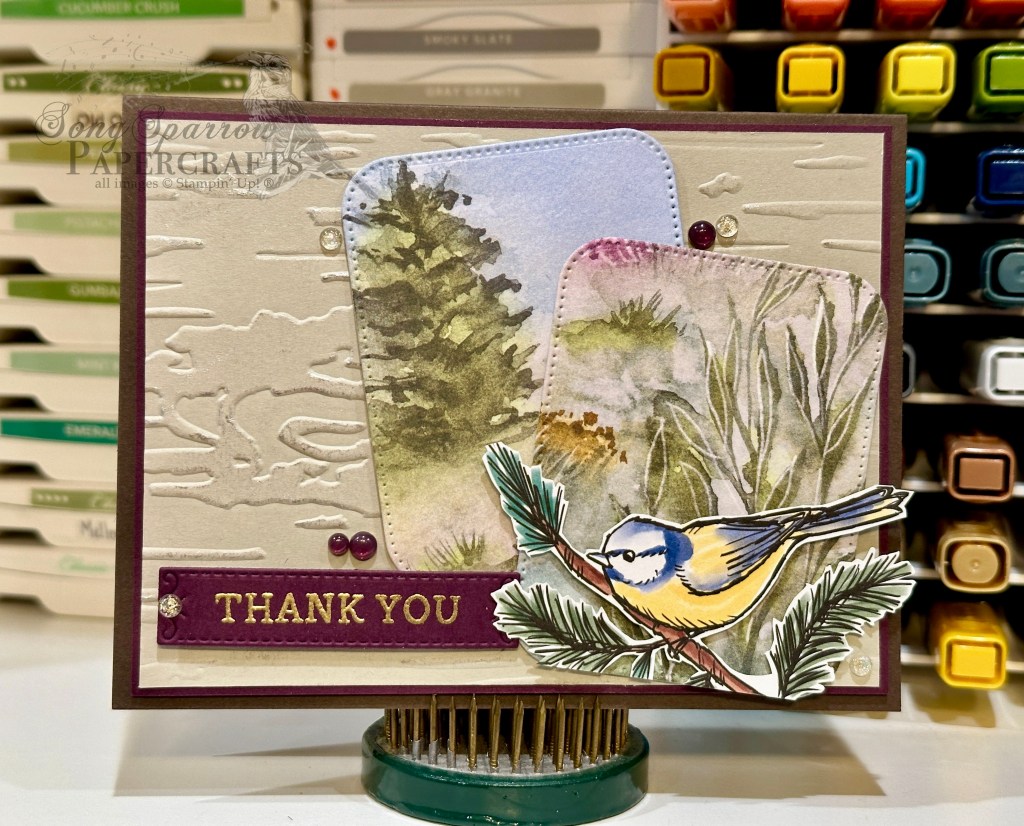
Although a couple of days late this week, we’re marching on with our Sketchy Fridays, where each week we’re using a card sketch to design our featured card. Right now, we’re working through a full series of designs using the card sketches found in current Stampin’ Up! catalogs.
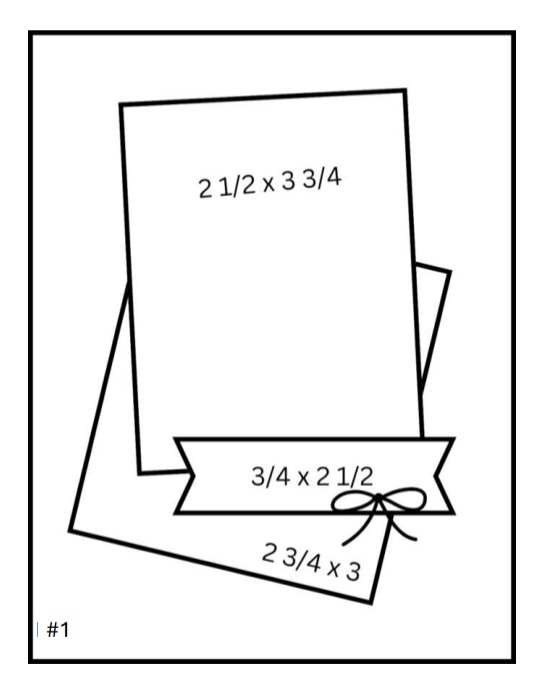
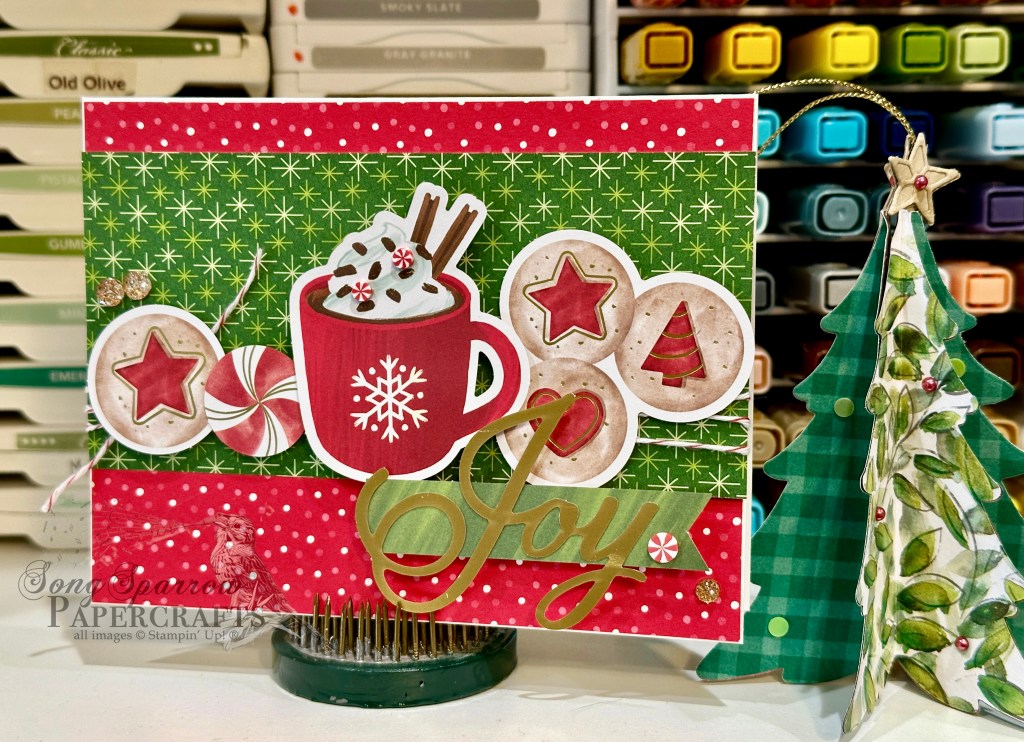
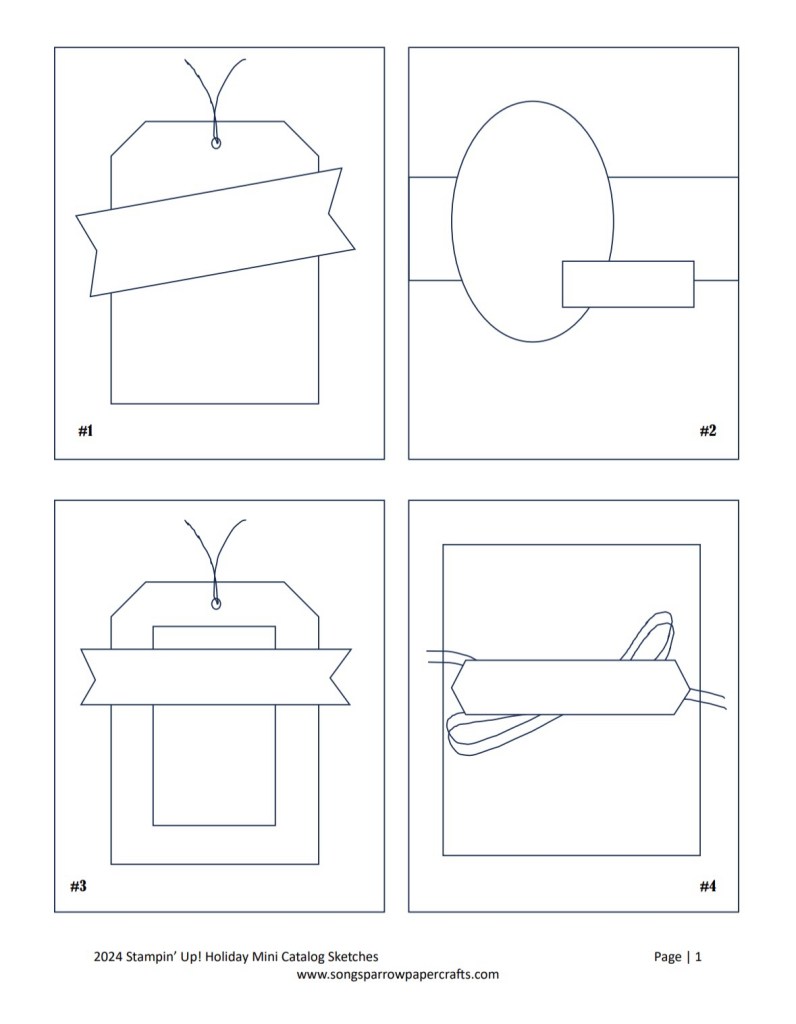
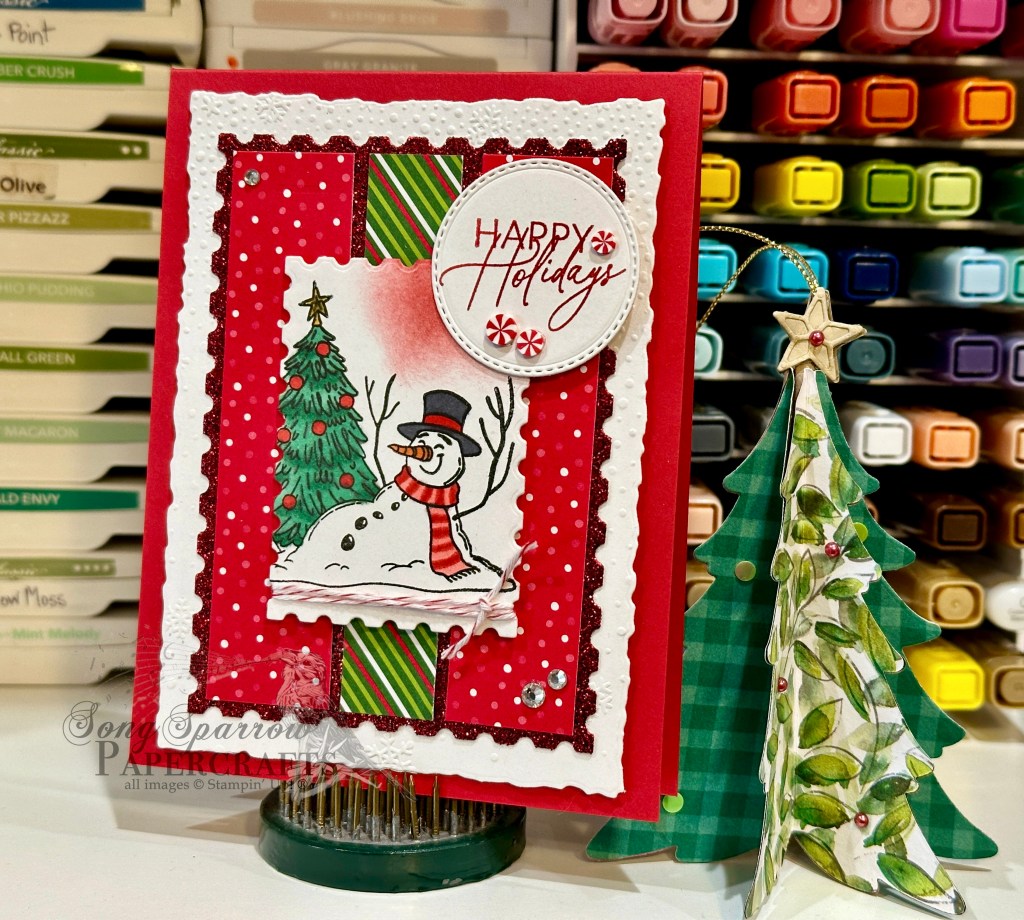
This week’s card is based on Sketch #7 in the Stampin’ Up! Holiday Mini Catalog and features a fun assortment of products, including designer series paper, dies, and holiday ephemera.
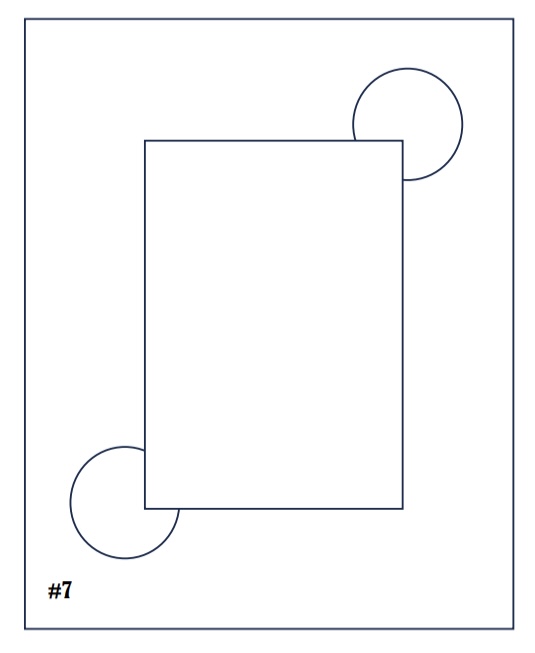
If you’ve followed along for a little while, you’ve heard me talk about how sketches are such a great way to get started with a card design. And you don’t always have to follow a sketch to a T. This week, I’ve rotated the sketch but have otherwise stuck to the layout pretty closely. So let’s take a closer look at all of the elements that are working together here.
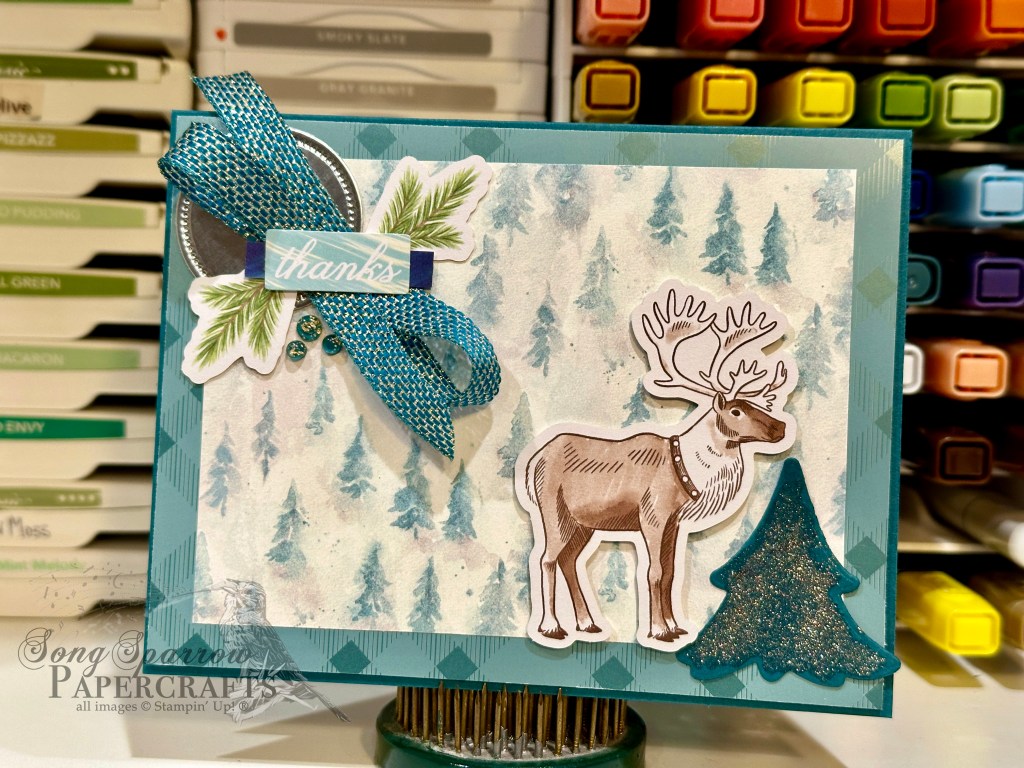
We get started with a base of Pretty Peacock cardstock. I used a piece of Tartan Foil patterned paper as the base for our focal panel. And then a piece of the Winer Meadow designer paper serves as our focal panel. I pulled the reindeer from the Joyful Images ephemera to serve as our focal image in the bottom corner. I added a smaller tree diecut from Pretty Peacock using the Merriest Trees dies to anchor the bottom corner of our focal panel. The sentiment pieces and greenery are also from the Joyful Images ephemera and sit nicely over a faux bow of Pretty Peacock & Gold metallic trim. A foil silver circle diecut with the Everyday Details dies serves as the top corner anchor and adds that nice pop of metallic sparkle to compliment the Wink of Stella on the opposing anchor tree. A few Pretty Peacock foiled dots finish things off nicely and draw the eye to the sentiment.
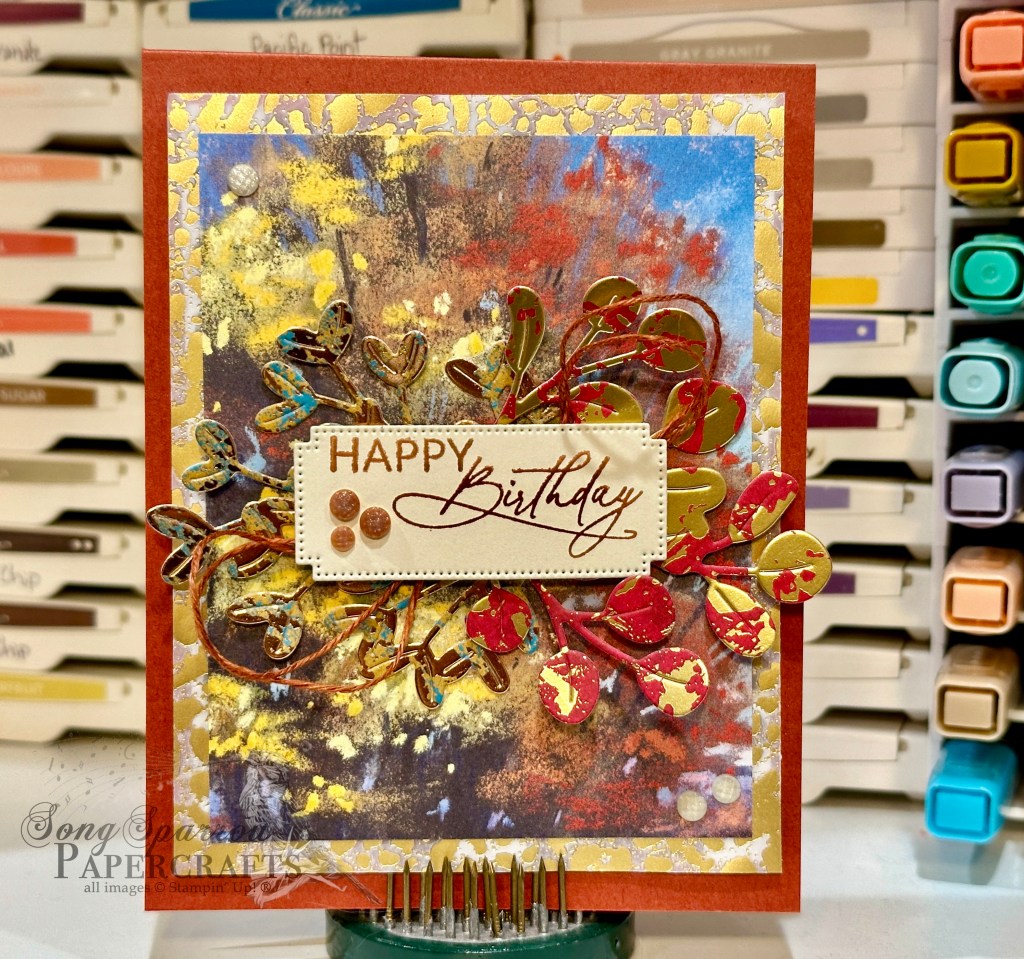
I’m rounding out this week’s woodsy card designs with a peek through the trees. Hope you’ll come check it out.
Product List
 Specialty Designer Series Paper")
 Designer Series Paper")


 Metallic Ribbon")


 Designer Series Paper")
 Designer Series Paper")


")
")


 Designer Series Paper")
 Specialty Designer Series Paper")
 Specialty Designer Series Paper")
 Specialty Designer Series Paper")
")


 Designer Series Paper")
")


 Glimmer Paper")
")
")


 Specialty Paper")
 Specialty Designer Series Paper")
")

 Striped Trim")
 Trim Combo Pack")


")