This week, we’re having some fun exploring a whole new crop of fun folds that I’ve been dying to try. Today, we’re working on a “faux” fun fold I learned from my fellow Luv 2 Stamp team member Patti Dolan called the Fan Fold. I call this a faux fun fold because it’s made to look like a folded fan but doesn’t actually involve any special folding.
We’re working the lovely Floral Delight paper pack for this new fun fold design. And we get started with a base of Mossy Meadow. The card front uses two patterns from the Floral Delight pack — the daisy and fleur de lis patterns. Our fan element is created by cutting our card base and paper panels and then adhering them together to create the fan look. I used a More Messages sentiment and accented with Daffodil Delight satin ribbon and some Peach Pie glimmer paper. Drusy embellishments on either side draw the eye to the sentiment.
Our peek-through panel from the inside card panel also uses a sheet of the Floral Delight paper and is mounted on a quarter sheet of Cloud Cover to bring together the outside and inside color palettes.
This fun “fold” looks a little complicated but is super easy to put together. You can download the free tutorial here.
This week is all about fun folds. I have to admit that I was pretty intimidated by fun folds at first, but once you’re brave enough to try your first one, there’s really no going back! Now, there’s nothing more exciting than adding another fun fold to my arsenal, especially when it’s an easy one that looks hard. *wink*
Today, we’re trying out a fun fold that I learned from my Luv2Stamp team leader Patty Bennett called the Explosion Pop-Up. And there are tons of variations of this fold out there that really dress it up and dress it down. I went with a pretty simple version for my first go.
We get started with a standard A2-sized card base of Pool Party cardstock. The two-panel focal panel starts with a backdrop of Pretty in Pink plaid from the Wildflower Birthdays paper pack that is diecut using the largest Textured Notes rectangle die. Then we cut a circle from the Pool Party and gold sheet using the Spotlight on Nature dies. To help set off the center of our focal panel, I mounted the circle panel atop a faux bow of gold striped mesh ribbon. Our focal image is from the ephemera sheet included in the Wildflower Birthday pack and mounted with dimensionals. A few gold drusy embellishments on either side set things off nicely and really bring the eye in.
The inside pop-up panel is a 6×6 sheet of the striped paper from the Wildflower Birthdays pack. I used more ephemera to decorate the left side. The sentiment panel is a small square of white cardstock that is stamped with a sentiment from The Right Words set in Pool Party ink. A few drusy embellishments on either end of the gold banner tie the design together nicely.
It takes just a minute to get the hang of folding the pop-up panel correctly. But other than that, this is a really simple fun fold that packs so much visual fun. Wanna give it a try? You can snag the free tutorial for today’s card here.
Happy Monday, everyone! Our summer is flying by in a flash as we begin the last two weeks of summer break here in N. Texas. It’s hard to believe that school is just around the corner. And I don’t know about you, but that brings about a lot of anxious preparation as we begin gathering new school supplies and shopping for new clothes with a preteen (not for the faint of heart!).
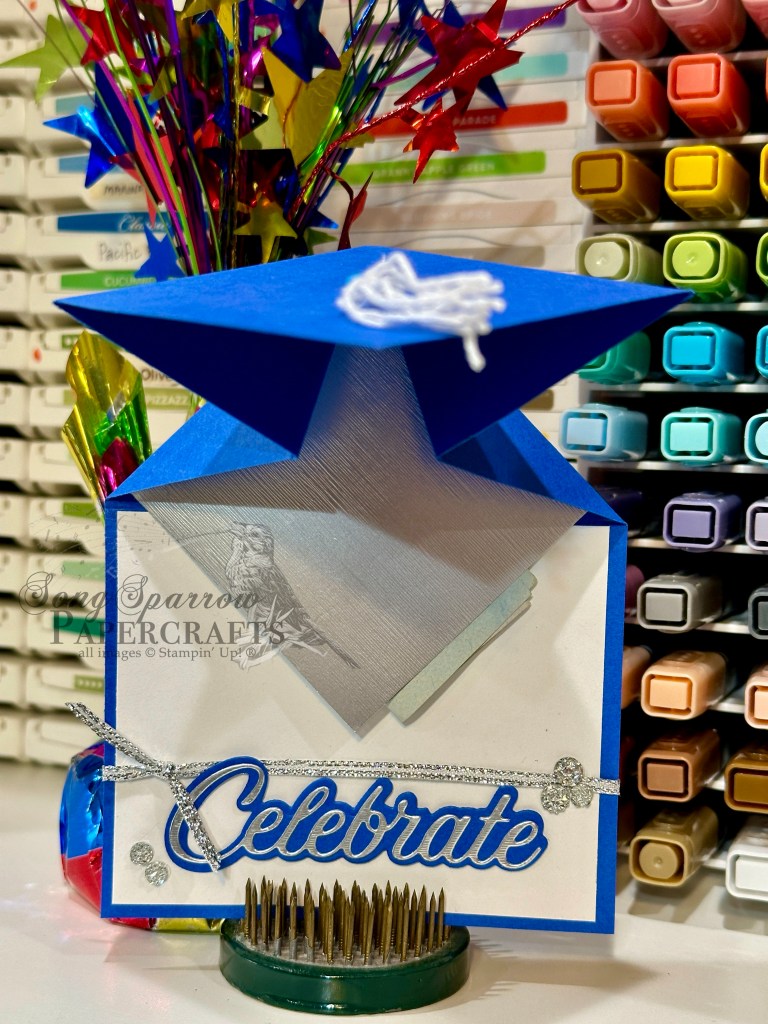
It also means that we’re beginning a new week of fun crafty designs. And this week we’re going to be working through a stash of fun folds that I’ve been dying to try. And first up comes a design of necessity as my oldest nephew is headed off to college in a few short weeks. I might be just a teensy bit behind in honoring his graduation, but there’s always the last-minute items to buy right? *wink* Today, I’m trying my hand at a super cute cap & tassel fun fold that I saw over at Beth’s Paper Cuts.
For a giftie like this one, I try to coordinate the color palette with the graduate’s school colors. In this case, I need to work with a palette of royal blue, white, and black. Finding just the right shade of blue proved a little tricky since I was out of Blueberry Bushel. BUT I happened to still have a supply of Pacific Point in my retired stash, so here we go.
I decided to have the royal blue serve as the predominant color in the design and then I used white and silver as accent colors. I used white baker’s twine to tie the tassel and happened to have some silver thread on hand that I used to bind the tassel together. I liked having this silver detail tie together with the sentiment. I used the recently-retired die set called Wanted to Say to cut the sentiment. Silver trim and drusy embellishments give us nice pops of festive shimmer around the sentiment.
As I was putting my card together, I got a little ahead of myself and ended up adhering the panel that was intended to be the gift pocket, which meant I had to improvise a solution. I cut an extra square of silver specialty paper to serve as the money pocket and placed it in the center of the folding section. It works, but it wasn’t exactly how envisioned this coming out. I’ll fix it on the next go-around. *grin*
I chose to use the top-inside panel to include a hand-written note, so it is not strongly affixed in this short demo. But I still wanted to show how this adorable fun fold opens and where that message panel will eventually be situated. I haven’t had time to make the how-to video for this design yet, but I did take the time to create a PDF tutorial which is free to download here.
Products used in today’s fun fold: Pacific Point (retired), Basic White cardstock Brushed metallic silver specialty paper Wanted to Say dies (retired) Silver trim White baker’s twine Drusy embellishments Brad Dimensionals
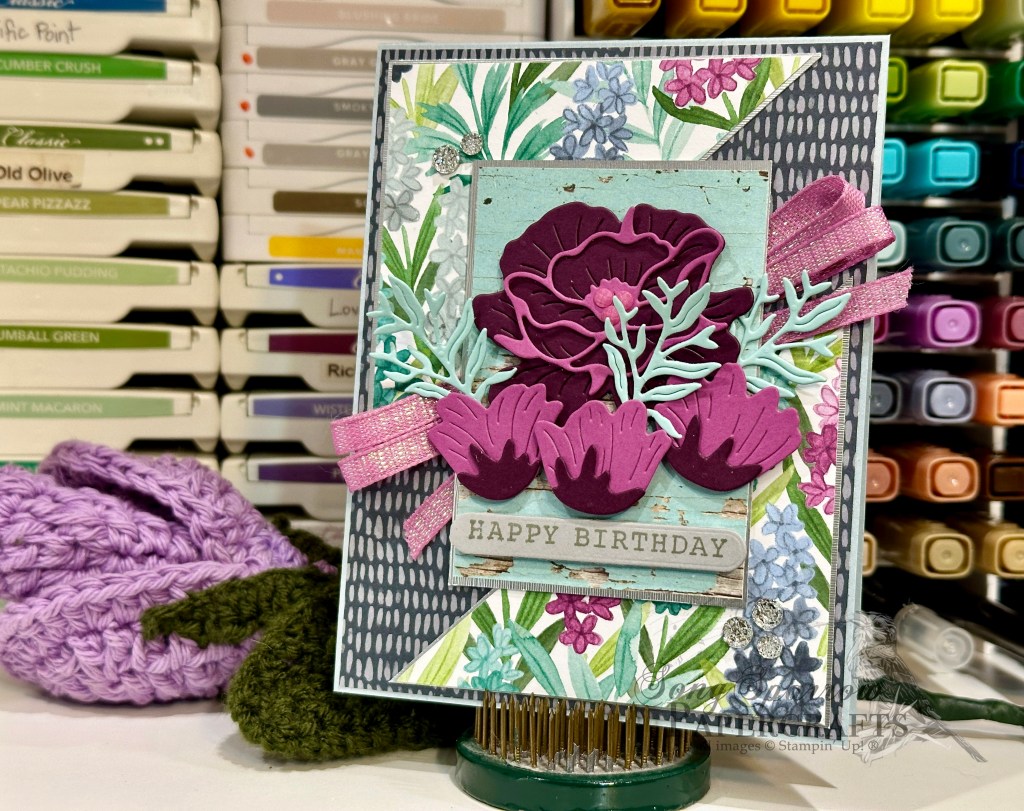
We’re wrapping up our week(ish) of designs featuring the Florals in Bloom products by Stampin’ Up! I love the vibrant colors in the papers and the versatility of the stamps and dies. I decided to round out the design series with a card that really allows this suite to shine. Helping us out for this card are the Country Woods paper and More Messages stamps and die.
To keep the color palette lighter and brighter, we get started with a base of Cloud Cover cardstock. I’m not sure I’ve talked too much about the new In Colors, but this is probably one of my favorites of the bunch. Cloud Cover is the perfect combination of grey and blue that allows you to transform the mood of the card easily with just a few changes in your helper colors. In this case, I chose the moody blue of the Secret Sea hashed-pattern sheet from the Florals in Bloom paper pack. Our focal panel is broken into three interwoven sections. The opposing corners are a piece of the cheery hyacinth patterned paper from Florals in Bloom that is matted with some Brushed Silver to help give some definition between the two busy patterns. The center portion of the focal panel is where all of the action takes place. A sheet of the Pool Party woodgrain from the Country Woods pack – also matted in Brushed Silver – serves as our stage. It rests atop a bow of Petunia Pop iridescent ribbon. Our purple-hued flowers take center stage with the sentiment tucked quietly underneath. A few Petunia Pop shimmer dots add a touch of twinkle to the center of our floral bunch, while the silver drusy embellishments on opposing corners give the eye a path to follow down and across.
I hope you’ve enjoyed getting a closer look at this beautiful product suite. Next week, our design series is all about fun folds. I have a stash of them in my gotta-try-it folder that we’re going to take for a test drive! I hope you’ll come along for the ride.
Well, yesterday saw a very exciting and emotionally-draining end to the day. Just as I was turning into our section of the neighborhood, I caught a strange sight out of the corner of my eye. And I realized that the gentleman I was seeing on the ground on the curb by his mailbox was not picking weeds but was, instead, in great distress as he sank down and face-planted into the grass as I made the corner and threw the car into park. I had hung up on the hubby to jump out and rush across the street, but it didn’t take hubby long to track my location and appear on scene. When all was said and done, several neighbors also came to aid and we managed to get the gentleman up into his garage and out of the sun as the ambulance arrived to check him out. We bid adieu and headed for home after his son-in-law arrived to serve as translator for the paramedics. So needless to say, I didn’t really have any emotional energy left to design once I got home and finally settled down after the rush of adrenaline.
But I’m back at it today. This week, we’ve been using the Florals in Bloom suite to create our designs. And today we’re pairing up the dies in this suite with the Plaster Painting embossing folder and More Messages stamps & dies to create this lovely encouragement card.
We start with a base of Secret Sea cardstock. The background panel is a quarter sheet of Secret Sea that has been machine embossed with the Plaster Painting embossing folder, and then I used some silver metallic ink to bring out the details in the embossed panel. The focal section consists of florals cut using the Pretty Florals dies and a combination of Strawberry Slush, Pretty in Pink, Pool Party, and Pretty Peacock cardstocks. To add some extra shimmer to the flowers, I cover the Strawberry Slush blooms with Wink of Stella before adhering the detail Pretty in Pink pieces on top. The floral centers are a cluster of the Strawberry Slush gems. The sentiment from More Messages is stamped on Smoky Slate cardstock in Gray Granite ink and then diecut with the coordinating More Messages die. I adhered a twist of silver trim behind the sentiment before adhering it to the side of the blooms off-center on the card front. We finish things off with some silver drusy embellishments to tie everything together and draw the eye across the design.
I designed this particular card with our office intern in mind and I can’t wait for her to receive the card on the farewell day of her summer internship!
Lovely certain seems a fair way to describe this Wednesday. Would you like to know why?
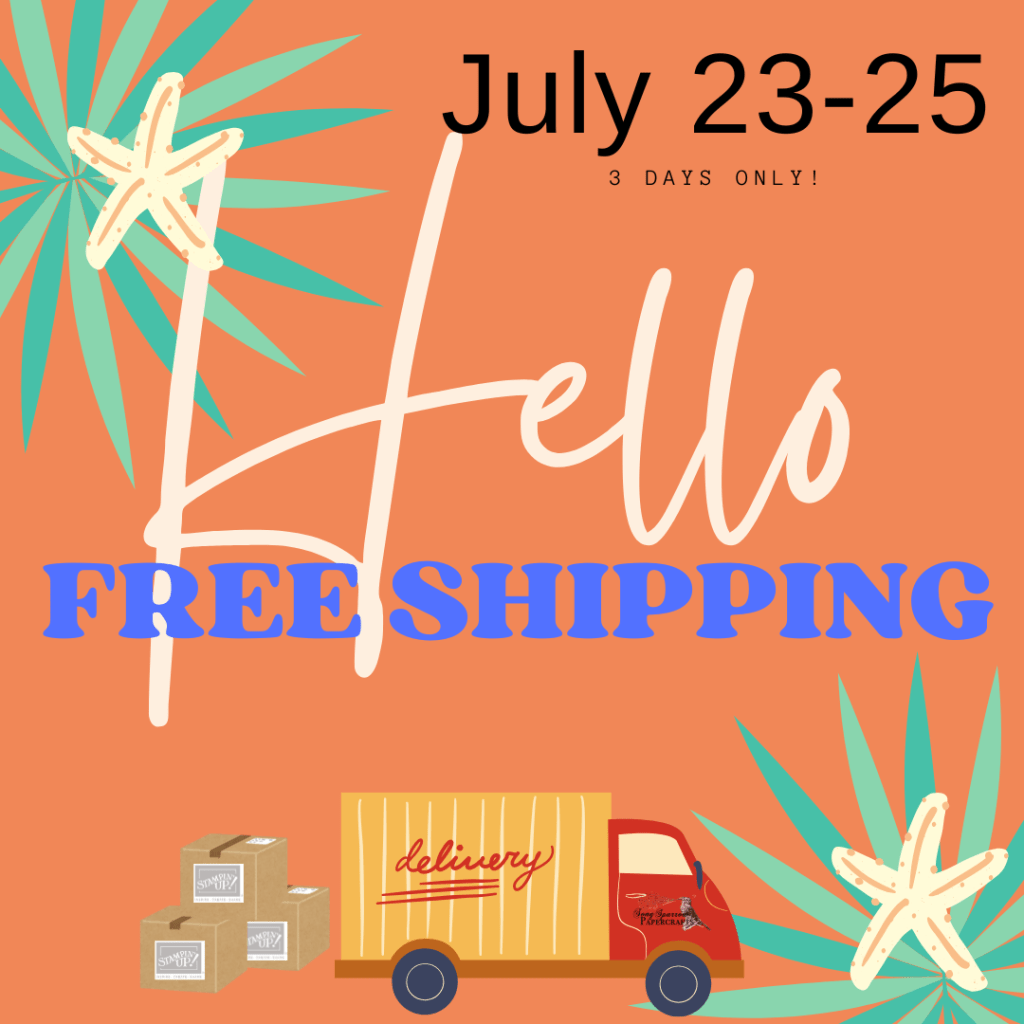
It’s that time of year…where Stampin’ Up! is offering FREE shipping on any order of $75 and above. I’ve had some items hanging out in my cart for a little while now, and I used this opportunity to save big on shipping since quite a bit of it was paper and other weighty items. Now is the perfect time to buy that paper or anything else in your shopping cart because you’ll save BIG on shipping. But better act fast because this deal won’t last long – July 23 through July 25! Check out my online store to learn more!
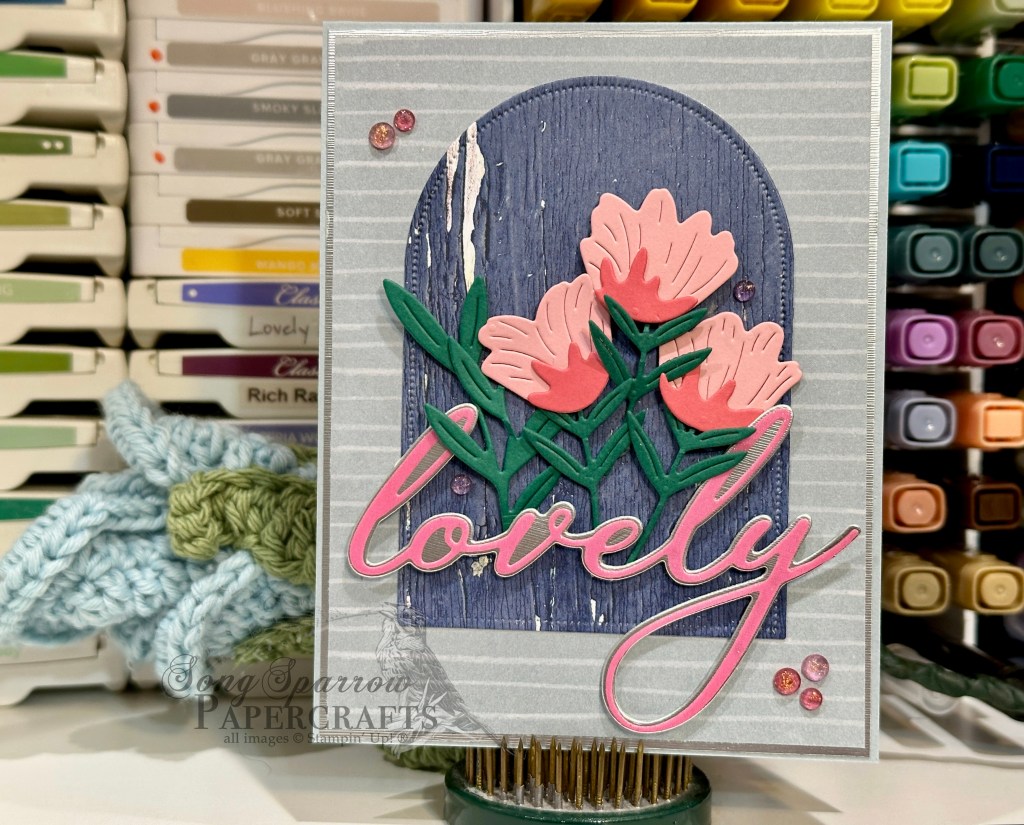
And that brings us to our card design for today. This week, we’ve been giving the Florals in Bloom suite a bit more attention and pairing it with other items in the crafty stash. Today’s combo includes the Country Woods patterned paper and brushed silver specialty paper. Let’s check it out.
We get started with a base the new In Color cardstock called Cloud Cover. The background panel is a piece of the lovely Florals in Bloom paper that is matted on brushed silver and adhered directly to the card front. I cut a piece of the blue woodgrain pattern from the Country Woods paper pack using the Everyday Arches dies and adhered this focal panel to background panel. Using the Pretty Florals dies, I cut stems and florets from a combination of Shaded Spruce, Pretty in Pink, and Strawberry Slush cardstock. The flowers are assembled with glue dots and each is adhered to the focal panel with dimensionals of varying heights. Using the Sweet Blooms dies, I cut the sentiment from a combination of brushed silver and a piece of pink shimmer paper from my retired stash bin. You could easily get the same shimmery effect by cutting from any shade of pink and then covering with Wink of Stella. I used my glue pen to adhere the two parts of the sentiment together. The sentiment is adhered over the flowers with extra dimensionals to be sure it stands above. We finish things off with the pink gems across the card front.
This week, we’re giving the elements in the Florals in Bloom suite a bit more love and combining them with other fun products in the stash. Today, we’re pairing up the Pretty Florals stamp set with the Thoughtful Designs specialty paper and Country Corners dies.
Our card begins with a base of Cloud Cover cardstock. A sheet of the blue Thoughtful Designs specialty paper serves as the dramatic backdrop for our focal panel. I love the intricate foiled detailing in this paper. I chose the darker end of the blue ombre sheet for the contrasting drama that it adds to this happy garden scene. Our focal panel begins with a base of Cloud Cover cardstock that is cut with the largest Country Corners die. A small stand of wildflowers stamped with the Pretty Florals stamps set adorn the panel in shades of pink, purple, and yellow. The sentiment from The Right Words stamp set is stamped in Secret Sea onto white cardstock and then cut with a combination of paper trimmer and paper snips to create a banner. I tied a length of white diagonal trim around the top of the panel and then adhered the sentiment panel over it with dimensionals. A bow of silver & white sheer ribbon over the center of the white trim adds the perfect touch of sparkle, along with a little Wink of Stella on the cone flowers, some gold foil gems over the purple flowers, and drusy embellishments scattered across the front.
Even cards that take a more serious tone can have touches of sparkle here and there to help invoke feelings of genuine care and heartfelt wishes.
It’s been a crazy couple of weeks around here in Song Sparrow land. Between completely redecorating my son’s room (minus the paint – that’s still on the to-do list!) and then prepping to go on vacation, let’s just say I was chasing my tail and had zero brain cells left for creative work!
But in the end, the kiddo was over the moon with his new room setup and we had a fabulous time on vacation. The vacation was, of course, the highlight for the adults because we traveled to a place we’ve been to many times (and love) that provides oodles of things for the kiddos to do without a screen. And for people who love to be outside fishing and enjoying the great outdoors, it was heaven! So all in all, I would call the hiatus from designing a win.
I don’t really feel like I did the last design theme a lot of justice with only 3 designs using the Florals in Bloom suite. So this week, we’re going to continue creating with this beautiful combination of products. And to spice things up, because you know that’s how I roll, we’ll be bringing in other sets as we go to keep it all interesting. For today’s design, we’re pairing the Florals in Bloom paper with The Right Words stamp set and the Beautiful Butterflies and Everyday Arches die sets.
We get started with a base of Highland Heather cardstock. The background panel is a combination of the small purple floral pattern from the Florals in Bloom paper pack and a mat of Highland Heather glimmer paper that I’m fortunate enough to still have in my stash. I tied a bit of Petunia Pop iridescent ribbon around the bottom of the background panel to help bring out the subtle shades of pink and lighter shades of purple. The background panel is adhered to the card front with dimensionals. The focal panel is cut from white cardstock using the Everyday Arches dies and turned on its side. I’ve then stamped the sentiment from The Right Words set in Gorgeous Grape on the side up and adhered the panel against the far edge of the background panel. A beautiful, dainty butterfly cut from pastel ombre and silver foil paper using the Beautiful Butterflies dies adds the perfect pop of sparkle and bit of visual interest that draws the eye directly to our focal panel. It’s adhered to our focal panel with a double-dose of dimensionals for an extra boost. A few purple sequins scattered about the card front in strategic places give the bits of sparkly interest so your eye moves across the design.
This design is clean and simple and comes together in a snap but lacks nothing in the drama department – which is just my style!
Our design spotlight for this week is the Florals in Bloom suite by Stampin’ Up! Aside from the fact that this suite is gorgeous in every conceivable way, it’s been the perfect spot of sunshine in a week that hasn’t been the happiest here in North Texas. Whether you are personally impacted by the flooding in the Texas Hill Country or not, there seems to be a universal feeling of sadness as we all come to grips with the innocent lives lost in the blink of an eye.
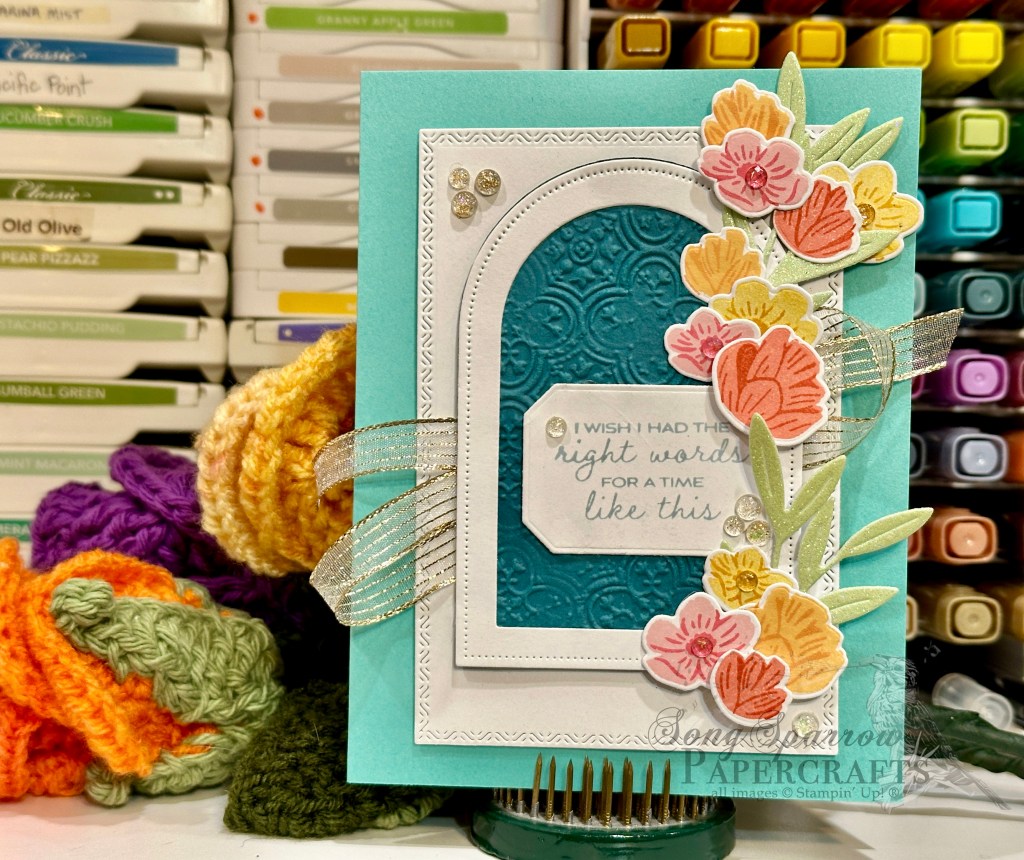
Today’s card design is inspired by those difficult moments where we simply don’t have any words to say. We simply hope that a hug will do. And for cardmakers, sometimes we have to send a hug in the mail. This card pairs the Pretty Florals bundle with The Right Words stamp set for the perfect hug in the mail.
We get started with a base of Coastal Cabana cardstock. The focal panel backdrop is a simple piece of white cardstock diecut with one of the larger Textured Notes dies. I wanted to create a window look and so I used the Everyday Arches dies to create a window frame of white cardstock and then cut a backdrop of Pretty Peacock that is machine embossed with the Distressed Tiles embossing folder to give the look of a paneled wall in the background. Our window is mounted over gold striped mesh ribbon for a subtle bit of twinkle that spans the card front. I loved the idea of a flowering fine climbing outside the window to add that touch of happy color. The flowers are stamped in various shades of pink, yellow, orange, and red-orange on white carsdtock using the Pretty Florals stamps and then diecut with the coordinating dies. The vine is cut from a sheet of the green ombre glimmer paper in the pastel ombre paper pack. The vine and flowers are adhered next to the window using a combination of glue dots and dimensionals to create a layered look. We add little pops of sparkle across the card front with a combination of foil gems in a variety of colors.
The dies in the Florals in Bloom suite offer a lot of opportunity for beautiful designs. We’ll explore more of what the dies can do in our next design. I hope you’ll drop by and check it out.
It’s the start of a brand new week. And I must say that it’s laden with some heavy burdens for those of us who live here in Texas as we’ve watched the tragedy of the holiday weekend flooding event in the Hill Country unfold. I saw today that areas of the Carolinas are also experiencing torrential rains and record flooding. So for a lot of us, our thoughts are consumed with a collective sadness and mourning for the loss of life and devastation left behind. I wrote a little about this on Saturday, as well.
But I’m trying to turn my thoughts and focus onto the hope and light that follows all of life’s storms. And so we’re moving onward and upward as we tackle a brand new design theme this week — the Florals in Bloom Suite. This gorgeous suite, which is currently so popular that it’s on backorder, pairs some beautiful floral designs in paper, stamps, and dies, along with a package of the new In Color flat pearls that coordinate beautifully with the paper. We’re pairing up the gorgeous patterned paper with the Label Me Grateful stamps today to create a super simple thank-you card.
Our card gets started with a base of Peach Pie cardstock. Our focal panel is a combination of three papers. Our base is a lovely dashed pattern from the Florals in Bloom paper pack. The main panel is also from this paper pack and combines blue and peach-hued floral stems. I matted the main panel in Summer Splash glimmer paper to bring out the more subtle tones in the focal paper and to give some contrast against the Secret Sea patterned backdrop. I turned this panel askew for a playful look and nice visual interest. The sentiment from the Label Me Grateful stamp set is stamped in Secret Sea on Cloud Cover cardstock and then diecut with the largest label die from the Mixed Labels die set. The sentiment panel is mounted on dimensionals above a lovely decorative bundle of Summer Splash bordered ribbon. We finish things off with some riverside pearls and In Color flat pearls.
Tomorrow we’re going to dancing through the flowers. I hope you’ll come join!


![Mossy Meadow 8-1/2" X 11" Cardstock [ 133676 ]](https://assets1.tamsnetwork.com/images/EC042017NF/133676s.jpg "Mossy Meadow 8-1/2\" X 11\" Cardstock [ 133676 ]")
![Cloud Cover 8 1/2" X 11" Cardstock [ 165621 ]](https://assets1.tamsnetwork.com/images/EC042017NF/165621s.jpg "Cloud Cover 8 1/2\" X 11\" Cardstock [ 165621 ]")
![Smoky Slate 8-1/2" X 11" Cardstock [ 131202 ]](https://assets1.tamsnetwork.com/images/EC042017NF/131202s.jpg "Smoky Slate 8-1/2\" X 11\" Cardstock [ 131202 ]")
![Floral Delight 12" X 12" (30.5 X 30.5 Cm) Designer Series Paper [ 164700 ]](https://assets1.tamsnetwork.com/images/EC042017NF/164700s.jpg "Floral Delight 12\" X 12\" (30.5 X 30.5 Cm) Designer Series Paper [ 164700 ]")
![2024–2026 In Color™ Glimmer 12" X 12" (30.5 X 30.5 Cm) Specialty Paper [ 163771 ]](https://assets1.tamsnetwork.com/images/EC042017NF/163771s.jpg "2024–2026 In Color™ Glimmer 12\" X 12\" (30.5 X 30.5 Cm) Specialty Paper [ 163771 ]")
![More Messages Bundle (English) [ 165473 ]](https://assets1.tamsnetwork.com/images/EC042017NF/165473s.jpg "More Messages Bundle (English) [ 165473 ]")
![Smoky Slate Classic Stampin' Pad [ 147113 ]](https://assets1.tamsnetwork.com/images/EC042017NF/147113s.jpg "Smoky Slate Classic Stampin' Pad [ 147113 ]")
![Daffodil Delight 1/8" (3.2 Mm) Satin Ribbon [ 164715 ]](https://assets1.tamsnetwork.com/images/EC042017NF/164715s.jpg "Daffodil Delight 1/8\" (3.2 Mm) Satin Ribbon [ 164715 ]")
![Drusy Adhesive Backed Embellishments [ 164223 ]](https://assets1.tamsnetwork.com/images/EC042017NF/164223s.jpg "Drusy Adhesive Backed Embellishments [ 164223 ]")
![Tear & Tape Adhesive [ 154031 ]](https://assets1.tamsnetwork.com/images/EC042017NF/154031s.jpg "Tear & Tape Adhesive [ 154031 ]")
![Stampin' Dimensionals [ 104430 ]](https://assets1.tamsnetwork.com/images/EC042017NF/104430s.jpg "Stampin' Dimensionals [ 104430 ]")


![Pool Party 8-1/2" X 11" Cardstock [ 122924 ]](https://assets1.tamsnetwork.com/images/EC042017NF/122924s.jpg "Pool Party 8-1/2\" X 11\" Cardstock [ 122924 ]")
![Basic White 8 1/2" X 11" Cardstock [ 166780 ]](https://assets1.tamsnetwork.com/images/EC042017NF/166780s.jpg "Basic White 8 1/2\" X 11\" Cardstock [ 166780 ]")
![Wildflower Birthday 12" X 12" (30.5 X 30.5 Cm) Specialty Designer Series Paper [ 164591 ]](https://assets1.tamsnetwork.com/images/EC042017NF/164591s.jpg "Wildflower Birthday 12\" X 12\" (30.5 X 30.5 Cm) Specialty Designer Series Paper [ 164591 ]")
![Textured Notes Dies [ 165555 ]](https://assets1.tamsnetwork.com/images/EC042017NF/165555s.jpg "Textured Notes Dies [ 165555 ]")
![Spotlight On Nature Dies [ 163580 ]](https://assets1.tamsnetwork.com/images/EC042017NF/163580s.jpg "Spotlight On Nature Dies [ 163580 ]")
![The Right Words Cling Stamp Set (English) [ 165316 ]](https://assets1.tamsnetwork.com/images/EC042017NF/165316s.jpg "The Right Words Cling Stamp Set (English) [ 165316 ]")
![Pool Party Classic Stampin' Pad [ 147107 ]](https://assets1.tamsnetwork.com/images/EC042017NF/147107s.jpg "Pool Party Classic Stampin' Pad [ 147107 ]")
![Gold Striped 3/8" (1 Cm) Mesh Ribbon [ 165599 ]](https://assets1.tamsnetwork.com/images/EC042017NF/165599s.jpg "Gold Striped 3/8\" (1 Cm) Mesh Ribbon [ 165599 ]")

![Petunia Pop 8 1/2" X 11" Cardstock [ 163801 ]](https://assets1.tamsnetwork.com/images/EC042017NF/163801s.jpg "Petunia Pop 8 1/2\" X 11\" Cardstock [ 163801 ]")
![Blackberry Bliss 8-1/2" X 11" Cardstock [ 133675 ]](https://assets1.tamsnetwork.com/images/EC042017NF/133675s.jpg "Blackberry Bliss 8-1/2\" X 11\" Cardstock [ 133675 ]")
![Brushed Silver And Gold Foil 12" X 12" (30.5 X 30.5 Cm) Specialty Paper [ 164861 ]](https://assets1.tamsnetwork.com/images/EC042017NF/164861s.jpg "Brushed Silver And Gold Foil 12\" X 12\" (30.5 X 30.5 Cm) Specialty Paper [ 164861 ]")
![Florals In Bloom 12" X 12" (30.5 X 30.5 Cm) Designer Series Paper [ 165175 ]](https://assets1.tamsnetwork.com/images/EC042017NF/165175s.jpg "Florals In Bloom 12\" X 12\" (30.5 X 30.5 Cm) Designer Series Paper [ 165175 ]")
![Country Woods 12" X 12" (30.5 X 30.5 Cm) Designer Series Paper [ 163393 ]](https://assets1.tamsnetwork.com/images/EC042017NF/163393s.jpg "Country Woods 12\" X 12\" (30.5 X 30.5 Cm) Designer Series Paper [ 163393 ]")
![Pretty Florals Dies [ 165178 ]](https://assets1.tamsnetwork.com/images/EC042017NF/165178s.jpg "Pretty Florals Dies [ 165178 ]")
![Petunia Pop 1/4" (6.4 Mm) Iridescent Ribbon [ 166203 ]](https://assets1.tamsnetwork.com/images/EC042017NF/166203s.jpg "Petunia Pop 1/4\" (6.4 Mm) Iridescent Ribbon [ 166203 ]")
![Charming Shimmer Faceted Dots [ 166139 ]](https://assets1.tamsnetwork.com/images/EC042017NF/166139s.jpg "Charming Shimmer Faceted Dots [ 166139 ]")
![Mini Glue Dots [ 103683 ]](https://assets1.tamsnetwork.com/images/EC042017NF/103683s.jpg "Mini Glue Dots [ 103683 ]")
![Mini Stampin' Dimensionals [ 144108 ]](https://assets1.tamsnetwork.com/images/EC042017NF/144108s.jpg "Mini Stampin' Dimensionals [ 144108 ]")

![Secret Sea 8 1/2" X 11" Cardstock [ 165624 ]](https://assets1.tamsnetwork.com/images/EC042017NF/165624s.jpg "Secret Sea 8 1/2\" X 11\" Cardstock [ 165624 ]")
![Strawberry Slush 8 1/2" X 11" Cardstock [ 165625 ]](https://assets1.tamsnetwork.com/images/EC042017NF/165625s.jpg "Strawberry Slush 8 1/2\" X 11\" Cardstock [ 165625 ]")
![Pretty In Pink 8 1/2" X 11" Cardstock [ 163793 ]](https://assets1.tamsnetwork.com/images/EC042017NF/163793s.jpg "Pretty In Pink 8 1/2\" X 11\" Cardstock [ 163793 ]")
![Pretty Peacock 8-1/2" X 11" Cardstock [ 150880 ]](https://assets1.tamsnetwork.com/images/EC042017NF/150880s.jpg "Pretty Peacock 8-1/2\" X 11\" Cardstock [ 150880 ]")
![Plaster Painting 3 D Embossing Folder [ 164656 ]](https://assets1.tamsnetwork.com/images/EC042017NF/164656s.jpg "Plaster Painting 3 D Embossing Folder [ 164656 ]")
![Gray Granite Classic Stampin' Pad [ 147118 ]](https://assets1.tamsnetwork.com/images/EC042017NF/147118s.jpg "Gray Granite Classic Stampin' Pad [ 147118 ]")
![Gold & Silver 1/8" (3.2 Mm) Trim Combo Pack [ 161633 ]](https://assets1.tamsnetwork.com/images/EC042017NF/161633s.jpg "Gold & Silver 1/8\" (3.2 Mm) Trim Combo Pack [ 161633 ]")
![Clear Wink Of Stella Glitter Brush [ 141897 ]](https://assets1.tamsnetwork.com/images/EC042017NF/141897s.jpg "Clear Wink Of Stella Glitter Brush [ 141897 ]")
![Strawberry Slush & Pretty In Pink Gems [ 165615 ]](https://assets1.tamsnetwork.com/images/EC042017NF/165615s.jpg "Strawberry Slush & Pretty In Pink Gems [ 165615 ]")
![Shaded Spruce 8-1/2" X 11" Cardstock [ 146981 ]](https://assets1.tamsnetwork.com/images/EC042017NF/146981s.jpg "Shaded Spruce 8-1/2\" X 11\" Cardstock [ 146981 ]")
![Sweet Blooms Dies (English) [ 165186 ]](https://assets1.tamsnetwork.com/images/EC042017NF/165186s.jpg "Sweet Blooms Dies (English) [ 165186 ]")
![Everyday Arches Dies [ 164629 ]](https://assets1.tamsnetwork.com/images/EC042017NF/164629s.jpg "Everyday Arches Dies [ 164629 ]")
![Fine-Tip Glue Pen [ 138309 ]](https://assets1.tamsnetwork.com/images/EC042017NF/138309s.jpg "Fine-Tip Glue Pen [ 138309 ]")

![Thoughtful Designs 12" X 12" (30.5 X 30.5 Cm) Specialty Designer Series Paper [ 163317 ]](https://assets1.tamsnetwork.com/images/EC042017NF/163317s.jpg "Thoughtful Designs 12\" X 12\" (30.5 X 30.5 Cm) Specialty Designer Series Paper [ 163317 ]")
![Pretty Florals Photopolymer Stamp Set [ 165177 ]](https://assets1.tamsnetwork.com/images/EC042017NF/165177s.jpg "Pretty Florals Photopolymer Stamp Set [ 165177 ]")
![Countryside Corners Dies [ 161471 ]](https://assets1.tamsnetwork.com/images/EC042017NF/161471s.jpg "Countryside Corners Dies [ 161471 ]")
![Secret Sea Classic Stampin' Pad [ 165285 ]](https://assets1.tamsnetwork.com/images/EC042017NF/165285s.jpg "Secret Sea Classic Stampin' Pad [ 165285 ]")
![Garden Green Classic Stampin' Pad [ 147089 ]](https://assets1.tamsnetwork.com/images/EC042017NF/147089s.jpg "Garden Green Classic Stampin' Pad [ 147089 ]")
![Strawberry Slush Classic Stampin' Pad [ 165286 ]](https://assets1.tamsnetwork.com/images/EC042017NF/165286s.jpg "Strawberry Slush Classic Stampin' Pad [ 165286 ]")
![Timid Tiger Classic Stampin' Pad [ 165278 ]](https://assets1.tamsnetwork.com/images/EC042017NF/165278s.jpg "Timid Tiger Classic Stampin' Pad [ 165278 ]")
![Fresh Freesia Classic Stampin' Pad [ 155611 ]](https://assets1.tamsnetwork.com/images/EC042017NF/155611s.jpg "Fresh Freesia Classic Stampin' Pad [ 155611 ]")
![Blackberry Bliss Classic Stampin' Pad [ 147092 ]](https://assets1.tamsnetwork.com/images/EC042017NF/147092s.jpg "Blackberry Bliss Classic Stampin' Pad [ 147092 ]")
![Crushed Curry Classic Stampin' Pad [ 147087 ]](https://assets1.tamsnetwork.com/images/EC042017NF/147087s.jpg "Crushed Curry Classic Stampin' Pad [ 147087 ]")
![Daffodil Delight Classic Stampin' Pad [ 147094 ]](https://assets1.tamsnetwork.com/images/EC042017NF/147094s.jpg "Daffodil Delight Classic Stampin' Pad [ 147094 ]")
![Iridescent Foil Gems [ 162842 ]](https://assets1.tamsnetwork.com/images/EC042017NF/162842s.jpg "Iridescent Foil Gems [ 162842 ]")
![Petal Pink & White 1/4" (6.4 Mm) Diagonal Trim Combo Pack [ 163417 ]](https://assets1.tamsnetwork.com/images/EC042017NF/163417s.jpg "Petal Pink & White 1/4\" (6.4 Mm) Diagonal Trim Combo Pack [ 163417 ]")
![Silver & White 1/2" (1.3 Cm) Sheer Ribbon [ 162149 ]](https://assets1.tamsnetwork.com/images/EC042017NF/162149s.jpg "Silver & White 1/2\" (1.3 Cm) Sheer Ribbon [ 162149 ]")


![Highland Heather 8-1/2" X 11" Cardstock [ 146986 ]](https://assets1.tamsnetwork.com/images/EC042017NF/146986s.jpg "Highland Heather 8-1/2\" X 11\" Cardstock [ 146986 ]")
![Three Color Glimmer 12" X 12" (30.5 X 30.5 Cm) Specialty Paper [ 162813 ]](https://assets1.tamsnetwork.com/images/EC042017NF/162813s.jpg "Three Color Glimmer 12\" X 12\" (30.5 X 30.5 Cm) Specialty Paper [ 162813 ]")
![Pastel Ombre Glimmer 12" X 12" (30.5 X 30.5 Cm) Specialty Paper [ 164851 ]](https://assets1.tamsnetwork.com/images/EC042017NF/164851s.jpg "Pastel Ombre Glimmer 12\" X 12\" (30.5 X 30.5 Cm) Specialty Paper [ 164851 ]")
![Silver Foil 12" X 12" (30.5 X 30.5 Cm) Specialty Pack [ 163096 ]](https://assets1.tamsnetwork.com/images/EC042017NF/163096s.jpg "Silver Foil 12\" X 12\" (30.5 X 30.5 Cm) Specialty Pack [ 163096 ]")
![Gorgeous Grape Classic Stampin' Pad [ 147099 ]](https://assets1.tamsnetwork.com/images/EC042017NF/147099s.jpg "Gorgeous Grape Classic Stampin' Pad [ 147099 ]")
![Purple Adhesive Backed Sequins [ 164970 ]](https://assets1.tamsnetwork.com/images/EC042017NF/164970s.jpg "Purple Adhesive Backed Sequins [ 164970 ]")
![Coastal Cabana 8-1/2" X 11" Cardstock [ 131297 ]](https://assets1.tamsnetwork.com/images/EC042017NF/131297s.jpg "Coastal Cabana 8-1/2\" X 11\" Cardstock [ 131297 ]")
![Pretty Florals Bundle [ 165179 ]](https://assets1.tamsnetwork.com/images/EC042017NF/165179s.jpg "Pretty Florals Bundle [ 165179 ]")
![Distressed Tile 3 D Embossing Folder [ 162189 ]](https://assets1.tamsnetwork.com/images/EC042017NF/162189s.jpg "Distressed Tile 3 D Embossing Folder [ 162189 ]")
![Pretty In Pink Classic Stampin Pad [ 163807 ]](https://assets1.tamsnetwork.com/images/EC042017NF/163807s.jpg "Pretty In Pink Classic Stampin Pad [ 163807 ]")
![Peach Pie Classic Stampin Pad [ 163810 ]](https://assets1.tamsnetwork.com/images/EC042017NF/163810s.jpg "Peach Pie Classic Stampin Pad [ 163810 ]")
![Flirty Flamingo Classic Stampin' Pad [ 147052 ]](https://assets1.tamsnetwork.com/images/EC042017NF/147052s.jpg "Flirty Flamingo Classic Stampin' Pad [ 147052 ]")
![Calypso Coral Classic Stampin' Pad [ 147101 ]](https://assets1.tamsnetwork.com/images/EC042017NF/147101s.jpg "Calypso Coral Classic Stampin' Pad [ 147101 ]")
![Cloud Cover Classic Stampin' Ink Refill [ 165279 ]](https://assets1.tamsnetwork.com/images/EC042017NF/165279s.jpg "Cloud Cover Classic Stampin' Ink Refill [ 165279 ]")

![Peach Pie 8 1/2" X 11" Cardstock [ 163799 ]](https://assets1.tamsnetwork.com/images/EC042017NF/163799s.jpg "Peach Pie 8 1/2\" X 11\" Cardstock [ 163799 ]")
![Label Me Grateful Cling Stamp Set (English) [ 166108 ]](https://assets1.tamsnetwork.com/images/EC042017NF/166108s.jpg "Label Me Grateful Cling Stamp Set (English) [ 166108 ]")
![Mixed Labels Dies [ 164652 ]](https://assets1.tamsnetwork.com/images/EC042017NF/164652s.jpg "Mixed Labels Dies [ 164652 ]")
![Riverside Irregular Pearls [ 164937 ]](https://assets1.tamsnetwork.com/images/EC042017NF/164937s.jpg "Riverside Irregular Pearls [ 164937 ]")
![2025–2027 In Color™ Flat Pearls [ 165192 ]](https://assets1.tamsnetwork.com/images/EC042017NF/165192s.jpg "2025–2027 In Color™ Flat Pearls [ 165192 ]")
![Summer Splash 3/8" (1 Cm) Bordered Ribbon [ 163786 ]](https://assets1.tamsnetwork.com/images/EC042017NF/163786s.jpg "Summer Splash 3/8\" (1 Cm) Bordered Ribbon [ 163786 ]")
