Happy Monday, everyone! It’s the official countdown to Christmas. Are you feeling prepared or are you like me and scrambling to the finish? It really didn’t help that I had the flu last week and didn’t feel well enough to do much crafting at all beyond Tuesday. I’m definitely in crunch mode now! But that’s okay. Christmas cards will come a little late and no one will keel over when it arrives after Christmas. *wink* Sometimes we just give ourselves the grace to get done what we can “on time” and make due with the rest.
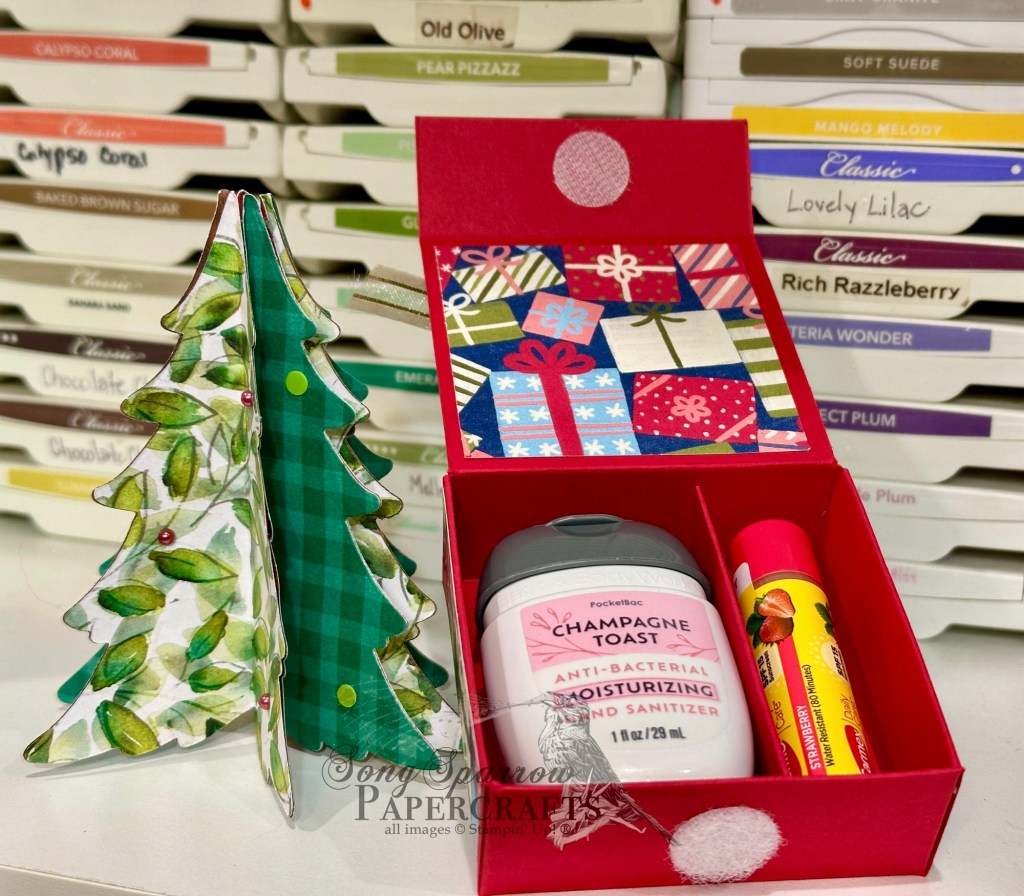
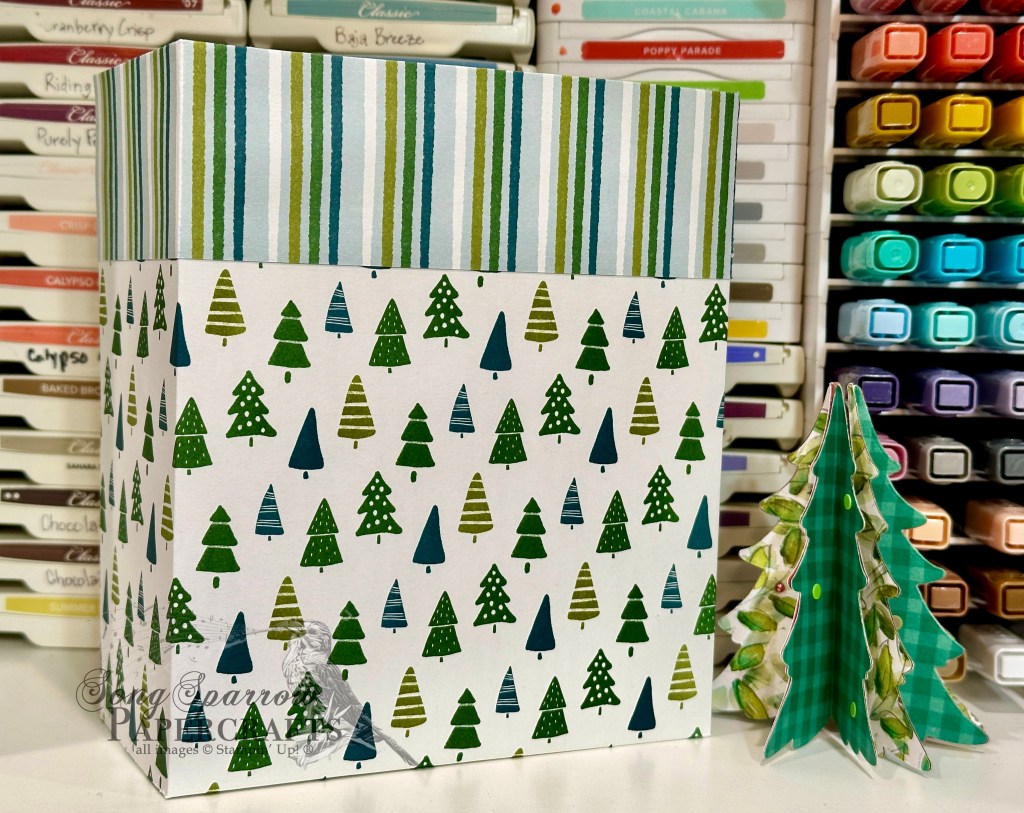
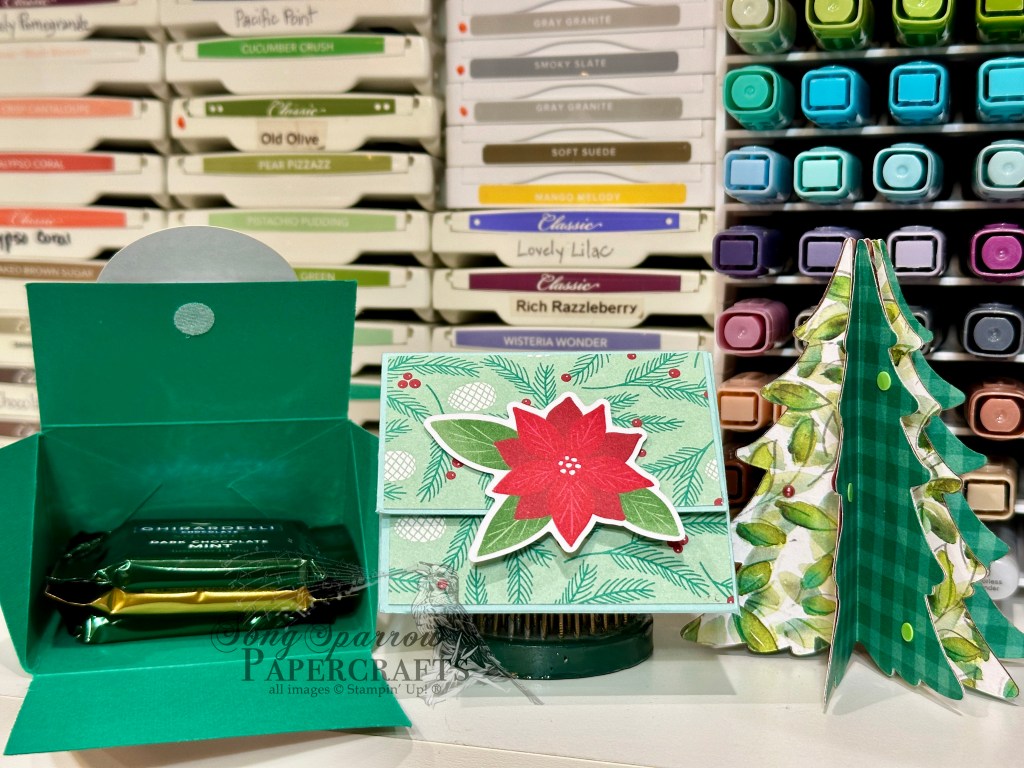
Today I’m sharing another gift box with you. I learned this box from The Paper Pixie and it’s been a huge hit. This little box is the perfect size for some hand cream, a little treat, and a pocket sanitizer. And I’ve had fun finding all the different ways to put this together. Today’s variation uses 100% patterned paper. Let’s check it out.

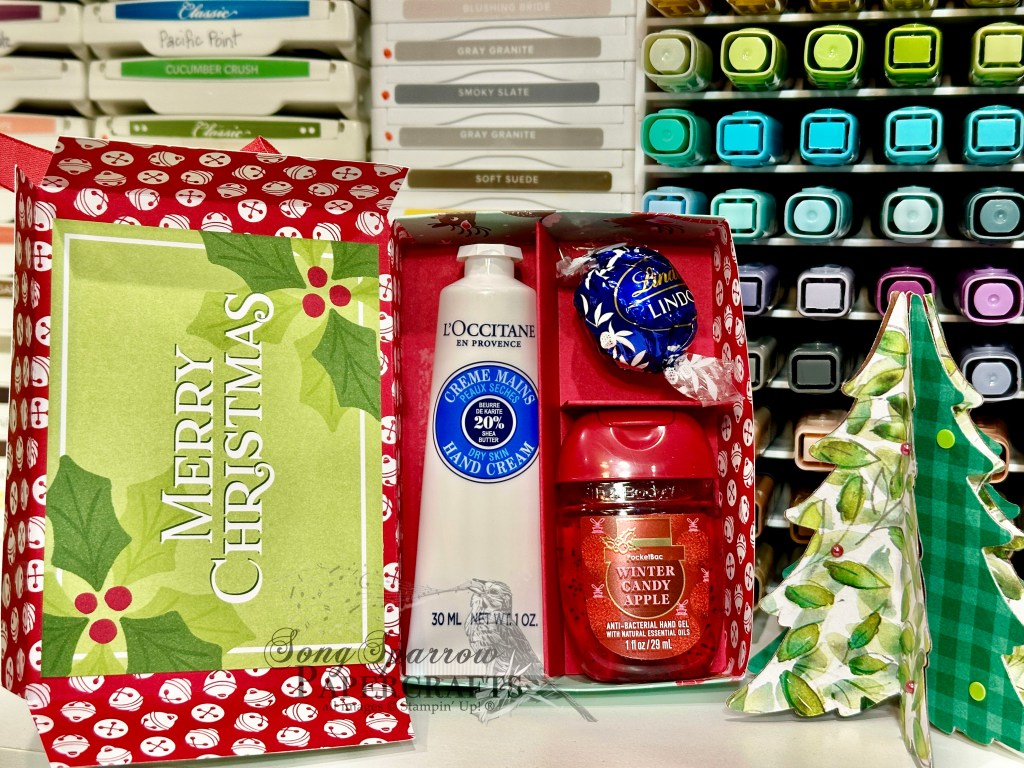
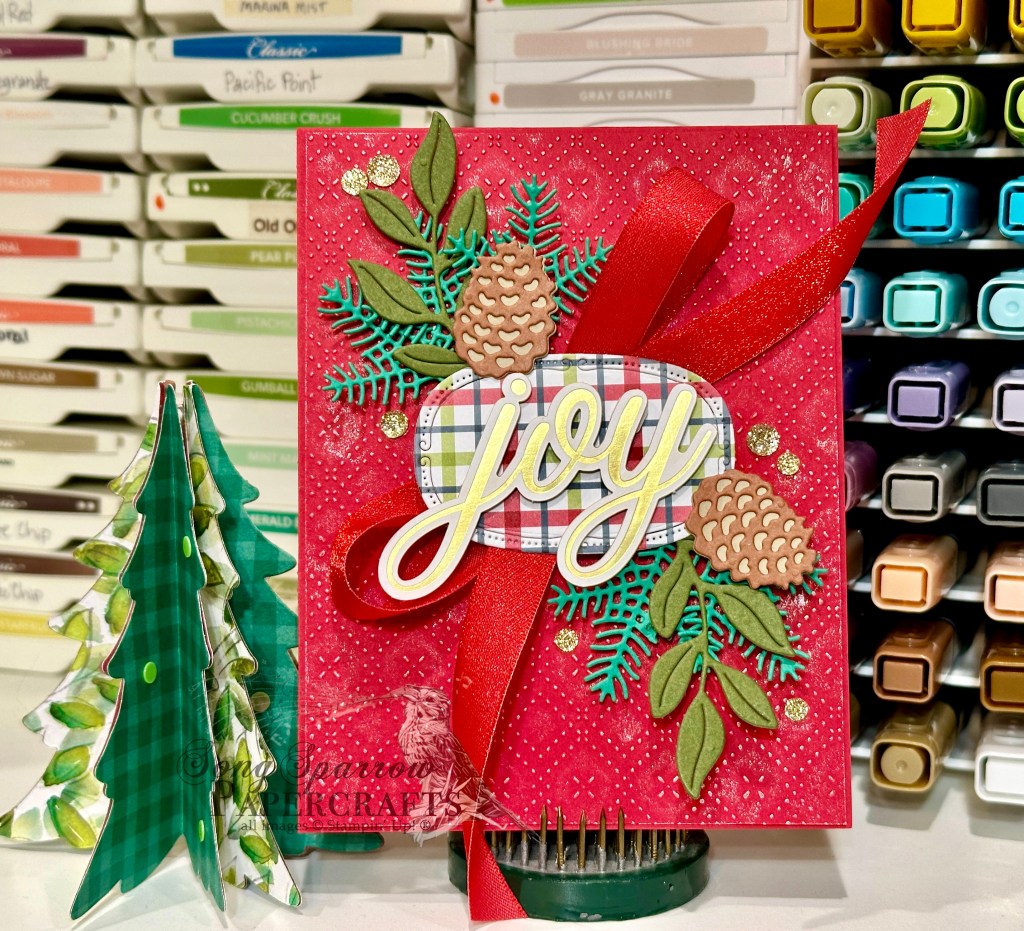
I just had to pull out the super fun Reindeer Days paper from last year’s holiday release. It’s so cute & festive and has the perfect front-backside combinations for this gift box. The inside dividers need to be a little more sturdy and so I chose some coordinating Real Red cardstock for that. I used the coordinating sticker sheet and Memories & More cards to decorate the box, along with some of the current shiny Real Red ribbon.
I whipped up a little tutorial that gives you some instructions both for the patterned paper and cardstock versions of this box. And you can always catch The Paper Pixie video tutorial if you’re like me and more of a visual, hands-on learner.

![Real Red 8-1/2" X 11" Cardstock [ 102482 ]](https://assets1.tamsnetwork.com/images/EC042017NF/102482s.jpg "Real Red 8-1/2\" X 11\" Cardstock [ 102482 ]")
![Shaded Spruce 8-1/2" X 11" Cardstock [ 146981 ]](https://assets1.tamsnetwork.com/images/EC042017NF/146981s.jpg "Shaded Spruce 8-1/2\" X 11\" Cardstock [ 146981 ]")
![Mossy Meadow 8-1/2" X 11" Cardstock [ 133676 ]](https://assets1.tamsnetwork.com/images/EC042017NF/133676s.jpg "Mossy Meadow 8-1/2\" X 11\" Cardstock [ 133676 ]")
![Crumb Cake 8-1/2" X 11" Cardstock [ 120953 ]](https://assets1.tamsnetwork.com/images/EC042017NF/120953s.jpg "Crumb Cake 8-1/2\" X 11\" Cardstock [ 120953 ]")
![Pecan Pie 8 1/2" X 11" Cardstock [ 161717 ]](https://assets1.tamsnetwork.com/images/EC042017NF/161717s.jpg "Pecan Pie 8 1/2\" X 11\" Cardstock [ 161717 ]")
![Traditions Of Christmas 12" X 12" (30.5 X 30.5 Cm) Specialty Designer Series Paper [ 165853 ]](https://assets1.tamsnetwork.com/images/EC042017NF/165853s.jpg "Traditions Of Christmas 12\" X 12\" (30.5 X 30.5 Cm) Specialty Designer Series Paper [ 165853 ]")
![Beautiful Pattern 3 D Embossing Folder [ 167097 ]](https://assets1.tamsnetwork.com/images/EC042017NF/167097s.jpg "Beautiful Pattern 3 D Embossing Folder [ 167097 ]")
![Delicate Pines Dies [ 166073 ]](https://assets1.tamsnetwork.com/images/EC042017NF/166073s.jpg "Delicate Pines Dies [ 166073 ]")
![Traditional Labels Dies [ 165864 ]](https://assets1.tamsnetwork.com/images/EC042017NF/165864s.jpg "Traditional Labels Dies [ 165864 ]")
![Greetings For You Mix & Match Ephemera Pack (English) [ 166208 ]](https://assets1.tamsnetwork.com/images/EC042017NF/166208s.jpg "Greetings For You Mix & Match Ephemera Pack (English) [ 166208 ]")
![Real Red 1/2" (1.3 Cm) Shiny Ribbon [ 165876 ]](https://assets1.tamsnetwork.com/images/EC042017NF/165876s.jpg "Real Red 1/2\" (1.3 Cm) Shiny Ribbon [ 165876 ]")
![Traditional Sparkling Sequins [ 165875 ]](https://assets1.tamsnetwork.com/images/EC042017NF/165875s.jpg "Traditional Sparkling Sequins [ 165875 ]")
![Stampin' Dimensionals [ 104430 ]](https://assets1.tamsnetwork.com/images/EC042017NF/104430s.jpg "Stampin' Dimensionals [ 104430 ]")
![Regal Distressed Patterns 12" X 12" (30.5 X 30.5 Cm) Specialty Designer Series Paper [ 164037 ]](https://assets1.tamsnetwork.com/images/EC042017NF/164037s.jpg "Regal Distressed Patterns 12\" X 12\" (30.5 X 30.5 Cm) Specialty Designer Series Paper [ 164037 ]")
![Joyful Days Memories & More Card Pack [ 165822 ]](https://assets1.tamsnetwork.com/images/EC042017NF/165822s.jpg "Joyful Days Memories & More Card Pack [ 165822 ]")
![Mossy Meadow & Gold 1/4" (6.4 Mm) [ 166158 ]](https://assets1.tamsnetwork.com/images/EC042017NF/166158s.jpg "Mossy Meadow & Gold 1/4\" (6.4 Mm) [ 166158 ]")
![Christmas Tags & More 6" X 6" (15.2 X 15.2 Cm) Mix & Match Specialty Designer Series Paper [ 165907 ]](https://assets1.tamsnetwork.com/images/EC042017NF/165907s.jpg "Christmas Tags & More 6\" X 6\" (15.2 X 15.2 Cm) Mix & Match Specialty Designer Series Paper [ 165907 ]")
![Autumn Leaves Dies [ 162185 ]](https://assets1.tamsnetwork.com/images/EC042017NF/162185s.jpg "Autumn Leaves Dies [ 162185 ]")
![Shaded Spruce & Soft Sea Foam 1/2" (1.3 Cm) Ribbon [ 165234 ]](https://assets1.tamsnetwork.com/images/EC042017NF/165234s.jpg "Shaded Spruce & Soft Sea Foam 1/2\" (1.3 Cm) Ribbon [ 165234 ]")
![Gold & Silver 1/8" (3.2 Mm) Trim Combo Pack [ 161633 ]](https://assets1.tamsnetwork.com/images/EC042017NF/161633s.jpg "Gold & Silver 1/8\" (3.2 Mm) Trim Combo Pack [ 161633 ]")
![Festive 12" X 12" (30.5 X 30.5 Cm) Glimmer Paper [ 164106 ]](https://assets1.tamsnetwork.com/images/EC042017NF/164106s.jpg "Festive 12\" X 12\" (30.5 X 30.5 Cm) Glimmer Paper [ 164106 ]")
![Sentimental Framing Dies [ 165476 ]](https://assets1.tamsnetwork.com/images/EC042017NF/165476s.jpg "Sentimental Framing Dies [ 165476 ]")
![Take A Bow 6" X 6" (15.2 X 15.2 Cm) Designer Series Paper [ 164309 ]](https://assets1.tamsnetwork.com/images/EC042017NF/164309s.jpg "Take A Bow 6\" X 6\" (15.2 X 15.2 Cm) Designer Series Paper [ 164309 ]")

![Basic White 8 1/2" X 11" Cardstock [ 166780 ]](https://assets1.tamsnetwork.com/images/EC042017NF/166780s.jpg "Basic White 8 1/2\" X 11\" Cardstock [ 166780 ]")
![Season Of Elegance 12" X 12" (30.5 X 30.5 Cm) Specialty Designer Series Paper [ 164144 ]](https://assets1.tamsnetwork.com/images/EC042017NF/164144s.jpg "Season Of Elegance 12\" X 12\" (30.5 X 30.5 Cm) Specialty Designer Series Paper [ 164144 ]")
![Gold Foil Sheets [ 132622 ]](https://assets1.tamsnetwork.com/images/EC042017NF/132622s.jpg "Gold Foil Sheets [ 132622 ]")
