We made it to the weekend! I hope your weekend has gotten off to a good start.
Today, we’re taking a look at one of the complementary birthday designs that I mentioned yesterday. As I was working on September birthday cards for friends, I found myself in a groove making a set of complementary birthday cards.
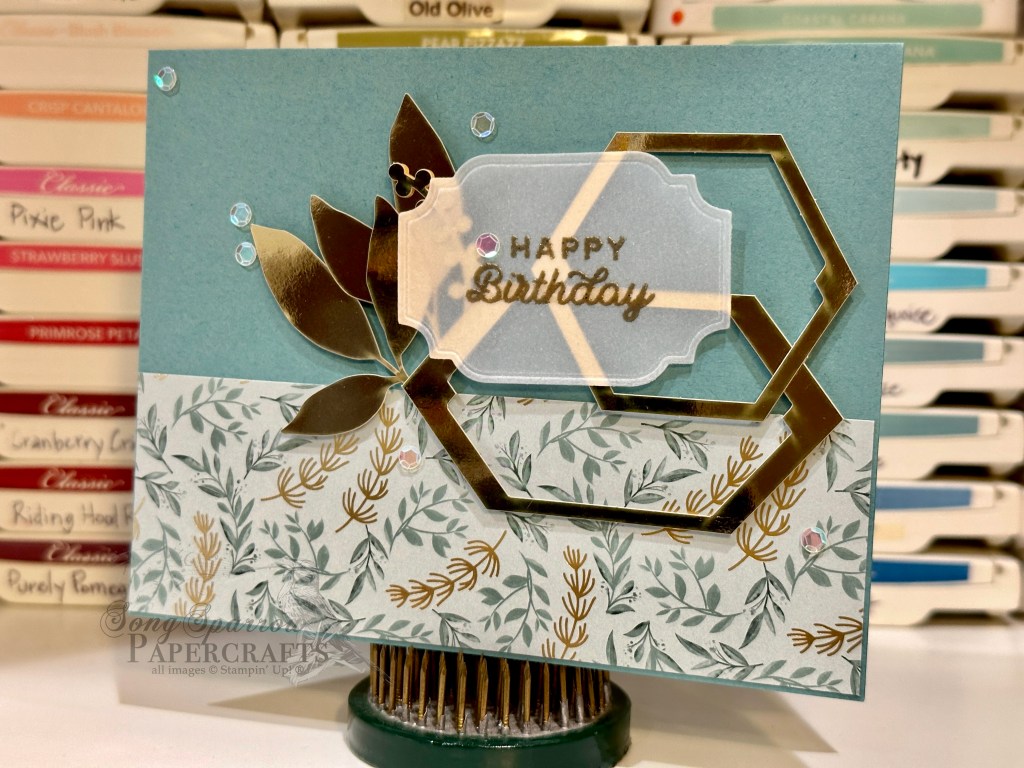
You’ll notice that this design also has a base of Lost Lagoon cardstock and that the gold elements from the Expressions in Ink Ephemera serve as the focal point of the design. The pattern of the designer paper is more delicate in this design, as are the focal elements. The leaves and berries complemented the designer paper pattern well. I have found that, with a little creativity, you can use just about every element in the ephemera set, even the negatives that may have otherwise been discarded. Here, I’ve used two negatives and selected them because of the interesting details in the interior corners. To me, it feels as though these details point to the sentiment, which is embossed on vellum to allow all of the beauty underneath to show through. I added some sequins for a bit of sparkle and to help the eye move more easily across the entire design.
Products used: Lost Lagoon, vellum cardstock Ever Eden DSP (retired) Expressions in Ink Ephemera (retired) Gold embossing powder Dimensionals Adhesives
Do you ever get in a groove when you’re creating projects? As I was making a whole host of birthday cards for my friends with September birthdays, I found myself making a complementary set of designs. When I’m designing cards for friends, the designs are usually very reflective of the person. In the case of this set of complementary designs, the colors and sparkle were “just right” for each card recipient.
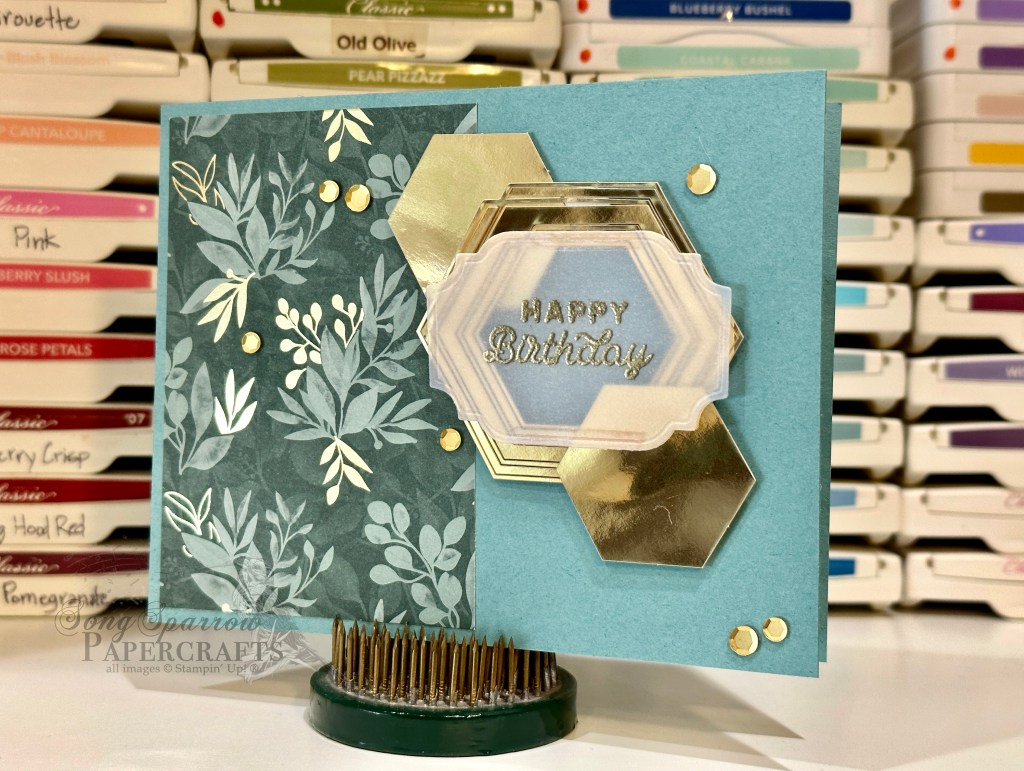
Here, a sheet of Lost Lagoon cardstock serves as the card base. I really love how it pulls the lighter details from the designer paper to the forefront. The Expressions in Ink Ephemera provides so many different looks depending on which of the gold elements you use. I wanted the gold elements to have more prominence and weight, and I especially loved using the solid centers as accents to the detailed hexagons in the middle. The sentiment is heat embossed in gold on vellum to allow the sentiment to be part of the geometric focal point without covering the beautiful details. A scattering of gold sequins helps draw the eye across the design and ensure the gold accents in the designer paper catch the eye, as well.
Products used: Lost Lagoon, vellum cardstock Ever Eden DSP (retired) Expressions in Ink Ephemera (retired) Gold embossing powder Adhesive-backed sequins Dimensionals Adhesives
All ads on this site are posted by WordPress and are based on your personal browsing history. I do not control ad content.
For the last couple of days, we’ve been looking at cute gift packaging ideas for small gifties. And what package would be complete without a gift tag?
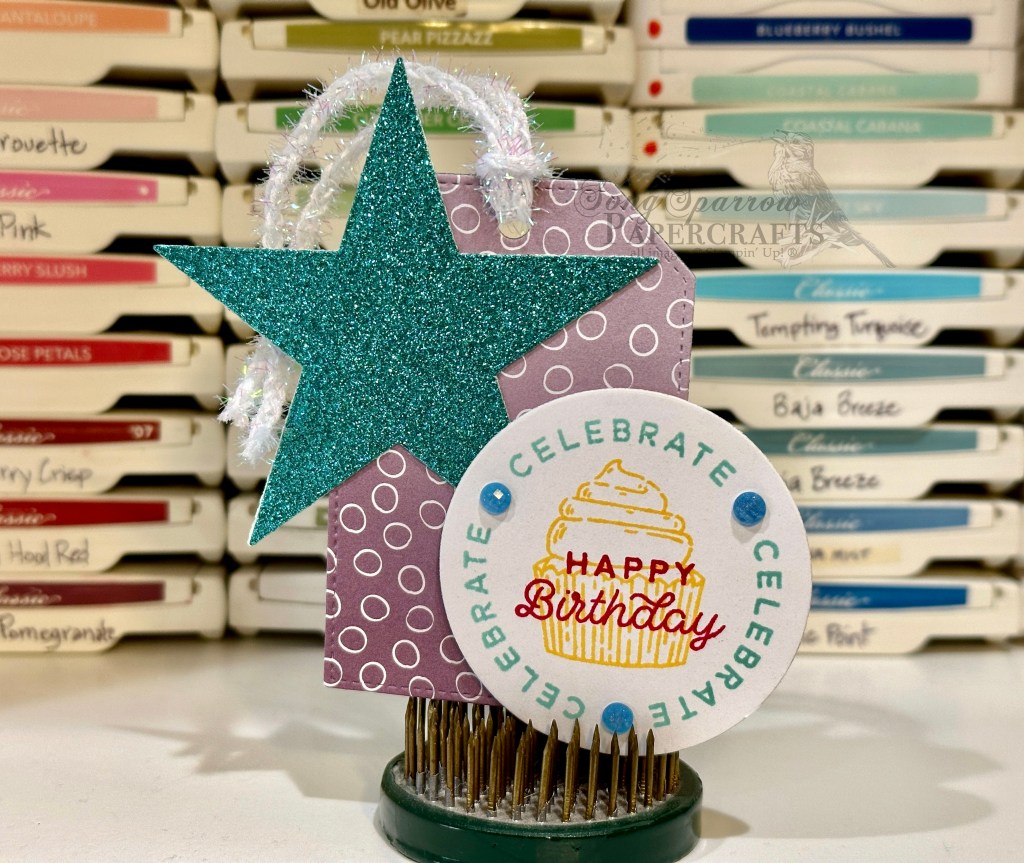
It doesn’t take much to whip up a cute tag to dress up a package. This tag is comprised of 3 basic components: a base, a decorative element, and the sentiment panel. For the base, I used some retired paper I had on hand and diecut it using the tag die from the Merriest Trees dies. Because I chose a decorative paper and not cardstock, I elected to cut a solid-colored piece to serve as the backing on the dot pattern to add a little more structure to the tag and give a place for a quick message to the gift recipient. The sparkly star is diecut using the So Many Stars dies. I really love that set of dies for its decorative stitching around the edges which adds a bit of pizzazz. The sentiment panel is punched from white cardstock using the 2 3/4″ circle punch and the Circle Sayings stamp set provides the elements for the adorable sentiment panel. A few strategically placed fine sparkle adhesive-backed gems and the iridescent trim give another touch of sparkle and complete the festive look.
Products used: White cardstock; Oh So Ombre DSP (retired); So Many Stars (retired), Merriest Trees dies; circle punch; Circle Sayings stamps; fine sparkle gems; iridescent trim
All ads on this site are posted by WordPress and are based on your personal browsing history. I do not control ad content.
The end of August presents many opportunities for new birthday designs as we have lots of friends celebrating birthdays. So this week I cranked out several cards for friends with birthdays in the next week.
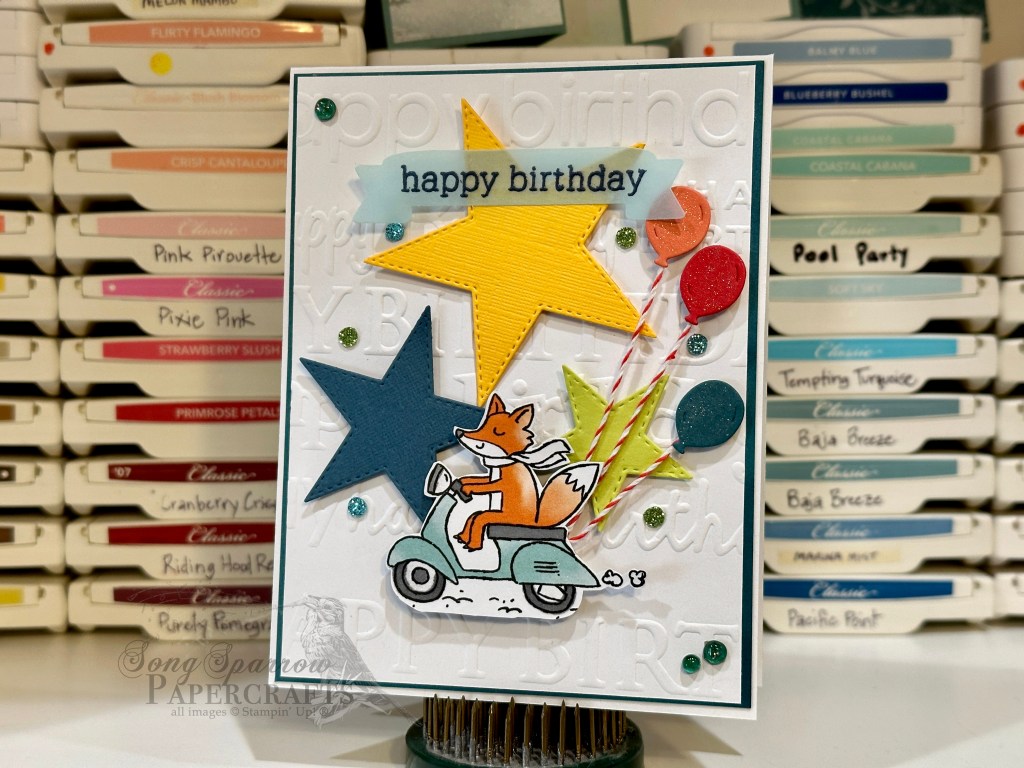
First up is this cute fella buzzing in to bring some birthday cheer. This design is for one of my son’s friends. They’re in those awkward preteen years so it’s always hard to know which way to go with card themes, but something whimsical really fits this particular kiddo’s personality. So I pulled out the Zoo Crew designer paper and fussy cut this scootering fox as the focal image. I added a little color and some Wink of Stella here and there on the image from the DSP to add more color and realism to the image. I thought it would be cute to have foxy motoring in the birthday balloons, so I diecut a set from various shades of cardstock and added a little Wink of Stella for some added pizzazz. The whole scene sits atop a piece of embossed cardstock matted on Pretty Peacock cardstock to really help the whole scene stand out nicely.
Products used: Basic White, Pretty Peacock, Calypso Coral, Poppy Parade, Granny Apple Green cardstock; vellum; Zoo Crew DSP; So Many Stars (retired), Bunch of Banners (retired), Zany Zoo dies; Sizzix embossing plate; PTI sentiment; glitter sequins; dimensionals
I had a lot of fun building this cute birthday scene. Once again, I pulled out my Zoo Crew designer paper for this adorable croc pedaling in some flowers. I kicked up the color by adding some to the bike and flowers and also added a bundle of balloons to punch up the birthday theme here. To help it feel as though the croc is trekking to a party, I added some simple trees and a cloud as background scenery.
Products used: Pretty Peacock, Lost Lagoon, Granny Apple Green cardstock; Bright & Beautiful DSP; vellum; Zoo Crew DSP; PTI scalloped circle (retired), Zany Zoo dies; adhesive-backed discs; twine (retired); dimensionals; adhesives
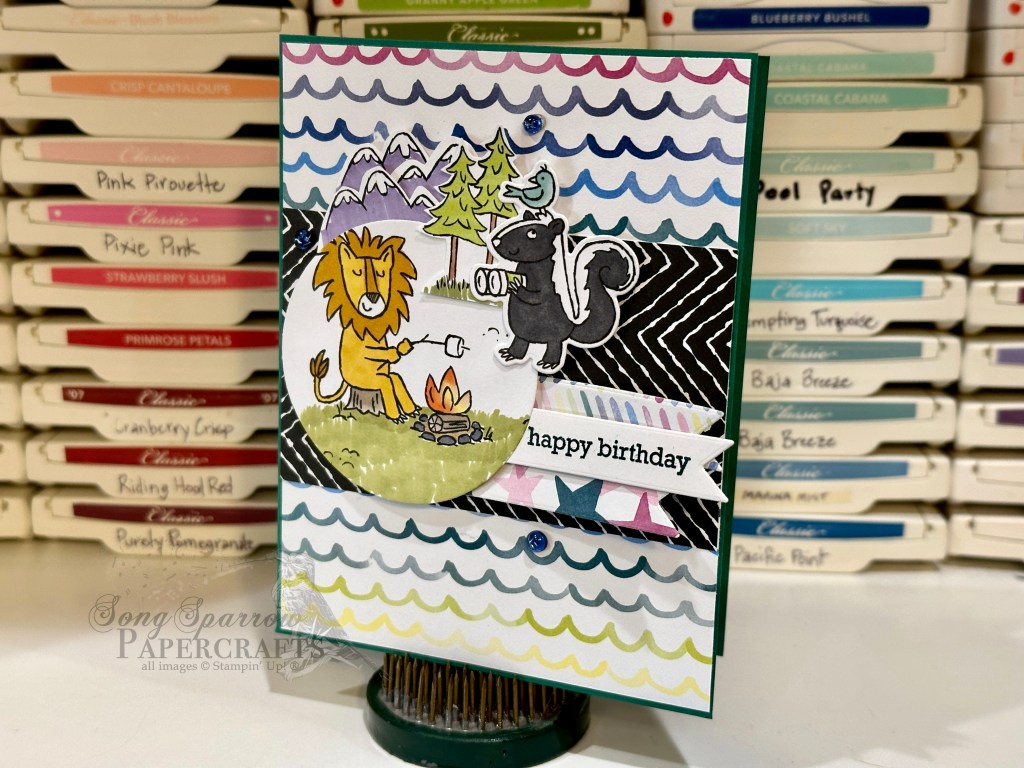
Have any adventure types in your circle of friends or family? There’s a terrific sheet of Zoo Crew DSP for that! And I pulled it out and started working on a scene for my outdoorsy friend. I used a circle punch to cut out the scene with the lion roasting a marshmallow. I used the Zany Zoo dies to cut the adorable birdwatching skunk and then fussy cut the mountains and trees. I filled in with a lot of color using the Stampin’ Blends markers to really help the scene come to life. On a scale of 1 to 10, I rank my coloring skills about a 4, but I’m pretty pleased with how things came out for this design.