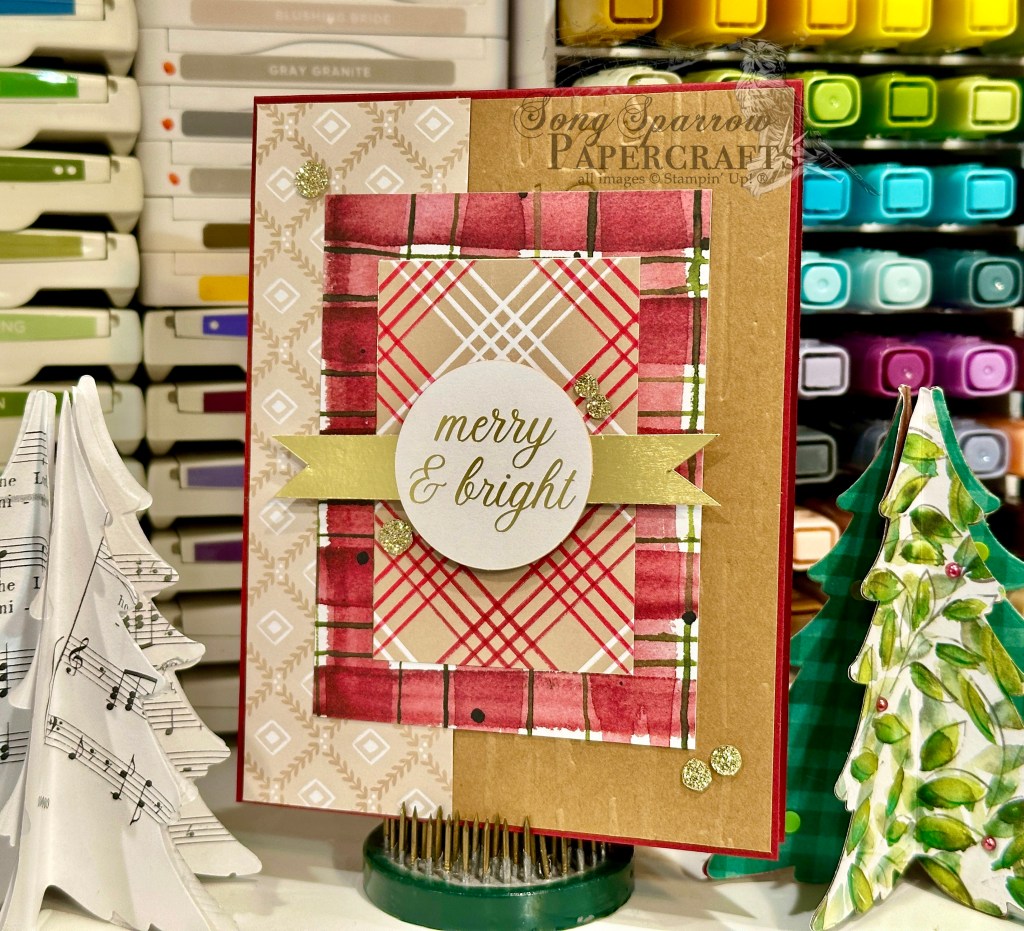
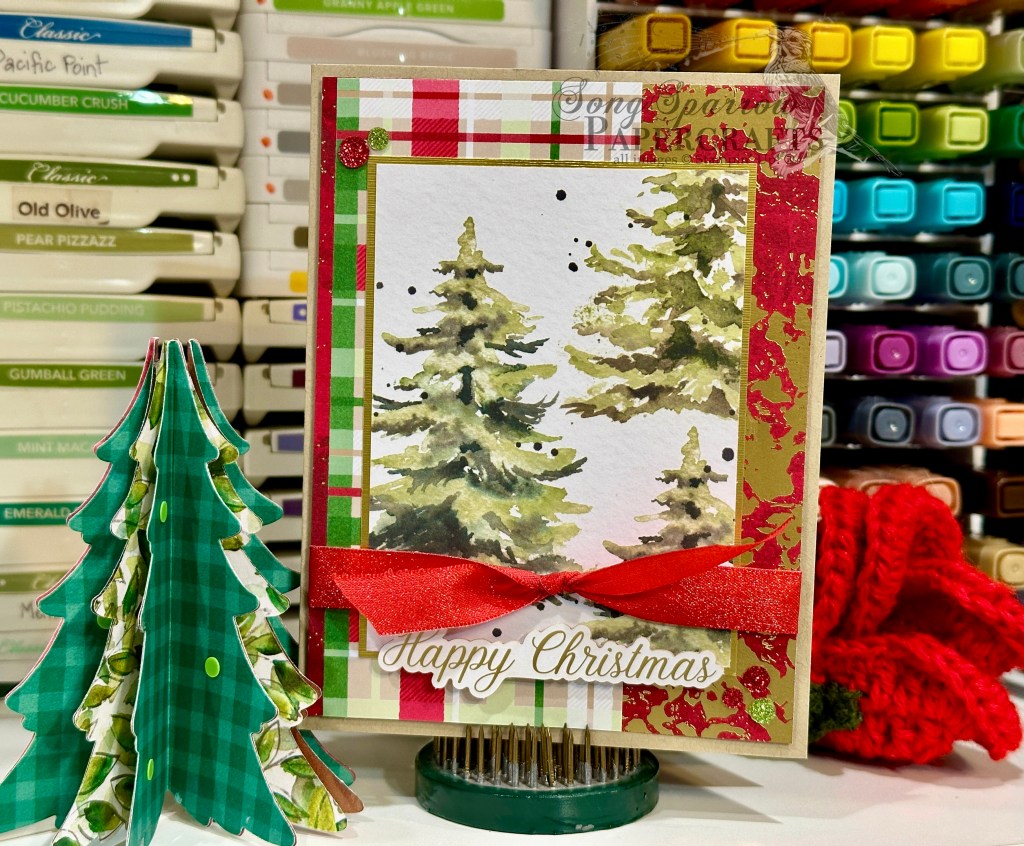
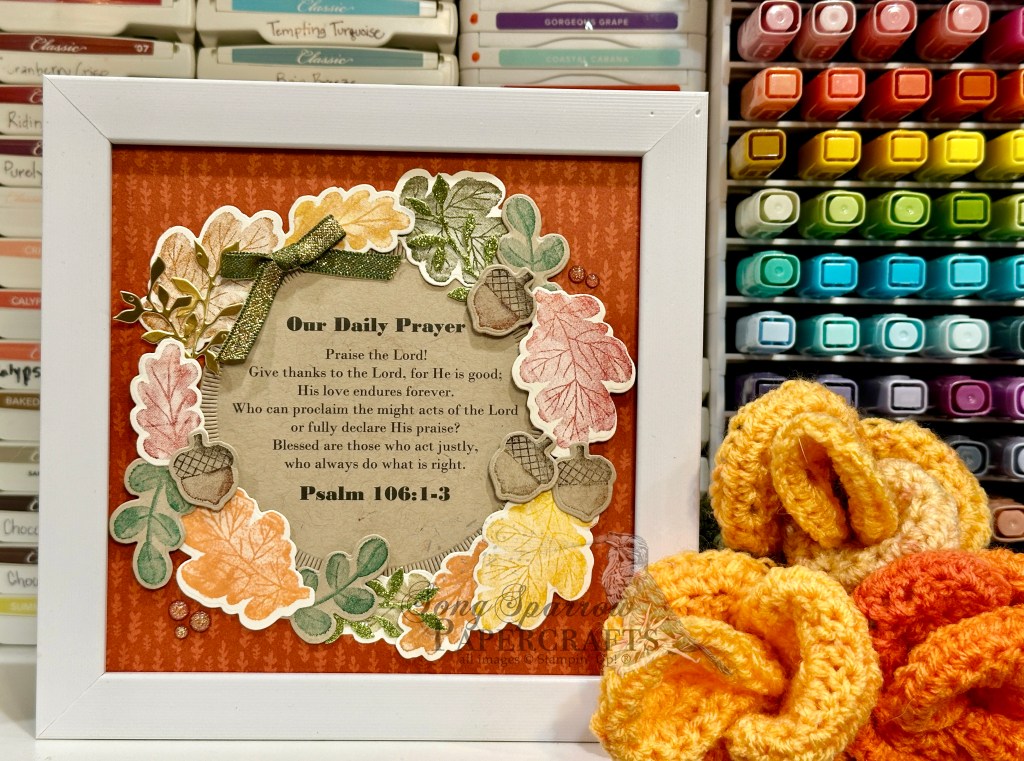
This week we’ve been making clean & simple holiday card designs using some of the new Stampin’ Up! holiday products that just launched this week. Today we’re pairing up the Joyful Days Memories & More cards with the Greetings for You ephemera to create this lovely wreath of joy.
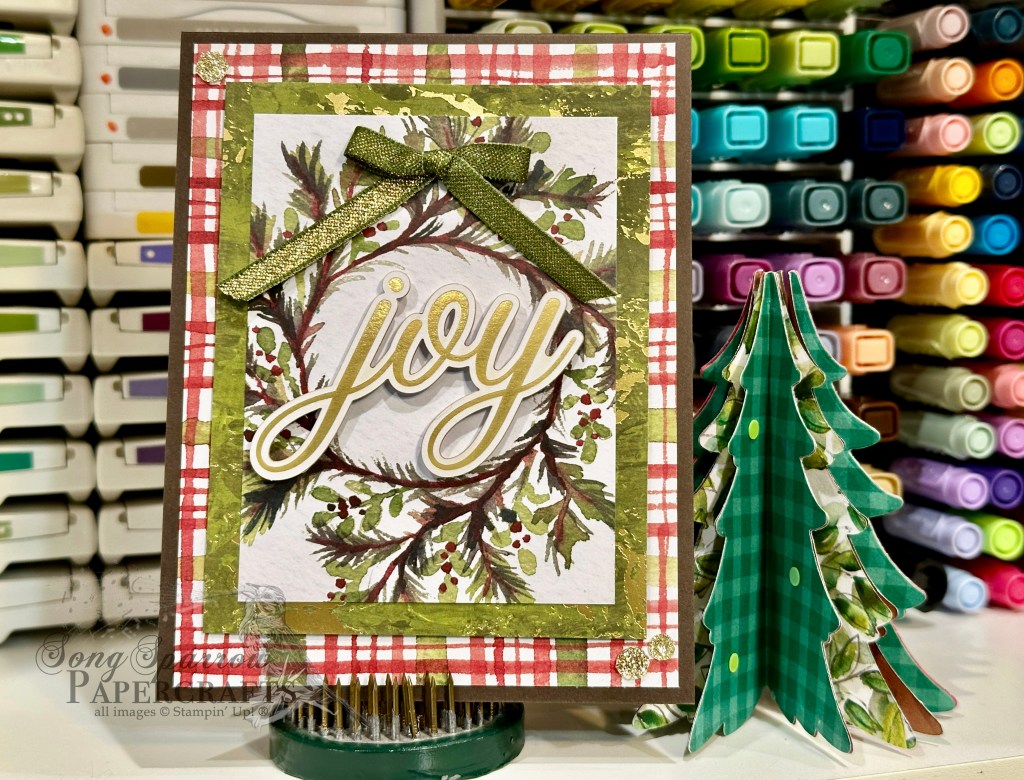
We get started with a base of Early Espresso cardstock. I love how it pulls out the wood stem of the evergreen in the wreath. Our backdrop is one of the larger cards of Christmas plaid from the Joyful Days pack. This really makes things festive. Our focal panel consists of two panels – the wreath card from the Joyful Days pack and the mat of Old Olive Season of Elegance paper. I love how this gives the perfect amount of sparkle that really helps bring our sentiment front and center. The full panel is adhered to the card backdrop using dimensionals. The sentiment JOY is from the Greetings for You ephemera pack and is adhered on multiple layers of dimensionals to ensure it stands tall above the rest of the design. We finish things off with a bow of Mossy Meadow & Gold ribbon at the top-center of our wreath and then some gold sparkly sequins from the Traditional Sparkling Sequins pack in opposing corners to tie the gold elements together.
I hope you’ve gotten some good ideas from this week’s designs to get you started on your holiday card stash. Next week is all about birthdays. I hope you’ll come along as we tour through the crafty stash to make some fun birthday cards.
Product List![Early Espresso 8-1/2" X 11" Cardstock [ 119686 ]](https://assets1.tamsnetwork.com/images/EC042017NF/119686s.jpg "Early Espresso 8-1/2\" X 11\" Cardstock [ 119686 ]")
![Season Of Elegance 12" X 12" (30.5 X 30.5 Cm) Specialty Designer Series Paper [ 164144 ]](https://assets1.tamsnetwork.com/images/EC042017NF/164144s.jpg "Season Of Elegance 12\" X 12\" (30.5 X 30.5 Cm) Specialty Designer Series Paper [ 164144 ]")
![Joyful Days Memories & More Card Pack [ 165822 ]](https://assets1.tamsnetwork.com/images/EC042017NF/165822s.jpg "Joyful Days Memories & More Card Pack [ 165822 ]")
![Greetings For You Mix & Match Ephemera Pack (English) [ 166208 ]](https://assets1.tamsnetwork.com/images/EC042017NF/166208s.jpg "Greetings For You Mix & Match Ephemera Pack (English) [ 166208 ]")
![Mossy Meadow & Gold 1/4" (6.4 Mm) [ 166158 ]](https://assets1.tamsnetwork.com/images/EC042017NF/166158s.jpg "Mossy Meadow & Gold 1/4\" (6.4 Mm) [ 166158 ]")
![Traditional Sparkling Sequins [ 165875 ]](https://assets1.tamsnetwork.com/images/EC042017NF/165875s.jpg "Traditional Sparkling Sequins [ 165875 ]")
![Stampin' Dimensionals [ 104430 ]](https://assets1.tamsnetwork.com/images/EC042017NF/104430s.jpg "Stampin' Dimensionals [ 104430 ]")
![Mini Stampin' Dimensionals [ 144108 ]](https://assets1.tamsnetwork.com/images/EC042017NF/144108s.jpg "Mini Stampin' Dimensionals [ 144108 ]")
![Mini Glue Dots [ 103683 ]](https://assets1.tamsnetwork.com/images/EC042017NF/103683s.jpg "Mini Glue Dots [ 103683 ]")
![Shaded Spruce 8-1/2" X 11" Cardstock [ 146981 ]](https://assets1.tamsnetwork.com/images/EC042017NF/146981s.jpg "Shaded Spruce 8-1/2\" X 11\" Cardstock [ 146981 ]")
![Christmas Tags & More 6" X 6" (15.2 X 15.2 Cm) Mix & Match Specialty Designer Series Paper [ 165907 ]](https://assets1.tamsnetwork.com/images/EC042017NF/165907s.jpg "Christmas Tags & More 6\" X 6\" (15.2 X 15.2 Cm) Mix & Match Specialty Designer Series Paper [ 165907 ]")
![Festive 12" X 12" (30.5 X 30.5 Cm) Glimmer Paper [ 164106 ]](https://assets1.tamsnetwork.com/images/EC042017NF/164106s.jpg "Festive 12\" X 12\" (30.5 X 30.5 Cm) Glimmer Paper [ 164106 ]")
![Textured Notes Dies [ 165555 ]](https://assets1.tamsnetwork.com/images/EC042017NF/165555s.jpg "Textured Notes Dies [ 165555 ]")
![Shaded Spruce 1/2" (1.3 Cm) Satin & Sheer Ribbon [ 164224 ]](https://assets1.tamsnetwork.com/images/EC042017NF/164224s.jpg "Shaded Spruce 1/2\" (1.3 Cm) Satin & Sheer Ribbon [ 164224 ]")
![Gold Twisted Thread [ 164603 ]](https://assets1.tamsnetwork.com/images/EC042017NF/164603s.jpg "Gold Twisted Thread [ 164603 ]")
![Cherry Cobbler 8-1/2" X 11" Cardstock [ 119685 ]](https://assets1.tamsnetwork.com/images/EC042017NF/119685s.jpg "Cherry Cobbler 8-1/2\" X 11\" Cardstock [ 119685 ]")
![Gathering Together 12" X 12" (30.5 X 30.5 Cm) Specialty Designer Series Paper [ 165969 ]](https://assets1.tamsnetwork.com/images/EC042017NF/165969s.jpg "Gathering Together 12\" X 12\" (30.5 X 30.5 Cm) Specialty Designer Series Paper [ 165969 ]")
![Nature's Sweetness 12" X 12" (30.5 X 30.5 Cm) Specialty Designer Series Paper [ 162616 ]](https://assets1.tamsnetwork.com/images/EC042017NF/162616s.jpg "Nature's Sweetness 12\" X 12\" (30.5 X 30.5 Cm) Specialty Designer Series Paper [ 162616 ]")
![Gold Foil Sheets [ 132622 ]](https://assets1.tamsnetwork.com/images/EC042017NF/132622s.jpg "Gold Foil Sheets [ 132622 ]")
![Christmas Greenery Dies [ 165872 ]](https://assets1.tamsnetwork.com/images/EC042017NF/165872s.jpg "Christmas Greenery Dies [ 165872 ]")
![Traditional Labels Dies [ 165864 ]](https://assets1.tamsnetwork.com/images/EC042017NF/165864s.jpg "Traditional Labels Dies [ 165864 ]")
![Cherry Cobbler & Gold 1/4" (6.4 Mm) Satin Ribbon [ 164028 ]](https://assets1.tamsnetwork.com/images/EC042017NF/164028s.jpg "Cherry Cobbler & Gold 1/4\" (6.4 Mm) Satin Ribbon [ 164028 ]")
![Crumb Cake 8-1/2" X 11" Cardstock [ 120953 ]](https://assets1.tamsnetwork.com/images/EC042017NF/120953s.jpg "Crumb Cake 8-1/2\" X 11\" Cardstock [ 120953 ]")