I don’t know about you, but I can’t believe that we’re wrapping up the month of August and marching right into September already! I mean, it’s Labor Day weekend. Whaaaaaa?! I feel like the older I get the faster the time seems to fly by.

And speaking of time flying by, it’s time again for another installment of Sketchy Fridays, where each week we’ll be using a card sketch to design our featured card. Right now, we’re working through a full series of designs using the card sketches found on page 22 of the current Stampin’ Up! Annual Catalog.
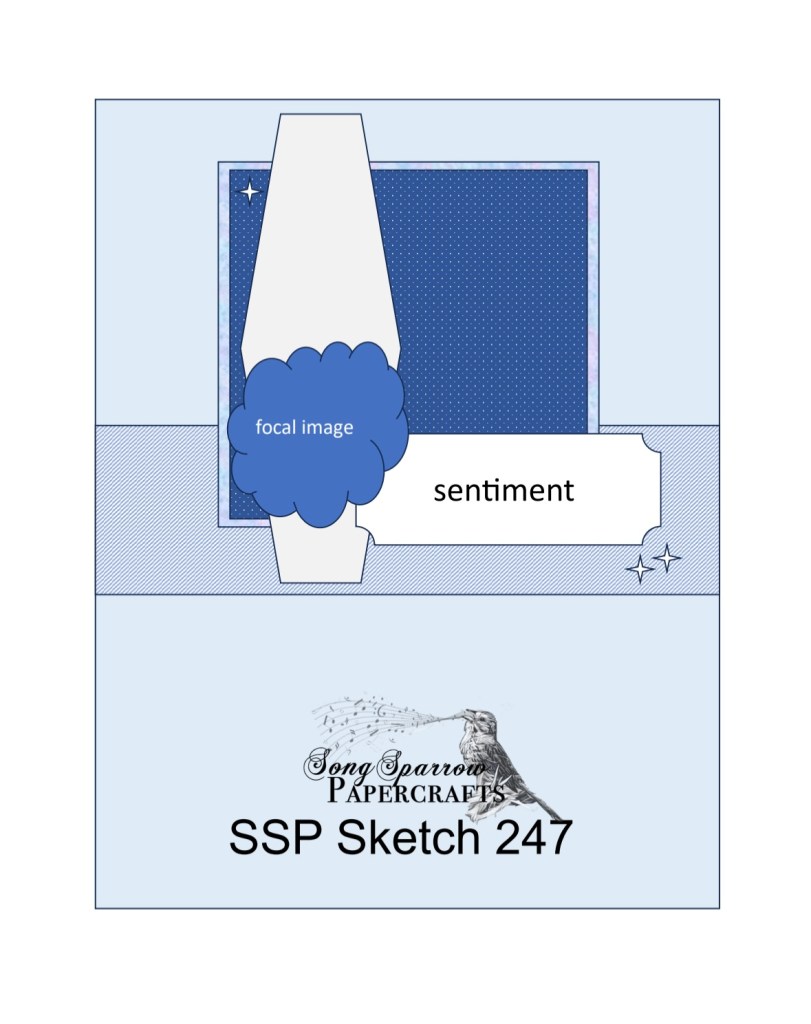
This week’s card is based on Sketch #20 and features the gorgeous Splendid Autumn designer paper from the new Stampin’ Up! Holiday Mini catalog that launches on September 4th.
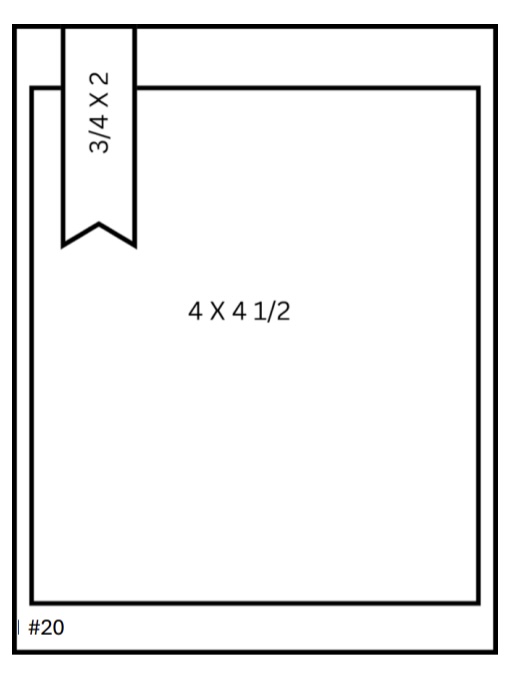
This paper pack just turns out sheet after sheet of stunning designs, and I’m loving each and every one. I’m pairing up a fun fold shared by my upline Patty Bennett with Sketch #20 from the Annual Catalog. I’ve taken the liberty of changing the orientation of the sentiment piece. And that’s the best thing about using a sketch — it gives you a place to start and then you tweak things to work for you.
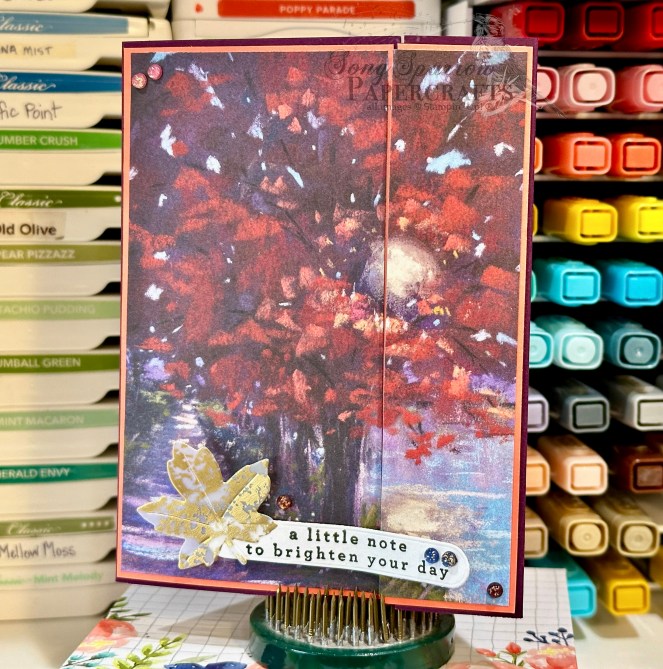
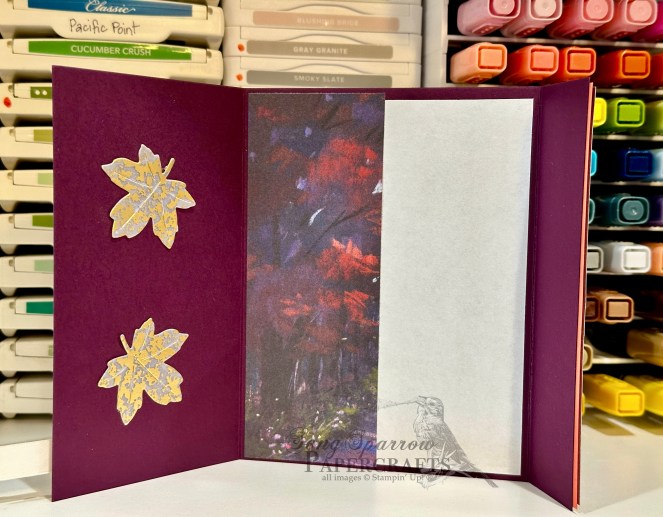
So our fun fold starts with a base of Blackberry Bliss cardstock. Rather than scoring in the center, we score and fold at 3-inches and 7.25-inches to give us our front fold with a standard-sized inside message panel. I decided to double mat the gorgeous sheet of Splendid Autumn patterned paper and used Flirty Flamingo to bring out the pinky-orange hues of the leaves. I cut and mounted the patterned paper so that the panels meet to form a complete picture when the card is closed. When open, there is a small border of Flirty Flamingo visible on the left panel and a slight overhang of the Splendid Autumn sheet on the right panel. The sentiment from Changing Leaves is stamped in black on white cardstock and then diecut using the Greetings of the Season die. I diecut a leaf from gold mercury vellum using the Autumn Leaves dies and adhered to the sentiment panel. The sentiment panel is mounted to the left panel of the card front using dimensionals. We finish off the card front with an assortment of regal foiled dots, which release next week. I felt like it was a shame to waste the remainder of the Splendid Autumn sheet, so it serves as the decorative strip next to the message panel on the inside of the card. I added a few additional gold mercury vellum leaves to tie things together.
I loved this fun fold because it offered the perfect opportunity to showcase a gorgeous sheet of paper. When I have paper that’s so pretty that I don’t want to cut it, I search for layouts like this one that let me put it on full display. Give it a try the next time you have a sheet of paper too pretty to cut up!
Tomorrow, we’re closing out our In the Woods card series with a fall sunset. I hope you’ll stop by and check it out!
Products used in today’s card:
Blackberry Bliss, Flirty Flamingo, Basic White cardstock
Splendid Autumn (coming soon!), gold mercury vellum DSP
Changing Leaves stamps
Autumn Leaves, Greetings of the Season dies
Regal foiled dots (coming soon!)
Dimensionals
Adhesives


 Specialty Designer Series Paper")
")


 Designer Series Paper")
 Foil Sheets")


 Designer Series Paper")
 Specialty Paper")


")


 Diagonal Trim Combo Pack")


 Specialty Designer Series Paper")

 Specialty Designer Series Paper")
")

 Trim Combo Pack")


 Luster Specialty Paper")
")


")
")


