Happy Friday, everyone. It was a very busy but productive week around here. And the weekend is shaping up to be pretty busy too with the kiddo’s various activities. But we’re excited for some nice weather in store for tomorrow before the rainy spring(ish) season kicks in here in North Texas.

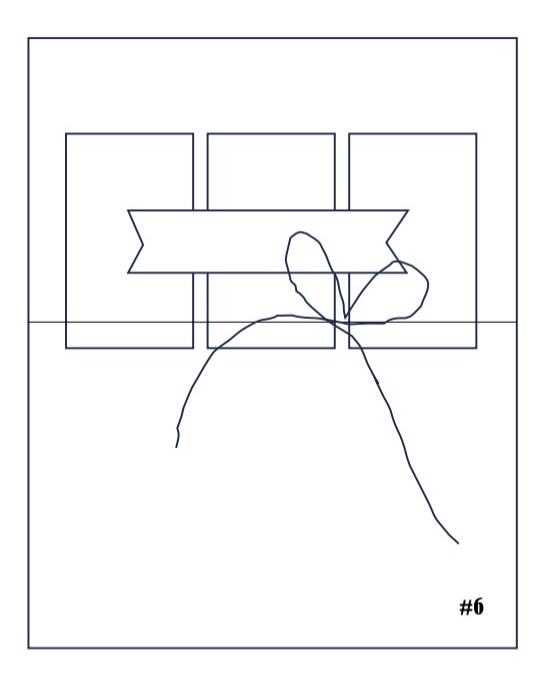
But let’s go down to the real business – Sketchy Fridays! For those of you who are new here, Sketchy Fridays is a weekly series where we’re using a card sketch to design our featured card. Right now, we’re working through a full series of designs using the card sketches found in current Stampin’ Up! catalogs.
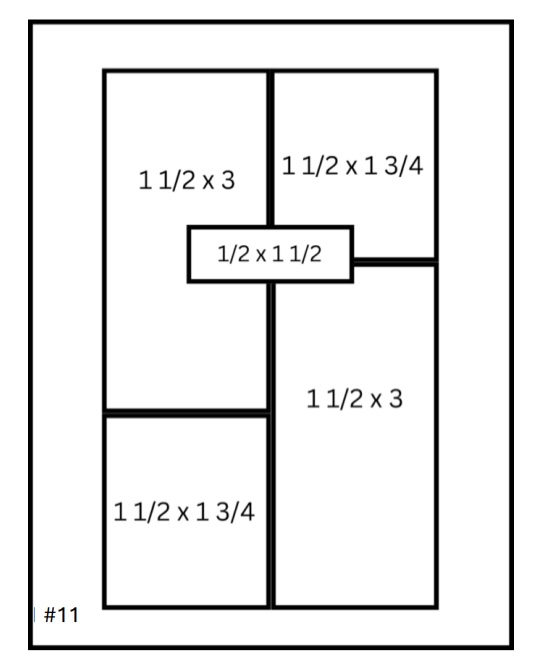
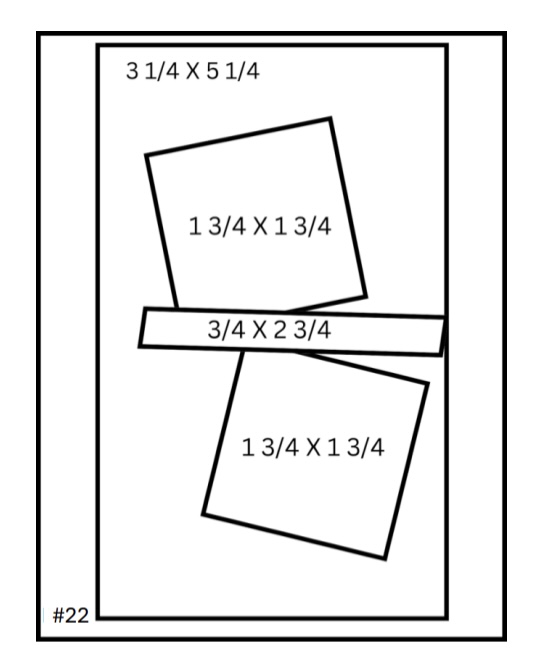
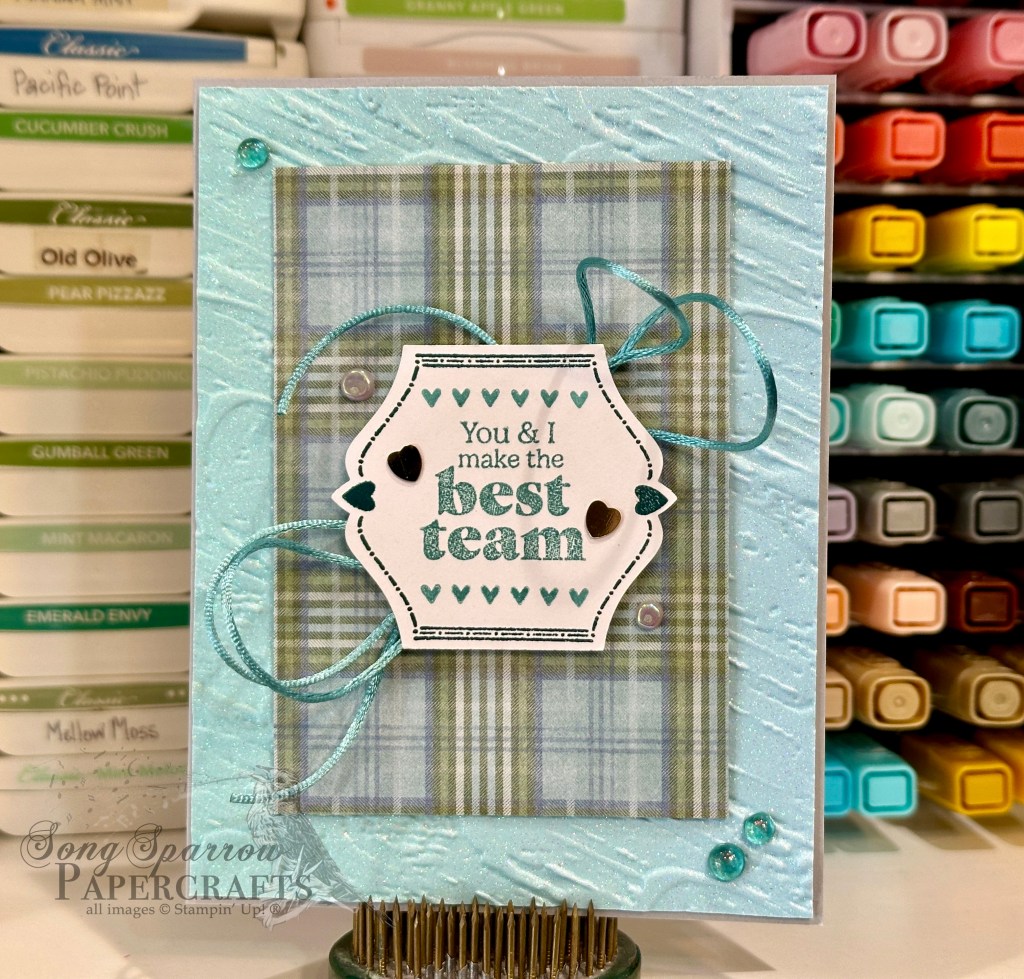
This week’s card is based on Sketch #11 from the Stampin’ Up! Annual Catalog. Today, we’re pairing up the Everyday Skies patterned paper with the new Online Exclusive stamp set called Pattern of Friendship (that releases next week!).
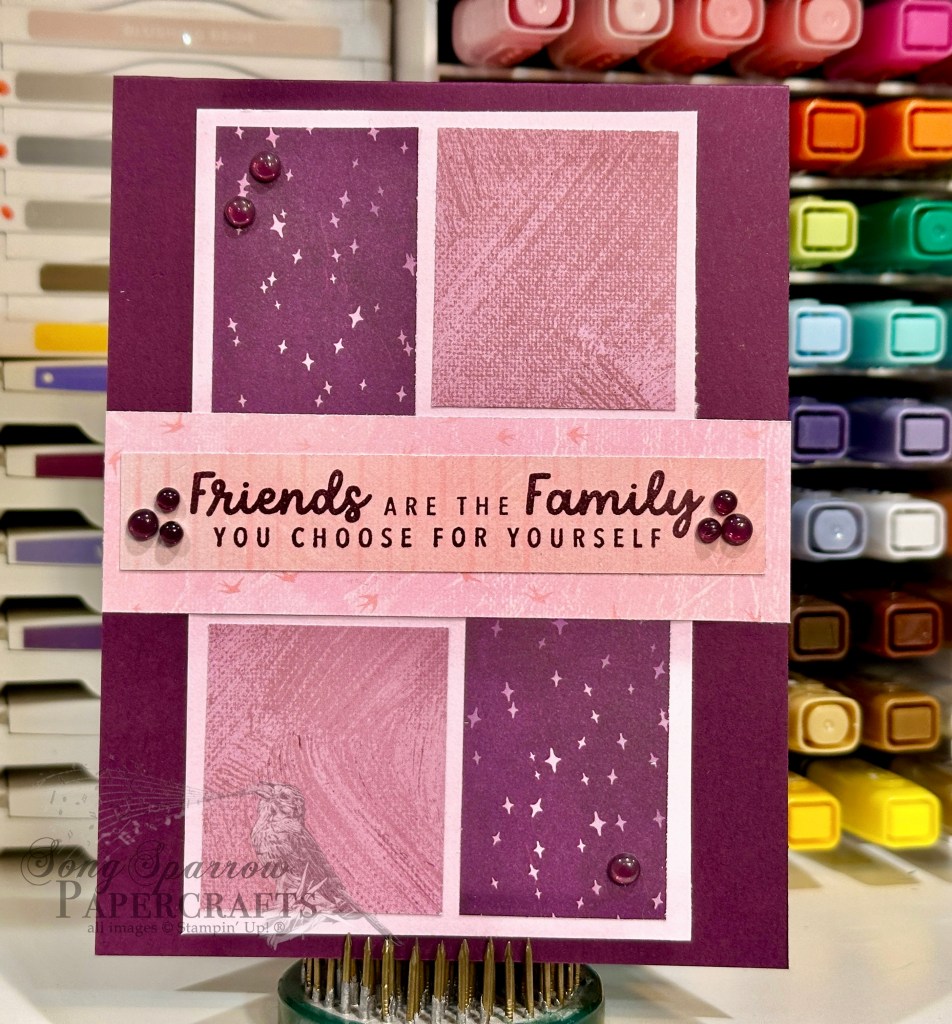
I just love this sentiment from the new Pattern of Friendship stamp set. It truly resonates with me because we certainly couldn’t have made it through the difficulties we faced in 2024 without our circle of friends who stepped in and helped our family!
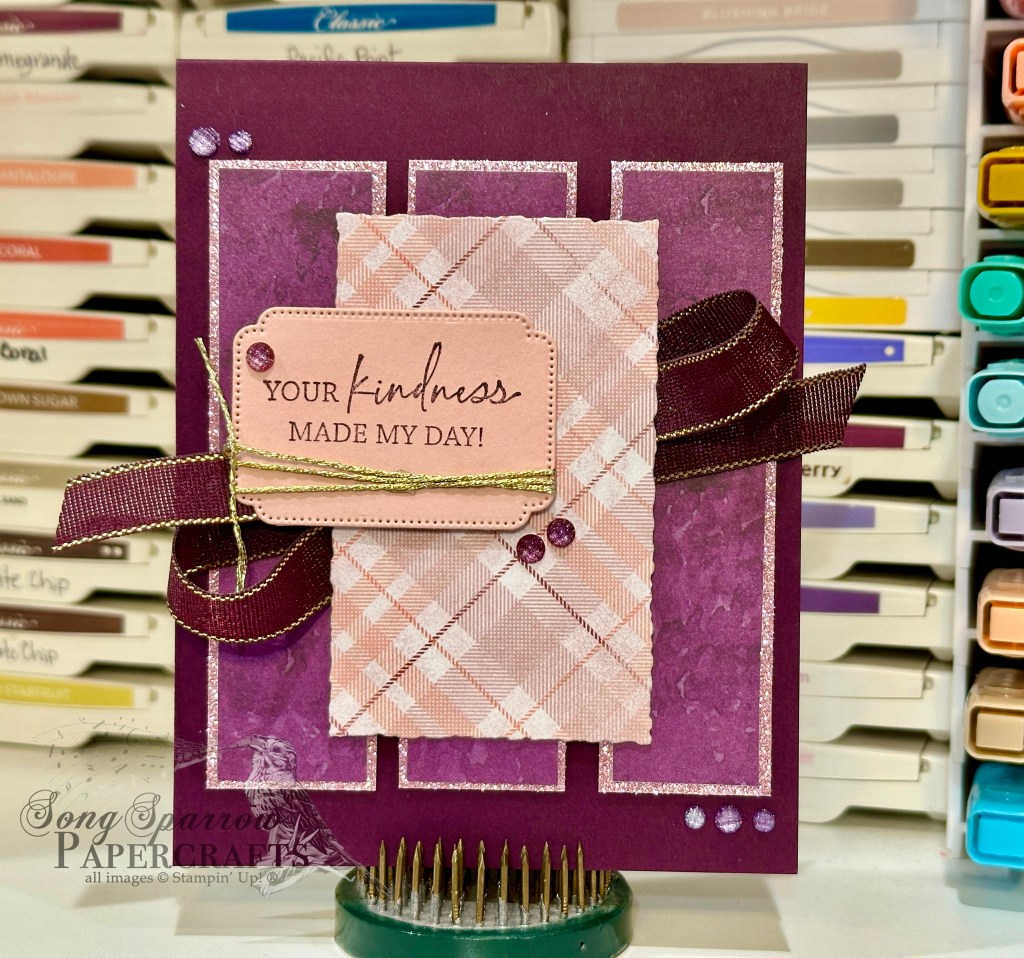
This card gets started with a base of Blackberry Bliss cardstock. I used Fresh Freesia as the background for our focal panel which is made up of scraps of the reverse side patterns of the Everyday Skies papers. I stamped the sentiment from Pattern of Friendship in Blackberry Bliss on a striped sheet of Everyday Skies and adhered it on a strip with a swallow pattern. Blackberry Bliss transparent dots give us some pops of interest to draw our eye to the center sentiment. This is a very clean & simple design that literally came together in 5 minutes (once I picked my papers, that is).
We’ll be closing out our design series using Everyday Skies tomorrow. And we’ll be using the patterns on the backsides to create another quick, clean & simple card. I hope you’ll pop in.
Product List

 Designer Series Paper")


 Specialty Designer Series Paper")
 Specialty Designer Series Paper")
 Specialty Designer Series Paper")
 Designer Series Paper")


")


 Metallic Ribbon")


 Designer Series Paper")
 Specialty Designer Series Paper")
 Specialty Paper")
")


 Satin Ribbon")


 Designer Series Paper & Sticker Sheet (English)")


 Designer Series Paper")
")


 Specialty Paper")