Fun Folds

Thinking of You Fun Fold

With spring making its appearance here in North Texas, it seemed appropriate to have this week’s designs hone in on a nature theme. And it also seemed like the perfect way to revisit some of my favorite sets that may soon find themselves fully retired.

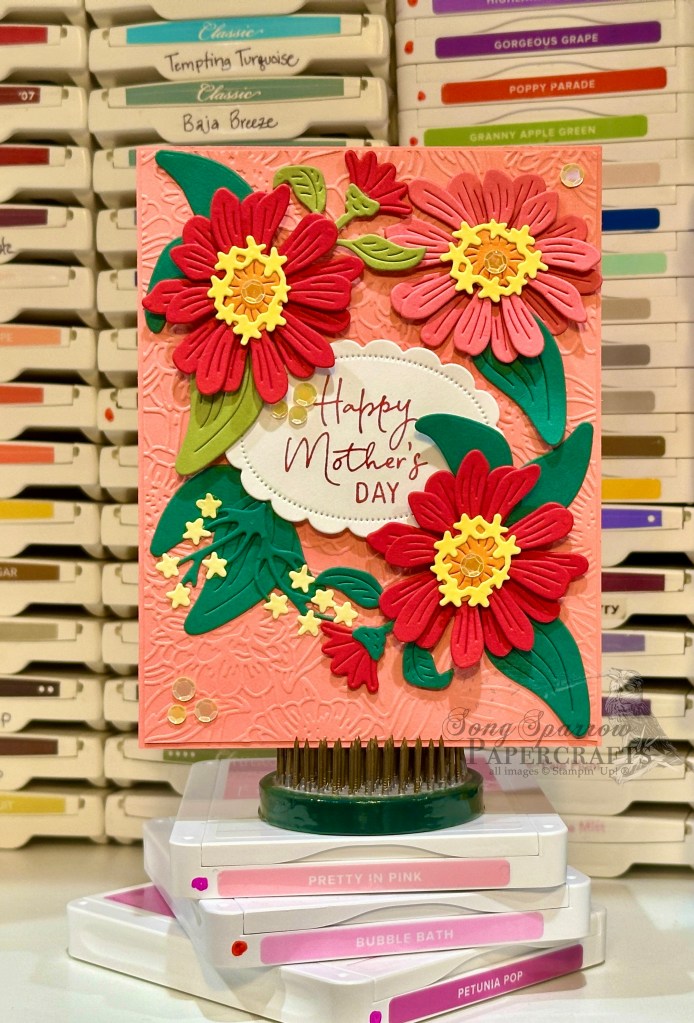
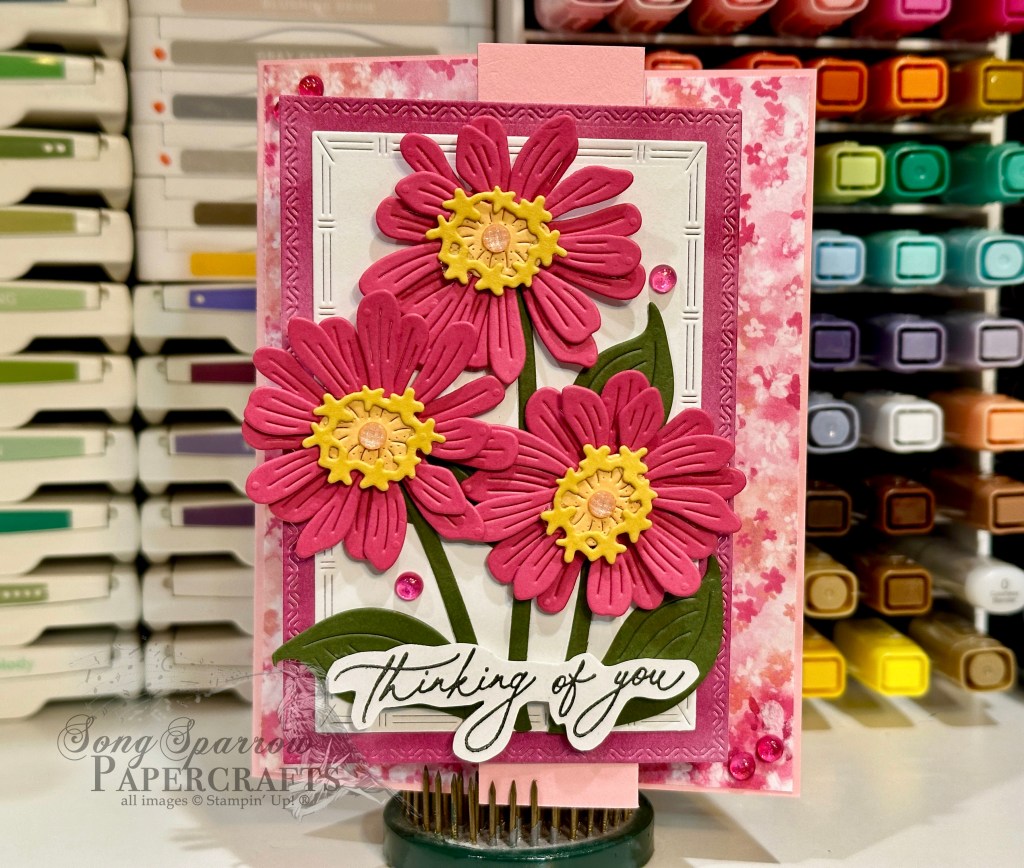
We get started this week with a fun fold design that features the Simply Zinnia dies and the Bloom Impressions patterned paper. I used a simple fold-back skinny z-panel design for this card to really bring emphasis to the fun panel of diecut flowers.

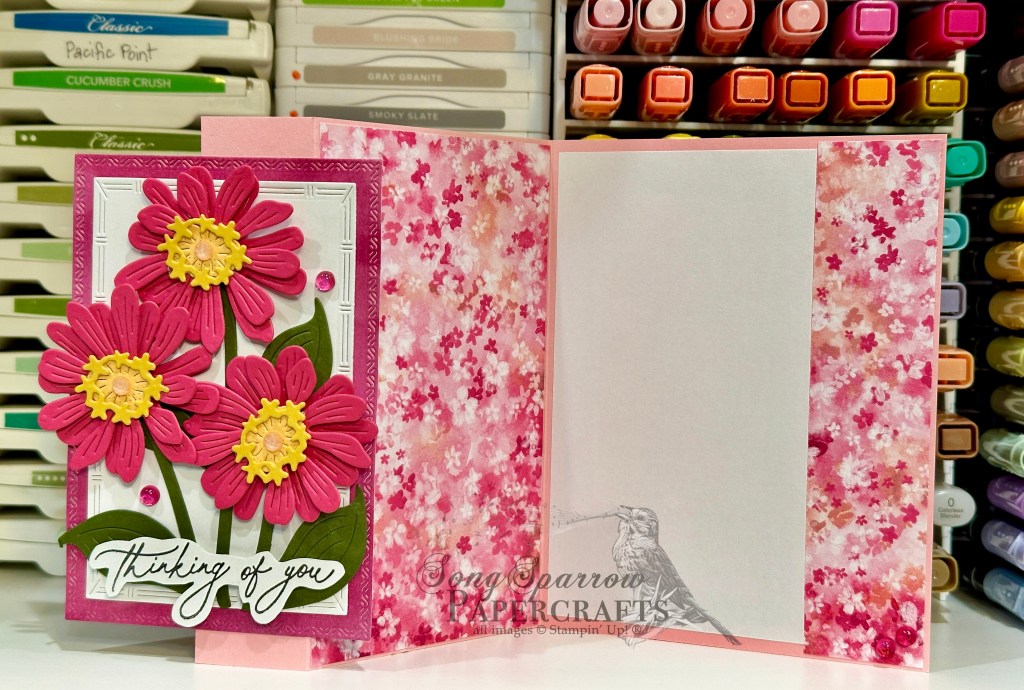
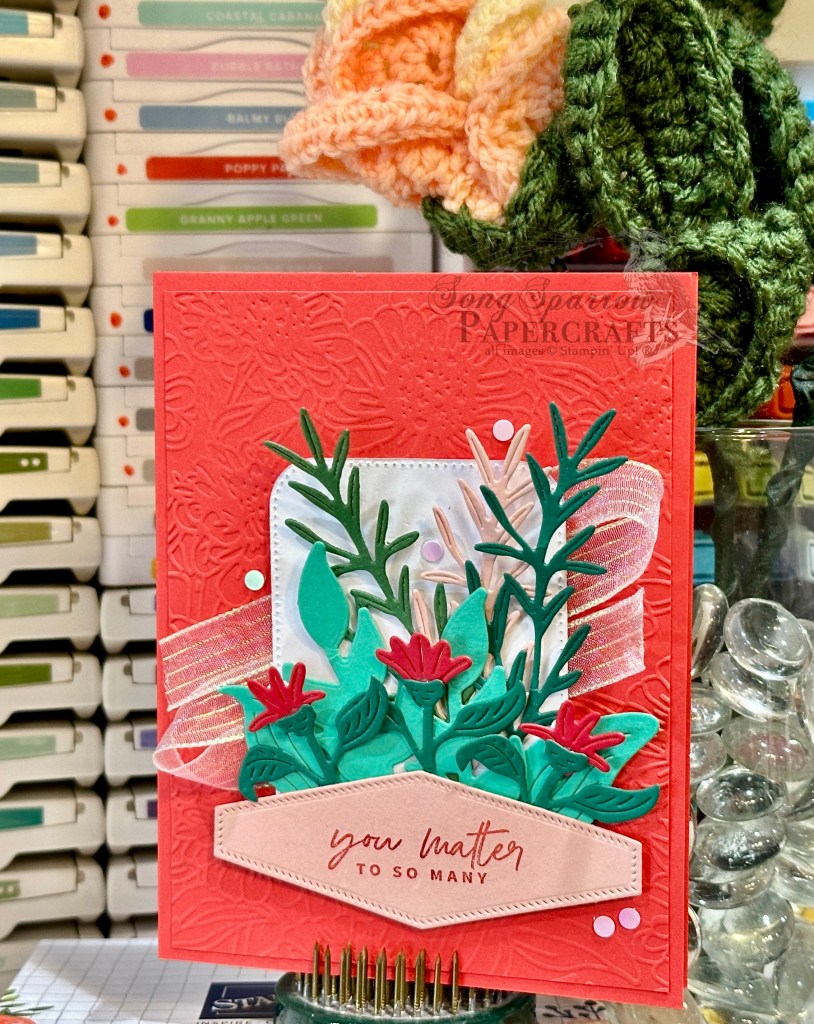
We started with a base of Pretty in Pink cardstock. I’m using the standard A2 size but folding the front card panel back a little over an inch on the right side to create the slender z-panel effect. I used a sheet of the pink Bloom Impressions patterned paper from the most recent Sale-a-Bration catalog to cover the front and inside panels.

For the focal panel affixed to the slender fold-back panel, I started with a sheet of the pink Beautiful Bokeh paper and diecut it with the Textured Notes dies and then cut a nesting white panel using the next smallest die. I decided to keep the color palette of the zinnias very simple and chose to use Melon Mambo as the featured hue. I used Peach Pie as the floral centers with the surrounding disc and ray florets being Crushed Curry. The stems are cut from Mossy Meadow. The flowers and floral elements are all cut with the Simply Zinnia dies. I layered the flowers with a combination of dimensionals and glue dots to create a more realistic look. The sentiment from Everyday Greetings is stamped in black on white cardstock and cut out with paper snips and affixed with dimensionals. I added some In Color shimmer gems as floral centers and then scattered a few Sunny Days iridescent dots for a little extra pop of pink.

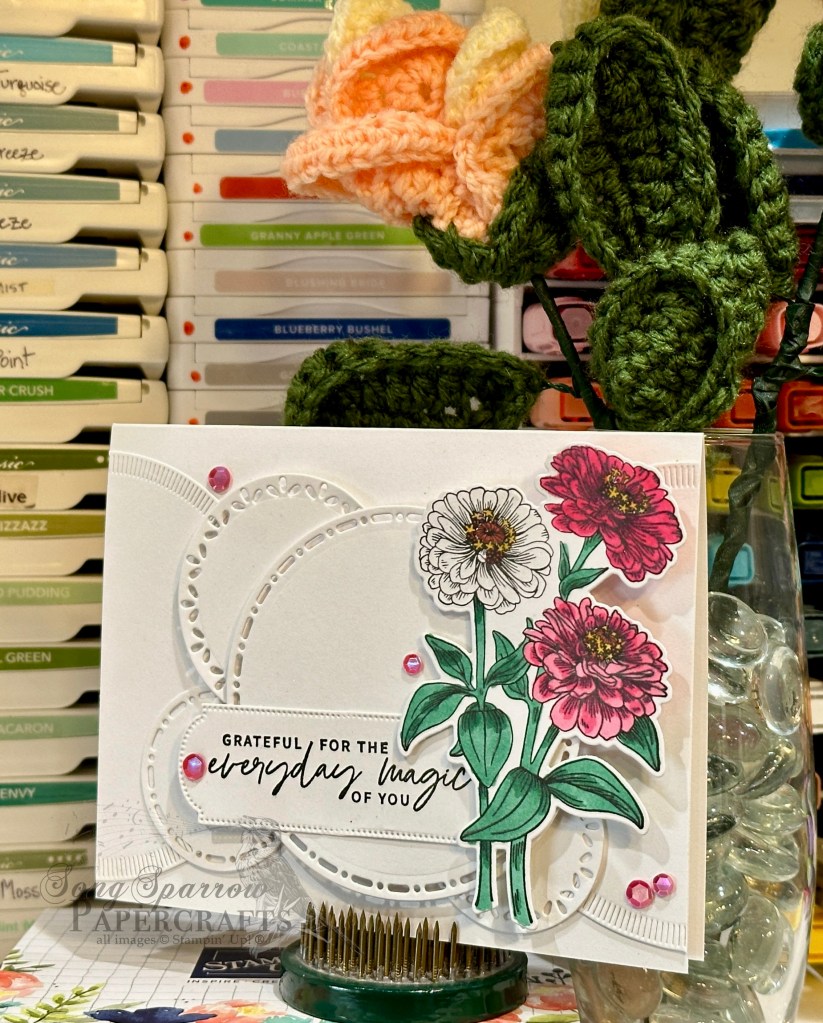
Tomorrow we’re going to continue our ode to nature by sticking to the garden path. I hope you’ll pop by and take a look!

Product List
Botanicals

Everyday Magic

I couldn’t think of a better way to close out our In the Garden series of cards than with this knockout card, which was inspired by Mitosu Crafts. Don’t you just love the layers of white on white? So elegant. And what a terrific way to showcase a beautiful focal image and sentiment!

A piece of white cardstock serves as our card base. Various sizes of circles are diecut from a sheet of white cardstock using the Spotlight on Nature dies. I made sure to vary the edge patterns while still keeping things symmetrical. Layers of dimensionals allow the various circles to stand on different visual planes, adding interest to our card front. Our focal image is the zinnia bunch from the Simply Zinnia stamp set and is stamped in black on white cardstock, colored with Stampin’ Blends, and then diecut with the coordinating die from the Simply Zinnia die set. I added Wink of Stella over each bloom for a subtle glimmer. The sentiment from Something Fancy is stamped in black on white cardstock and then diecut with the Greetings of the Season die using the extension method. I used the zinnia to cover the tag hole in our sentiment panel. A few shiny sequins scattered on our card front draw the eye across the stunning design.

I hope you’ll tune in next week as we head back to school and use our stamps in some unconventional ways!

Products used in today’s card:
White cardstock
Simply Zinnia, Something Fancy stamps
Simply Zinnia, Spotlight on Nature, Greetings of the Season dies
Stampin’ Blends
Wink of Stella
Shiny sequins
Dimensionals
Adhesives

Product List
Botanicals

You Matter

As we are wrapping up our final two weeks of summer before the kiddo heads back to school, we’re squeezing in lots of last-minute fun. One of things we enjoy doing every summer is going to our local bowling alley. The USBC hosts a program known as Kids Bowl Free and our local bowling alley participates. For a one-time fee, you can enroll the whole family and get 2 free games every weekday. My son has taken a particular interest in bowling and is actually quite good at it. This summer, he has added the youth bowling league to his list of regular activities and is planning to continue for the fall league. Right now, his team is about midway in the pack as far as standings so he’s working hard to improve his game. As with any sport, this is adding up to new equipment and lessons and time, but we absolutely love how much he loves it! And I can think of far worse things to spend money on!

We’re continuing our series this week called In the Garden. And today, we’re making our way through the cut flowers. One of my absolute favorite summer flowers is the zinnia. They come in so many happy colors and their blooms just keep going and going. I also love that they’re fairly hard to kill. *wink* Stampin’ Up! has a wonderful bundle of products called Flowering Zinnias that includes paper, stamps, dies, and embellishments; and today’s card features a portion of those products.

I recently saw a card by Stamp With Brenda that combined shades of red and light pink and just loved it, so that inspires our card today. We get started with a base of Poppy Parade cardstock. A quarter sheet of embossed Poppy Parade serves as our backdrop. It’s been cut down slightly and then machine embossed using the Zinnia embossing folder. Our focal panel has lots of beautiful layers. We get started by cutting a large square of white cardstock using the largest square from the Nested Essentials die set. Using the Painted Lavender and Simply Zinnia dies, we cut a combination of greenery stems. Our zinnia blooms are cut from Real Red cardstock to give a little contrast and help them pop against the busy backdrop. Our sentiment from the Something Fancy set is stamped in Poppy Parade on Petal Pink cardstock and then diecut using the smallest diamond die from the Nested Essentials set. This is all layered on top of a bit of iridescent striped trim and adhered to our card front with varying layers of dimensionals. A few iridescent discs are scattered on our card front to draw the eye to our focal section.

Tomorrow we’re going to look at several ways to use busy patterned paper to create stunning floral card designs. I hope you’ll drop by.

Products used in today’s card:
Poppy Parade, Shaded Spruce, Summer Splash, Mossy Meadow, Petal Pink, Real Red, Basic White cardstock
Something Fancy stamps
Deckled Rectangles, Painted Lavender, Simply Zinnia dies
Zinnia embossing folder
Iridescent striped trim
Iridescent discs
Dimensionals
Adhesives

Product List
Botanicals · Coming Soon · Mother’s Day

Zinnias for You

Things have really begun to green up in our area and I’ve begun making treks to my favorite garden center to fill my patio pots. I really love having a yard full of color! For our growing area, I have to choose plants that not only like our mild springs but that really love the sweltering heat of summer. And one of my all-time garden favorites is zinnias. They come in a wide variety of colors, are fairly bug resistant, and don’t mind the Texas heat one bit — winner!

When Stampin’ Up! released the Flowering Zinnias suite in the latest Online Exclusives, I immediately fell in love with the designer paper. I wasn’t quite so sure about the stamps or dies. If I’m being honest, I didn’t immediately like the stamps or dies because I felt like they were a little too fussy and I was intimidated by the thought of trying to use them. But I was soon convinced that I needed them when I began seeing all of the drop-dead stunning designs my fellow stampers were making with them.

Believe me when I tell you that this card looks way more complicated than it actually is to assemble. The dies really do do all of the work for you. And just look at the stunning results!

We start with a base of Flirty Flamingo cardstock. I next diecut a quarter panel of the same and then embossed using the Zinnia embossing folder. This panel is cut slightly smaller than the card base. I then began diecutting flowers from Real Red and Calypso Coral cardstock using the Simply Zinnias dies. The flower centers are a combination of Pumpkin Pie and Daffodil Delight. Next are the leaves, which have been diecut from Shaded Spruce and Old Olive. The smaller flowers are diecut from Lemon Lolly. The sentiment from Perennial Postage is stamped on white cardstock and then diecut using the soon-to-release Unbounded Love dies.

The embossed Flirty Flamingo panel is adhered directly to the card base. I next assembled the flowers. To assemble, I used dimensionals between the two flower petal layers. A large Zot glue dot secures the orange center to the top layer of petals and then I used a fine tip glue pen to add adhesive to the circle of small flowers that sits atop the flower center. For the smaller budding flowers, a glue dot adheres the flower to the stem.

To complete the card, I began by adhering the sentiment to the center with dimensionals. The red flowers come next and are also adhered to the card front using dimensionals. The leaves are layered underneath the flowers and secured with glue dots. The Calypso Coral flower is secured directly to the card base with a large Zot glue dot to give dimension to the look. The small stem of accent flowers is secured with a single dimensional, while the flowers themselves are held in place with glue dots. Shiny sequins finish off the design with some flare and a bit of sparkle.

I’ll be bringing you some BONUS content tomorrow of brand NEW product as we take a romp through the meadow using the gorgeous Unbounded Beauty and Thoughtful Journey products. You won’t want to miss it!

Products used for today’s card:
Flirty Flamingo, Real Red, Calypso Coral, Pumpkin Pie, Daffodil Delight, Lemon Lolly, Shaded Spruce, Old Olive, Basic White cardstock
Perennial Postage stamps
Simply Zinnia, Unbounded Love (coming soon!) dies
Zinnia embossing folder
Shiny sequins
Glue dots
Dimensionals
Adhesives