Autumn · Fall · sketches · Sketchy Fridays

Sketchy Fridays: Accomplished So Much

This week is all about autumn, and we’re using unique combinations of Stampin’ Up! products to make some beautiful card designs.

And it’s already time again for another installment of Sketchy Fridays, where each week we’ll be using a card sketch to design our featured card. Right now, we’re working through a full series of designs using the card sketches found on page 22 of the current Stampin’ Up! Annual Catalog.

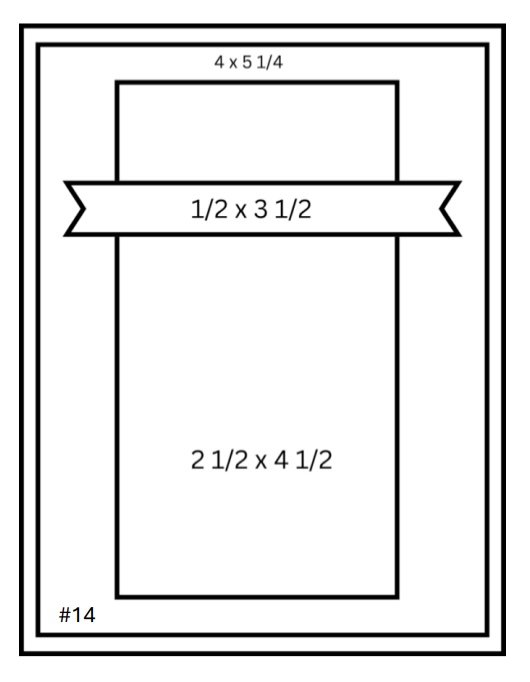
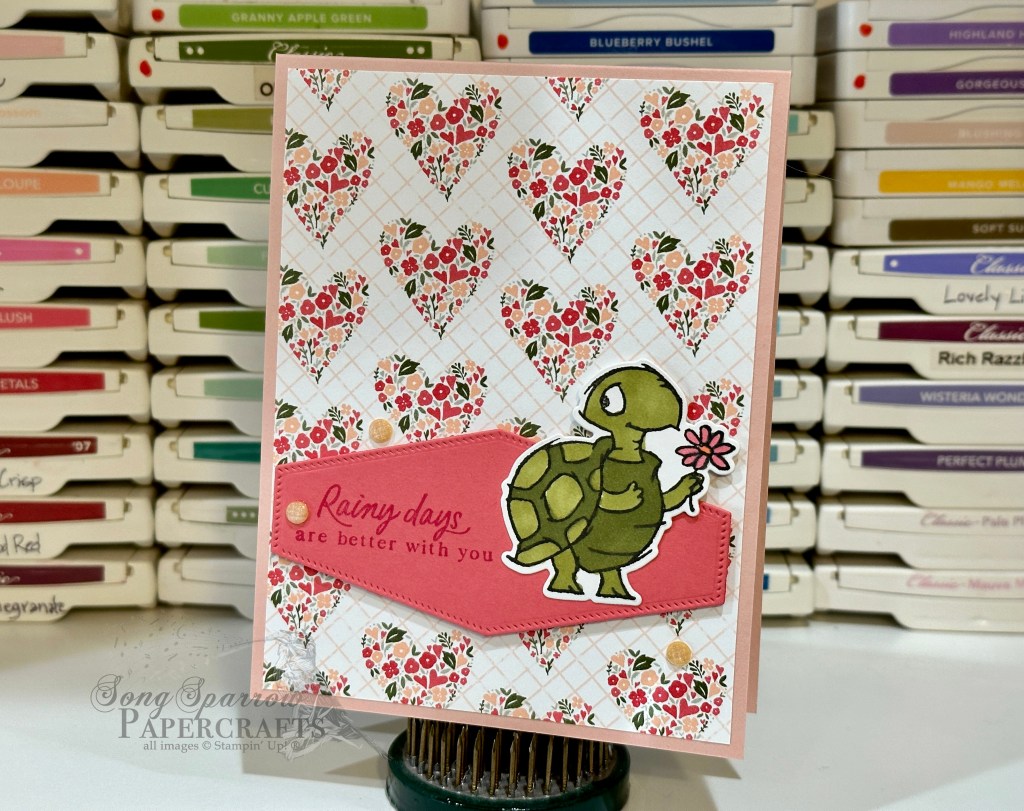
This week’s card is based on Sketch #14 and features the gorgeous Splendid Autumn designer paper from the new Stampin’ Up! Holiday Mini catalog.

As I was thumbing through the papers in the Splendid Autumn paper pack, I was looking for a sheet that would lend itself to an unexpected combination of products. When I saw this beautiful sheet of the groves of trees separated by a stream with its hues of greens and purples, along with the usual fall foliage colors, I knew I had found the sheet I was looking for.

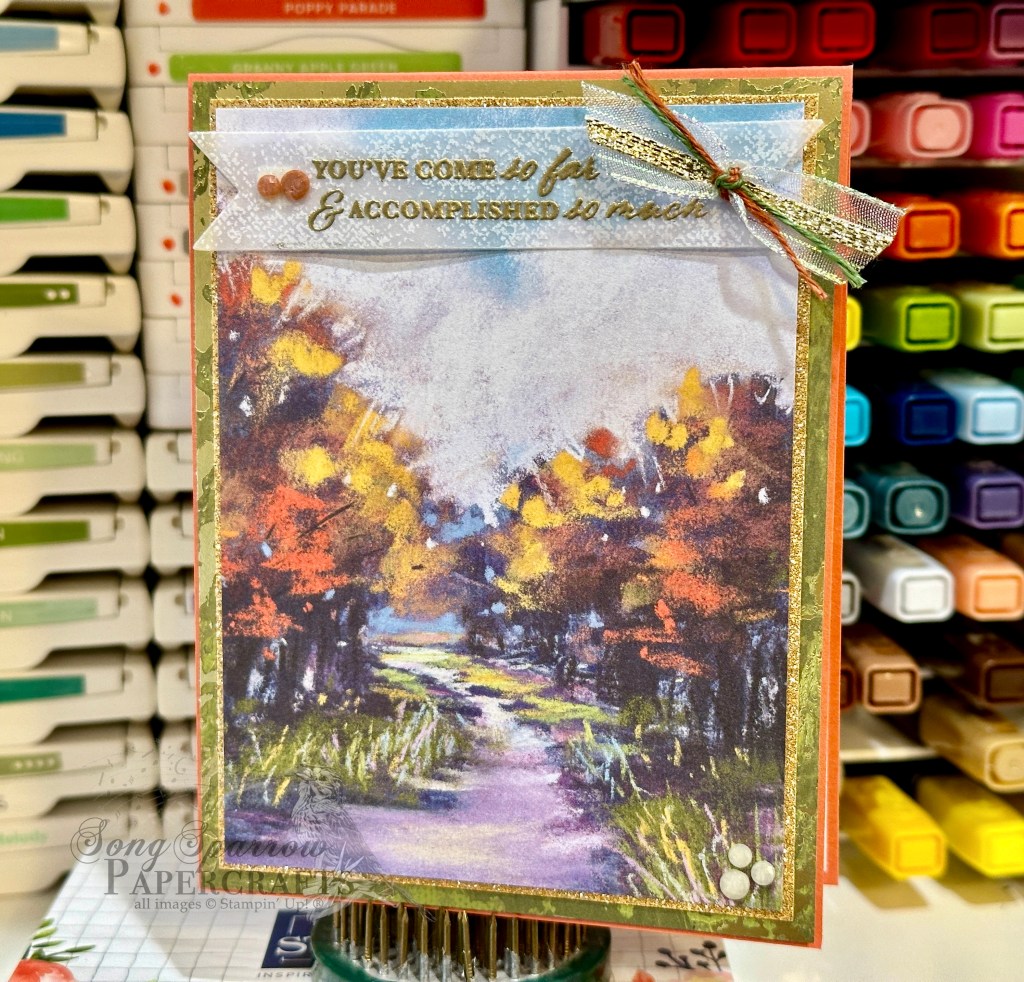
The beauty of today’s Sketch #14 is it lets us use this gorgeous paper as the focal point and then support it with mats as complements. We get started with a base of Calypso Coral cardstock. I love how this base color makes the oranges in the trees pop over the golden hues. Our sheet of Splendid Autumn is matted in two different colors. We use a very thin mat of Peach Pie glimmer paper right up against the Splendid Autumn, and it’s such a nice complement to the golden hues in our paper. Then we’re using a larger secondary mat of Old Olive Season of Elegance designer paper. Just look at how this brings out the grass along either side of our creek that’s reflecting our gorgeous dusky sky. And in person, the sparkle of the gold foiling in this sheet plays along perfectly with the glimmer paper. The sentiment from Wonderful Thoughts is heat embossed in gold on a sheet of white vellum from the Graceful Greenery vellum pack and then diecut using the Greetings of the Season dies using the extension method to give us a full banner. We finish things off with a twist of ribbons, including iridescent striped sheer ribbon, gold trim, and two colors of linen thread from the new Natural Tones pack, and a few of the new Earth Tones shimmer gems in opposing corners for a little sparkle.

I hope you tune in tomorrow as we round out our All About Autumn card series. I’ll be bringing you another emboss resist project, as well as a BONUS post showing how you can make a simple easel project that packs a big punch!

Products used in today’s card:
Calypso Coral cardstock
Season of Elegance, Splendid Autumn, Graceful Greenery vellum, Gold textured DSP
Wonderful Thoughts stamps
Greetings of the Season dies
Iridescent striped ribbon
Gold trim
Natural Tones linen thread
Earth Tones shimmer gems
Dimensionals
Adhesives

Product List
Frosted Forest

Forest of Amazing

This week, we’re working with the new Online Exclusive bundle from Stampin’ Up! called Frosted Forest. This bundle includes a photopolymer stamp set, coordinating dies, and coordinating decorative masks. Up until I added this bundle to my stash, I had staunchly avoided decorative masks. Decorative masks allow you to quickly color and add detail to your stamped images with sponges or blending brushes. I thought they were going to be too fussy, but Stampin’ Up! has made it super easy to line them up perfectly every time with the corner notches.

Wanna know something else I really love about the Frosted Forest set? It pairs beautifully with SO many other SU! products. And today’s card shows you exactly that, so let’s talk about how this one comes together.

We get started with a base of Mossy Meadow cardstock. I chose a quarter panel of Pool Party as the backdrop for the focal panel so that I wouldn’t have to add the sky myself, and it allowed for a soft backdrop for all of the stamped images that follow.

So next we start building our background scene with a combination of the In the Grove and Grassy Grove stamp sets. The mountain range from In the Grove is stamped in Gorgeous Grape and then I lightly sponged over it with Highland Heather and pulled that color down to create a valley. With the grass stamp from Grassy Grove, we add a layer of grass slightly over the purple of the mountain valley using Mossy Meadow ink and continue down the panel with the grass stamp from In the Grove, also using Mossy Meadow, until the panel is complete. A few gaps here and there give a sense of changes in terrain and elevation.

Next up, we start building our forefront scene by stamping both the large and small tree from Frosted Forest in black in on Gray Granite cardstock. Each is shaded using the coordinating decorative masks with a combination of Shaded Spruce, Old Olive, and Garden Green and then each tree is diecut using the coordinating Frosted Forest die. The smaller trees are adhered on either side of the panel with dimensionals. The larger tree is adhered in the center with dimensionals so that it stands taller. The larger and smaller deer silhouettes are diecut from Crumb Cake cardstock using the Grove dies and then tucked into the trees and adhered with glue dots. The bird from the Frosted Forest set is stamped in black on Smoky Slate cardstock and then diecut with the coordinating die. It’s adhered with a dimensional over the grass so that it appears to be soaring through the valley.

Our sentiment from the Changing Leaves set is stamped in black on white cardstock and then diecut using the Friends for Life smudge banner. A piece of the Moody Mauve shimmer paper is also cut with the Friends for Life smudge banner and is cut in half to allow it to serve as a mat for the sentiment. The full panel is adhered with dimensionals and a few rhinestone jewels are added to draw the eye to the sentiment.

While this card may look a little complicated, it comes together quickly and easily. I love thinking about how I can use various sets together to create beautiful scenes, and the Frosted Forest set lends itself so easily to doing so.

I hope you’ll tune in tomorrow to see how we can create a snowy scene. You won’t want to miss it!

Products used in today’s card:
Mossy Meadow, Pool Party, Basic White, Crumb Cake, Smoky Slate, Gray Granite cardstock
Moody Mauve In Color cardstock
Frosted Forest stamps, masks, and dies
In the Grove, Grassy Grove, Changing Leaves stamps
Grove, Friends for Life dies
Rhinestone basic jewels
Dimensionals
Adhesives

Product List
January Mini Catalog

A Note to Lift You

I love a good play on words. And Stampin’ Up! never fails to deliver on them in their sentiments. I find that a good pun always makes me smile or even chuckle. And who doesn’t need a little bit of that in their life?!

Today’s card is all about the pun in the Hot Air Balloon set. We get started with a base of Lost Lagoon cardstock. The background panel consists of a mat of Lost Lagoon shimmer paper and a sheet of the Lighter Than Air designer series paper. Our focal images are diecut from another sheet of Lighter Than Air using the Hot Air Balloon dies. I added a few detail die strips to a few balloons and each balloon got a treatment of coordinating Rainbow Dots to really punch things up (see what I did there? *snicker*). The balloon baskets are a combination of Calypso Coral and Crumb Cake cardstock. I added dimensionals and a vellum cloud for a bit of realism to our scene. The sentiment from the Hot Air Balloon set is stamped on white cardstock and then cut with trimmers to resemble a banner. The sequins and ribbon add a bit of sparkle and help the eye move diagonally across the card design.

Sail in tomorrow to see what card is taking flight!

Products used in today’s design:
Lost Lagoon, Crumb Cake, Calypso Coral, Pretty Peacock, Basic White, vellum cardstock
Lost Lagoon shimmer, Lighter Than Air DSP
Hot Air Balloon stamps
Silver & white sheer ribbon
Rainbow dots
Neutrals sequins
Dimensionals
Adhesives

All ads on this site are posted by WordPress.  Song Sparrow Papercrafts is not responsible for ad content.

January Mini Catalog

Hang in There

For as long as I can remember, I’ve been fascinated by hot air balloons. My aunt and uncle had a balloon when I was a little girl. And I remember going to a few balloon festivals and watching the balloon teams prepare the balloons for flight — all the sights and smells and sounds. I still love to watch hot air balloons from afar so that I can see the balloons all at once with their rainbow of colors.

Stampin’ Up! has launched its own balloon festival with the suite called Lighter Than Air. The full suite includes stamps, dies, paper, and embellishments. I started with just the designer series paper, which makes wonderful cards for all sorts of occasions. But I’ve since added the stamp bundle after seeing so many wonderful inspiration designs. The Hot Air Balloon bundle will be carrying over when the new catalog launches!

For today’s card design, we start with a background of Melon Mambo cardstock to coordinate with the selected background paper from the Lighter Than Air paper pack. The focal panel background is a combination of white glimmer paper, which has been diecut using one of the larger Perennial Postage dies, and a sheet of the cloud paper from Lighter Than Air. Two balloons have been diecut from the designer paper, while the third is stamped on white cardstock using the Hot Air Balloon stamps. The white detailing on the balloon has been diecut from white glimmer paper using the coordinating Hot Air Balloon dies. Each of the baskets has been stamped in Crumb Cake ink on coordinating cardstock and then diecut using the Hot Air Balloon dies. The clouds and sentiment panels were each diecut from vellum. The sentiment from the Hot Air Balloon set is stamped on the banner which was cut using the Happy Little Things dies. The scene is layered with dimensionals to give a more realistic look, and a bit of sparkle is added using the shiny sequins and silver trim.

We’re taking to the skies this week with more fun air-inspired designs. I hope you’ll take flight with me!

Products used in today’s card:
Melon Mambo, Basic White, Crumb Cake, vellum cardstock
Lighter Than Air, glimmer DSP
Hot Air Balloon bundle
Perennial Postage, Happy Little Things dies
Shiny sequins
Silver trim
Dimensionals
Adhesives

All ads on this site are posted by WordPress.  Song Sparrow Papercrafts is not responsible for ad content.

Luv 2 Stamp Artisan Design Team · Terrific Tuesdays

Amazing Things

I have really enjoyed working with the Painted Lavender bundle in preparation for this week’s Terrific Tuesdays video. And for today’s bonus post, we use a masking technique to create this lovely fun fold.

The Painted Lavender bundle is part of a larger suite of products called Perennial Lavender, which includes the Perennial Postage bundle we worked with last week, along with the Perennial Lavender designer series paper, paper butterflies, and purple fine sparkle gems which are all a part of today’s featured card.

I wanted to try using the paper butterflies ask masks and decided that a peek-through z-fold would be the perfect way to showcase a masked section. We begin with a card base of Lost Lagoon. I chose the sheet of Perennial Lavender designer paper that includes both flowers and butterflies in a tight-knit pattern. White cardstock serves as the base for the inside of the card and the peek-through section of the card. I used a larger and smaller paper butterfly as masks and inked over them with sponge daubers and Blackberry Bliss ink directly on the inside card base on the peek-through section. To keep a nice, even border on the left of the butterflies, I used a strip of washi tape to keep the sponged section just where I wanted it. Each of the butterflies are then flipped over to the uninked side and adhered to the front of the card. The sentiment from the Wonderful Thoughts stamp set is stamped on white cardstock diecut with the Nested Essentials dies. Two small butterflies from the Painted Lavender stamp set help draw the eye to the sentiment. Purple sparkle gems are scattered over the card front for pops of color and sparkle and to help the eye travel across the card design.

Interested in more inspiration for the Painted Lavender bundle? Check out this week’s Terrific Tuesdays episode for more designs!

Products used in this design:
Lost Lagoon, Basic White cardstock
Perennial Lavender DSP
Painted Lavender, Wonderful Thoughts stamps
Painted Lavender, Nested Essentials dies
Paper butterflies
Purple fine shimmer gems
Dimensionals
Adhesives

All ads on this site are posted by WordPress.  Song Sparrow Papercrafts is not responsible for ad content.

Clean and Simple

Better with You

The Country Floral Lane designer paper is so fun to work with. When I saw the sheet of patterned paper used in today’s card design, I knew it needed to become an encouragement card.

A sheet of Blushing Bride cardstock serves as the card base. I used the Playing in the Rain stamps for the sentiment and focal image. The adorable turtle holding the flower is the perfect complement to this designer paper. The sentiment panel base is diecut from Calypso Coral using the Nested Essentials dies. The sentiment is stamped on the panel using the Playing in the Rain stamps. I stamped the turtle in black ink on white cardstock and colored with the Stampin’ Blends markers. Then it’s diecut using the coordinating Playing in the Rain dies and adhered directly to the panel. The panel and turtle are elevated with dimensionals. A few fine sparkle gems add a little touch of twinkle to the design and just that little bloop of happiness.

Products used:
Blushing Bride (retired), Calpypso Coral, white cardstock
Country Floral Lane DSP (retired)
Playing in the Rain stamps & dies
Nested Essentials dies
Fine sparkle gems
Stampin’ Blends markers
Dimensionals
Adhesives

All ads on this site are posted by WordPress and are based on your personal browsing history. I do not control ad content.