Clean and Simple · Fun Folds

Picked for You

This week, we’ll be frolicking in the meadows and stopping to smell a few flowers along the way. Stampin’ Up! has a whole host of papers and stamps that put us squarely in the middle of beautiful fields and fragrant flower patches. And we’re going to explore some of my favorites throughout this week.

We begin today with a new take on an old fun fold. I recently ran across the hidden barn fold design and knew I had to give it a try. Why is it called a hidden fold? When the card is completely closed, the two sections of the front panel meet, they make the center cut virtually disappear.

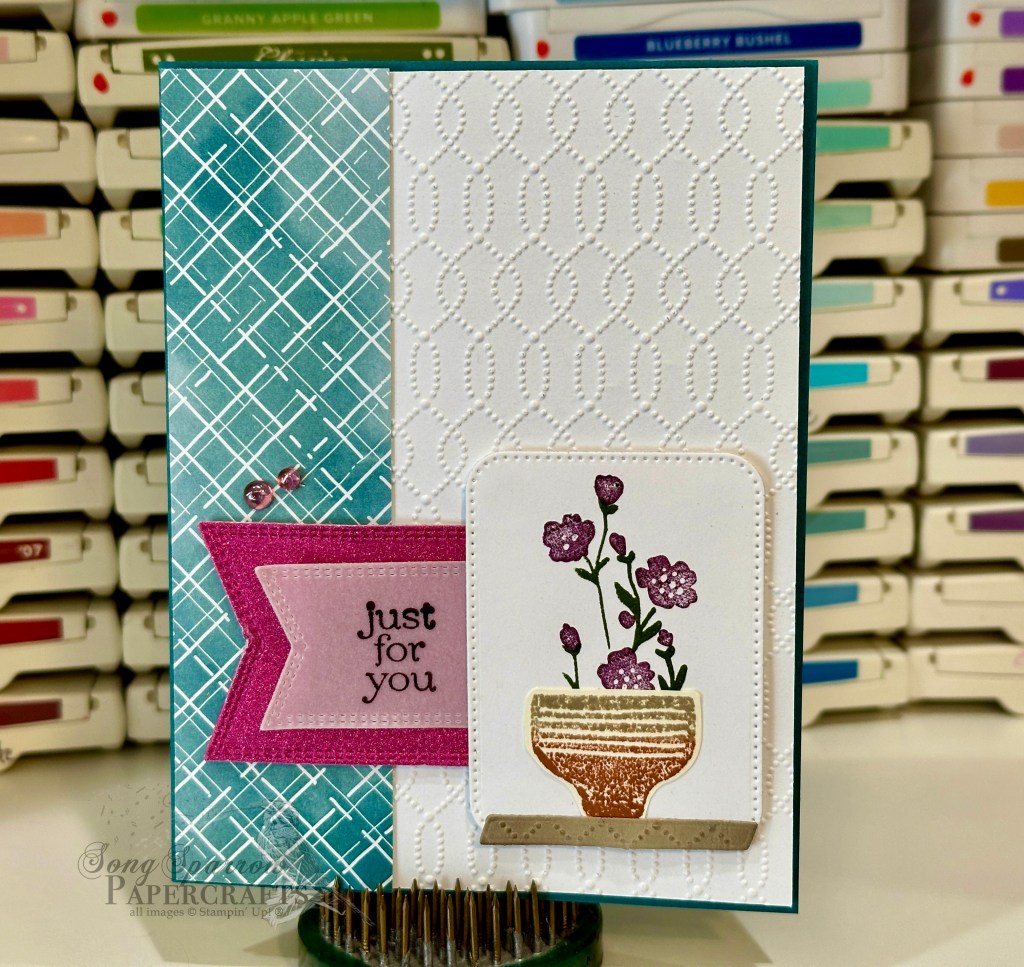
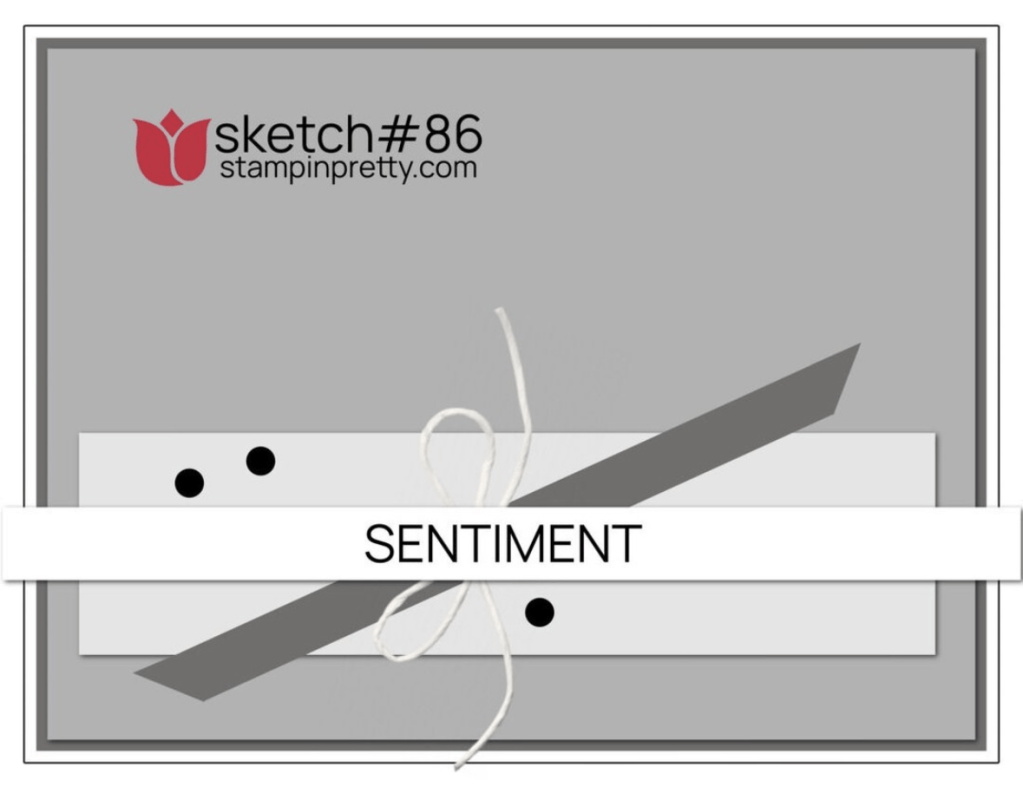
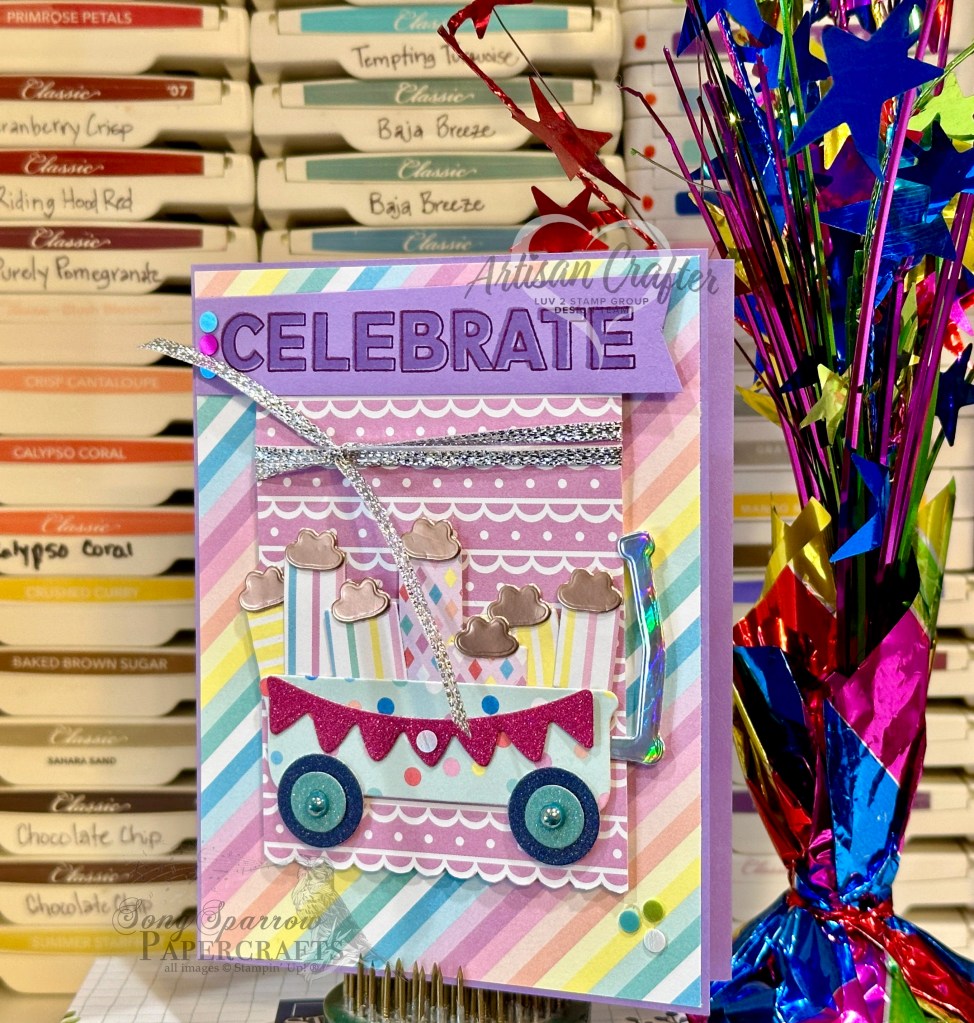
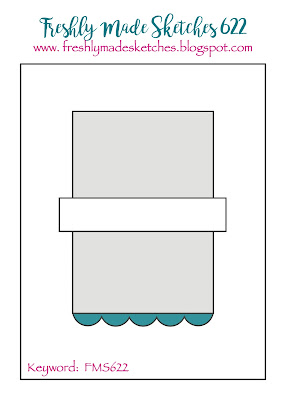
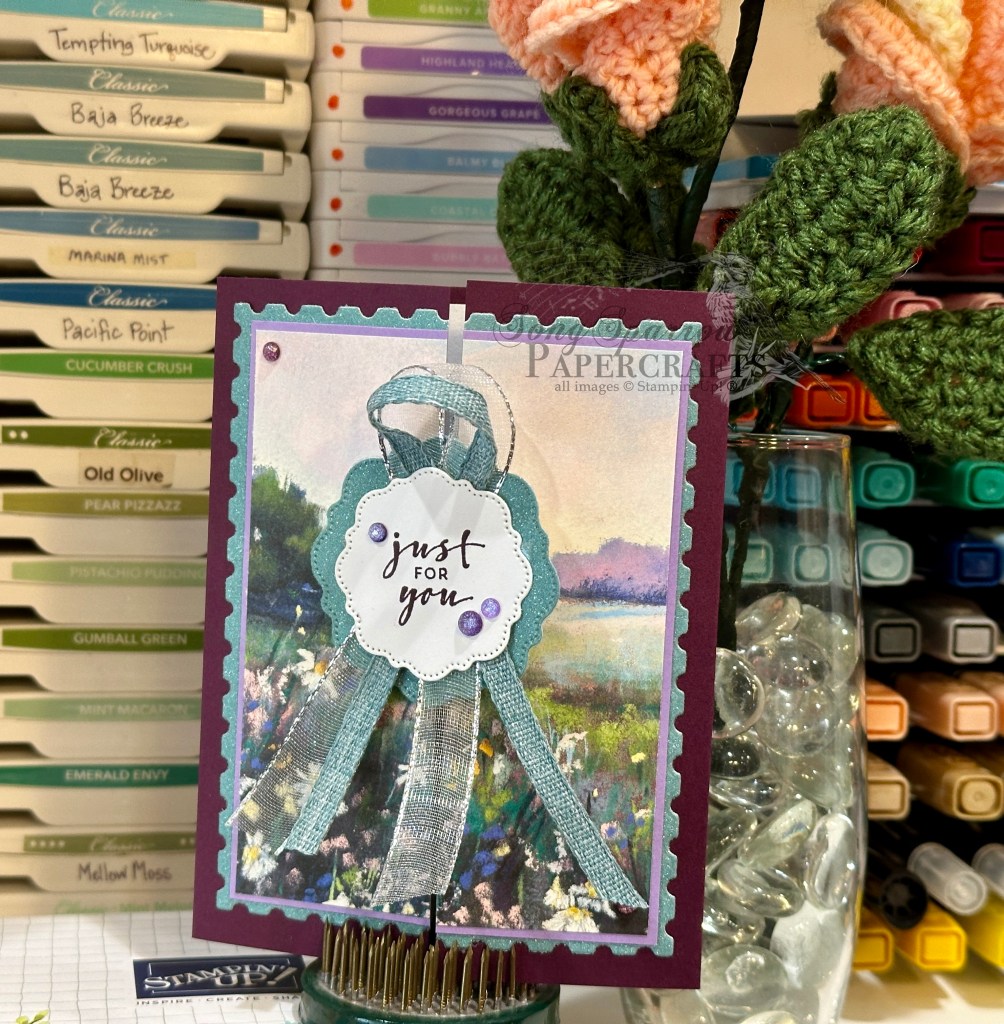
So our take on this card begins with a base of Blackberry Bliss cardstock. The focal panel consists of a bottom mat of Lost Lagoon soft shimmer paper that is diecut using the largest Perennial Postage die, followed by a layer of Highland Heather cut just a tick smaller, and finally with our section of Meandering Meadow designer paper on top. To accomplish the two perfect sections, I cut the shimmery layer in half after I diecut it. I adhered the DSP and Highland Heather mat together first before also cutting them in half with the trimmer. Then these three layers were adhered together before carefully adhering them in place on the card front so that they meet together perfectly at the center. The sentiment from Charming Sentiments is stamped on white cardstock and diecut using the smallest Thoughtful Expressions die. The sentiment mat is cut from Lost Lagoon shimmer paper. A twist of silver & white sheer ribbon and Lost Lagoon bordered ribbon are adhered in between the two sentiment layers. Using dimensionals, the sentiment is adhered to the left flap of the card front. I added a few purple fine shimmer gems for sparkle and to move the eye diagonally across the card front.

This particular design is super easy to put together. And by changing the color palette and DSP, each card has a completely different look. This is going to be a go-to design for me if I need to make a whole host of simple yet beautiful cards!

Tune in tomorrow as we explore the rolling Hills of Tuscany!

Products used in today’s card:
Blackberry Bliss, Highland Heather, Basic White cardstock
Meandering Meadow, Lost Lagoon soft shimmer DSP
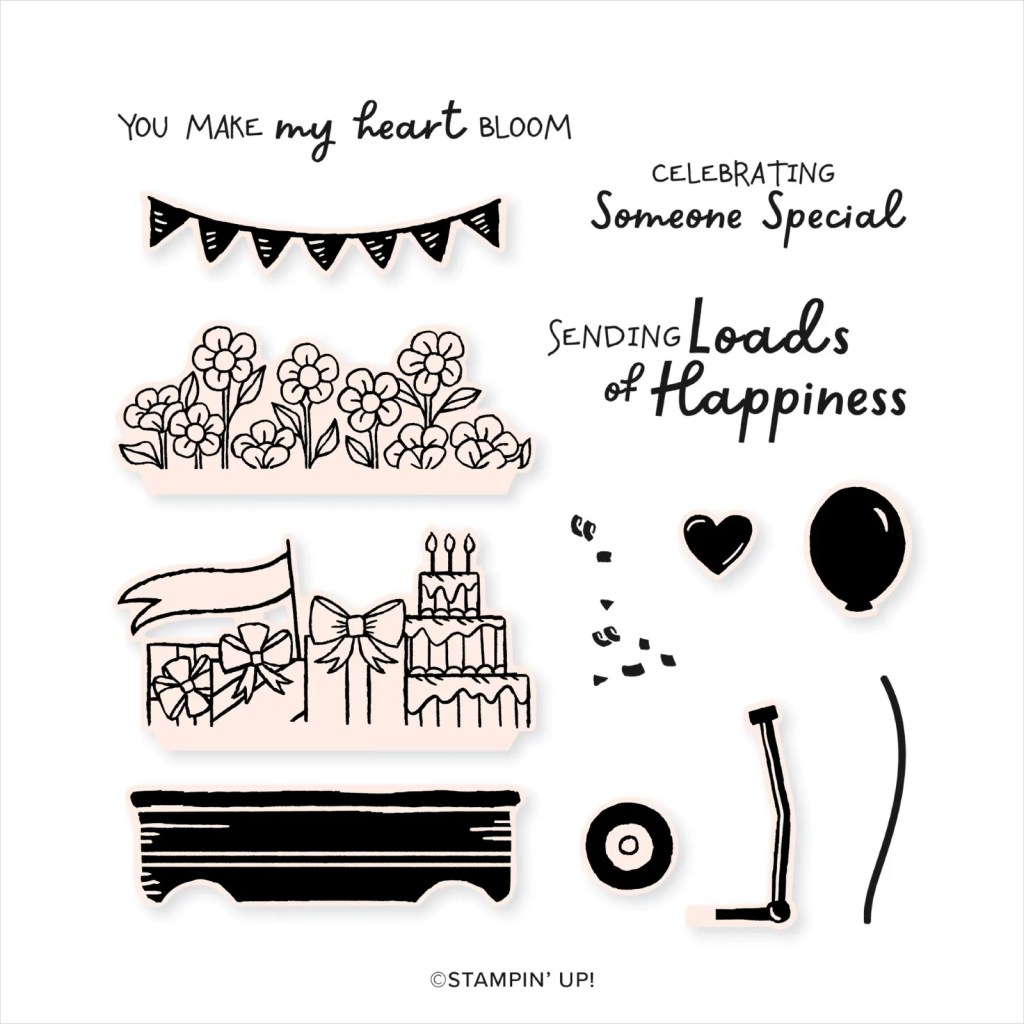
Charming Sentiments stamps
Thoughtful Expressions, Perennial Postage dies
Silver & white sheer trim, Lost Lagoon bordered ribbon
Purple fine shimmer gems
Dimensionals
Adhesives

Coming Soon

Lifting Me Higher

Our journey through the skies comes to an end today as we round out our aviation-themed trek through the Stampin’ Up! lineup. And today’s card is a full sneak peek at the brand NEW suite of products called Take to the Sky. The full suite includes stamps, coordinating dies, designer series paper, and silver trinkets. This suite will have you soaring when it releases in May!

Our card today begins with a base of Balmy Blue cardstock. The backdrop for our focal panel is a sheet of the cloud pattern designer paper. On top is another sheet with a radar view pattern. I cut a hole towards the top of the radar sheet using the Everyday Details dies, which allows the cloud pattern to peek through. And I reinforced this peek-through look by diecutting clouds from vellum using the Bright Skies and Hot Air Balloon dies. I stamped the largest plane from the Adventurous Skies stamp set onto white cardstock, colored the body of the plane with Stampin’ Blends, and then diecut with the coordinating die. I drew further attention to the spinning propeller by diecutting the smallest circle from Everyday Details from vellum. I added an Industrial Trinket to give a realistic look to the center of the spinning propeller. The sentiment from Adventurous Sky is stamped directly on vellum and then diecut using the Bright Skies dies. I scattered a few additional trinkets and some translucent sequins to tie things together and help the eye move across the card.

There are so, so many more designs I would like to try with this super fun suite of products that I plan to highlight this suite for a full week once it releases with the brand new Annual Catalog in May. In the meantime, next week we’ll be romping through the grassy plains and fields of flowers. I hope you’ll come along!

Products used in today’s card:
Balmy Blue, Basic White, vellum cardstock
Take to the Sky DSP (coming soon!)
Adventurous Sky bundle (coming soon!)
Industrial trinkets (coming soon!)
Stampin’ Blends
Sequins trio
Dimensionals
Adhesives

Coming Soon

Speedy Recovery

We’re continuing our aviation adventures this week by taking a closer look at the brand NEW Adventurous Sky bundle, which is set to release in May with the launch of the new 2024-25 Stampin’ Up! Annual Catalog. This week’s chosen theme of flight is inspired by husband, who is a commercial pilot and aviation enthusiast.

And the theme of today’s card, in particular, is also inspired by my hubby, who has been having some serious health issues. When we’re making get well cards, we don’t often think of incorporating someone’s hobbies or interests when designing cards, but when you want something to feel very personalized for a recipient, I believe that’s the best way to do it!

Our card today is set on a base of Balmy Blue cardstock using the fold-back fun fold, which allows a portion of the inside panel to peek through when the card is fully closed. Before I adhered the fold-back portion of the card front, I used the Adventurous Sky cloud stamps to stamp a background on the entire inside-left panel. I also adhered the raindrop-embossed piece of vellum to the edge of the fold-back panel and then adhered it to the card front. On the exposed portion of the inside message panel, I chose the topography patterned sheet from the Take to the Sky designer series paper pack — the coordinating DSP to Adventurous Sky that will release in May.

The plane is cut from the Silver and Berry Burst sheets of Holographic specialty paper using the Adventurous Sky dies. But you might be thinking that it doesn’t look red. This particular sheet of paper looks blue when it’s cut into smaller pieces and from certain angles in larger pieces, and so by diecutting and then putting the plane on the diagonal, you see blue in this design. Neat, huh?! To give the illusion of a spinning prop, I cut a circle from vellum using the smallest die in the Everyday Details set. The center of the prop is made with the soon-to-be-released Industrial Trinkets piece.

The sentiments from Happy Little Things are stamped on white cardstock that is diecut from white cardstock using the Deckled Rectangles dies. A twist of silver & white sheer ribbon and the white sequins tie with the metallic elements of the plane and finish the visual triangle across the card design.

I hope you’ll fly by tomorrow to get a better look at the full Take to the Sky suite — paper, stamps, dies, and embellishments!

Products used in today’s design:
Balmy Blue, Basic White, vellum cardstock
Holographic Trio, Take to the Sky (coming soon!) DSP
Happy Little Things stamps
Deckled Rectangles, Adventurous Sky (coming soon!) dies
Raindrops embossing folder
Sequins trio, Industrial Trinkets (coming soon!)
Silver & white sheer ribbon
Dimensionals
Adhesives

January Mini Catalog

Wishes Up and Away

This week, we’re flying high with Stampin’ Up! sets that feature vehicles of flight. Thus far, we’ve been soaring with the Hot Air Balloon bundle. And today’s design is (almost) directly inspired by fellow SU! demo Anne Granger. Just a few tweaks here & there with products I had on hand and *voila* a fantastic birthday card ready to hoist your well wishes.

This card design begins with a base of Lost Lagoon cardstock. The background panel consists of a mat of Pretty Peacock soft shimmer paper and the lovely rainbow pattern designer paper from the Sale-a-Bration pack called Sunny Days. The focal panel is also matted with the shimmer paper and the balloon is stamped directly on the white cardstock panel in coordinating colors of Lost Lagoon and Pretty Peacock. I dressed up the sentiment by diecutting it separately using the Autumn Leaves dies. This design is finished off with Pretty Peacock sequins from the Sequins Trio set and the Pretty Peacock & Gold metallic ribbon.

Tune in tomorrow to get a SNEAK PEEK at a brand new flight-related suite of products. I know you’re gonna love it as much as I do!

Products used in today’s card:
Lost Lagoon, Basic White cardstock
Pretty Peacock fine shimmer SP
Sequins trio
Pretty Peacock & Gold metallic ribbon
Dimensionals
Adhesives

All ads on this site are posted by WordPress.  Song Sparrow Papercrafts is not responsible for ad content.

January Mini Catalog

A Note to Lift You

I love a good play on words. And Stampin’ Up! never fails to deliver on them in their sentiments. I find that a good pun always makes me smile or even chuckle. And who doesn’t need a little bit of that in their life?!

Today’s card is all about the pun in the Hot Air Balloon set. We get started with a base of Lost Lagoon cardstock. The background panel consists of a mat of Lost Lagoon shimmer paper and a sheet of the Lighter Than Air designer series paper. Our focal images are diecut from another sheet of Lighter Than Air using the Hot Air Balloon dies. I added a few detail die strips to a few balloons and each balloon got a treatment of coordinating Rainbow Dots to really punch things up (see what I did there? *snicker*). The balloon baskets are a combination of Calypso Coral and Crumb Cake cardstock. I added dimensionals and a vellum cloud for a bit of realism to our scene. The sentiment from the Hot Air Balloon set is stamped on white cardstock and then cut with trimmers to resemble a banner. The sequins and ribbon add a bit of sparkle and help the eye move diagonally across the card design.

Sail in tomorrow to see what card is taking flight!

Products used in today’s design:
Lost Lagoon, Crumb Cake, Calypso Coral, Pretty Peacock, Basic White, vellum cardstock
Lost Lagoon shimmer, Lighter Than Air DSP
Hot Air Balloon stamps
Silver & white sheer ribbon
Rainbow dots
Neutrals sequins
Dimensionals
Adhesives

All ads on this site are posted by WordPress.  Song Sparrow Papercrafts is not responsible for ad content.

January Mini Catalog

Hang in There

For as long as I can remember, I’ve been fascinated by hot air balloons. My aunt and uncle had a balloon when I was a little girl. And I remember going to a few balloon festivals and watching the balloon teams prepare the balloons for flight — all the sights and smells and sounds. I still love to watch hot air balloons from afar so that I can see the balloons all at once with their rainbow of colors.

Stampin’ Up! has launched its own balloon festival with the suite called Lighter Than Air. The full suite includes stamps, dies, paper, and embellishments. I started with just the designer series paper, which makes wonderful cards for all sorts of occasions. But I’ve since added the stamp bundle after seeing so many wonderful inspiration designs. The Hot Air Balloon bundle will be carrying over when the new catalog launches!

For today’s card design, we start with a background of Melon Mambo cardstock to coordinate with the selected background paper from the Lighter Than Air paper pack. The focal panel background is a combination of white glimmer paper, which has been diecut using one of the larger Perennial Postage dies, and a sheet of the cloud paper from Lighter Than Air. Two balloons have been diecut from the designer paper, while the third is stamped on white cardstock using the Hot Air Balloon stamps. The white detailing on the balloon has been diecut from white glimmer paper using the coordinating Hot Air Balloon dies. Each of the baskets has been stamped in Crumb Cake ink on coordinating cardstock and then diecut using the Hot Air Balloon dies. The clouds and sentiment panels were each diecut from vellum. The sentiment from the Hot Air Balloon set is stamped on the banner which was cut using the Happy Little Things dies. The scene is layered with dimensionals to give a more realistic look, and a bit of sparkle is added using the shiny sequins and silver trim.

We’re taking to the skies this week with more fun air-inspired designs. I hope you’ll take flight with me!

Products used in today’s card:
Melon Mambo, Basic White, Crumb Cake, vellum cardstock
Lighter Than Air, glimmer DSP
Hot Air Balloon bundle
Perennial Postage, Happy Little Things dies
Shiny sequins
Silver trim
Dimensionals
Adhesives

All ads on this site are posted by WordPress.  Song Sparrow Papercrafts is not responsible for ad content.

Clean and Simple

Just for You

One of my favorite times of year is right now — spring! I love to admire all of the beautiful flowers, including the ones that I plant myself! Some of my favorites include zinnias, morning glory, dianthus, and salvia, to name just a few. Stampin’ Up! has some really wonderful botanical stamp sets, and this week we’ll be exploring a number of them.

Today we have a super clean and simple card. This card is built on a base of Pretty Peacock. The backdrop for our focal section is a strip of Hello, Irresistible designer series paper and quarter-sheet of white cardstock embossed with the Softly Sophisticated embossing folder, which was a most recent Sale-a-Bration item. For the image panel, I diecut a piece of white using the Nested Essentials dies and a lovely floral arrangement is stamped in the center. This lovely stem of flowers is stamped using the Softly Sophisticated stamp set, also a most recent Sale-a-Bration set. The pottery bowl is stamped on Very Vanilla using the Planted Paradise stamp set. Our sentiment is stamped on vellum and diecut using the Nested Essentials dies, along with the nesting banner die cut from Berry Burst shimmer paper.

We’ll be using the Planted Paradise set for tomorrow’s card and I can’t wait for you to see it!

Products used:
Pretty Peacock, Crumb Cake, Very Vanilla cardstock
Hello, Irresistible; shimmer, vellum DSP
Softly Sophisticated, Planted Paradise stamps
Softly Sophisticated embossing folder
Nested Essentials dies
Tinsel gems
Dimensionals
Adhesives

All ads on this site are posted by WordPress.  Song Sparrow Papercrafts is not responsible for ad content.

Luv 2 Stamp Artisan Design Team · sketches

Time to Celebrate

Preparing for my son’s birthday last week had birthday front and center in the design line-up. And today’s card is a second take on a sketch by Stampin’ Pretty — with a flip of the smaller background panel and a little shift on the position of the decorative element.

This card begins with a base of Night of Navy cardstock. I chose two star patterns from the Bright & Beautiful designer series paper pack to serve as the backdrop. I used a strip of More Dazzle specialty paper and Night of Navy & gold sheer ribbon to bridge the divide between the two patterns. For the decorative element, I chose the balloons from the new Filled with Fun die set and diecut them from all of the shades of the Soft Shimmer specialty paper pack. The sentiment from Filled with Fun is stamped on white shimmer paper and the decorative element is white glimmer paper diecut using the Thoughtful Expressions set. A few Night of Navy tinsel gems finish off this sparkly celebration in an envelope!

This week, we’ll be exploring some botanical designs. I hope you’ll follow along!

Products used in today’s design:
Night of Navy cardstock
Bright & Beautiful, Soft Shimmer, Glimmer, More Dazzle DSP
Filled With Fun stamps
Filled With Fun, Thoughtful Expressions dies
Tinsel gems
Gold cord, Night of Navy & gold sheer ribbon
Dimensionals
Adhesives


All ads on this site are posted by WordPress.  Song Sparrow Papercrafts is not responsible for ad content.

Luv 2 Stamp Artisan Design Team · sketches

Heart Blooms

Today, we’re taking another look at the Filled With Fun bundle, which includes an adorable photopolymer stamp set and coordinating dies. This Online Exclusive from Stampin’ Up! can be used in so many different ways and will pair with any number of other super cute sets. One of the many things I love about SU! is that they design products to mix and match, which means your stamps and dies can serve you in a LOT of ways. I’m not always the best at thinking of creative or different ways to use my stamp sets, but someone in my great, big world of crafty friends has!

I’ve been coloring a lot outside of my usual design lines lately. And today’s stretch uses patterns. There are some patterned papers that really just stump me. Outside of having them stand alone and take center stage, I’m not sure what to do with them. But one of the things you can learn by following stampers who have completely different styles from your own is how to do things differently and IT WORKS! For today’s card, we’re using two very busy patterns from the Delightfully Eclectic designer series paper pack and they work together beautifully! Sometimes it’s all about figuring out how your patterns can compliment one another and remembering that a pattern doesn’t have to take center stage in a design.

Today, we’re using a sketch from Stampin’ Pretty as the inspiration for our card layout. We start with a base of Fresh Freesia cardstock. I really like how this color brought out the deeper pink tones in both patterns of the Delightfully Eclectic DSP. Rather than using the full wagon image from Filled With Fun, I chose to use a portion of it as a planter for the lovely flowers from the stamp set. Our Stampin’ Blends provide the beautiful flowers with their coordinating color. I love how perfectly the sweet turtle from Playing in the Rain pairs with this scene and sentiment. The sparkle for this design comes compliments of the white and Bubble Bath shimmer papers, along with the Blooming Pearls, adhesive hearts & flowers, and Bubble Bath sequins from Sequins Trio.

Today’s card doesn’t follow the sketch to the letter, but that’s the beauty of inspiration – it’s not your ruler, it’s just your guide!

In honor of my son’s birthday, I will be giving away 3 mystery packets of 6×6 designer series paper – both current and retired designs. To be entered to win, simply comment on any of my social media posts (WordPress, Facebook, Instagram) and tell me your favorite Stampin’ Up! color(s). I’ll have my son draw a winner at 3 PM CST tomorrow (March 29).

Products used in today’s design:
Fresh Freesia, Basic White cardstock
Delightfully Eclectic, Bubble Bath soft shimmer, white shimmer DSP
Filled With Fun, Playing in the Rain stamps & dies
Hearts & flowers, Blooming pearls, Sequins trio
Dimensionals
Adhesives


All ads on this site are posted by WordPress.  Song Sparrow Papercrafts is not responsible for ad content.

Luv 2 Stamp Artisan Design Team · sketches

Celebration Wagon

One of the most recent Stampin’ Up! Online Exclusive releases is called Filled With Fun. This bundle includes an adorable wagon-themed set of stamps and dies. There are so many cute possibilities with this set! I’ve had so many ideas swirling in my head ever since I saw it.

So today, we’re pairing this adorable wagon with another sketch by the crew over at Freshly Made Sketches. When I saw this sketch, I was immediately drawn to the scallop element at the bottom of the focal section. I remembered the sheet of paper in the Lighter Than Air paper pack that had the scalloped element and wanted to give it a try as the focal panel for my card design. And it’s worked beautifully!

Our card begins with a base of Highland Heather cardstock. I chose the cross-stripe pattern from the Lighter Than Air designer paper pack as the background. From there, I began building my wagon. I diecut the wagon using the coordinating dies and a sheet of the polka-dotted paper. I used Night of Navy and Lost Lagoon glimmer paper for the wagon wheels and hubcabs of Blooming Pearls for a little extra pizzazz. The wagon handle is diecut from the Holographic Trio specialty paper. I wanted to fully lean into the celebratory theme of this card design, so I diecut the banner from Berry Burst shimmer paper and hung it on the side of the wagon.

The Filled With Fun stamp set includes a birthday-themed stamp with presents and cake, but I wanted to fill the wagon with presents alone without all the fussy cutting. And that’s when I remembered that the Merriest Trees die set included packages! I selected several different patterns from the Lighter Than Air paper pack and began diecutting packages. I chose to use the Rose Gold specialty paper as the bows for a little additional colorful sparkle. The packages are layered on dimensionals to give depth of field to the scene.

This card is finished with a beautiful CELEBRATE banner at the top of the focal panel. The sentiment from Happy Little Things is stamped on Highland Heather and then cut with the paper trimmer. A twist of silver & white trim and a few carefully placed iridescent discs draw the eye across the design and tie everything together.

Tune in tomorrow for another fun design using Filled With Fun and a new sketch plus a GIVEAWAY. You won’t want to miss it!

Products used in today’s design:
Highland Heather cardstock
Lighter Than Air, soft shimmer, Holographic trio, Rose Gold DSP
Filled With Fun, Happy Little Things stamps
Filled With Fun, Merriest Trees dies
Silver trim
Iridescent discs
Blooming Pearls
Dimensionals
Adhesives


All ads on this site are posted by WordPress.  Song Sparrow Papercrafts is not responsible for ad content.