I don’t know about you, but I have a love-hate relationship with holiday weeks. We all love a short work week, but it always feels to me like I’m just squeezing in a lot more work into a shorter time period. That was definitely the case today anyway!
And I’ve been SO off on my days as of late that I was thinking today was the new product release day when it’s actually tomorrow….womp-womp! But it doesn’t dampen my enthusiasm for you to see all of the new stuff. I’m just sad you have to wait one more day.
Anywho, this week we’re getting another peek at some of the cute holiday products that will be available tomorrow. Our design focus this week is clean and simple holiday cards using the Joyful Days Memories & More card pack, the Greetings for You ephemera, and the Christmas Tags & More patterned paper pack with ephemera sheets included. So much good stuff! Today we’re mixing in an embossing folder.
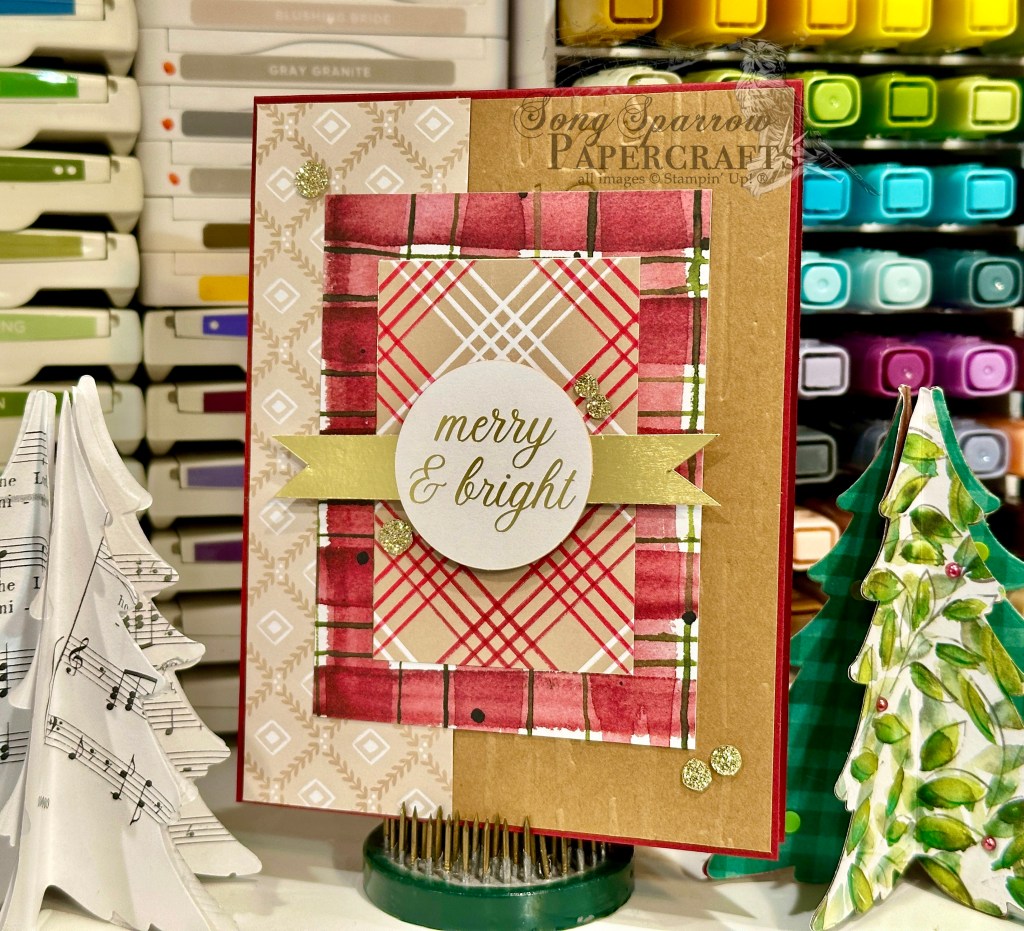
Today’s card starts with a base of Cherry Cobbler cardstock. I had a leftover strip of light brown patterned cardstock from one of the sheets in the Christmas Tags & More pack which served as the jumping-off spot for the color palette and design for the rest of the card. I paired it up with a piece of Pecan Pie machine embossed with the Birch Wood embossing folder to create the backdrop for the focal panel. The focal panel backdrop is a combination of one of the smaller cards of plaid from the Joyful Days card pack and a plaid tag from the sheet of tags in the Christmas Tags & More pack. I chose the Merry & Bright circle sentiment from the Greetings for You ephemera pack and matted it with a banner of gold foil specialty paper and adhered it to the focal panel with several layers of dimensionals to be sure it really catches the eye. I finished things off with some gold sparkly sequins from the Traditional Sparkling Sequins pack so your eye catches some sparkles all the way across the card front.
I hope you’ll tune in tomorrow to see another clean & simple holiday card design.
Products used in today’s card:
Cherry Cobbler, Pecan Pie cardstock
Gold foil, Christmas Tags & More DSP
Greetings for You ephemera
Joyful Days Memories & More card pack
Birch Wood embossing folder
Traditional sparkling sequins
Dimensionals