Friends for Life

Thank You, Friend

Happy weekend, all! We have officially completed our first week of summer break here, and we’ve enjoyed just bummin’ around, for the most part. Between the rain and the start of the Texas summer heat, it hasn’t been the best week to be outside. But we’ve made the best of things and found plenty of other things to occupy our time. The kiddo really loves to bowl, and we renewed our Kids Bowl Free subscription for this summer. This cool program allows you to pay a flat fee for the summer to bowl 2 games each weekday with your kiddo(s) at your local participating bowling alley. It’s an absolute steal and we’ve thoroughly enjoyed this program for going on 5 years now. Wanna learn more? Check it out here.

I’ve also made plenty of time to play around in the craft room this week, as well. And today, we’re finishing up our look at the projects we can create using the Stampin’ Up! Friends for Life stamps and dies. I kept things simple today with a take on a design posted over on the Stampin’ Through the Catalog page. This clean and simple design combines Friends for Life and Softly Said sets to make this lovely card. This design caught my eye for its simplicity. You can easily turn out a number of these and swap out sentiments to fit the occasion.
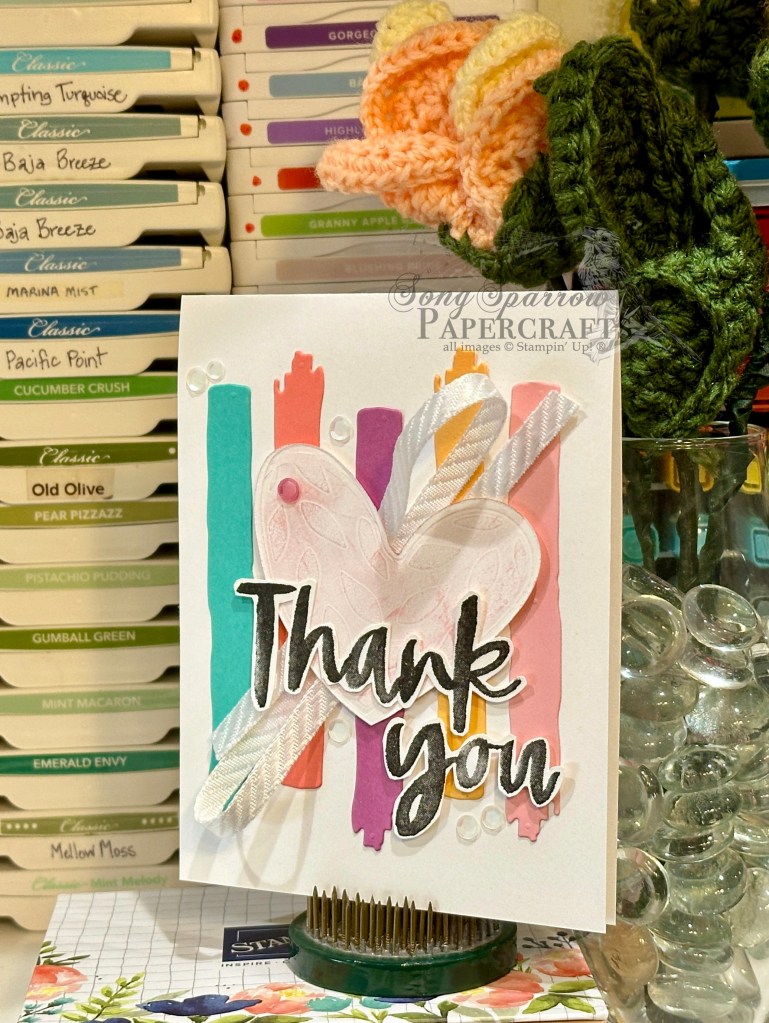
We get started with a card base of Basic White cardstock. While a standard sized card, the cardstock is cut down the long edge rather than the short edge, giving you a score at the top. The paint smudge die gives us our background and is a combination of Summer Splash, Calypso Coral, Petunia Pop, Peach Pie, and Pretty in Pink cardstock. Each smudge is oriented a different direction and is slightly offset for some visual interest. The sentiment backdrop is white cardstock that has been debossed with the leaf-print die, cut out with the open heart die, and then lightly smudged with Pretty in Pink ink to really bring out the debossed pattern. A twist of the white diagonal trim is adhered behind the heart, which is placed over the backdrop with dimensionals. The sentiment from Simply Said is stamped in black on white cardstock and then fussy cut with paper snips before being adhered with dimensionals. The design is finished with the white and pink sequins from the Sequins Trio set.

In case you missed this week’s Terrific Tuesdays video where I demonstrated how to deboss using your dies, you can catch the quick tutorial by clicking here.

I hope you got some ideas from this week’s cards featuring the Friends for Life bundle. Next week’s theme is Father’s Day and we’ll be using a whole host of different sets to make some great cards. I hope you’ll drop by and check them all out!

Products used in today’s card:
Summer Splash, Calypso Coral, Petunia Pop, Peach Pie, Pretty in Pink, Basic White cardstock
Simply Said stamps
Friends for Life dies
White diagonal trim
Sequins trio
Dimensionals
Adhesives
Friends for Life

Hey, Happy Birthday

We happen to be big Duck Dynasty fans around here. So it’s not uncommon to hear us quote the show from time-to-time or use some of the famous catch phrases, like “Hey, Jack” or something similar. Today, I’m pairing the Friends for Life bundle with the Saying Hey set, which always just makes me think of Si from DD. *grin*

In seriousness though, today we’re making a more masculine design using the Friends for Life set by pairing it with some other great Stampin’ Up! products. This shaker card birthday design is sure to make any recipient feel special!

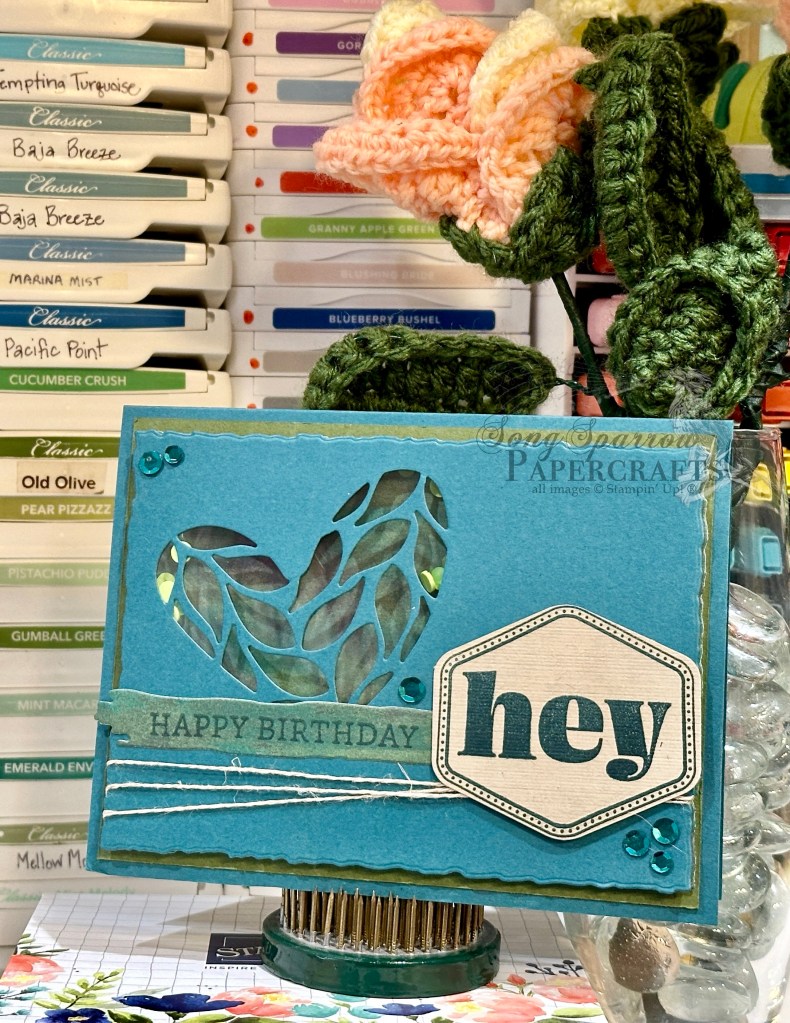
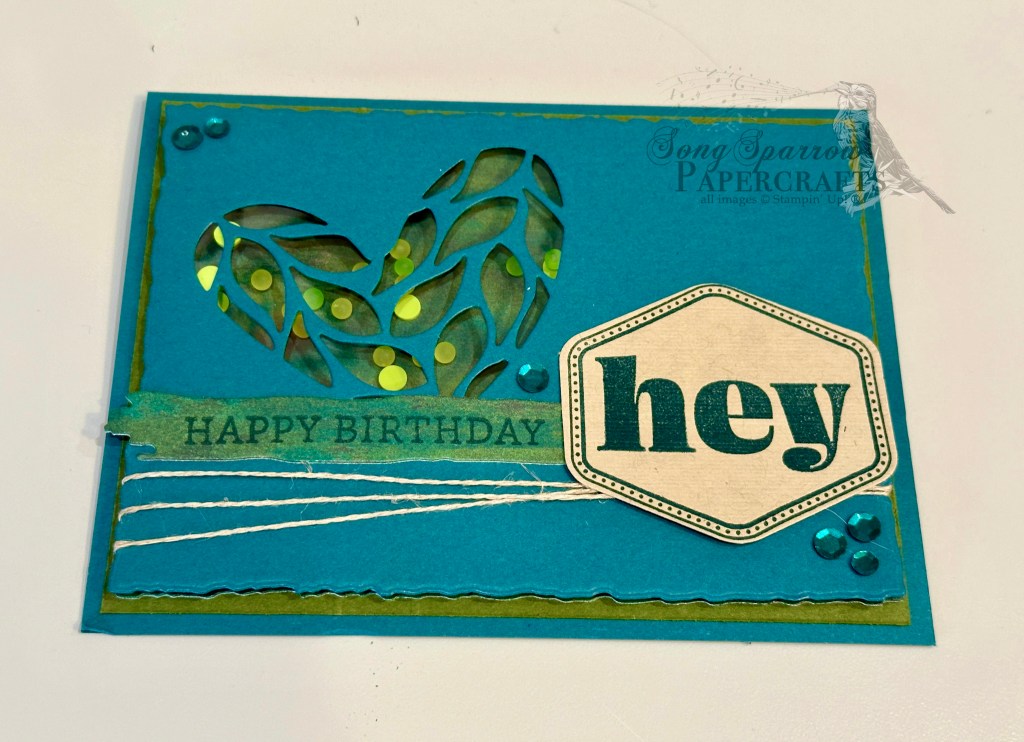
We get started with a base of Pretty Peacock cardstock. This is a standard sized horizontal design. The mat for the focal panel is a sheet of Mossy Meadow cardstock. The shaker panel base layer is a sheet of the Meandering Meadow designer paper diecut with the largest Deckled Rectangles die. The cover layer is diecut with the leaf-patterned heart from Friends for Life and the largest die from the Deckled Rectangles set. A piece of acetate is affixed behind the heart, and then to create the area to house the shaker pieces, a box is fashioned around the backside of the heart using foam strips. TIP: I save the acetate sheets from new stamp sets once I’ve placed them in cases. It’s amazing how quickly you accumulate a stash! I used a combination of green and yellow frosted dots and shaker pieces inside the foam square. To affix the front shaker panel to the back, I added additional foam strips around the exterior of the front panel and then adhered the two layers together.

For the sentiment, I began by wrapping linen thread around the base of the shaker panel. The frame from Heartfelt Hexagon is stamped on Crumb Cake cardstock using Pretty Peacock ink and then the Hey sentiment from Saying Hey is stamped using the masking tape technique to avoid stamping the punctuation. This panel is punched using the coordinating Heartfelt Hexagon punch. The paint smudge panel is diecut from the remaining portion of the Meandering Meadow designer paper and then Happy Birthday is stamped in a single line across the panel. The two are then affixed to the front of the card in an overlapping fashion. A few Pretty Peacock sequins across the card front finish things off.

I hope you’ll join me tomorrow as we wrap up our series using the Friends for Life stamps and dies.

Products used in this card:
Pretty Peacock, Mossy Meadow, Crumb Cake cardstock
Meandering Meadow DSP
Acetate sheet
Friends for Life, Heartfelt Hexagon, Saying Hey stamps
Friends for Life, Deckled Rectangles dies
Heartfelt Hexagon punch
Linen thread
Sequins trio
Foam strips
Adhesives

Friends for Life · Fun Folds · Gifting

Happy Birthday, Friend

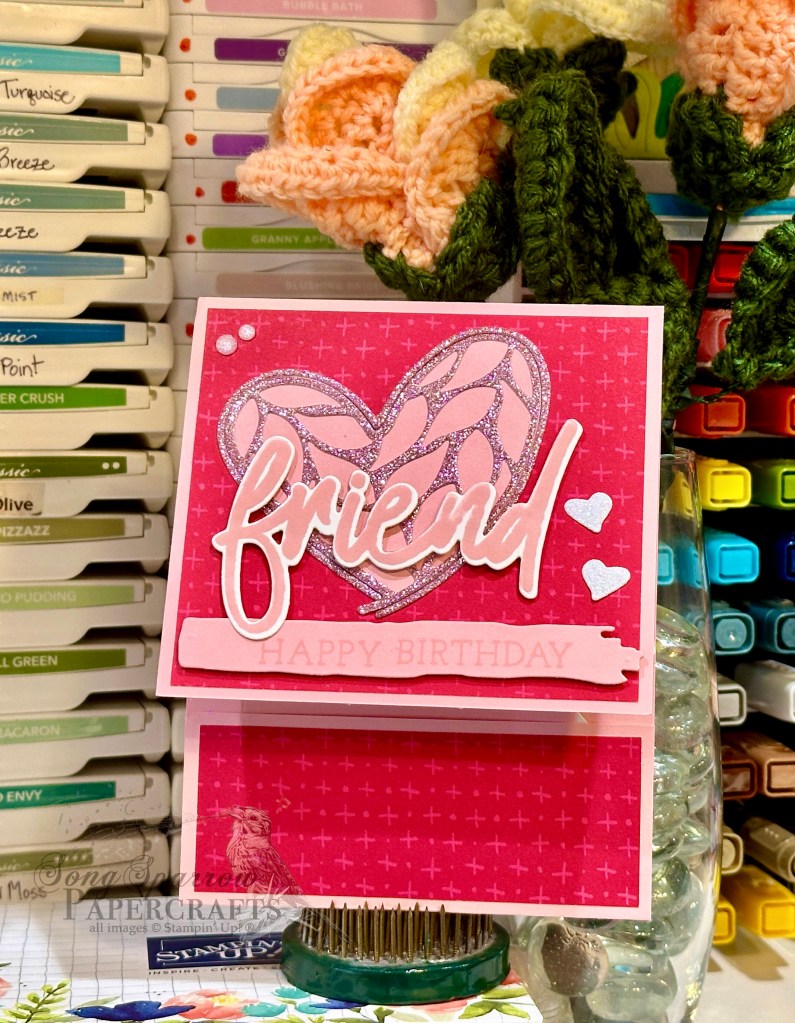
Today we’re continuing to explore all the many ways we can use the Friends for Life bundle by Stampin’ Up! to create fabulous projects. I don’t know about you, but I like to have birthday cards of all kinds on hand for those moments when I need to grab a birthday card on the run. And today’s design is a two-for-one — a gift and a beautiful card!

This gift card design is a modified version of the Slide Up Gift Card Holder by fellow demo Jackie Bolhuis over at Klompen Stampers. I simplified the design to have a slide out gift card holder rather than the slide up version Jackie makes, but both are equally as wonderful for providing a lovely way to give a gift card. What I really loved about this design is it offers so much visual interest. From a beautiful card front that serves double duty as the gift card pocket to the ample space on the inside to dress things up, you have plenty of opportunity to express your creativity.

We get started with a base of Pretty in Pink cardstock. The cardstock is halved on the long edge for this design, but rather than scoring in the center, you’ll instead score at 3 3/4-inches and 9 1/4-inches. That gives you a center portion of standard size and then a flip-up flap and smaller bottom flap for the card front. The smaller flap should be adhered to the card base on either side to create the small pocket, which will be visible when the card front is closed. I chose a sheet of the Flowering Zinnias designer paper as the background panel and cut it so that a small border shows on each of the front panels. The fun background image is the large heart from the Friends for Life die set. I cut a Pretty in Pink heart and used the center portion as the background for the Pretty in Pink glimmer hearts. For the glimmer hearts, nestle the leaf heart die inside the large heart die when diecutting. I then used both the outside and inside hearts on top of the Pretty in Pink solid heart. The sentiment panel is diecut from Pretty in Pink using the smudge banner and then the sentiment is stamped tone-on-tone toward one end. The word friend from Friends for Life is stamped in Pretty in Pink on white cardstock and then diecut with the coordinating die. The sentiment is adhered to the card front with dimensionals .Two small hearts are diecut from white glimmer paper and used as eye-catching accents for the sentiment. The card front is finished of with a few In Color shimmer gems.

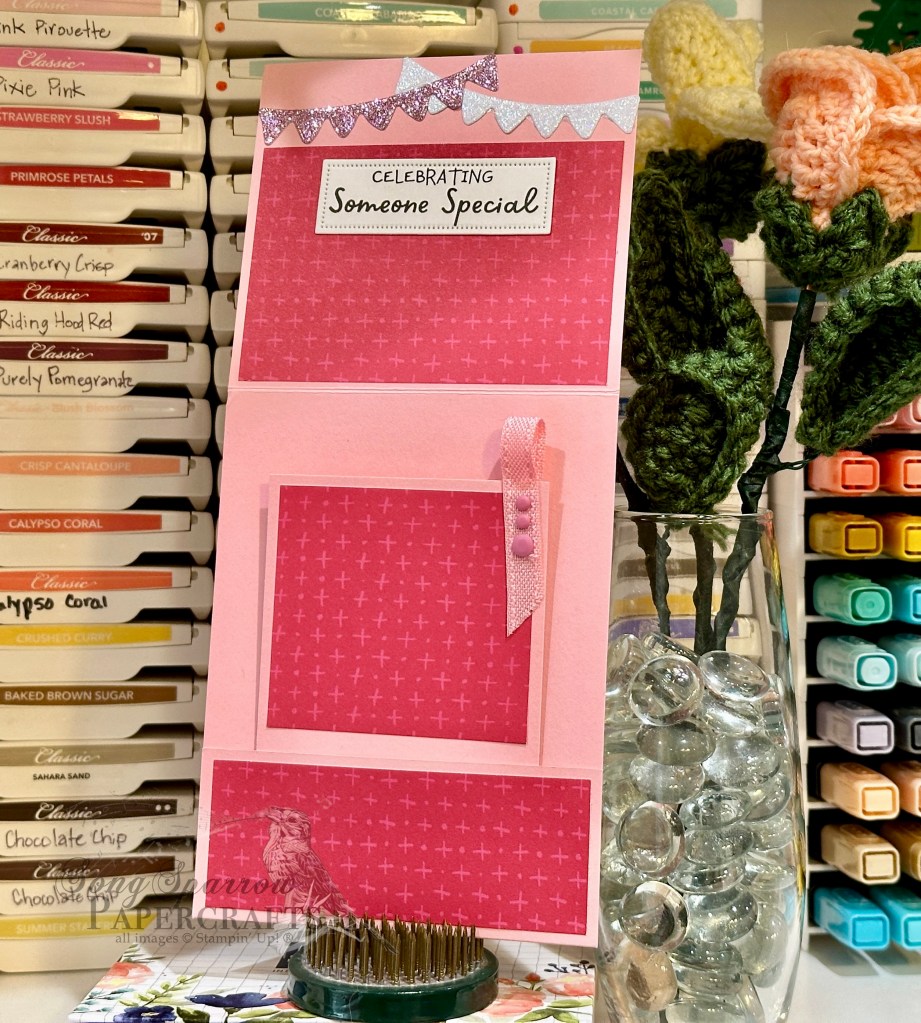
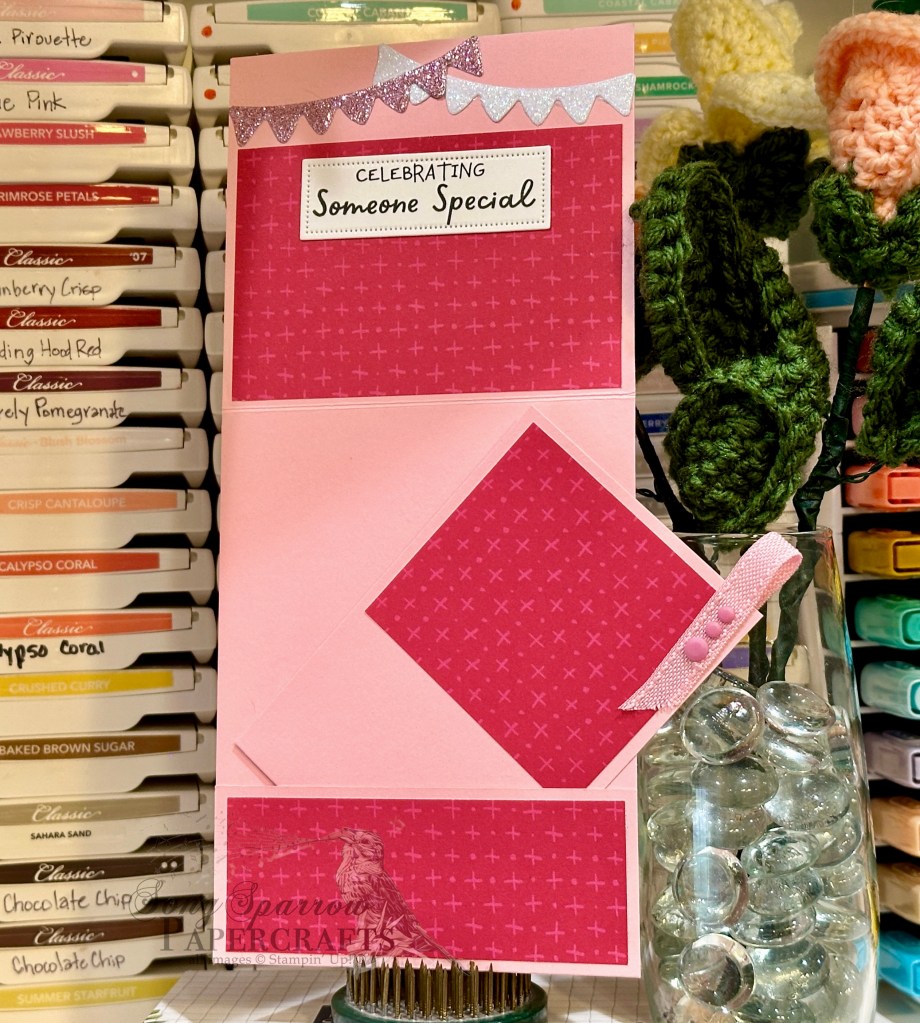
The inside of the card is finished to coordinate with the card front. The top flip panel has a piece of the Flowering Zinnias designer paper. Two shimmery banners diecut from glimmer paper and cut using the Filled with Fun dies bring festive fun to this top panel. The inside sentiment from Filled with Fun is stamped on white cardstock diecut using the Autumn Leaves dies. TIP: In order to get the banner long enough for the sentiment, you’ll want to use the extension method.

The gift card holder itself is a pocket within a pocket. It’s made two-sided so that the portion visible through the card front disappears into the background. A tug on the Pretty in Pink bordered ribbon reveals the gift holder and the gift card in the pocket on the reverse side. Each side has a piece of the Flowering Zinnias paper to coordinate with the rest of the card, along with a repeat of the happy birthday sentiment. I chose to keep the inside of my card very simple, but you can see where you could really dress it up.

I hope you’ll join me tomorrow for a more masculine inspired design.

Products used in today’s gift card:
Pretty in Pink, Basic White cardstock
Flowering Zinnias, In Color glimmer, White glimmer DSP
Friends for Life, Filled with Fun stamps
Friends for Life, Autumn Leaves, Filled with Fun dies
Pretty in Pink bordered ribbon
In Color shimmer gems, In Color resin dots
Dimensionals
Adhesives
Friends for Life

Hey

We’ve made it to the middle of the week. And here in North Texas, we just might need a boat to get about town. We’ve had so much rain over the last several weeks and just keep getting more. Everything is absolutely soaked and it seems we’re maybe stuck in this wet weather pattern for a while longer. I know we’ll be wishing for this rain come July, but for this brief moment, it wouldn’t be so bad if we had a day or two without it!

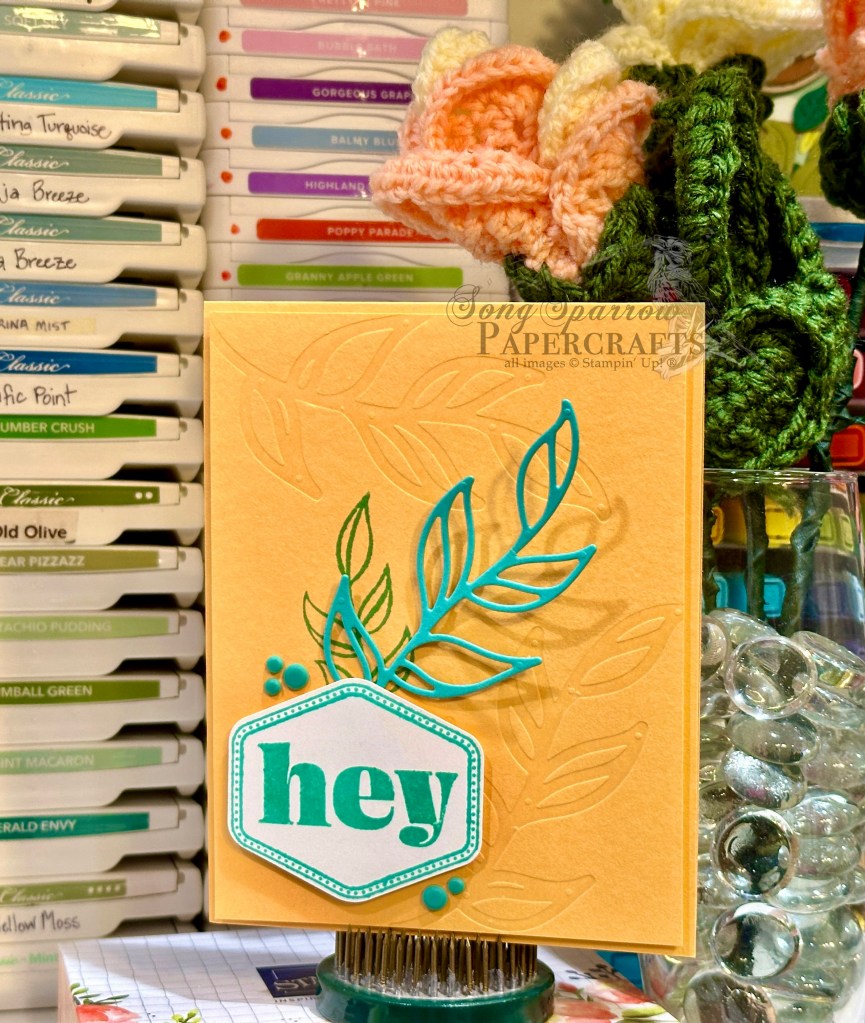
But how about some bright and cheery cards to bring us out of our blues? This week, our featured Stampin’ Up! bundle is called Friends for Life. This terrific bundle includes photopolymer stamps and coordinating dies. And today’s card is a clean and simple design that uses a fun technique called die debossing, where we use our dies to both cut and make an impression at the same time. Click here for a brand NEW Terrific Tuesdays video where I show you how it’s done.

We start today’s card with a base of Peach Pie cardstock. I also cut a quarter-sheet of Peach Pie for the debossed background panel. The twig of leaves is diecut from Summer Splash cardstock using the Friends for Life dies. By making a sandwich of Summer Splash, the twig die, and Peach Pie, you are able to cut and deboss at the same time. I trimmed the Peach Pie panel to ensure that a 1/8-inch border of card base shows on each side. Using the Heartfelt Hexagon stamps, stamp the double border on white cardstock in Summer Splash ink. Then stamp “hey” from the Saying Hey set in Summer Splash in the center of the hexagon, making sure you cover the ending punctuation with a piece of tape. Punch your sentiment panel using the Heartfelt Hexagon punch. Once you have determined the placement of your sentiment panel, stamp a small twig of leaves in the blank space of the debossed background panel. Affix the diecut twig using a glue dot. Then affix your hexagonal sentiment panel on top using dimensionals. Finish with Summer Splash In Color resin dots.

This card design is simple to replicate and could easily be adapted for any occasion by simply modifying color scheme and/or sentiment. Have you tried the die debossing technique? What did you think?

Products used in today’s card:
Peach Pie, Summer Splash, Basic White cardstock
Friends for Life stamps & dies
Heartfelt Hexagon stamps & punch
Saying Hey stamps
In Color resin dots
Dimensionals
Adhesives

Friends for Life

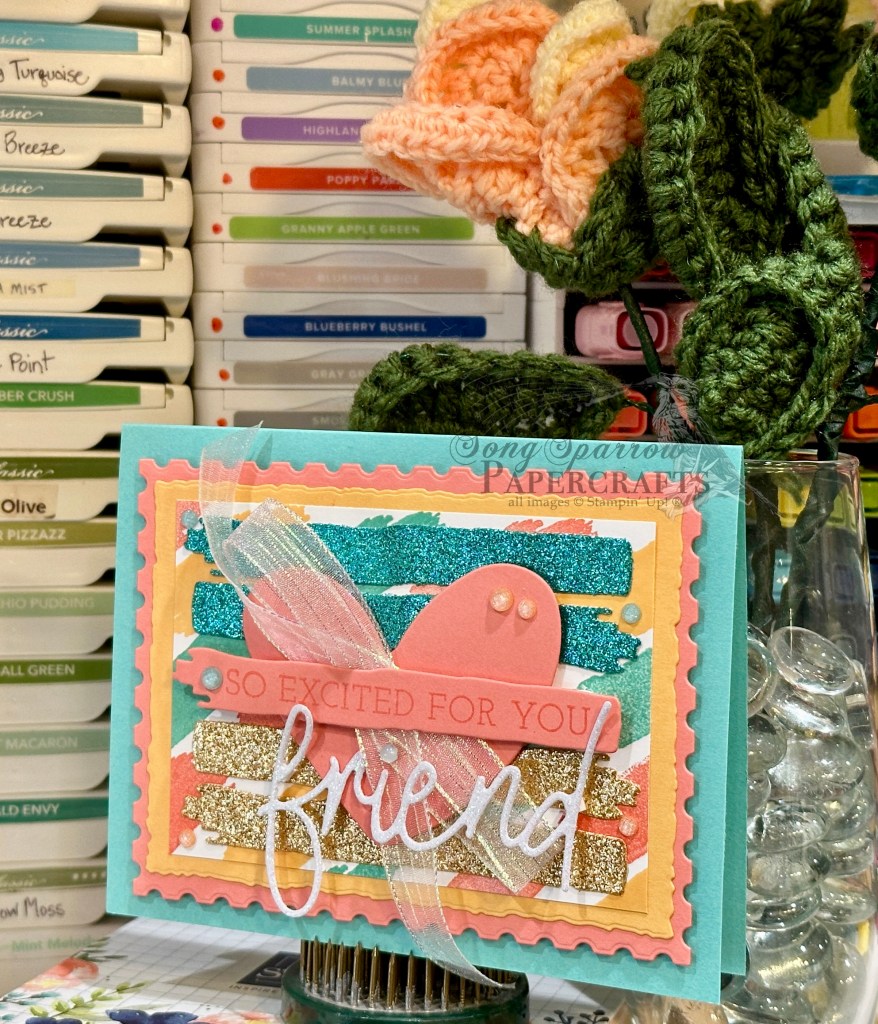
Excited For You, Friend

This week we’re exploring all of the wonderful ways we can use the Stampin’ Up! Friends for Life stamps and dies. Do you ever use your stamps to make your own backgrounds? Today, we’re going to do just that.

I was feeling in the summer mood as I chose the color palette for this card, so I chose a trio that reminds me of rainbow sherbet—Peach Pie, Flirty Flamingo, and Coastal Cabana.

We get started with a standard card base of Coastal Cabana cardstock. Our background panel consists of three separate elements—two mats and a stamped background panel. The bottom mat is Flirty Flamingo diecut using the largest Perennial Postage die. The next mat is Peach Pie diecut using the second-largest Deckled Rectangles die. The stamped background panel is white cardstock, which has been stamped on the diagonal using the ink smudge stamp from Friends for Life in an alternating color pattern of Peach Pie, Coastal Cabana, and Flirty Flamingo. This panel is adhered to the card base with dimensionals.

Our focal section is layered with diecuts from Friends for Life. The base consists of Summer Splash and Peach Pie glimmer paper diecut using the smudge banner and adhered directly to the background panel. Next up is the heart diecut from Flirty Flamingo and then another smudge banner. Part of the sentiment is stamped tone-on-tone on the Flirty Flamingo banner. The heart and sentiment banner are adhered with dimensionals. A faux bow of striped iridescent ribbon is twisted behind the sentiment banner for some eye-catching shimmer. The word “friend” is cut from white glimmer paper and also adhered with dimensionals. I finished things off with In Color shimmer gems and a dot for the i using a white transparent dot.

Tune in tomorrow to see how we’re going to use our detail stamps and dies to add some pizzazz to a clean and simple design.

Products used in today’s card:
Coastal Cabana, Flirty Flamingo, Peach Pie, Basic White cardstock
Friends for Life stamps & dies
Perennial Postage, Deckled Rectangles dies
Striped iridescent ribbon
In Color shimmer gems, transparent dots
Dimensionals
Adhesives

Friends for Life

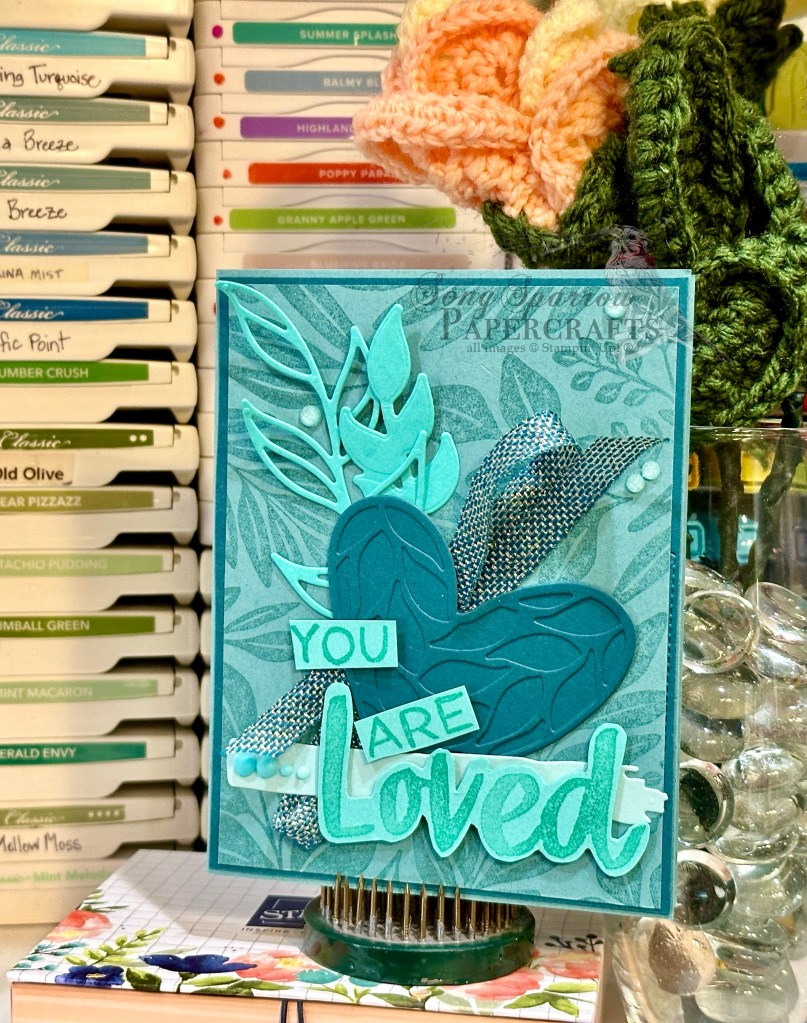
You Are Loved

Happy shiny new week, friends! We had some more crazy, wet weather here over the weekend. So we didn’t get as much time in the great outdoors as we would ordinarily prefer. But we made the most of our sunny breaks with fun family time over the first few days of official summer break.

This week, we will be working with a brand new product bundle from Stampin’ Up! called Friends for Life, which includes photopolymer stamps and coordinating dies. Like so many SU! products, this bundle pairs smashingly well with a whole host of other items in the current catalog.

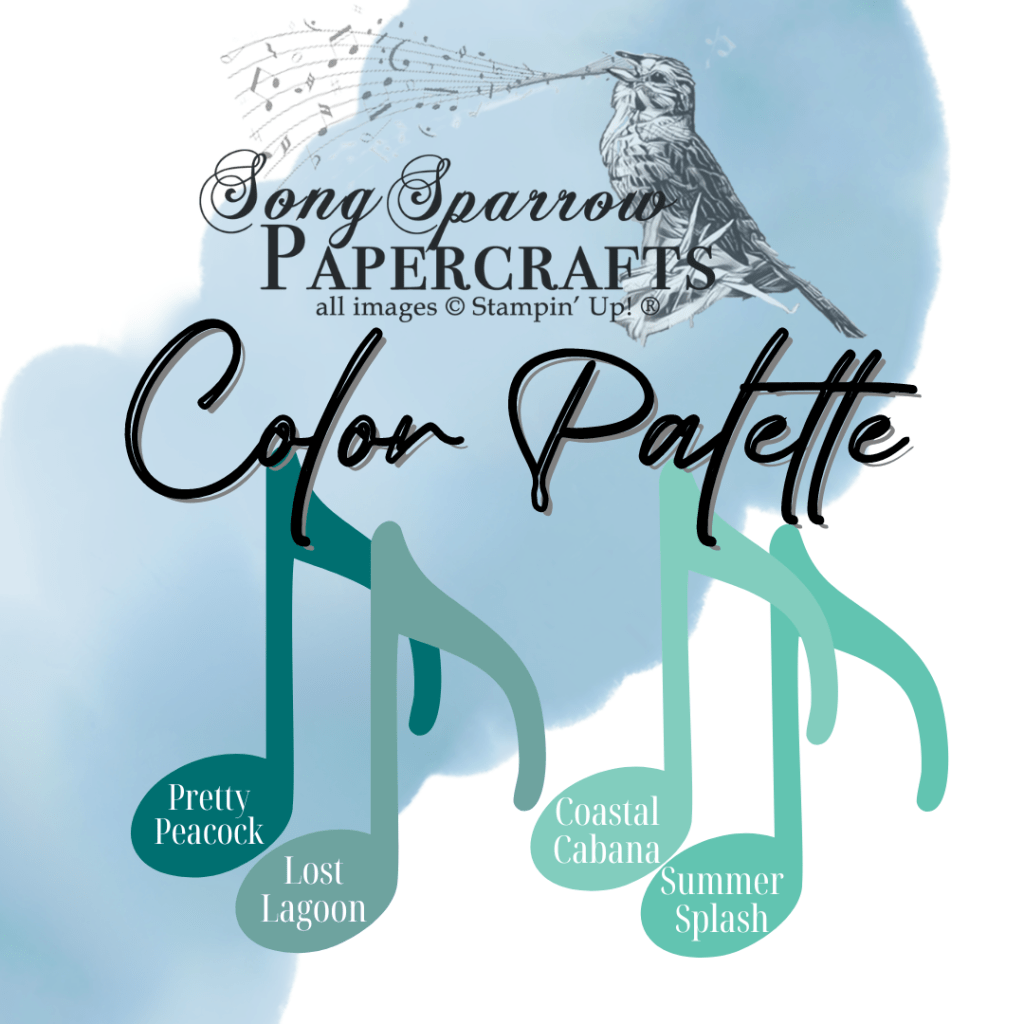
Today’s card design works with a monochromatic color palette. These 4 shades of blue-green are next to one another on the SU! color wheel. And we pair the Friends for Life bundle with the Leaf Collection and Softly Said stamps to turn out this stunner.

We get started with a base of Lost Lagoon cardstock. The background image panel is a quarter-sheet of Lost Lagoon that is stamped tone-on-tone using the Leaf Collection background stamp. This panel is matted with Pretty Peacock. Both the background panel and the mat are cut down to ensure that a very thin border of the card base is showing once both are adhered to the base.

Next, we diecut our complementary image pieces starting with the Pretty Peacock leaf-print heart from the Friends for Life set. I used both the heart outline and the print together when diecutting this piece. I cut a second heart outline from Pretty Peacock to make the center backing piece for the leaf-print heart. The two sets of leaves from Friends for Life set are diecut from Summer Splash cardstock and adhered behind the heart. A twist of Pretty Peacock & Gold metallic trim add a little sparkle to the focal section of the card.

The sentiment from Softly Said is stamped tone-on-tone on Coastal Cabana cardstock. Each word is then cut out using paper snips. The word “loved” is adhered with dimensionals to the paint smear die from the Friends for Life set that is diecut from Pool Party cardstock, while the other block-cut words are adhered askew over the heart using dimensionals. The design is finished off with a combination of Summer Splash In Color shimmer gems and ombré matte decorative dots.

Tomorrow we will be making our own designer paper using the Friends for Life stamps. I hope you’ll come check it out.

Products used in today’s card:
Pretty Peacock, Lost Lagoon, Coastal Cabana, Pool Party, Summer Splash cardstock
Friends for Life dies
Leaf Collection, Softly Said stamps
Pretty Peacock & gold metallic ribbon
In Color shimmer gems, ombré matte decorative dots
Dimensionals
Adhesives

Botanicals · sketches

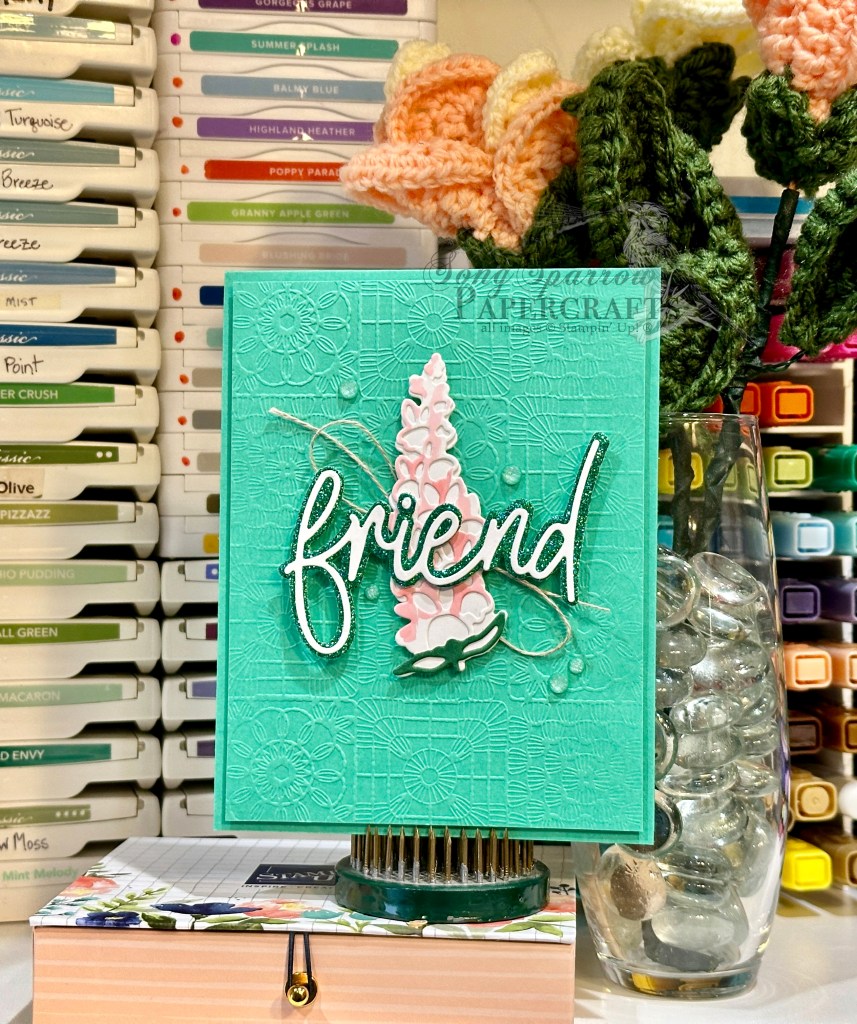
Flower for a Friend

We’re rounding out our week of designs using the Stampin’ Up! Inspiring Snapdragons bundle, which includes coordinating cling stamps and dies. Today, we have a clean and simple design that was inspired by a sketch from my sketchbook.

We get started with a base of Shy Shamrock cardstock. I also cut a quarter-sheet of Shy Shamrock and then embossed using the Cute Crochet embossing folder. The embossed quarter panel is then trimmed down to be 1/4-inch smaller than the standard card front. The panel is adhered to the card front using dimensionals. I next diecut the middle-sized snapdragon from white cardstock using the Inspiring Snapdragons dies. Using Pretty in Pink and Shaded Spruce Stampin’ Blends, I colored the decorative layer of the snapdragon. I used a glue pen to apply adhesive to the decorative layer and adhere it to the snapdragon base. The sentiment is diecut from Shy Shamrock glimmer paper and Basic White cardstock using the Friends for Life dies. I used a glue pen to apply adhesive and adhere to the two sentiment layers together.

To assemble the focal section of the card, I began with a glue dot in the center of the card. I cut linen thread and made a decorative faux bow and used the glue dot to hold it in place. Using dimensionals, I next adhered the snapdragon over the linen thread and then the sentiment over the snapdragon blossom. To ensure the sentiment stands above everything else, the dimensional layer is doubled. I finished things off with a scattering of Shy Shamrock shimmer gems.

I really love this card design because it’s super simple to make and replicate quickly, but it looks like a million bucks. If you have other sentiment diecuts in your stash, you could easily substitute a different one for a multitude of occasions.

Next week, we’ll be focusing on the Friends for Life bundle. I hope you’ll pop in and see how many different ways we can use this fabulous bundle!

Products used in today’s design:
Shy Shamrock, Basic White cardstock
In Color glimmer paper
Inspiring Snapdragons, Friends for Life dies
Cute Crochet embossing folder
Stampin’ Blends
In Color shimmer gems
Linen thread
Dimensionals
Adhesives

Botanicals · L2S Group Instahop

Hey, You’ve Got This

Happy Thursday, friends. I don’t know if you guys have had crazy weather this week, but here in North Texas, we’ve had some big thunderstorms over the last week. The one we experienced on Monday has closed school for the remainder of the school year due to damage sustained to campuses and buildings across the district. I have to say that it’s the craziest wind I’ve experienced in a long time! Today’s card theme is getting through tough times. And there are certainly some folks who have had tough times this week with damage from the storms.

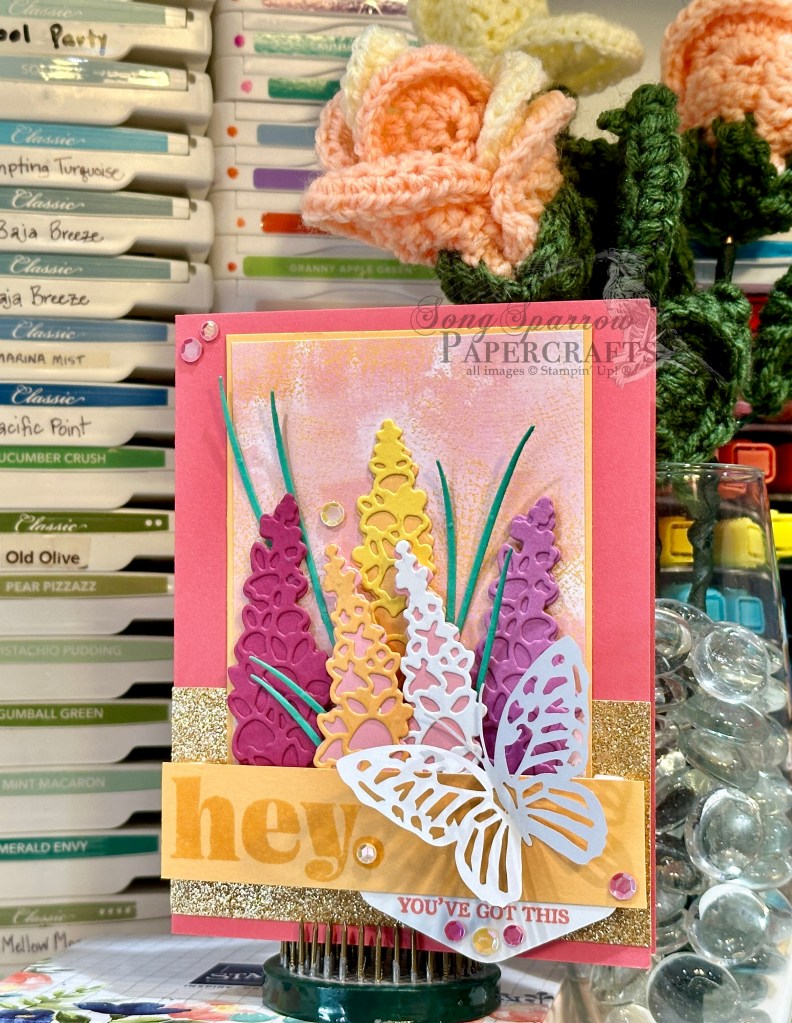
This week, we’ve been exploring all the ways we can use the Inspiring Snapdragons stamps and dies to make beautiful cards. Today, we’re using the dies to build a scene. And I gained color inspiration from Mother Nature herself. When you’re working with a set, especially botanical sets, do you ever look for photos of the plants to find inspiration? I love doing this when I’m looking to create art that imitates life, and that’s precisely how I put together the colors of these snapdragon blooms.

We start our card with a base of Flirty Flamingo cardstock. The background for the image panel consists of a mat of Peach Pie cardstock and a piece of Unbounded Beauty designer series paper. I slid a large strip of Peach Pie In Color glimmer paper behind the image panel for sparkle and a bit of blingy drama. The snapdragon blooms are a combination of Melon Mambo, Petunia Pop, Pretty in Pink, Basic White, Daffodil Delight, and Peach Pie and are all diecut using the Inspiring Snapdragons dies. I layered the blooms to give the illusion of a stand of snapdragons in the garden. The blades of grass are cut from Shy Shamrock cardstock and are scattered in amongst the snapdragon blooms. The sentiment panel consists of a strip of Peach Pie and a tab of white cardstock punched using the Heartfelt Hexagon punch. “Hey” from the Saying Hey stamp set is stamped tone-on-tone on the Peach Pie strip, while the “you’ve got this” from Unbounded Love is stamped in Flirty Flamingo on the white hexagon half-tab. I used Melon Mambo and Pumpkin Pie shiny sequins to add pops of sparkle across the card front and a large paper butterfly to really draw the eye in to the sentiment panel.

Today’s card is a part of the Luv 2 Stamp Group Instagram Hop. Click here to head over to my Instagram feed and check out what the other demos in our L2S Group have created for you today!

Products used in today’s card:
Flirty Flamingo, Peach Pie, Petunia Pop, Melon Mambo, Daffodil Delight, Pretty in Pink, Shy Shamrock, Basic White cardstock
Unbounded Beauty, In Color glimmer DSP
Inspiring Snapdragons dies
Saying Hey, Unbounded Love stamps
Shiny sequins
Paper butterfly
Dimensionals
Adhesives
Heartfelt Hexagon punch

Botanicals · sketches

Hi, Friend

Howdy, friends! Thanks for popping by today for another look at the Inspiring Snapdragons stamps and dies bundle. Snapdragons were one of my Granny’s favorite seasonal flowers. She had the best green thumb when it came to snapdragons. I, however, did not inherit that part of her gardening skills. I have the worst luck with snapdragons, even though I enjoy them a lot. *grin*

We’re revisiting our sketch from yesterday … with a little twist. The fun thing about sketches is that they give you a place to start with design and give you the flexibility to adapt them. And today’s card is a perfect example of adapting, where I scaled down and adjusted the placement of the image panel to allow more of my background panel to show.

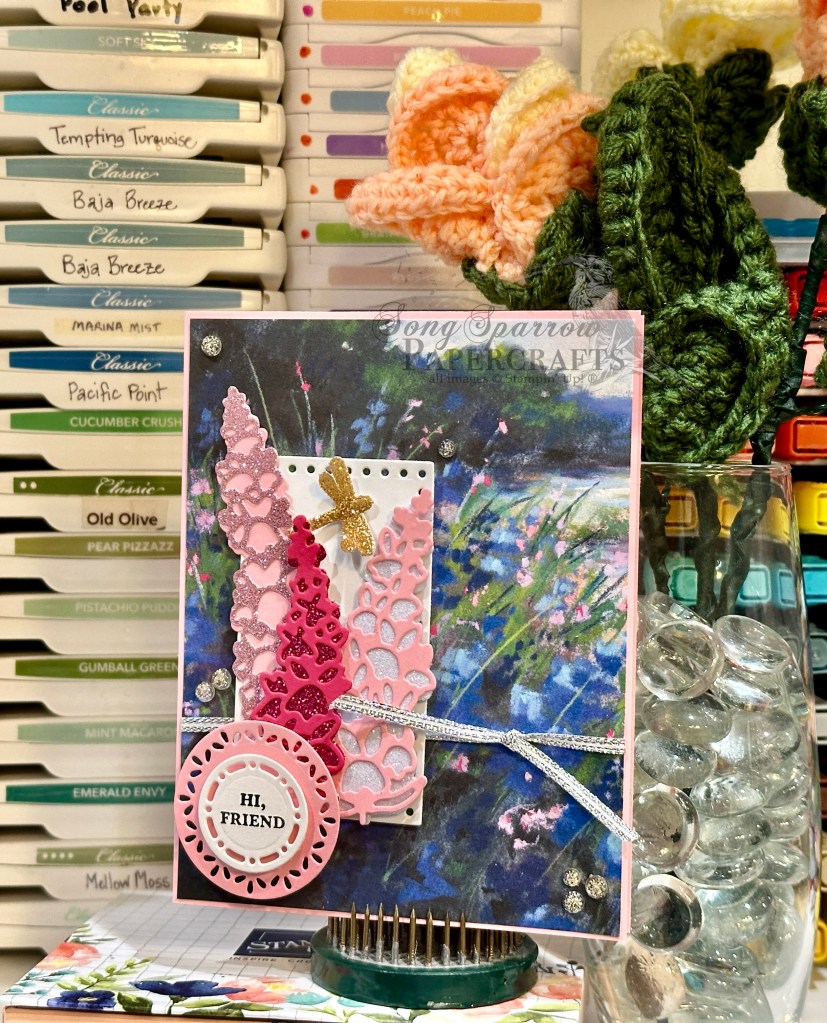
So let’s get started on today’s card. We begin with a base of Pretty in Pink cardstock. The background panel is a sheet of Meandering Meadow designer series paper. I chose a sheet that had flowers that, to me, had similar shape and look to snapdragons. I tied silver & white trim around the designer paper panel before adhering to the card base.

The image panel is a base of white cardstock diecut using the Everyday Details dies. I chose to make several snapdragons in the pink color family to really pull the pink blossoms forward in the background paper. I used a combination of cardstock and glimmer paper for the snapdragon blooms, including Berry Burst, Melon Mambo, Pretty in Pink, white, and Petunia Pop. Each blossom consists of two layers—a base and detail layer. I adhered the snapdragon blossoms to the image panel and varied the height of each using dimensionals. The image panel is adhered to the background layer using dimensionals.

The sentiment panel is cut from white cardstock using the Spotlight on Nature dies. The sentiment from Wonderful Thoughts is stamped in black in the center. The sentiment panel mat is diecut from Pretty in Pink using a larger die from the Spotlight on Nature die set. The layers are adhered using dimensionals and then affixed to the card front using stacked dimensionals to ensure the sentiment panel stands above the layered snapdragons. I added a dragonfly cut from In Color glimmer paper above the snapdragon blossoms and then finished things off with iridescent foil gems.

I hope you’ll pop in tomorrow to see how we can use this fabulous bundle to build a scene! You won’t want to miss it.

Products used in today’s card:
Pretty in Pink, Petunia Pop, Melon Mambo, Basic White cardstock
Meandering Meadow, In Color glimmer DSP
Wonderful Thoughts stamps
Inspiring Snapdragons, Everyday Details, Spotlight on Nature dies
Silver & white trim
Iridescent foil gems
Dimensionals
Adhesives

Botanicals · sketches

Snapdragon Love

This week, we’re going to be working with the Inspiring Snapdragons bundle by Stampin’ Up! This bundle includes cling stamps and coordinating dies. We’ll be looking at all of the ways that we can use these stamps and dies, both together and apart, to create beautiful cards.

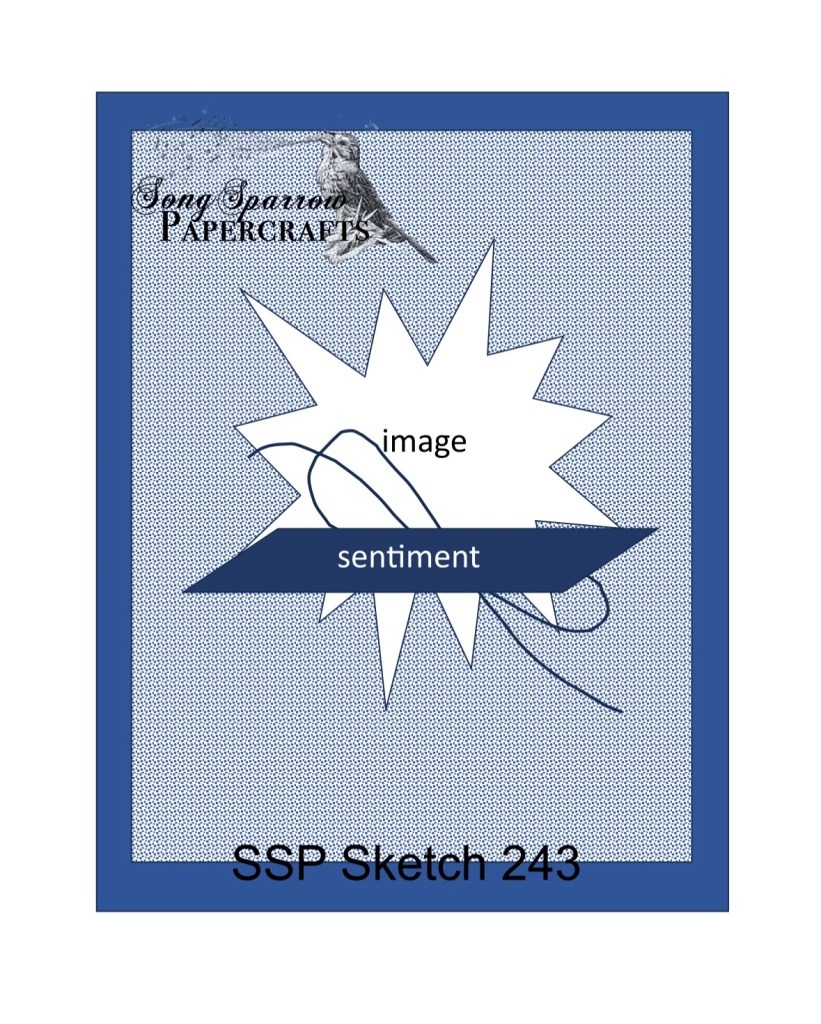
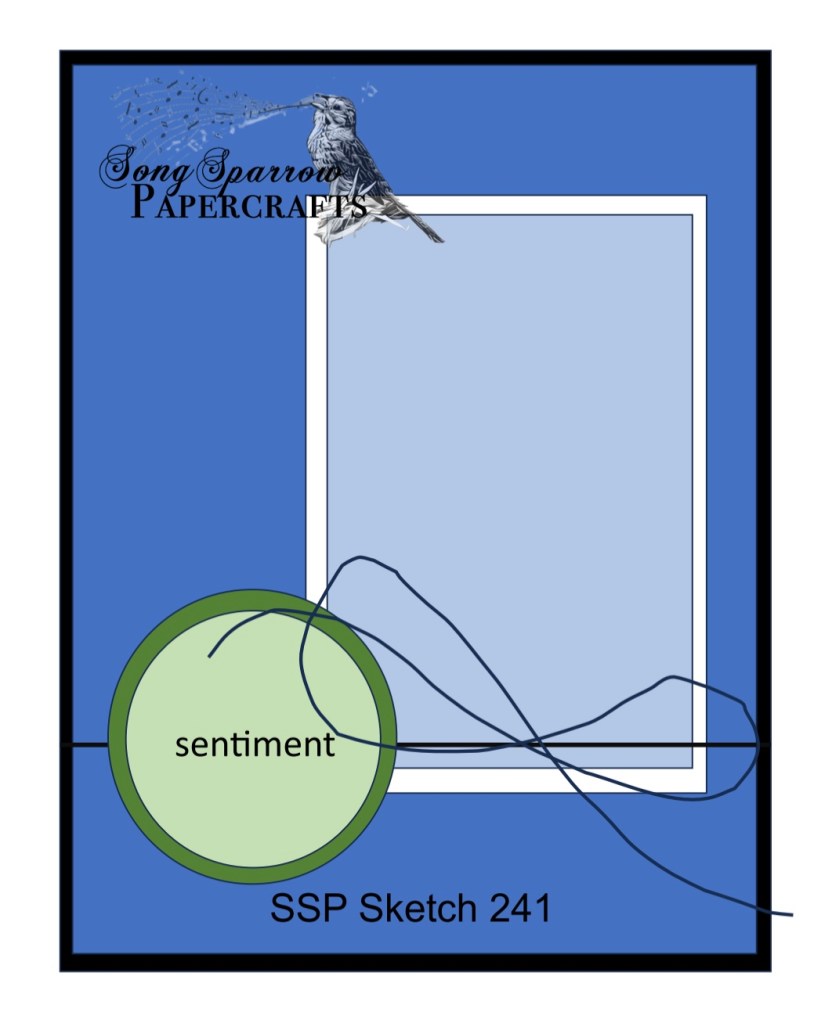
And today’s card is based on a sketch from my sketch book. When I come across a great card, I typically take a screenshot and add it to my inspiration folder. Sometimes I am saving a card because I’m inspired by product usage, but a lot of times, I’m saving it as inspiration for layout when using products from my own stash. I often share with you guys when I found inspiration for a layout but don’t usually include a sketch. I have begun converting awesome layouts into digital sketches and thought I would begin sharing them with you as I use them. Love a sketch? Please feel free to save it to your own sketch collection.

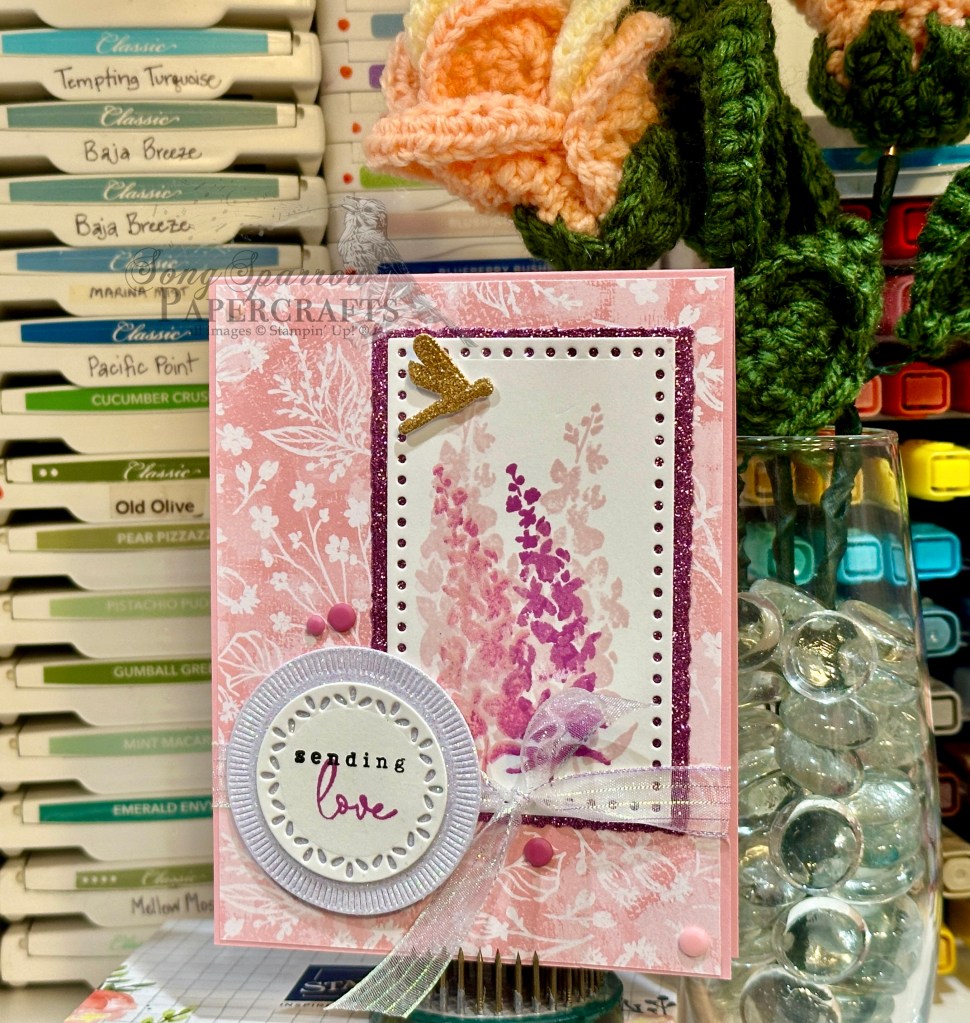
Today’s card starts with Pretty in Pink cardstock. The patterned background layer is a sheet of the Unbounded Beauty designer series paper. For the image panel, I started with a sheet of white cardstock diecut using the Everyday Details dies. The image panel mat is diecut from Petunia Pop In Color Glimmer paper using the Deckled Rectangles dies. On the white panel, I stamped the two smaller snapdragon images using Bubble Bath, Pretty in Pink, and Petunia Pop ink. I then adhered the two panels together using my adhesive runner.

Next, I diecut the sentiment panel and mat. The sentiment panel mat is diecut from white glimmer paper and the sentiment panel itself is diecut from white cardstock using nesting circles from the Spotlight on Nature dies. The sentiment is from the Country Flowers set. I first stamped the word “sending” in black ink towards the top of the blank sentiment panel. Then I stamped “love” in Petunia Pop underneath, allowing part of the L to overlap the word “sending.” Adhere these two panels together with adhesive. TIP: To prevent stamping any portion of the word “sending” while stamping the remaining portion of your sentiment, I covered it with a piece of tape — any tape will do. I have tried cleaning my stamp in between stamping portions, but I still manage to get a ghost image of the previously inked portion. And I’ve found the taping method to be the most effective way to prevent that.

To finish things off, adhere the image panel on the top-right portion of the card. Tie sheer ribbon around the bottom third of the card, covering the bottom of the image panel. I chose to tie the sheer ribbon in a knot, but a bow could also work. Next, adhere the sentiment panel over the ribbon and bottom-left portion of the image panel using dimensionals. I added a gold glimmer dragonfly and In Color resin dots to finish things off.

Tomorrow, we’re going to take our sketch for another spin with a little variation. I hope you’ll pop in and let me know what you think!

Products used in today’ card:
Pretty in Pink, Basic White cardstock
Unbounded Beauty, In Color Glimmer DSP
Inspiring Snapdragons, Country Flowers stamps
Iridescent striped trim
In Color resin dots
Dimensionals
Adhesives