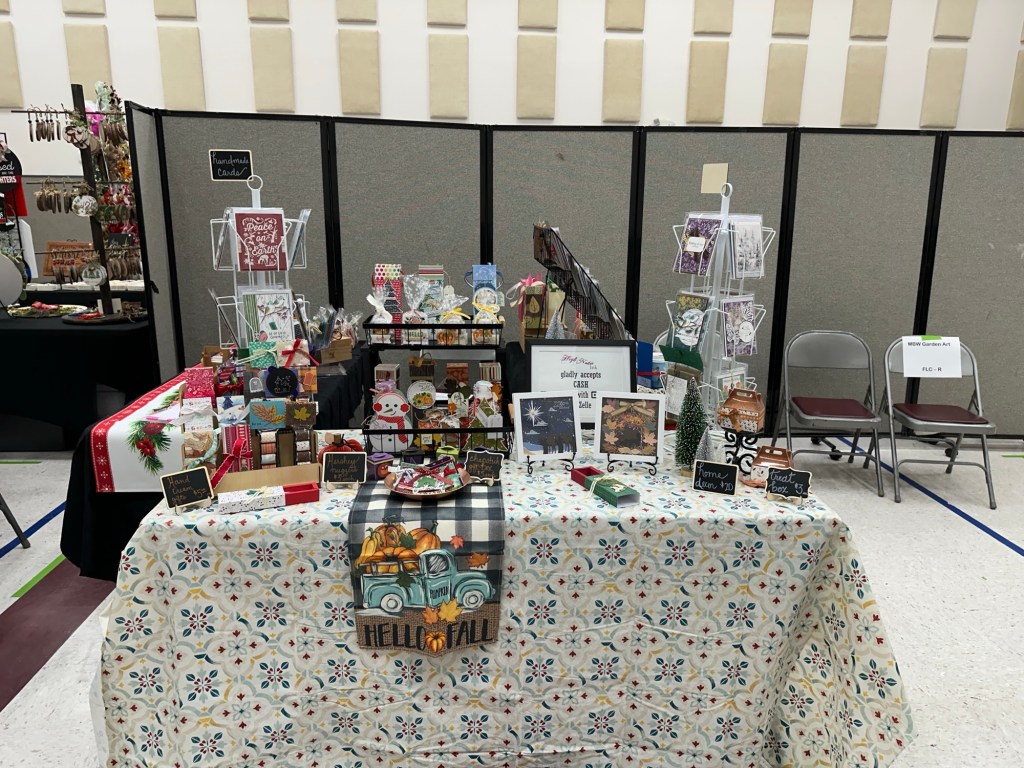
It’s show day! Show days are always a little frazzled as you get the final touches on the booth setup and hope for the best.
If you’re local to the DFW area, come see me at First Methodist Rowlett! I’m in booth S in the Family Life Center.
It’s show day! Show days are always a little frazzled as you get the final touches on the booth setup and hope for the best.
If you’re local to the DFW area, come see me at First Methodist Rowlett! I’m in booth S in the Family Life Center.
It’s been a tremendously busy week. I’ve been working away in the craft room as I’m down to the wire for my craft booth items. Today is setup day and tomorrow is booth day!
Today, I’m popping in to share another fun giftie that will be available in my shop — home decor items. On one of our recent virtual team events, we made a framed project and I just fell in love with the idea.
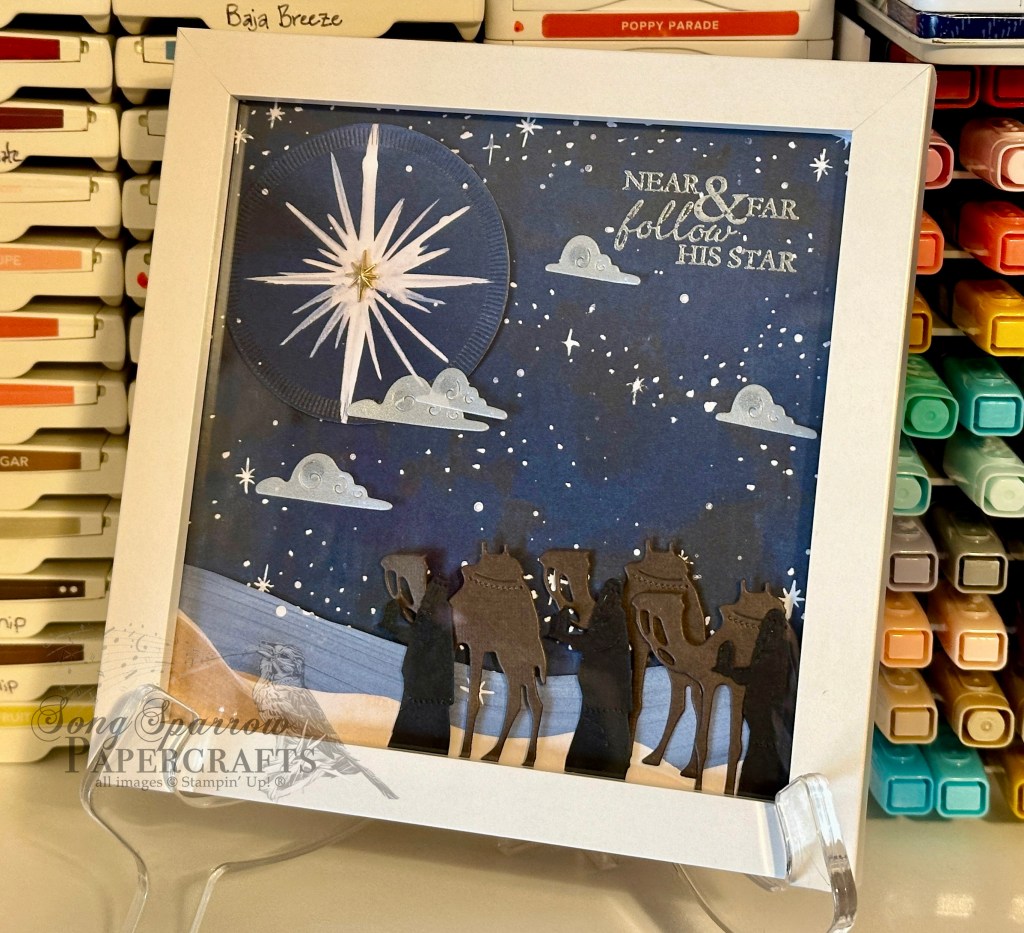
And as with most things I prefer to undertake in the craft room, projects don’t have to be overly complicated to have a WOW factor. Today’s sample is a Christmas project using the O Holy Night suite. This set of products retired last year and I’m still super sad about it! This particular project is a combination of patterned paper and diecut elements — most of them are repeated images. A simple bit of layering with dimensionals builds a gorgeous scene of the wisemen on their journey to find Jesus.
For those of you who have been following along over the last week and expressed some interest in the lip balm box, I was able to carve out a little time to make a video and PDF tutorial to walk you through putting a box together.
Next week, I’ll be popping in with a preview of my favorite soon-to-release Online Exclusive bundle. It’s otterly adorable! *wink wink*
It’s a bright and shiny new week, and I don’t know about you, but last week was a doozy. I felt like we were meeting ourselves coming and going! This week should be a little less frantic with the kiddos being out of school for fall break.

Last week, we got a special treat here in North Texas as the conditions were perfect (for those who live in areas without light pollution) to see the aurora. My parents had the absolute best view. Just look at that sky! What a terrific reminder of the majesty of God’s creation!
This week, I’m still frantically working to finish up items for my booth for this weekend’s craft fair. And since so many of these things are gift items and we’re heading into the gift-giving time of year, I thought it the perfect opportunity to continue sharing some of the things that go in my booth.
This year, I’m trying something new. I found a wonderful gift box by The Paper Pixie to hold small tubes of hand cream. Once I got the hang of making the box, which is a little tricky at first, these cute gifties come together pretty quickly. I try to have a good variety of seasons and occasions represented in the packaging. I found a really nice variety pack of hand creams that came in a whole assortment of fragrances on Amazon, but this box is also perfectly sized for the smaller L’Occitane hand creams if you happen upon a good deal for a variety pack.
If you’re a craft fair-goer, what types of things are you looking for? Tell me in the comments!
It’s craft fair season, and I’m hard at work preparing for an upcoming show. I like to offer a wide variety of products outside of just cards because, quite honestly, it always seems like the gift items sell best.
One surefire hit is always chocolate. And today’s cute giftie is a custom-wrapped chocolate bar. I’ve seen lots of clever ways to wrap a chocolate bar, but I really love this particular envelope design because it’s super quick and simple to make! super helpful when you want to turn out a bunch in a short amount of time.
Using double-sided patterned paper means that your treat envelope is decorative from start to finish. Several glue dots in the chocolate bar help it stay put inside the envelope. I like to hold the envelope closed with ribbon and then add a cute decorative element on top. Isn’t this an adorable way to give a sweet treat?!
We’ll be continuing our look into my craft booth next week. I have lots more cute stuff to show you and a video tutorial to share!
It has been a busy week this week, and I wish I could say that it involved more time in the Song Sparrow Papercrafts studio. But alas, the call of work and homelife have prevailed. We’ve all had our share of homework to do. And I don’t know about you, but we’ve been watching the trek of Hurricane Milton with bated breath.
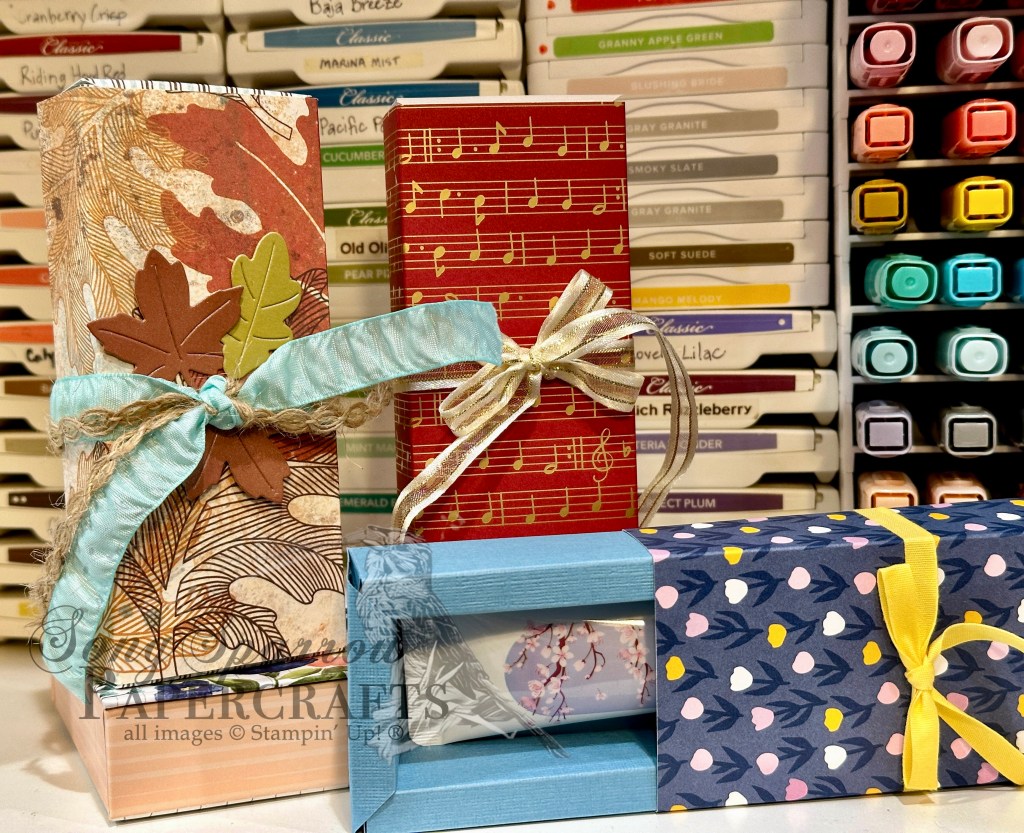
As I’m preparing for an upcoming craft show, we’re taking a look at some of the fun gifties that I’ll have in my booth. Aside from having the fun edible treats, I love to create little gift items that contain something useful. And who doesn’t love a good tube of lip balm? I have some in just about every room of the house, plus my car and my purse and at my office.
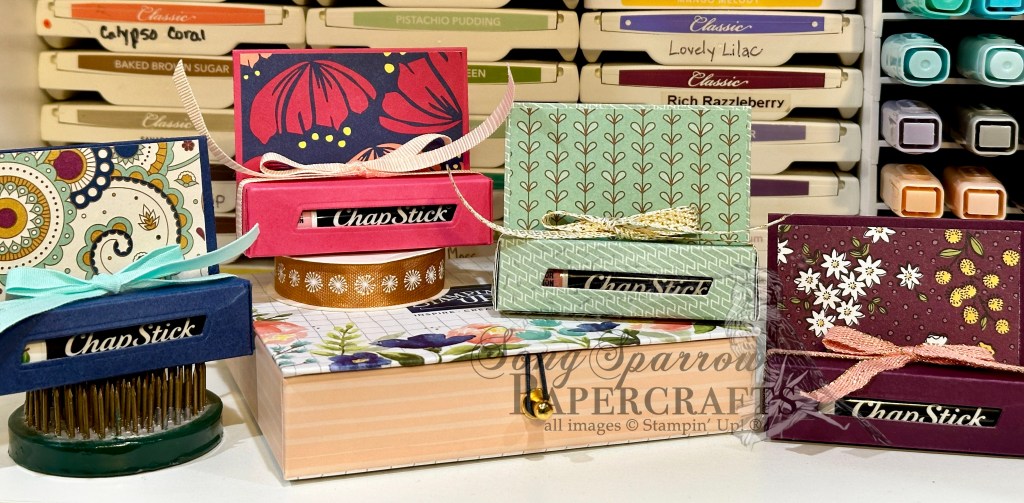
I found a super cute gift box tutorial over at The Paper Pixie that I have adapted/simplified a bit. Are these not the cutest little boxes? You can use solid or patterned cardstock for the box itself. I had some thicker patterned cardstock, and it worked super well. But as you can see, a plain box doesn’t have to look plain once you’re done dressing it up!
If you’re interested in a PDF tutorial for these cute boxes that includes my little shortcuts, simply drop me a comment with a link to your socials (or other means of sending it to you). I’ll be sending out all of the requested tutorials from this week’s projects over the weekend.
I’ll be popping in with a few more craft show goodies over the next few days. So I hope you’ll pop in and check out more cute gifties.
We’ve made it to a new week, and you may have noticed my absence at the end of last week. It’s crafting show season and I have 2 that fall very close together. Needless to say, I didn’t budget quite enough time to do ALL.THE.THINGS last week and so my planned blog post materials had to be set aside.
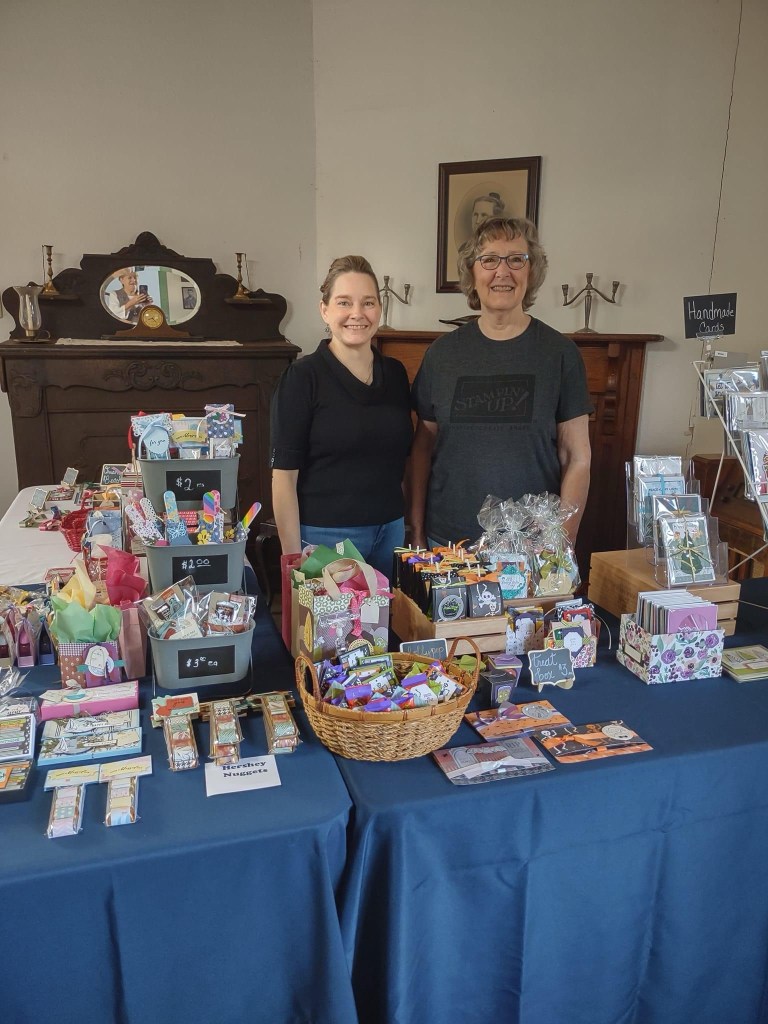
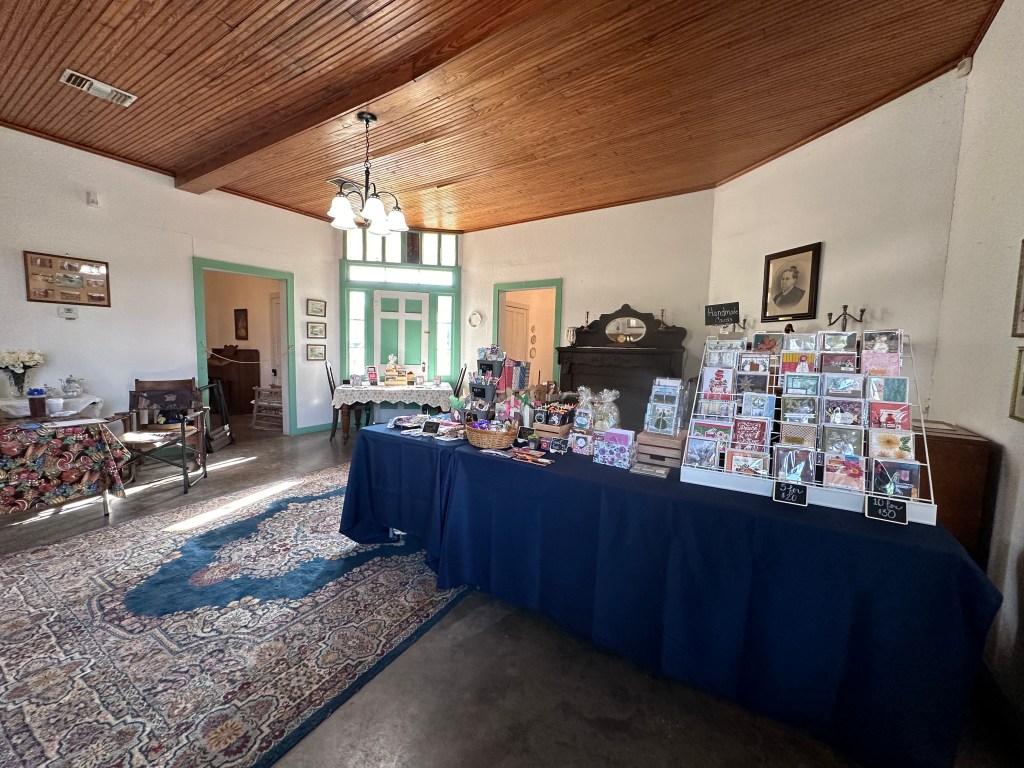
Over the weekend, I’m teamed up with my mom to set up a booth for an event in her area. We had a lot of fun, and I figured out just how much more work I have to do to be prepared for my next event in TWO short weeks!
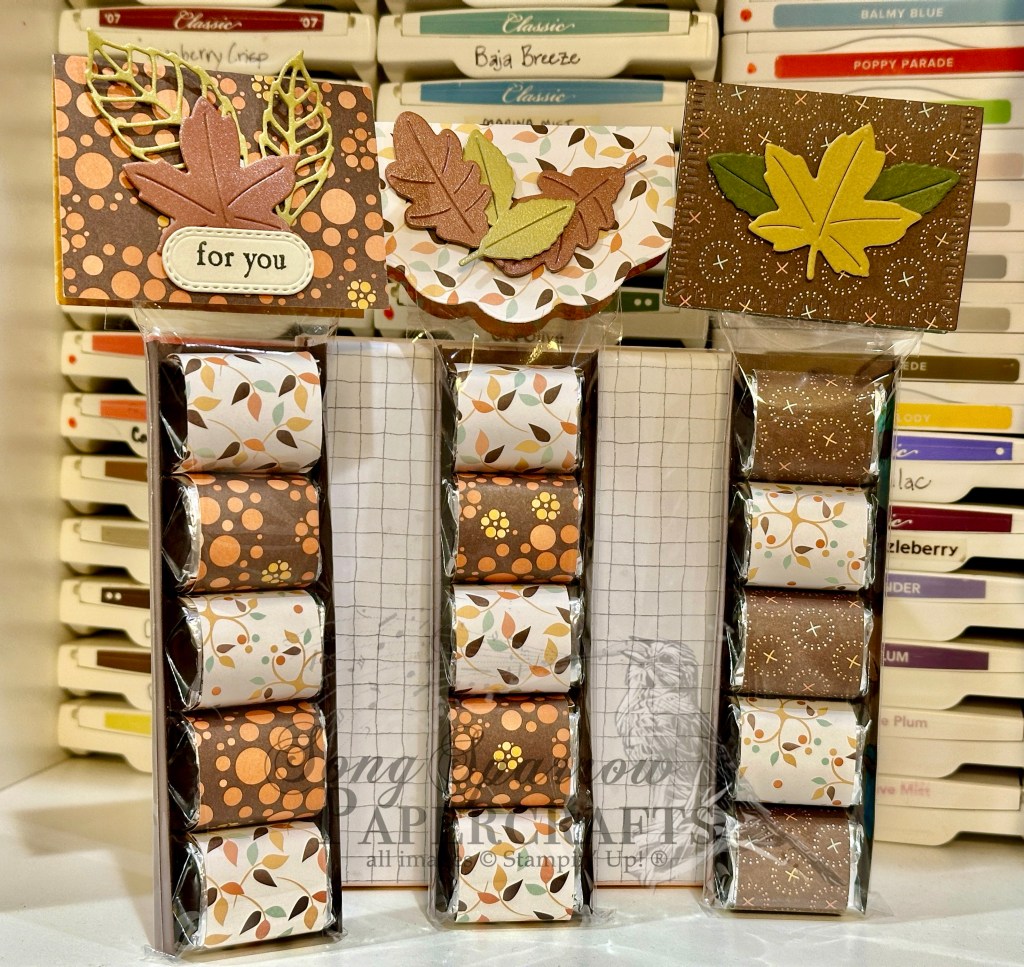
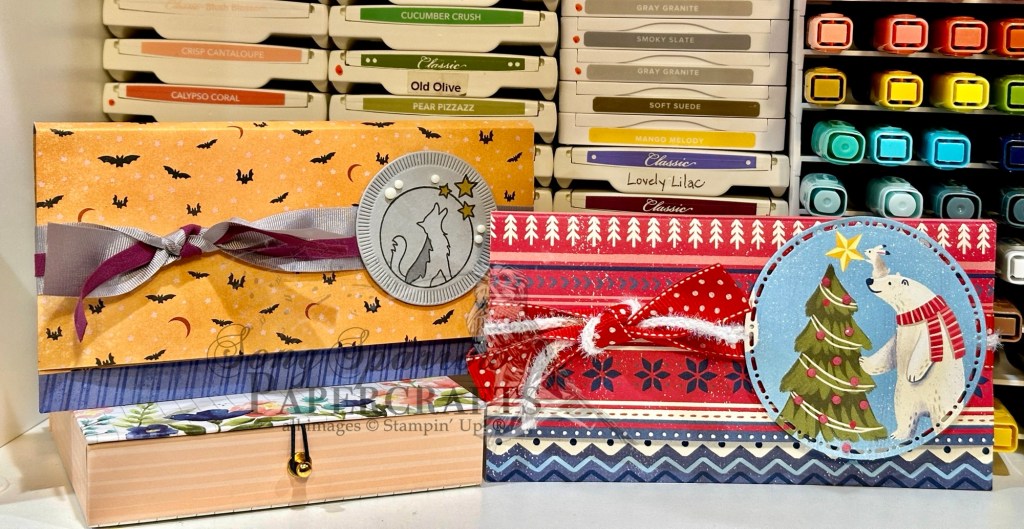
So this week, I’ll be sharing some of the projects that I make especially for my craft fair booths. And first up are these super cute little Hershey nugget treat packages. I really love these for a quick little something to pass along to someone as a pick-me-up or thank-you.
When I’m preparing craft booth items, I always start by using the retired product in my stash. So these nuggets use several different packets of retired fall-inspired paper patterns. And then I dress up the packaging with dies that meet the theme. We have such lovely fall-inspired die sets that I, of course, had to reach for both Autumn Leaves and Changing Leaves for my dress-up elements for these nugget packets. I’ll be offering a variety of seasonal packaging for the nugget treats, including fall, Halloween, and Christmas.
If you’re interested in the tutorial for these Hershey nugget treats, drop me a comment with your e-mail or social media link so I can send you a copy.
Pop in tomorrow to see what else I’ll be offering in my craft show booth.
This week, we’re using the Nests of Winter suite by Stampin’ Up! to create our designs. This suite of products includes coordinating stamps & dies, patterned paper, an embossing folder, twine, and shimmer gems. Today’s card showcases the versatility of this set as we make a lovely fall design.
I don’t know if you’re one to change your decor based on the seasons, but I really love to do that. Some seasons I go more “all out” than others, but I have some very basic elements around the house that change based on the season. One thing I’m sure to change is the wreath on my front door, which inspired today’s design. The greenery swag in the Winterly Tree Tops set is perfect for wreath-making!
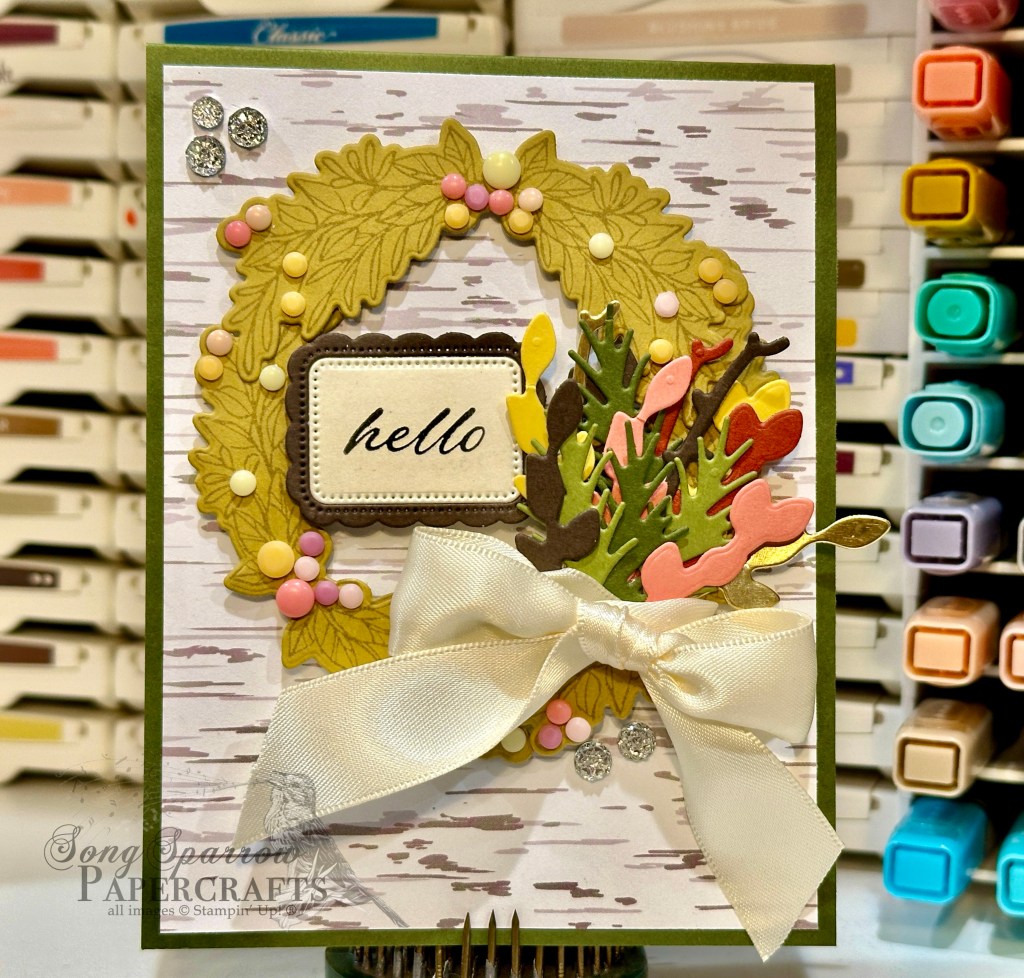
We get started on our card with a base of Mossy Meadow cardstock. Our background panel is the woodgrain pattern from the Nests of Winter patterned paper pack. I just love the old barn door look here! Our wreath is made with the greenery swag image from the Winterly Tree Tops stamp set. The image is stamped in Crumb Cake on Wild Wheat cardstock. The berries are completed with a combination of In Color resin dots and Rainbow dots using a combination of pinks, oranges, and yellows to really reflect our fall color palette. I decided to mimic the look of fall wreath picks and used the smaller greenery elements in the Winterly Tree Tops die set to accomplish this. The picks are a combination of Early Espresso, Old Olive, Mossy Meadow, Calypso Coral, Daffodil Delight, Cajun Craze, and gold foil papers. They’re tied together with some of the lovely Very Vanilla satin ribbon. Our greeting placard is a combination of Very Vanilla and Early Espresso cardstock diecut using the Unbounded Love dies and the sentiment is stamped from Wonderful Thoughts is stamped in black. Everything is adhered with dimensionals to really give the look of a wreath hanging on the door. A few drusy embellishments add a little sparkle and really bring our eyes across the lovely wreath.
Tomorrow we’re going to be using a new sketch and once again using our Nests of Winter to create a lovely fall-inspired card design. Come check it out!
Products used in today’s card:
Mossy Meadow, Very Vanilla, Calypso Coral, Daffodil Delight, Cajun Craze, Old Olive, Early Espresso cardstock
Nests of Winter, gold foil DSP
Winterly Tree Tops stamps & dies
Unbounded Love dies
Rainbow dots, In Color resin dots
Very Vanilla satin ribbon
Drusy embellishments
Dimensionals
Adhesives


We’ve made it to the halfway point of the week already, friends. I don’t know about you, but I have more things to do than I have time to do them these days! I’m preparing for 2 craft shows this month and my craft room looks like it! *snicker*
This week, we’re using the Stampin’ Up! Nests of Winter suite of products to create our projects. Today, we’re pairing up the lovely patterned papers with a few other current products in the SU! lineup to create this lovely Hello card.
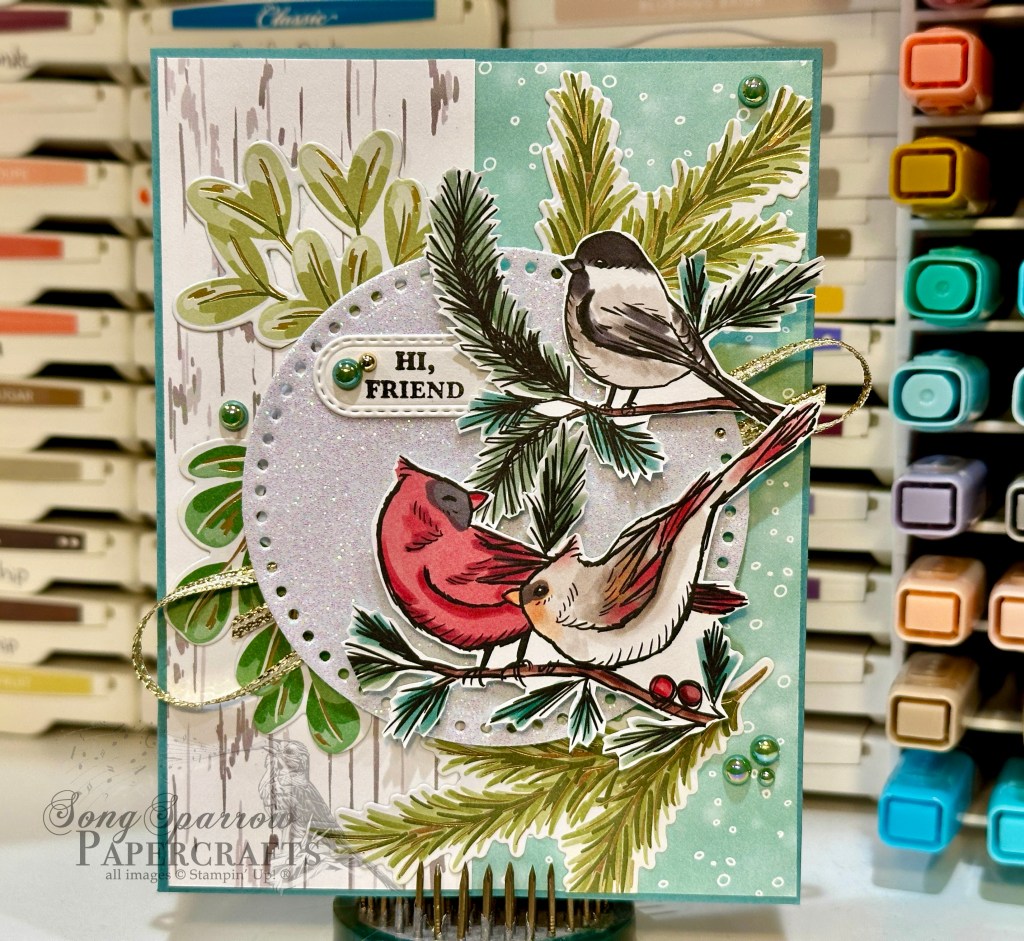
We start with a base of Lost Lagoon cardstock. I love how this base brings out the subtle hues in the greenery around the birds. The background panel consists of the snowy and woodgrain patterns from Nests of Winter. Our focal panel is all about the birds. I chose to fussy cut the chickadee and pair of cardinals from the sheet from Nests of Winter to serve as our focal images. Our birds are layered on top of a sparkly glimmer paper circle cut with the Spotlight on Nature dies and greenery cut from the Season of Green & Gold paper with the Golden Greenery dies. A twist of gold trim behind the panel complements the sparkle of the gold-foiled greenery. The sentiment from Wonderful Thoughts is stamped in black on white cardstock and then diecut with the Changing Leaves dies and tucked behind the greenery. A few blooming pearls across our design help the eye move across our focal panel to take in every detail.
Tomorrow we’re going to build a fall design with our feature suite. I hope you’ll pop in and see how it turns out!
Products used in today’s card:
Lost Lagoon, Basic White cardstock
Nests of Winter, white glimmer, Season of Green & Gold DSP
Wonderful Thoughts stamps
Golden Greenery, Spotlight on Nature, Changing Leaves dies
Gold trim
Blooming pearls
Dimensionals
Adhesives


It’s starting to feel a lot more like fall in North Texas as our mornings are beginning to be more brisk. Fall is one of my favorite seasons, and one of the things I love about fall is that our winter bird friends return. My son got the family into bird watching when he was younger and we have enjoyed it ever since. We have birds that come and go from our area each year, and we enjoy looking for them.
This week, we’re using the Stampin’ Up! Nests of Winter to suite to design our projects. This suite of products includes lovely patterned paper, stamps, and dies that all share bird images. Today, we’re using a very simple layout to create our design.
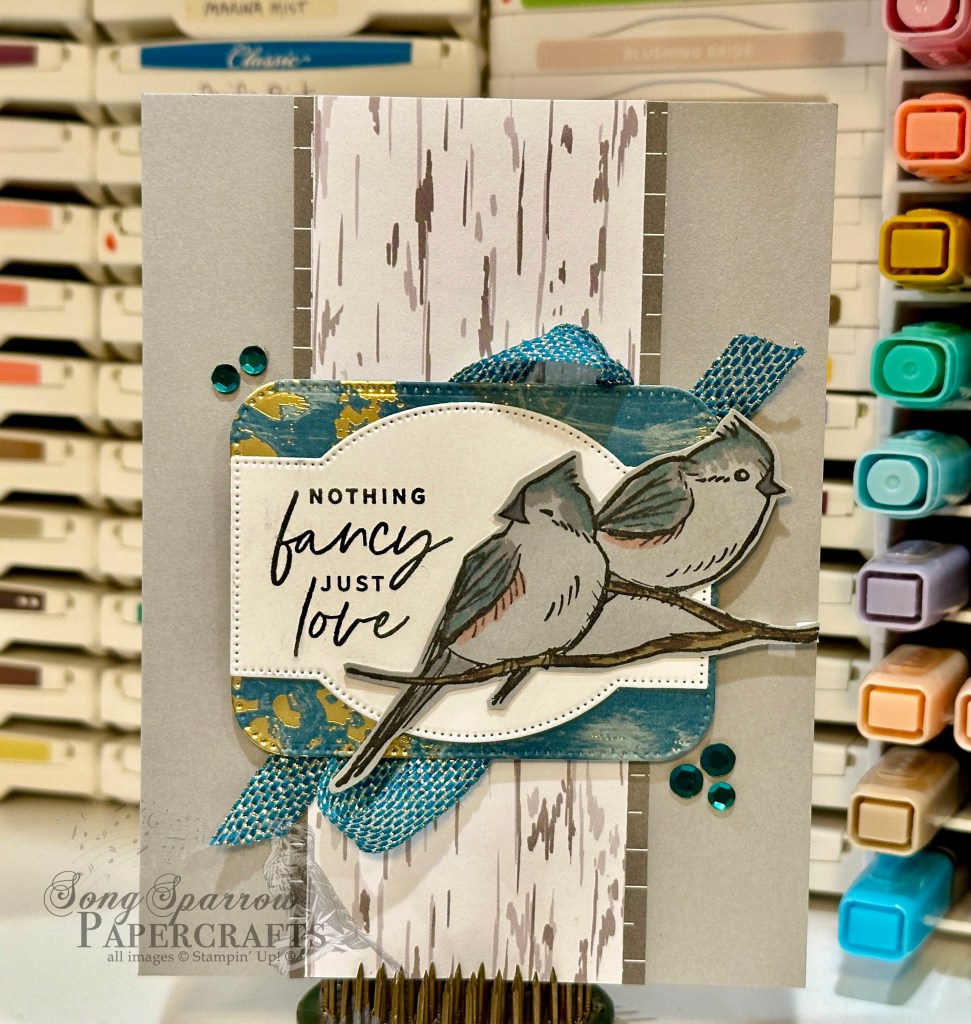
We get started with a base of Smoky Slate cardstock. Our center background panel is a strip of patterned papers. The woodgrain pattern is from the Nests of Winter pack, while the mat is from Nature’s Sweetness. I love how the mat really accentuates the colors and shading in the woodgrain pattern.
Our focal panel also has several layers. The base is a piece of the Pretty Peacock Season of Elegance foiled paper that is diecut using the Nested Essentials set. I wanted to pull in pops of color that would accentuate the blue undertones in the birds’ feathers.
The sentiment panel is a piece of white cardstock diecut using the Greetings of the Season dies, and then the sentiment from Wonderful Thoughts is stamped in black on the left side to allow for our focal image. Our duo of birds is stamped in black on Smoky Slate and then colored with Stampin’ Blends. I used a combination of Smoky Slate, Pretty Peacock, and Calypso Coral to shade the birds to resemble tufted titmice—some of my favorite little winter birds. I fussy cut the birds to omit the seasonal greenery to keep things more seasonally neutral for this card design.
The focal panel is adhered with dimensionals over a twist of the Pretty Peacock & Gold metallic ribbon. Groups of Pretty Peacock sequins are added on either side of our focal panel for a pop of sparkle and to help move the eye across our design.
Tomorrow we’re going to be using more of the images from the papers in this suite. I hope you’ll pop by.
Products used in today’s card:
Smoky Slate, Basic White cardstock
Nests of Winter, Season of Elegance, Nature’s Sweetness DSP
Winterly Tree Tops, Wonderful Thoughts stamps
Nested Essentials, Greetings of the Season dies
Stampin’ Blends
Pretty Peacock & Gold metallic ribbon
Sequins trio
Dimensionals
Adhesives


Welcome to a brand new week. It’s the last day of September. Who else is reeling a little bit about that?!
This week, we’re starting a brand new series using the Stampin’ Up! Nests of Winter suite. We’re starting off super simple by letting the beautiful paper do all the talking. With so many of you dealing with the aftermath of Hurricane Helene, this sentiment felt appropriate today. The photos of the damage left behind is simply overwhelming! Our prayers are definitely with you all.
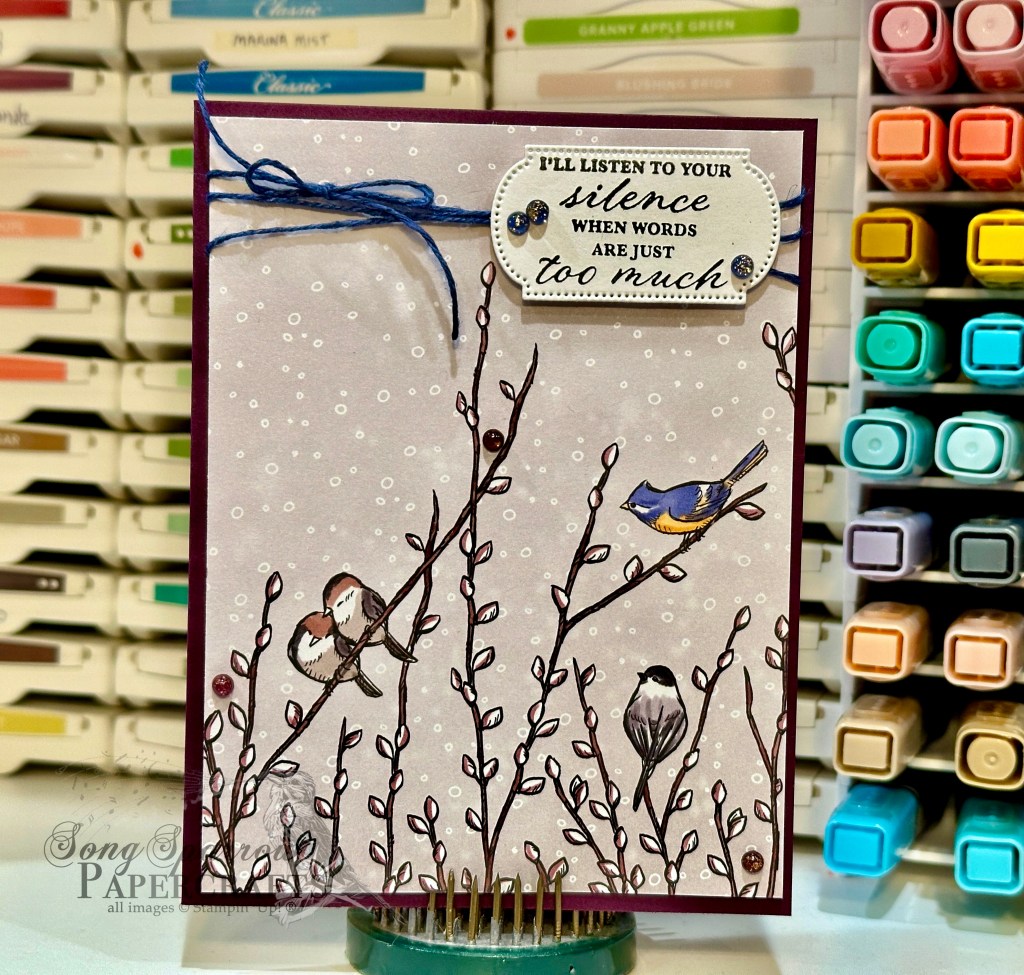
We start our card with a base of Blackberry Bliss cardstock. I love how that pulled the subtle purple hues in this paper more forward. I chose the one-sheet-wonder sheet from the Nests of Winter paper pack as our focal sheet for this card. I twisted the Night of Navy linen thread around the top. I love how this makes the little blue bird in our focal sheet really pop. The sentiment from Wonderful Thoughts is stamped in black on white cardstock and then diecut using the Greetings of the Season dies. I added a few regal foiled dots on the sentiment panel and scattered a few among the branches below.
This clean and simple design is a great way to let a gorgeous piece of paper do all the heavy lifting. Check in tomorrow to see more from this lovely suite of products.
Products used in today’s card:
Blackberry Bliss, Basic White cardstock
Nests of Winter DSP
Wonderful Thoughts stamps
Greetings of the Season dies
Natural Tones linen thread
Regal foiled dots
Dimensionals
Adhesives


 Designer Series Paper")
")
")

 Satin Ribbon")

 Glimmer Specialty Paper")
 Specialty Designer Series Paper")

 Trim Combo Pack")
 Specialty Designer Series Paper")
 Specialty Designer Series Paper")
")


 Metallic Ribbon")


