Gifting

Best Laid Plans

We’ve made it to a new week, and you may have noticed my absence at the end of last week. It’s crafting show season and I have 2 that fall very close together. Needless to say, I didn’t budget quite enough time to do ALL.THE.THINGS last week and so my planned blog post materials had to be set aside.

Over the weekend, I’m teamed up with my mom to set up a booth for an event in her area. We had a lot of fun, and I figured out just how much more work I have to do to be prepared for my next event in TWO short weeks!

So this week, I’ll be sharing some of the projects that I make especially for my craft fair booths. And first up are these super cute little Hershey nugget treat packages. I really love these for a quick little something to pass along to someone as a pick-me-up or thank-you.

When I’m preparing craft booth items, I always start by using the retired product in my stash. So these nuggets use several different packets of retired fall-inspired paper patterns. And then I dress up the packaging with dies that meet the theme. We have such lovely fall-inspired die sets that I, of course, had to reach for both Autumn Leaves and Changing Leaves for my dress-up elements for these nugget packets. I’ll be offering a variety of seasonal packaging for the nugget treats, including fall, Halloween, and Christmas.

If you’re interested in the tutorial for these Hershey nugget treats, drop me a comment with your e-mail or social media link so I can send you a copy.

Pop in tomorrow to see what else I’ll be offering in my craft show booth.

Friends for Life · Fun Folds · Gifting

Happy Birthday, Friend

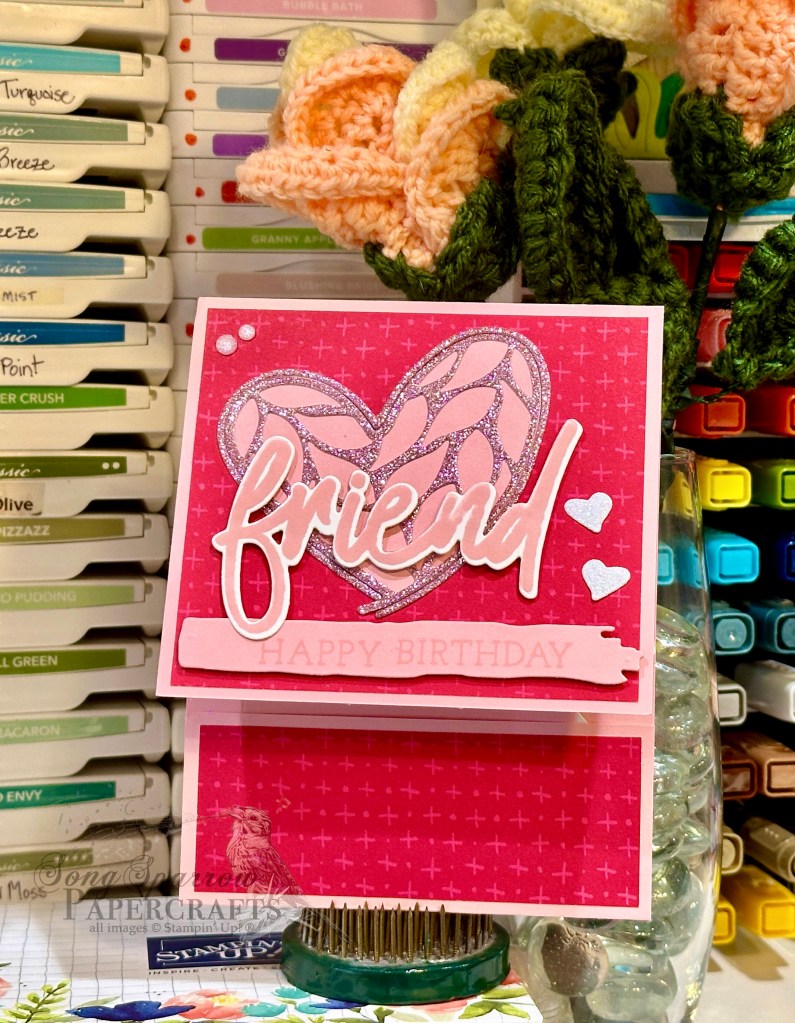
Today we’re continuing to explore all the many ways we can use the Friends for Life bundle by Stampin’ Up! to create fabulous projects. I don’t know about you, but I like to have birthday cards of all kinds on hand for those moments when I need to grab a birthday card on the run. And today’s design is a two-for-one — a gift and a beautiful card!

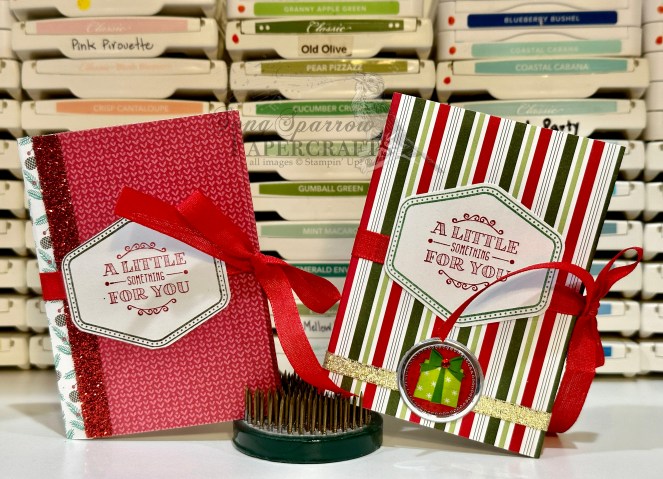
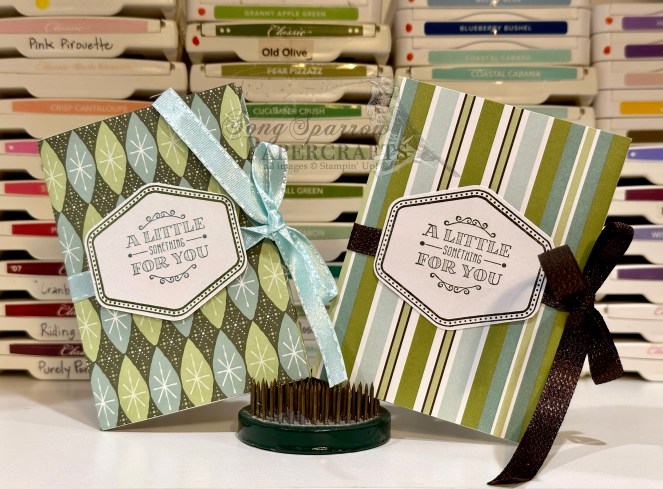
This gift card design is a modified version of the Slide Up Gift Card Holder by fellow demo Jackie Bolhuis over at Klompen Stampers. I simplified the design to have a slide out gift card holder rather than the slide up version Jackie makes, but both are equally as wonderful for providing a lovely way to give a gift card. What I really loved about this design is it offers so much visual interest. From a beautiful card front that serves double duty as the gift card pocket to the ample space on the inside to dress things up, you have plenty of opportunity to express your creativity.

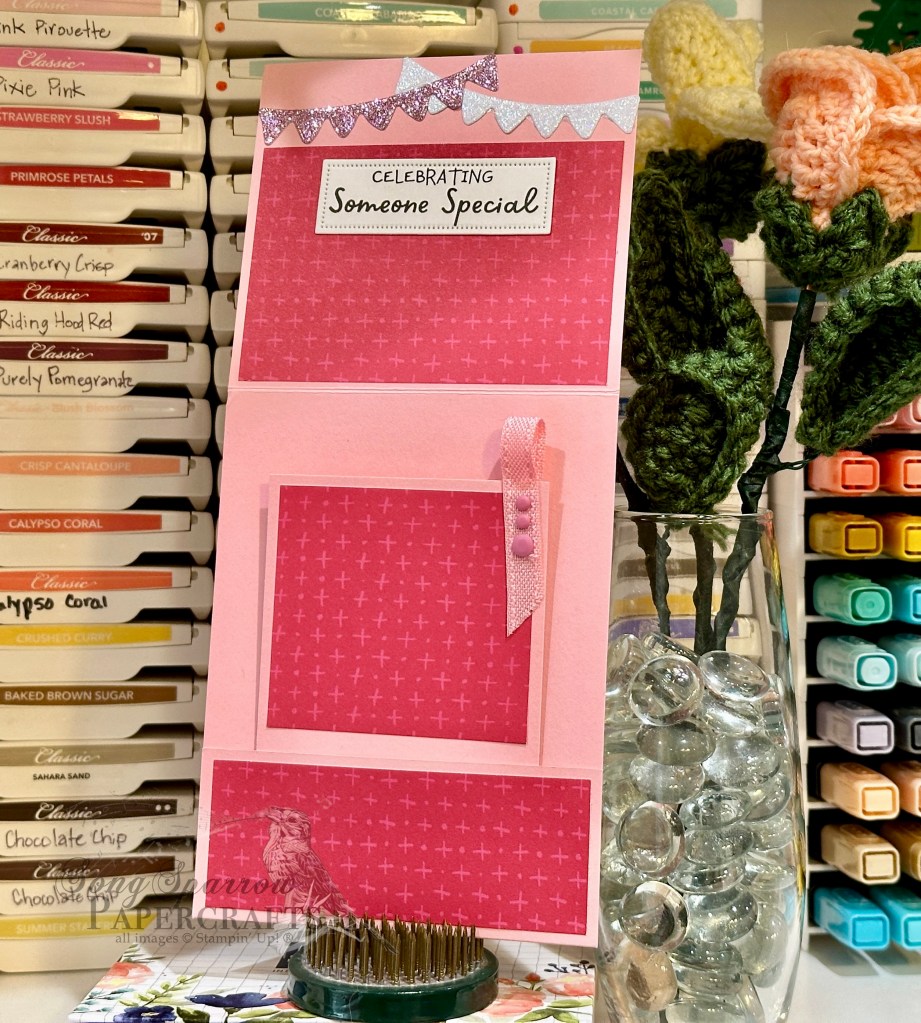
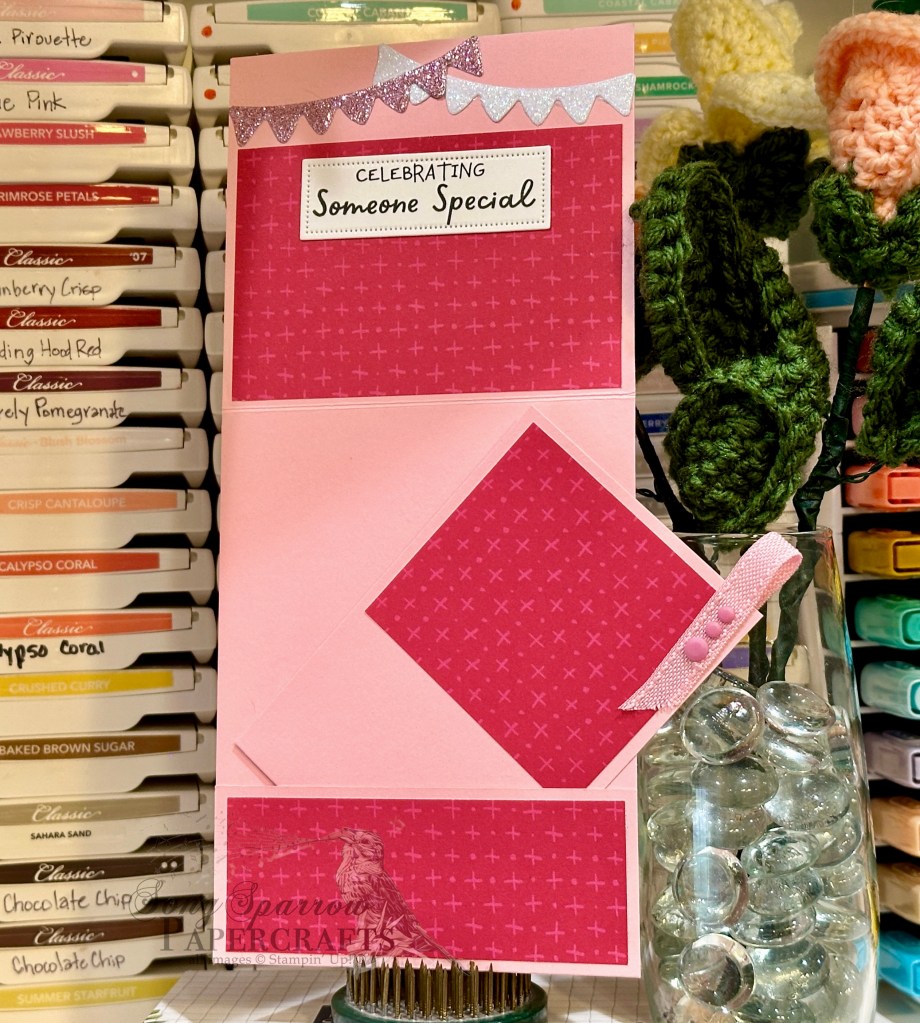
We get started with a base of Pretty in Pink cardstock. The cardstock is halved on the long edge for this design, but rather than scoring in the center, you’ll instead score at 3 3/4-inches and 9 1/4-inches. That gives you a center portion of standard size and then a flip-up flap and smaller bottom flap for the card front. The smaller flap should be adhered to the card base on either side to create the small pocket, which will be visible when the card front is closed. I chose a sheet of the Flowering Zinnias designer paper as the background panel and cut it so that a small border shows on each of the front panels. The fun background image is the large heart from the Friends for Life die set. I cut a Pretty in Pink heart and used the center portion as the background for the Pretty in Pink glimmer hearts. For the glimmer hearts, nestle the leaf heart die inside the large heart die when diecutting. I then used both the outside and inside hearts on top of the Pretty in Pink solid heart. The sentiment panel is diecut from Pretty in Pink using the smudge banner and then the sentiment is stamped tone-on-tone toward one end. The word friend from Friends for Life is stamped in Pretty in Pink on white cardstock and then diecut with the coordinating die. The sentiment is adhered to the card front with dimensionals .Two small hearts are diecut from white glimmer paper and used as eye-catching accents for the sentiment. The card front is finished of with a few In Color shimmer gems.

The inside of the card is finished to coordinate with the card front. The top flip panel has a piece of the Flowering Zinnias designer paper. Two shimmery banners diecut from glimmer paper and cut using the Filled with Fun dies bring festive fun to this top panel. The inside sentiment from Filled with Fun is stamped on white cardstock diecut using the Autumn Leaves dies. TIP: In order to get the banner long enough for the sentiment, you’ll want to use the extension method.

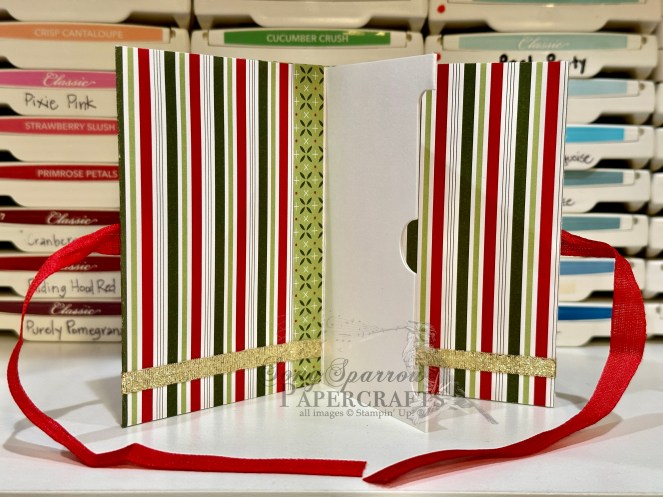
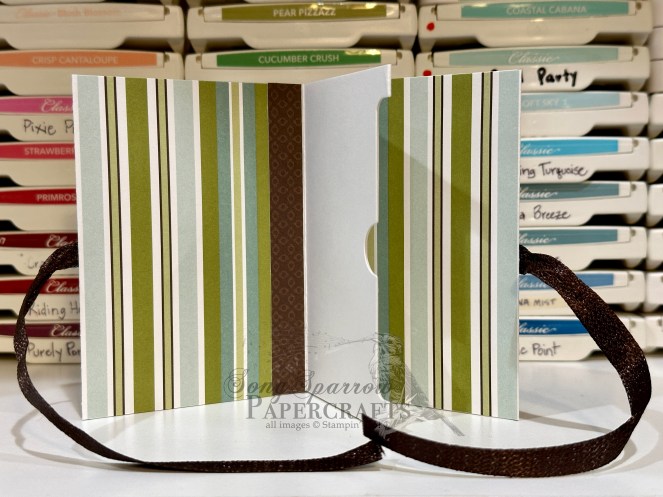
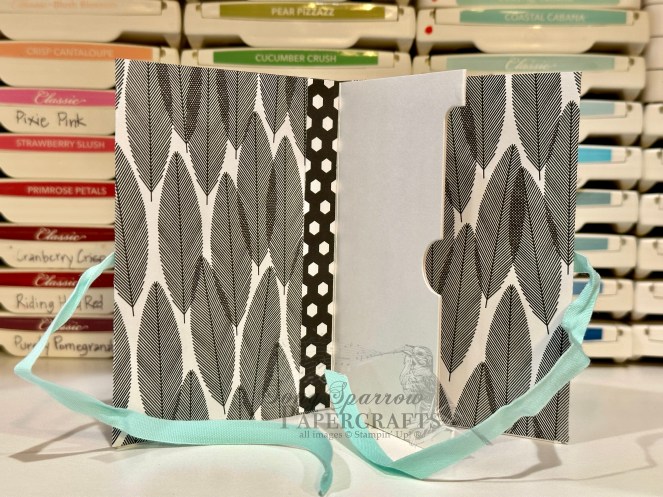
The gift card holder itself is a pocket within a pocket. It’s made two-sided so that the portion visible through the card front disappears into the background. A tug on the Pretty in Pink bordered ribbon reveals the gift holder and the gift card in the pocket on the reverse side. Each side has a piece of the Flowering Zinnias paper to coordinate with the rest of the card, along with a repeat of the happy birthday sentiment. I chose to keep the inside of my card very simple, but you can see where you could really dress it up.

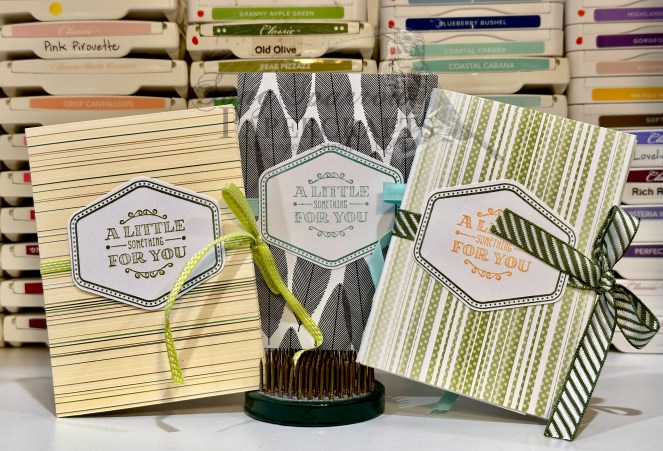
I hope you’ll join me tomorrow for a more masculine inspired design.

Products used in today’s gift card:
Pretty in Pink, Basic White cardstock
Flowering Zinnias, In Color glimmer, White glimmer DSP
Friends for Life, Filled with Fun stamps
Friends for Life, Autumn Leaves, Filled with Fun dies
Pretty in Pink bordered ribbon
In Color shimmer gems, In Color resin dots
Dimensionals
Adhesives

Gifting · Packaging

Did Someone Say Gift Cards?

These days, it can be hard to know what to buy friends or family for that special occasion. And so gift cards or cash have become very popular options. But who says that you can’t wrap a gift card?

When we give gift cards in our family, we like to dress things up. And sometimes the recipient even has to go on a little scavenger hunt to get to the prize. I’ve found various ways to make these types of gifts feel special. And today, I’m highlighting just one way — the booklet envelope.

Long ago I purchased some pre-cut/pre-scored templates that serve as the booklet base for each envelope. And in hindsight, now that all of these templates are gone, I wish I had jotted down all of the measurements for the base to be able to make more on my own! Each booklet is then decorated using designer paper, ribbon, and embellishments. One 6-inch by 12-inch strip of designer paper covers the outside and both inside flaps of the envelope. I used scraps of DSP to cover any exposed portions of the base on the inside of the envelope up against the gift pocket. I found that a ribbon closure seemed to work best with this design and adhered the ribbon all the way around the outside of the booklet using tear tape. TIP: my favorite brand of tear tape is Sookwang because it’s super sticky, easy to tear, and comes in a variety of widths.

Do you like to dress up a gift card? How do you do it? Let me know in the comments!

birthday · Gifting

Spruce Up a Gift Bag

As a paper crafter, I try not to miss an opportunity to add that special handmade touch to gifts. It’s incredibly simple to dress up those packages with a lovely little something. From beautiful ribbon to a unique gift tag, a gift can be jazzy in no time!

I recently whipped up these cute gift tags so I would be ready for the next birthday party. These designs may look fancy and a bit complicated, but each design came together quickly. Let’s see how these came together.

Candles. The tag base is Basic White cardstock diecut using the Merriest Trees dies. I used some older washi tape I had on hand to serve as the colorful grounding for the sentiment panel, which begins with a piece of vellum diecut using the circle from the All That die collection. The candles are stamped in multiple colors on white cardstock using the Big News stamps. I colored each one lightly with a coordinating watercolor pencil and then add a bit of sparkle to the flames of each one using Stickles. The “happy birthday” sentiment is stamped on white cardstock using the Papertrey Ink Birthday Basics stamps and then diecut using the Bunch of Banners dies. A few iridescent discs on either side of the sentiment keep the eye in the center of the tag.

Wish. The tag base is comprised of two layers. The base layer is cut from Oh So Ombre designer paper and the Crumb Cake is diecut using the Merry Tags dies. Next comes the silver star banner which is diecut from metallic silver cardstock using the Star Blast dies. The sentiment is a single Papertrey Ink die and cut from a sheet of Pretty Peacock. Everything is held together with glue from the precision glue pen.

Products used: Birthday candles
Basic White, vellum cardstock
Washi tape
PTI Birthday Basics stamps (retired)
Big News stamps (retired)
Merriest Trees, All That, Bunch of Banners (retired) dies
Watercolor pencils
Stickles
Iridescent discs
Dimensionals
Adhesives
Ribbon

Products used: Make a Wish
Crumb Cake, Pretty Peacock cardstock
Metallic silver cardstock (retired)
Oh So Ombre DSP (retired)
Circles Collection, Merry Tags, Star Blast dies (retired)
PTI Make a Wish die
Adhesives
Precision glue pen
Ribbon

All ads on this site are posted by WordPress and are based on your personal browsing history. I do not control ad content.

birthday · Gifting

Dressing a Package

For the last couple of days, we’ve been looking at cute gift packaging ideas for small gifties. And what package would be complete without a gift tag?

It doesn’t take much to whip up a cute tag to dress up a package. This tag is comprised of 3 basic components: a base, a decorative element, and the sentiment panel. For the base, I used some retired paper I had on hand and diecut it using the tag die from the Merriest Trees dies. Because I chose a decorative paper and not cardstock, I elected to cut a solid-colored piece to serve as the backing on the dot pattern to add a little more structure to the tag and give a place for a quick message to the gift recipient. The sparkly star is diecut using the So Many Stars dies. I really love that set of dies for its decorative stitching around the edges which adds a bit of pizzazz. The sentiment panel is punched from white cardstock using the 2 3/4″ circle punch and the Circle Sayings stamp set provides the elements for the adorable sentiment panel. A few strategically placed fine sparkle adhesive-backed gems and the iridescent trim give another touch of sparkle and complete the festive look.

Products used: White cardstock; Oh So Ombre DSP (retired); So Many Stars (retired), Merriest Trees dies; circle punch; Circle Sayings stamps; fine sparkle gems; iridescent trim

All ads on this site are posted by WordPress and are based on your personal browsing history. I do not control ad content.