Welcome to a new episode of Terrific Tuesdays, where each week we’ll explore new projects using some of the latest projects from Stampin’ Up! I know what you may be thinking….wait, it’s not Tuesday. And you’d be right. If you’ve followed me here or on any of the socials for the last several months, you may remember that I had to take a break due to a family emergency. And I want to take this opportunity to thank all of you for sticking around and waiting for my return. While I’m back to posting more regularly now, it will still be necessary for me to take breaks here and there as we continue to address some long-term medical needs.
But today, I’m bringing you a new Terrific Tuesdays video. Earlier this week, I shared a treat holder fun fold with a teaser that a video tutorial would be forthcoming and this is it! I walk you through this cute treat holder step-by-step and give you some pointers, i.e. lessons in avoiding mistakes that I learned the hard way! *wink* For those folks who like to watch and also follow along with written instructions, I’m including the PDF tutorial for FREE download.
I hope you enjoy this twist on our Terrific Tuesdays format!
All ads on this site are posted by WordPress. Song Sparrow Papercrafts is not responsible for ad content.
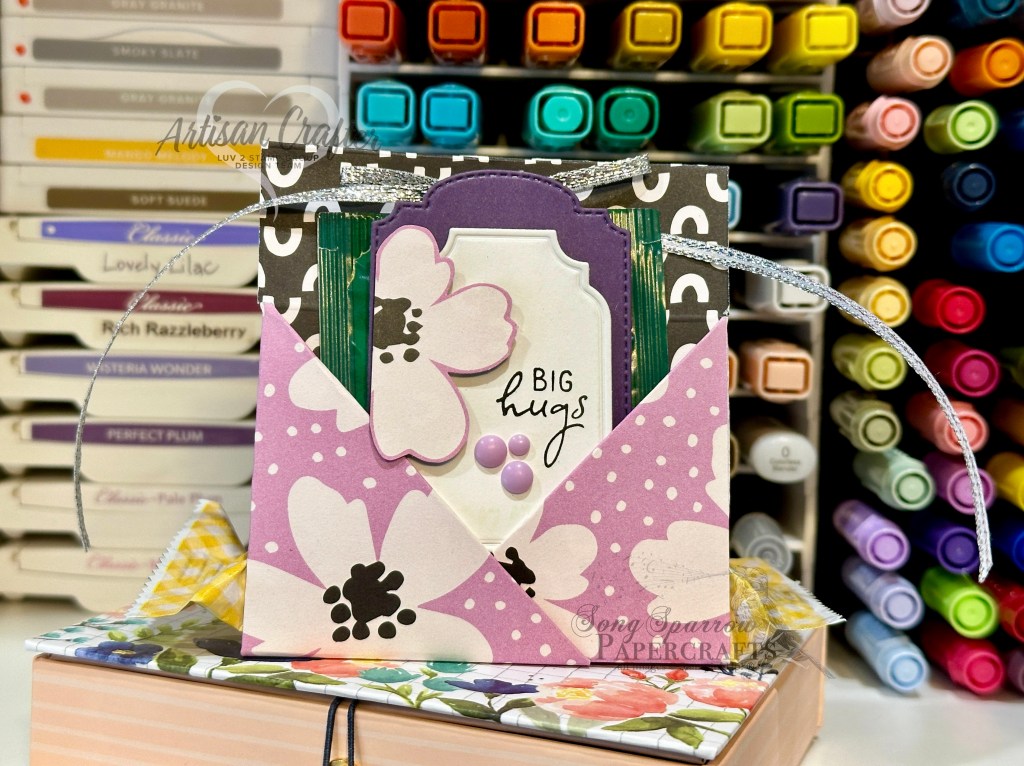
Our monthly Luv 2 Stamp Team challenge is using designer series paper and to include at least one 3D project in the mix. I decided to make a fun treat holder for my 3D project since I had just recently made a whole slew of this design for a craft fair.
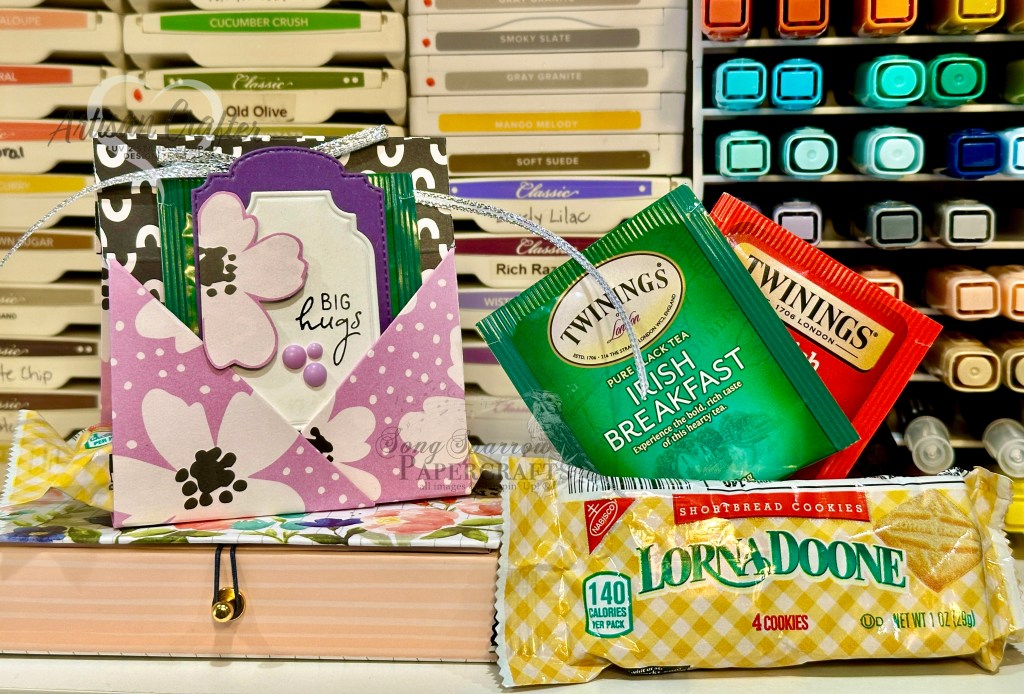
What I love about this particular fun fold is that you can adapt it to numerous occasions based on what you stuff in all of the treat holder slots. For today’s design, I chose to focus more on afternoon tea time. But I’ve also used these little gifties to feature get well items, like a package of tissues, some tea and honey, and vitamin mixes. There’s really no limit to how you can tailor them to any occasion.
For today’s treat holder, I used a sheet of the Delightfully Eclectic designer paper. The decorative insert has a base of Gorgeous Grape diecut using the Thoughtful Expressions dies. The sentiment from Perennial Postage is stamped on white and then diecut using the All That dies. I cut a flower from the DSP to tie everything together. I hope to post a tutorial video tomorrow (cross your fingers) and will also share the PDF tutorial.
Products used: Gorgeous Grape, Basic White cardstock Delightfully Eclectic DSP Perennial Postage stamps Thoughtful Expressions, All That dies Rainbow dots Silver trim Dimensionals Adhesives
All ads on this site are posted by WordPress. Song Sparrow Papercrafts is not responsible for ad content.
The Bright Skies stamps and dies in the current Stampin’ Up! Mini catalog are some of my favorites because they allow you to make so many different cards for a variety of occasions. This is one of those sets that will remain in my stash even after the current mini catalog retires.
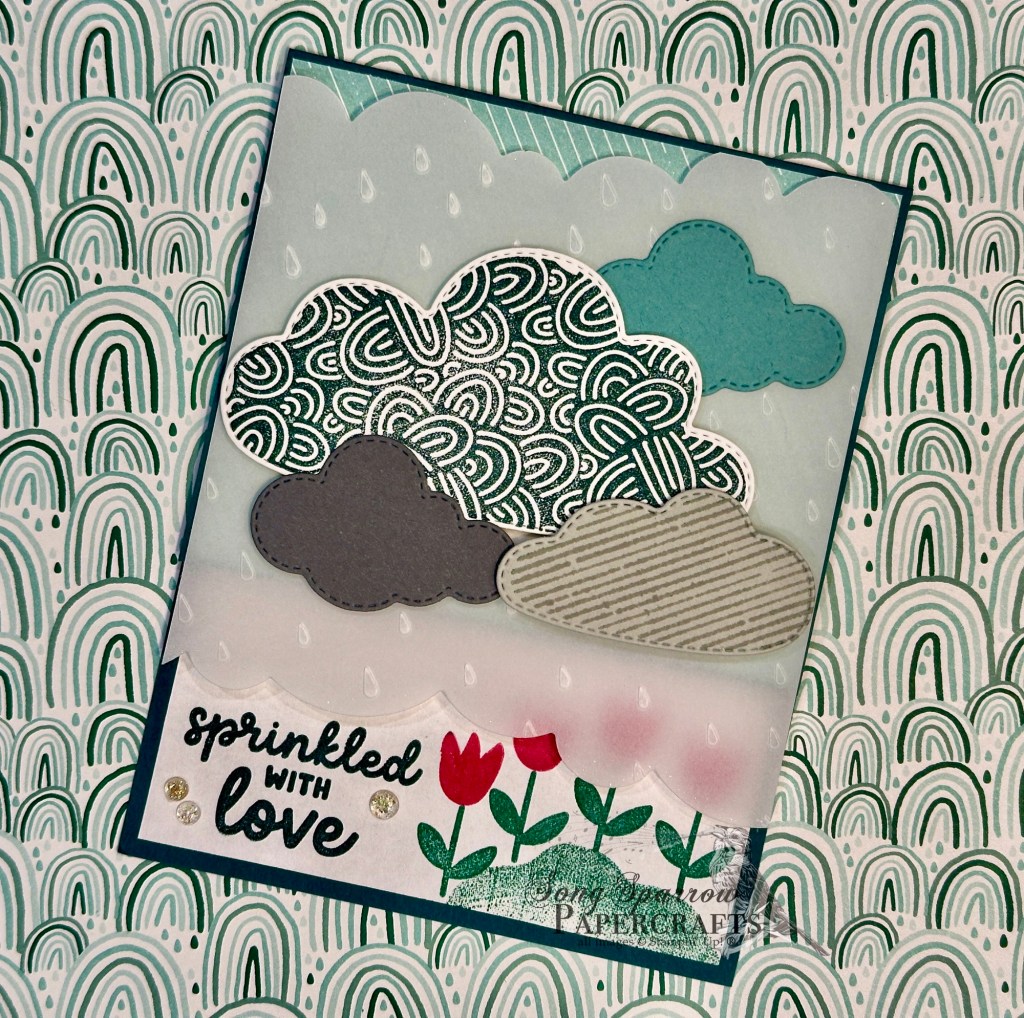
This card design uses a peek-through fun fold design to reveal the sentiment. And for me, the eye-catching twist on this fun fold is the use of the vellum.
This card is built on a base of Pretty Peacock. I removed 2 1/2-inches of the front panel to create the peek-through portion. A piece of the Sunny Days designer series paper serves as the base for the front panel. A sheet of vellum is diecut on each end using the Bright Skies cloud bank dies and then embossed with the Raindrops embossing folder. This vellum panel is adhered with dimensionals over the base. To create a variety of clouds, I stamped two of the four clouds on cardstock using the Bright Skies stamps and simply diecut two from colored cardstock. Dimensionals help create the cloud layers over the vellum.
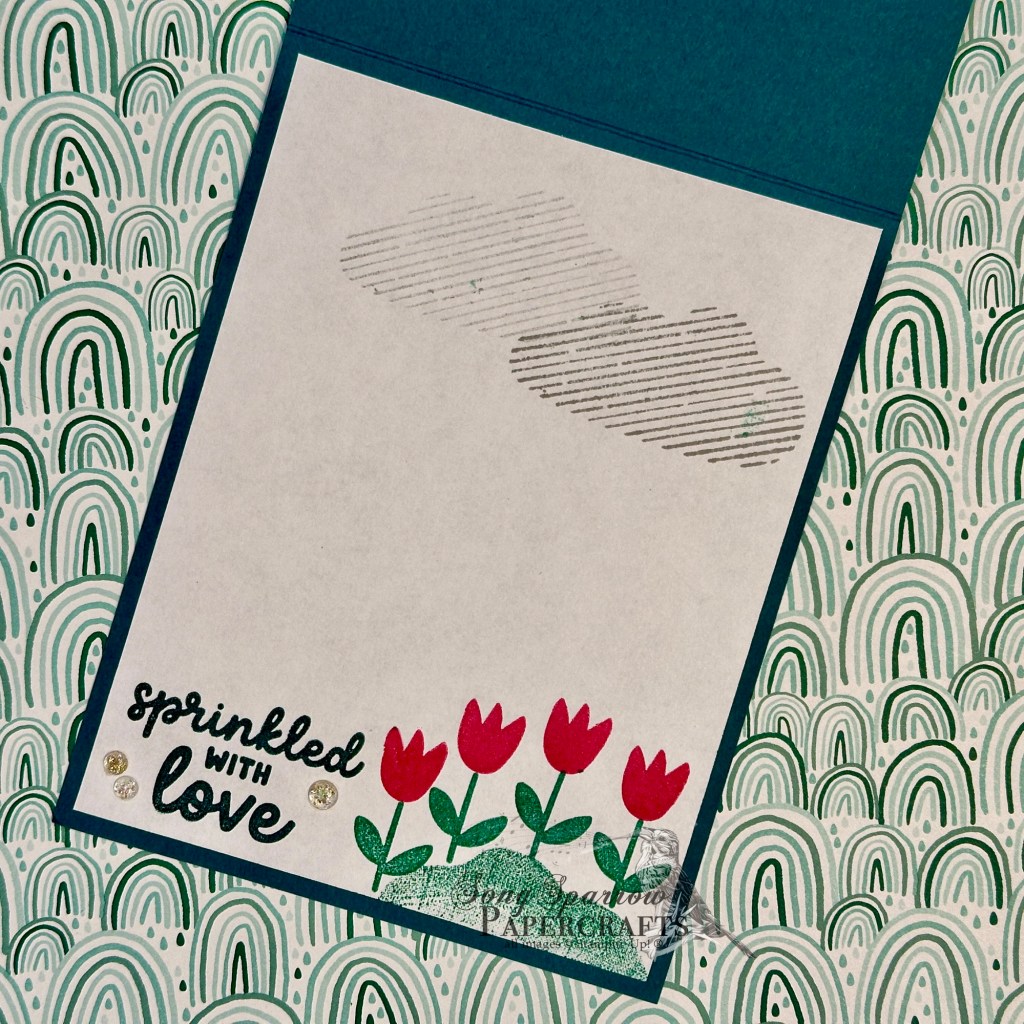
The sentiment for this card is stamped in the inside message panel which is visible thanks to the peek-through panel we created with the front card panel. The little scene is created with the Bright Skies stamps and begins with the little hill of flowers. I used the back of one of the smaller clouds to stamp the hill and then filled in with the flower stems and tulips. And finished with the sentiment. A few foiled gems help the eye settle on the sentiment.
Peek-through designs are such a great way to dress the inside and outside of your cards at the same time.
Products used in today’s design: Pretty Peacock, Shaded Spruce, Lost Lagoon, Smoky Slate, Basic White cardstock Sunny Days DSP Bright Skies stamps Bright Skies dies Gold foiled gems Dimensionals Adhesives
All ads on this site are posted by WordPress. Song Sparrow Papercrafts is not responsible for ad content.
Happy Thursday, everyone! And more importantly for us here in the U.S., happy Thanksgiving! My family will be gathering today to celebrate but, more importantly, we will be together to laugh and spend time together. I am blessed to have a close-knit family who gathers together often, not just for holidays. We share in joys and sorrows and tough circumstances together. And when we have friends who are far away from their families for the holidays, we wrap them right into ours!
I hope you have reasons to offer thanksgiving today. And if you are far away from family, I hope God sends you friends who will love you like family. And it’s the idea of being part of a community that inspired this week’s card design. Let’s take a look!
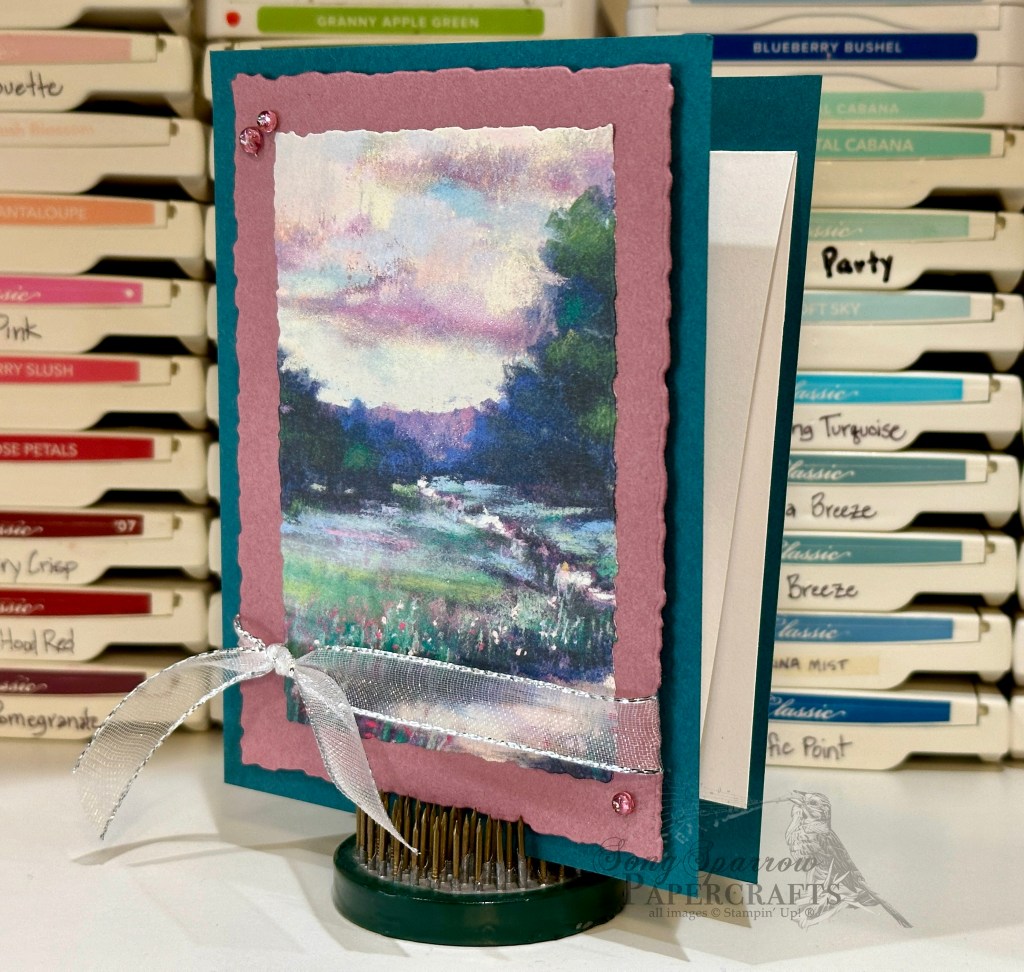
The new Meandering Meadows designer series paper currently available in Online Exclusives is simply stunning, and each of the scenic sides of these papers lend themselves to beautiful cards with very little else needed outside of the gorgeous paper. There are a whole host of fun folds that allow us to retain large sections of paper while still providing variety of design and, of course, gorgeous cards.
Today’s card design is based on a fun fold, known as a Split Panel, that I learned from fellow demonstrator Jackie Bolhuis with Klompen Stampers. This fold came by its name because the front and back panels are split apart and held together by a Z-fold in the center. I chose the portrait orientation, but you could easily turn the design landscape.
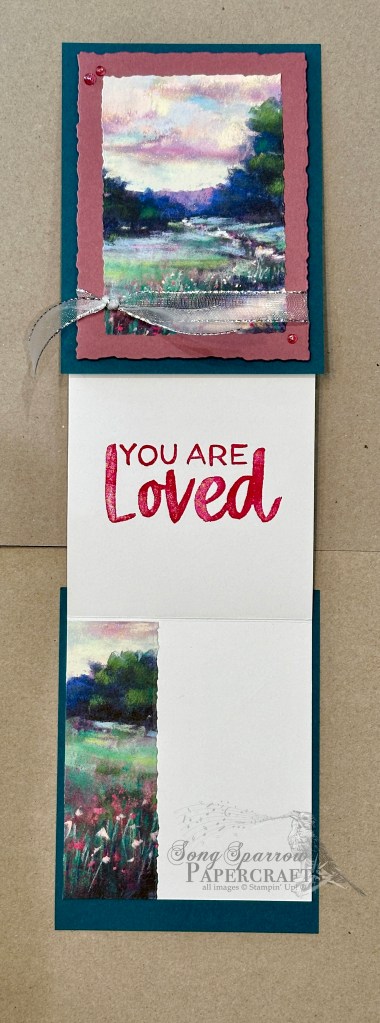
The two panels of the base of this design are Pretty Peacock cardstock. I wanted to draw out the beautiful pinks in the clouds and flowers in the sheet of Meandering Meadow DSP I selected, so I chose to mat the sheet with Moody Mauve. I used the Deckled Rectangles dies to cut both the mat and DSP panel. I tied a piece of silver and white sheer ribbon around the bottom of the panel before adhering to the card front with dimensionals. A few pink tinsel gems in opposing corners add a little sparkle and allow the eye to move across the focal panel. Although difficult to see in these photos, I highlighted the pinks in the clouds and across the mountain front by going over them with Wink of Stella. It’s a truly stunning effect in person! I stamped the sentiment, from the Softly Said stamp set, in the center of the inside fold-out. The message panel is framed on one side by a scrap of the DSP I cut for the card front.
I made this card with a particular friend in mind. Life has thrown my friend a lot of difficult things lately, and I wanted to offer a word of support. You know, I think we should do more of that these days. Life is hard for so many people, and some feel like the whole world is against them and they have no one who cares about them. A simple word of support or encouragement can make all the difference in whether that person carries on. Food for thought as so many of us are blessed to celebrate Thanksgiving with family and friends today.
Products used: Pretty Peacock, Moody Mauve, Basic White cardstock Meandering Meadows DSP Deckled Rectangles dies Silver and white sheer ribbon Tinsel gems Dimensionals Adhesives
All ads on this site are posted by WordPress and are based on your personal browsing history. I do not control ad content.
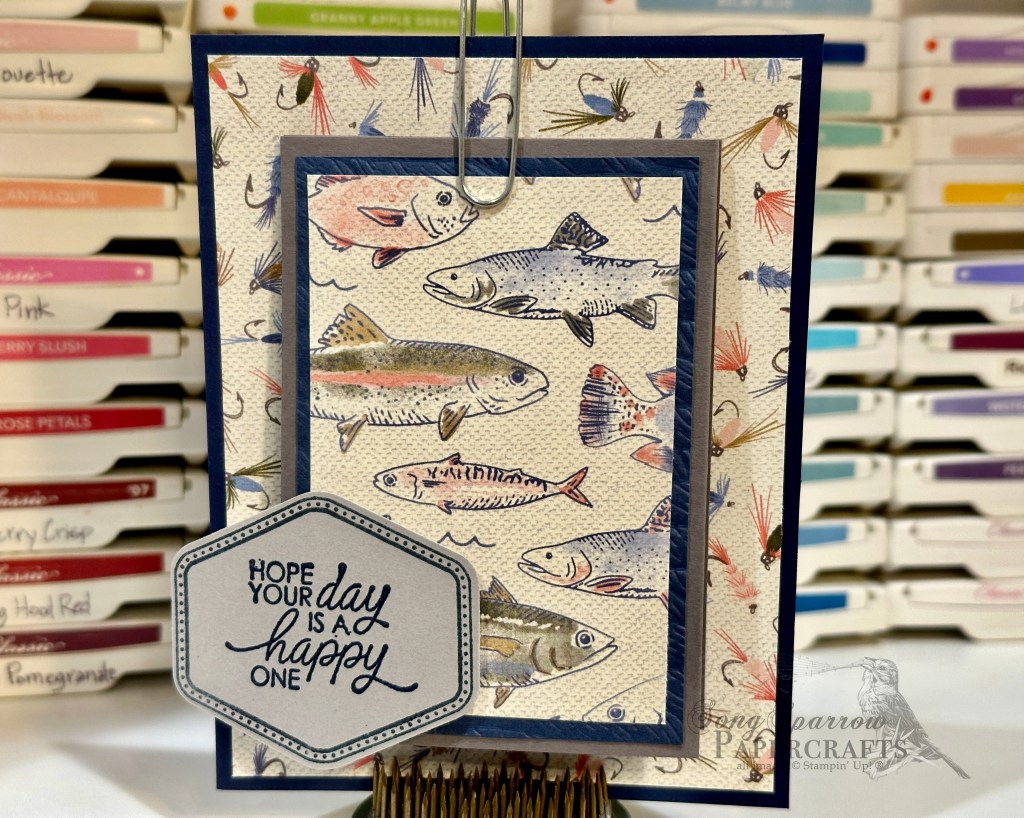
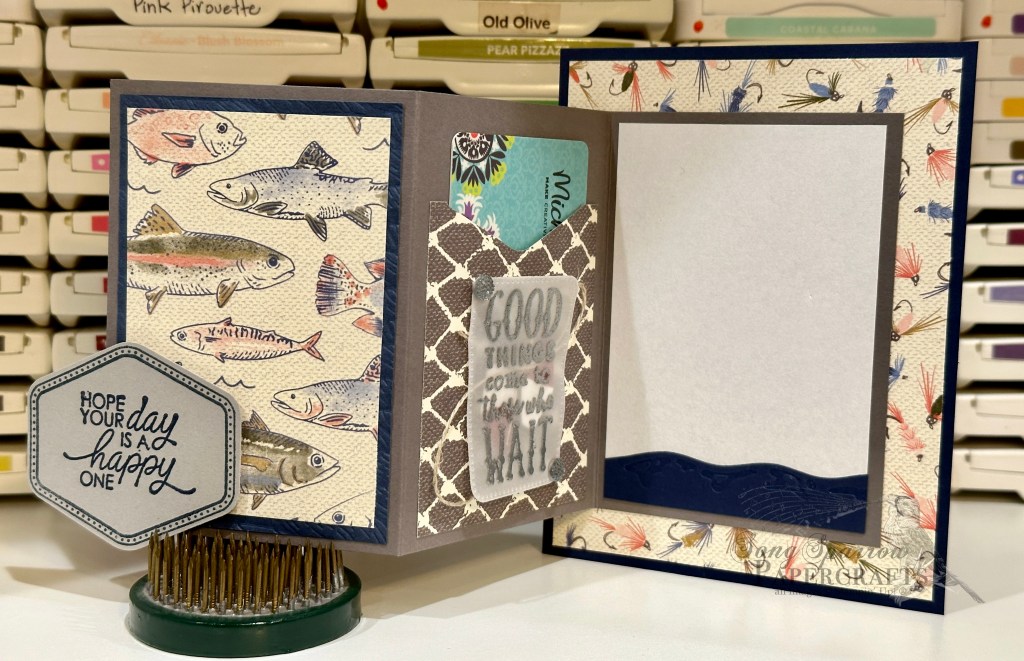
Did you catch yesterday’s Terrific Tuesdays video? This week’s episode is all about gift card holders and was inspired by today’s card design! I love finding fun ways to give gift cards. I recently ran across this super fun gift card holder shared by fellow demonstrator Heidi Collins. I knew this would be the perfect design for an upcoming family member’s birthday as this young man is all things outdoors.
The gift card holder is built on a standard single-panel base of Night of Navy cardstock. The patterned papers are all from the Let’s Go Fishing designer series paper pack. The fold-out gift card holder portion in the center is built on a piece of Basic Gray cardstock, which is scored into thirds. For the front-facing panel, I decided to add a little interest to the navy mat by embossing it using the 3D Rope embossing folder. The sentiment panel is stamped on Smoky Slate cardstock with a border stamp from the Heartfelt Hexagon set and a sentiment from the So Sincere stamp set and then punched with the coordinating hexagon punch. The gift card pocket is made with a piece of Let’s Go Fishing DSP with the notch created by the hexagon punch. The cute vellum sentiment panel on the gift card pocket has a heat embossed sentiment from the Gone Fishing stamp set and is diecut using the Nested Essentials dies. There are a few bobbers and some line underneath the vellum panel to carry the theme through and for a bit of visual interest. The message panel is a simple piece of white paper with a strip of Night of Navy diecut and embossed using the Gone Fishing dies.
This gift card holder was super easy to put together! And with several more upcoming birthdays and the Christmas holidays just around the corner, as well, I love having a cute way to give gift cards that can easily be tailored to each individual recipient and occasion.
Wanna know more? Check out this week’s Terrific Tuesdays video to learn how this design was adapted for holiday gift-giving!
Products used for today’s design: Night of Navy, Basic Gray, Smoky Slate, Cherry Cobbler, Basic White, vellum cardstock Let’s Go Fishing DSP Gone Fishing stamps & dies Heartfelt Hexagon stamps & punch Faceted gems trio Linen thread Silver embossing powder Dimensionals Adhesives
All ads on this site are posted by WordPress and are based on your personal browsing history. I do not control ad content.
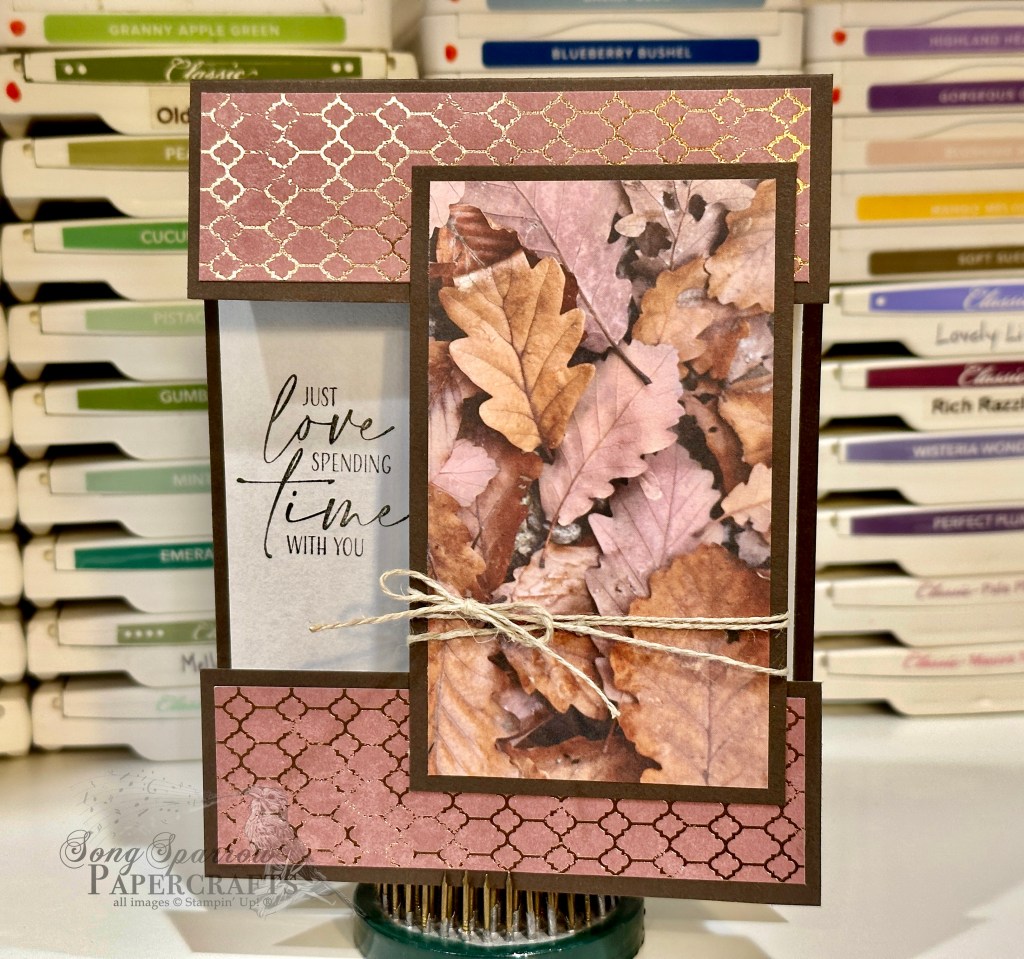
Do you love learning new things? I’m learning new fun folds to add interest to my card designs, and I really love this one that I learned from fellow demonstrator Jacki Bolhuis with Klompen Stampers. She calls it the Split Front Fold, but I like to think of it as the Cut and Twist because you cut out the center of the front panel and twist it up to make it a focal panel. What I really love about this fun fold is that you can get stellar results whether you dress up the front focal panel or leave it as a stand-alone, like I did here. So many possibilities!
For this card, we begin with a base of Early Espresso and a single sheet of the leaf pattern from the All About Autumn designer paper pack. The base is is a standard size but scored at the top rather than on the side. To achieve the cut and flip, with the long edge up, you cut 1 1/2-inches from one side and then make a second cut of 2 1/2-inches. This leaves a 1 1/2-inch strip just beyond the center fold, along with the two pieces that were cut. The larger piece gets twisted up vertically to serve as the focal panel on the card front and also holds the smaller pieces of the card front together. I chose the leaf pattern of All About Autumn to serve as the star of the vertical focal panel. The foiled pattern on the back side of the leaf sheet serves as the two decorative strips at the top and bottom. A little twist of linen thread gives a little punch to the focal panel. To allow the beautiful patterned paper to really shine, the sentiment is stamped on the card base so that it shows through the peek-through window in the card front.
What do you think of this new Cut and Twist method? I’m excited to try some other designer papers with this unique fun fold!
Products used: Early Espresso cardstock All About Autumn DSP Linen thread Adhesives
All ads on this site are posted by WordPress and are based on your personal browsing history. I do not control ad content.
Sometimes I find myself a little stumped with design ideas for beautiful designer papers because the thought of cutting them up gives me pause. But I’ve learned that there are a whole host of fun folds that afford an inspired design while sparing gorgeous designer papers.
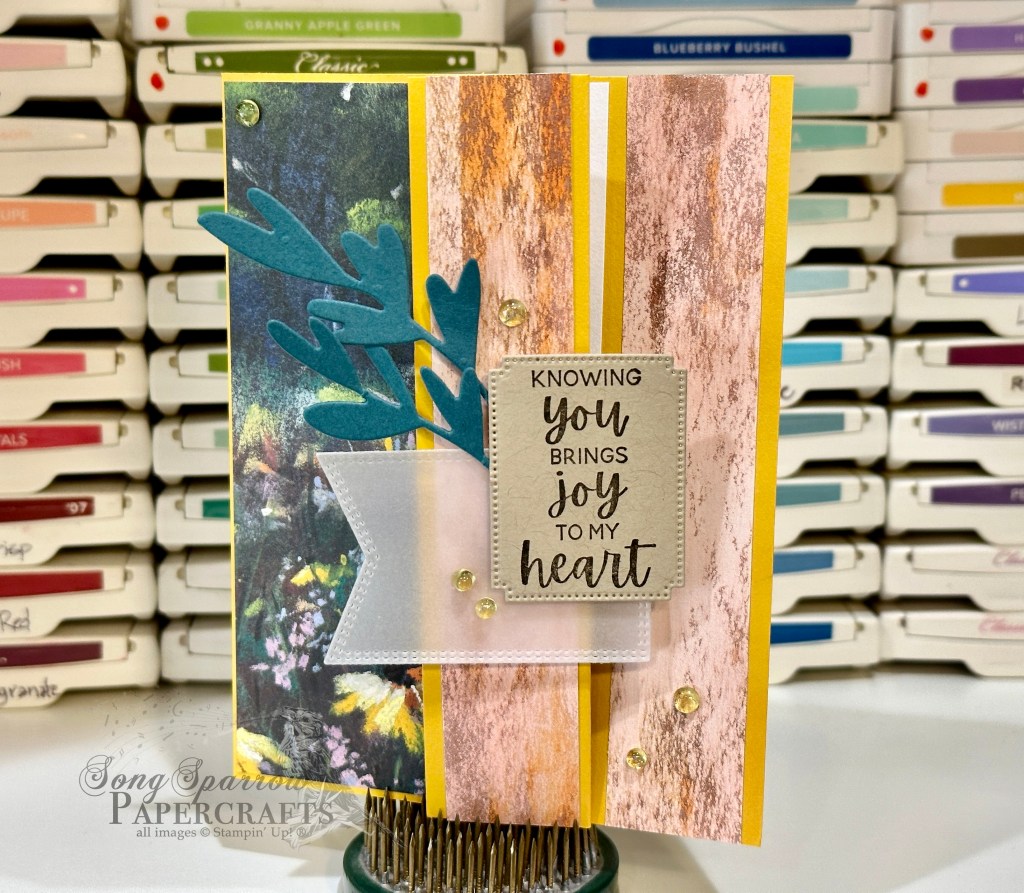
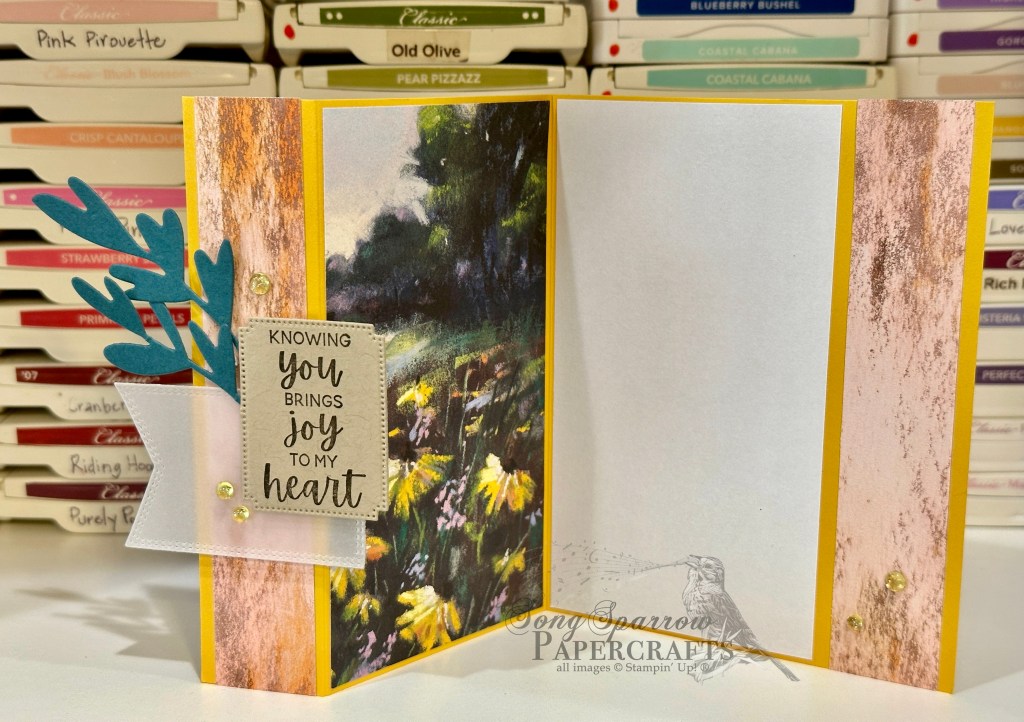
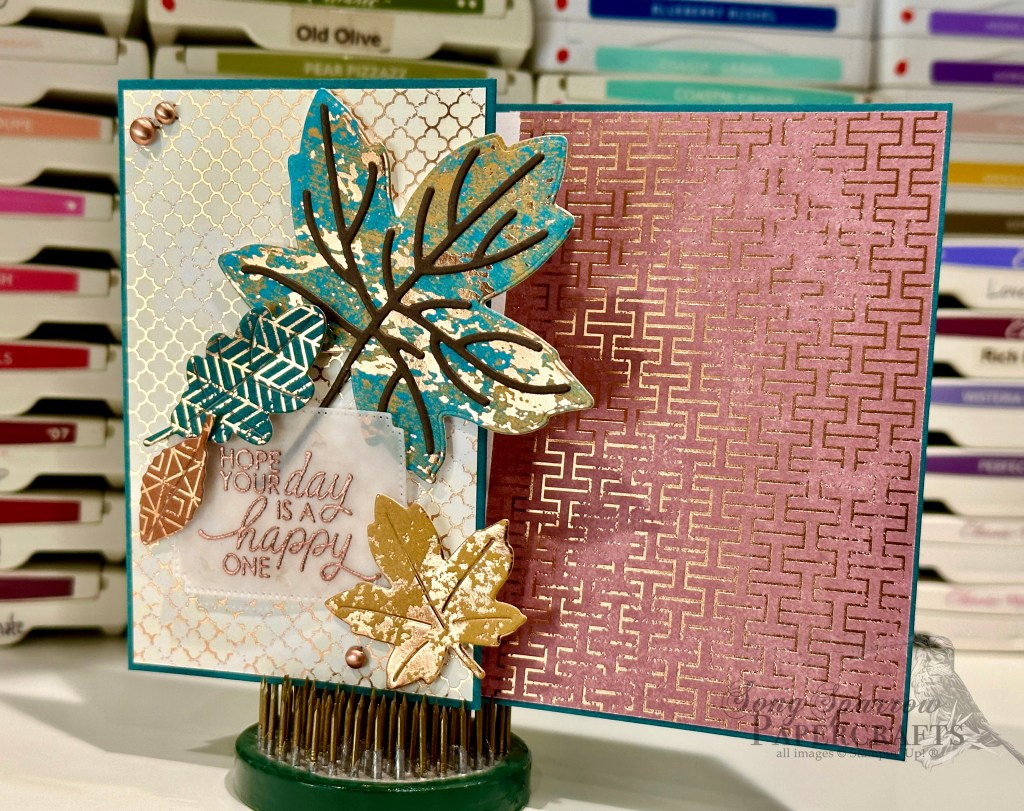
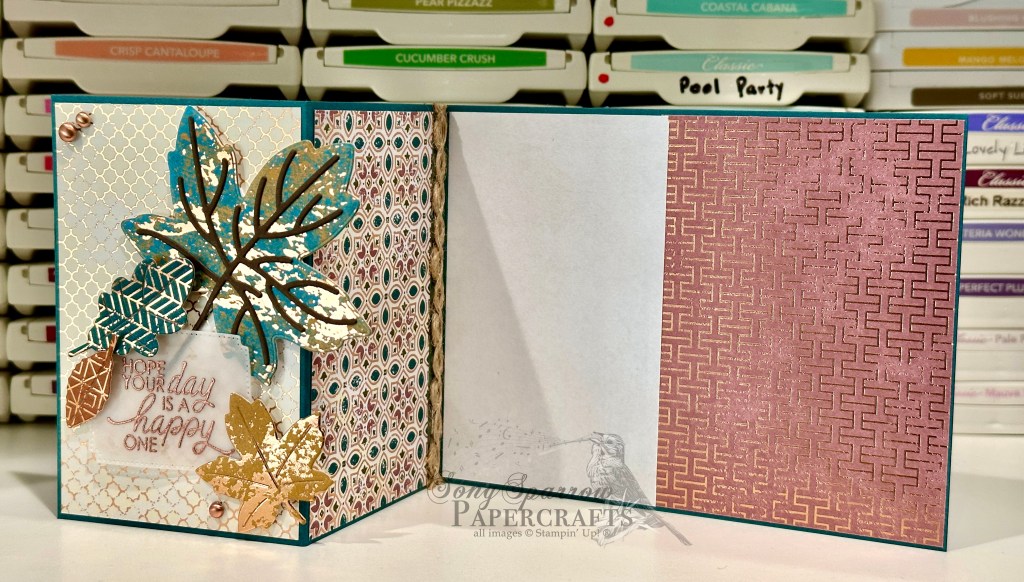
I recently ran across a small modification to the Z-fold that gives even more space for designer paper. As you look at the closed card, you may be thinking that the design looks oddly familiar. That’s because this fun fold is a combination of both a Z-fold and peek-through, but rather than cutting the one-inch strip from the card front, the card front is scored at the one-inch mark. Then this small flap is folded back toward the card front.
This card design begins with a base of Crushed Curry card stock. It is cut to a standard size of 4 1/4 x 5 1/2-inches with the 1-inch panel scored and folded back on the front panel. Two sheets of a single pattern of Meandering Meadow designer paper are needed for this design — one for the card front and flap and the other for the inside panel and inside base. I chose the beautiful fields of yellow daisies for this card because it perfectly represents the cheerful sentiment. The smaller strips of patterned paper are the reverse side of the sunny daisy paper. The focal sentiment panel is comprised of a vellum banner diecut using the Nested Essentials dies and a smaller sentiment panel diecut from Crumb Cake cardstock using the Autumn Leaves dies. The sentiment is from the So Sincere stamp set. To add a pop of additional color to the sentiment, a few sprigs of greenery cut from Pretty Peacock using the Bold Bouquet dies is tucked in the center. A scattering of sparkle gems add visual interest and move the eye across the design.
I really love this new fun fold variation and am looking forward to putting it to use with a few of my other favorite designer papers. What do you think of this fun fold variation? Interested in giving it a try? Check out the PDF tutorial here.
For today’s card design, I challenged myself to use paper scraps for as many elements as I could. I had accumulated a number of scraps of All About Autumn after completing projects for a team event. So those scraps set the color palette for this card design.
We begin with a base of Early Espresso cardstock. A 1-inch peek-through panel is cut in the card front. The predominantly vanilla mosaic foil from All About Autumn serves as the decorative base for the card front. Scraps of Mossy Meadow and copper foil serve as the peek-through elements on the base panel. A scrap of Moody Mauve foil is mounted askew on the mosaic foil to add visual interest and a color base for the vellum sentiment panel. The mauve also helps to bring out the copper metallic of the leaves and sentiment. The leaves are diecut from Oxidized Copper designer paper using the Autumn Leaves dies. The veining of the larger leaf is diecut from Crumb Cake cardstock to add a little definition without detracting from the overall design. The sentiment is stamped using the Pansy Patch set and heat embossed in copper atop a vellum panel that is diecut using a Deckled Rectangle die. The vellum sentiment panel and leaves are layered using dimensionals. The brushed metallic dots draw the eye to the sentiment panel in the center.
Do you save your paper scraps? If so, do you have success in using up your accumulated scraps? I’m a scrap saver and pretty efficient at being able to use them. I do periodically purge my scraps since the smaller pieces can sometimes take over. I love how these scraps worked together for this design!
Products used: Early Espresso, Crumb Cake, vellum cardstock All About Autumn (retired), Oxidized Copper DSP Pansy Patch stamps Autumn Leaves, Deckled Rectangles dies Copper embossing powder Brushed metallic dots Dimensionals Adhesives
All ads on this site are posted by WordPress and are based on your personal browsing history. I do not control ad content.
I’m feeling all the fall vibes these days. What about you? In usual fashion, however, the weather here in North Texas can’t decide if it’s summer, fall, or winter. But I shall press on with my fuzzy socks and long sleeves anyway!
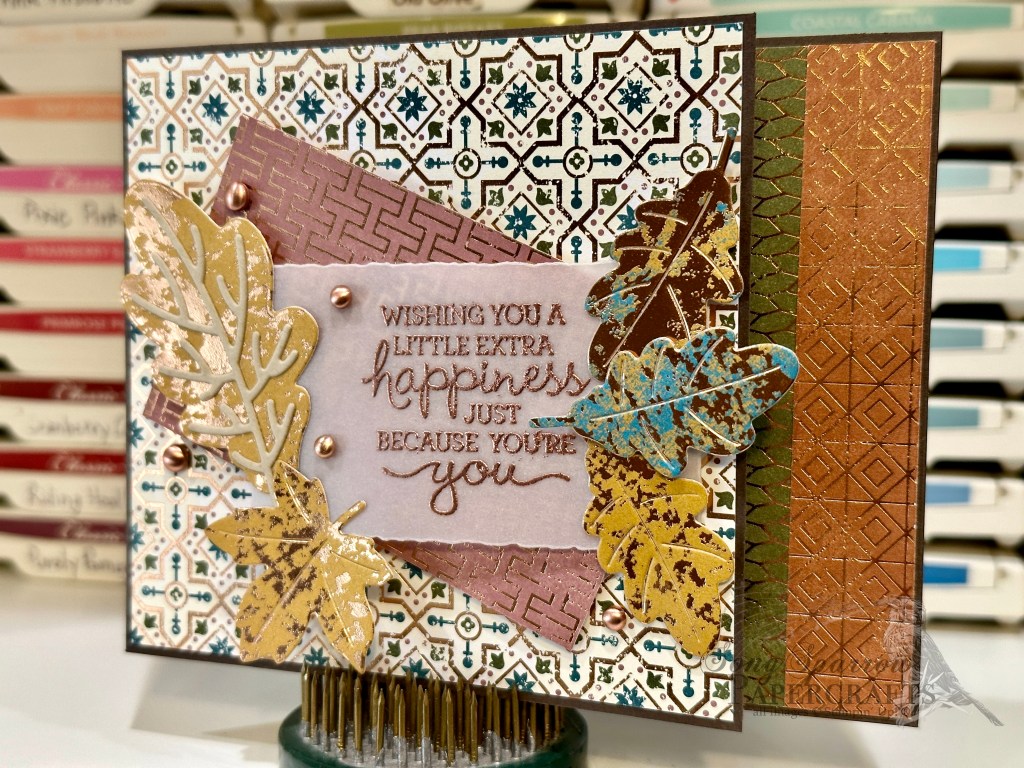
Today, we’re revisiting the Z-fold. Did you recognize it when you glanced at the photos of today’s card? It looks a little different when the orientation is changed from portrait to landscape, and I just love how this orientation adds some extra drama!
For this card, we begin with a base of Pretty Peacock. You’ll want to cut your card base 4 1/4-inches by 11-inches and then score at 2 3/4-inches and 5 1/2-inches to achieve the landscape-oriented Z-fold. The foiled papers are from two different designer series paper packs — All About Autumn and Oxidized Copper. For the card panels, I selected 3 different foiled patterns from the All About Autumn paper pack. These 3 patterns work in tandem to introduce the color palette of vanilla, peacock, and mauve. The leaves on the front panel are diecut from our selected designer papers using the Autumn Leaves dies. The veining for the largest leaf is cut from Early Espresso, which helps the eye pick up on the foiling in our other card elements. The sentiment is stamped using the So Sincere stamp set and then heat embossed in copper atop a panel of vellum, which is diecut using the Autumn Leaves die set. The sentiment panel and leaves are layered on the card front using dimensionals. The brushed metallic dots help the eye move across the front panel of the card and also draw out the foiling in the papers.
TIP: if you use a paper scrap that isn’t quite wide enough, like I did here with the mosaic pattern in the center, select a complementary ribbon to fill in the gap and add interest. I loved the texture and pattern that the natural wavy trim adds to the mosaic panel.
Products used: Pretty Peacock, Early Espresso, vellum cardstock All About Autumn (retired), Oxidized Copper DSP So Sincere stamps Autumn Leaves dies Natural wavy trim Copper embossing powder Brushed metallic dots Dimensionals Adhesives
All ads on this site are posted by WordPress and are based on your personal browsing history. I do not control ad content.
Do you participate in Thankful November? While I don’t always participate to the extent that I make social media posts, I do tend to find myself much more reflective through the month of November and try to turn my focus to giving thanks. Honestly, it’s such a wonderful practice that I really need to carry it forward throughout the entire year. How do you feel about it?
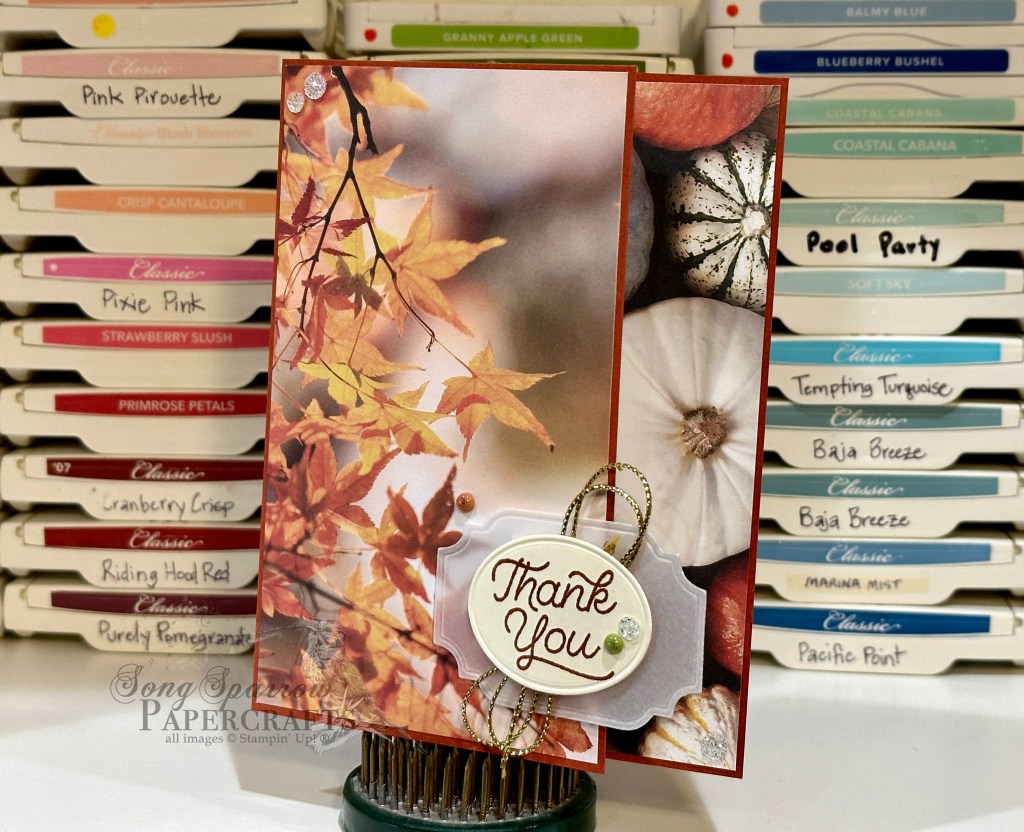
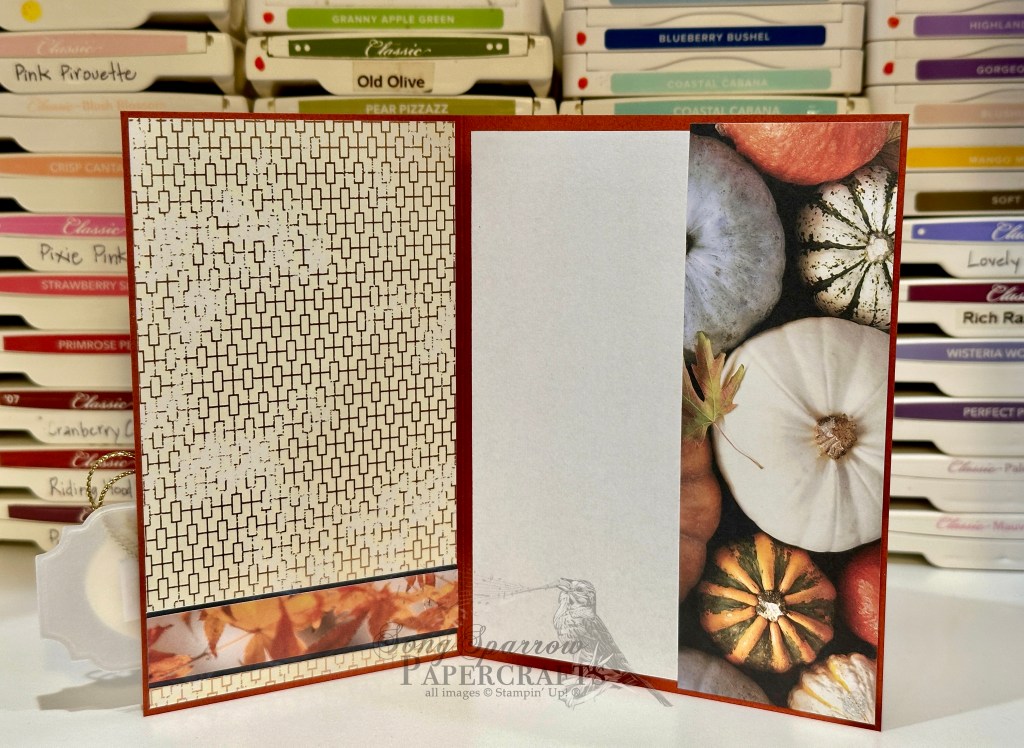
Inspiration for card designs reflecting thankfulness always seem to come much easier this time of year. And today’s design is no exception. This lovely peek-through fun fold card uses the All About Autumn designer series paper. This paper pack is so inspired — with its beautiful foiled patterns on one side and still life fall photographs on the other. I’m finding it hard to even begin to grow tired of it! And clearly LOTS of you agree because it is now completely sold out!
Today’s card begins with a base of Cajun Craze. Aside from the 1-inch peek-through section on the card front, the base is a standard 4 1/4-inch by 5 1/2-inch design (when closed). This design uses 3 separate sheets of All About Autumn designer paper. The sheet with the sweetgum leaves, the foiled side of the sheet with books, and the sheet with pumpkins. The sweetgum leaves sheet is cut to 3 1/8-inches by 5 3/8-inches and adhered to the front panel of the card base. I retained a 1-inch strip of the leaves and used it as an accent on the foiled panel on the inside of the card, and the small strip is matted with a scrap of the blue cardigan sheet from this paper pack — that I happened to have lying on the craft table. The pumpkin sheet that serves as the peek-through portion of this card measures approximately 2-inches wide. The sentiment panel is more understated in this design because I wanted it to complement more than stand out. The base panel of the sentiment is vellum that is diecut using the All That die set. The sentiment from Circle Sayings is stamped in Cajun Craze on Very Vanilla cardstock and then diecut using the oval from the All That die collection. Before adhering the sentiment to the vellum base, I elevated it on dimensionals and then set it atop some twists of gold cord. Glitter sequins and speckled spots add a little sparkle and visual interest and help guide the eye down and across the card design.
I don’t know about you, but when I have a pack of really gorgeous paper, my mind immediately turns on designs that allow me to showcase as much of the paper as I can. And so I naturally gravitate to fun folds. Do you like fun folds? Did you know that there are quite a few PDF tutorials for some of my favorite folds over on the Tutorial page of my website? Feel free to click here to check them all out!
Products used: Cajun Craze, Very Vanilla, vellum cardstock All About Autumn DSP (sold out) Circle Sayings stamp set All That dies Speckled dots Glitter sequins Gold cord Dimensionals Adhesives
All ads on this site are posted by WordPress and are based on your personal browsing history. I do not control ad content.