Dies · Shop the catalog · Zany Zoo

Zany Zoo Diagonal Fun Fold

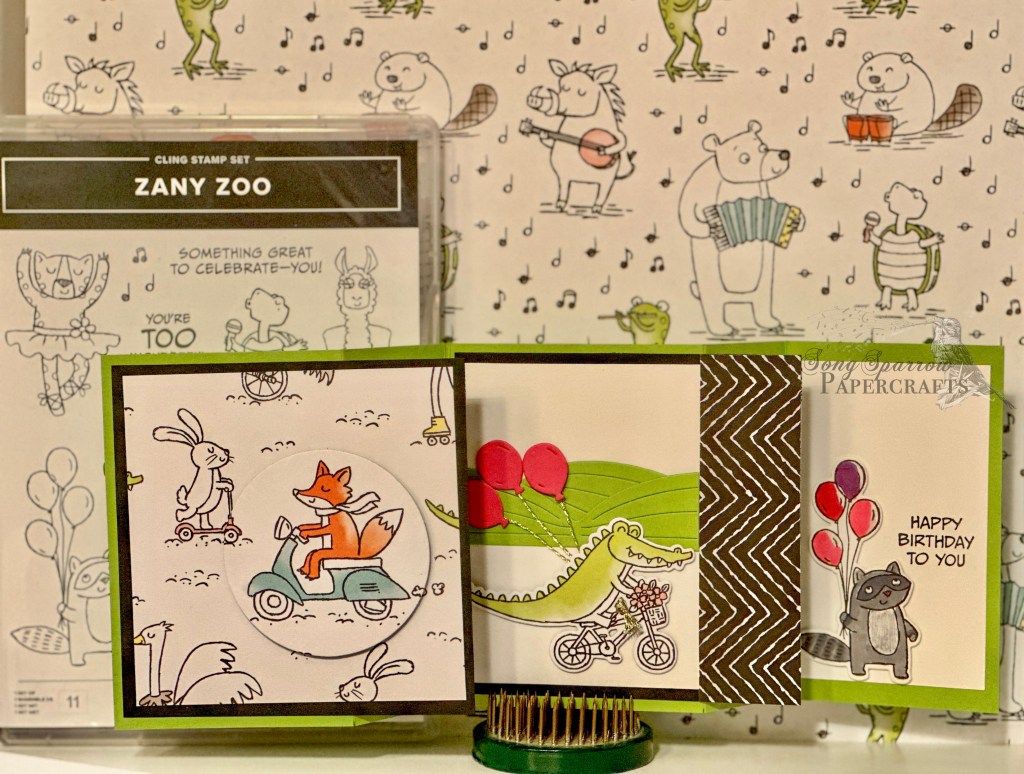
Howdy and happy Monday everyone! I hope you enjoyed the weekend and maybe a festivity or two for Father’s Day. Today, I’m bringing you another fun card design using the Zany Zoo Suite and a diagonal fun fold shared over at Klompen Stampers.

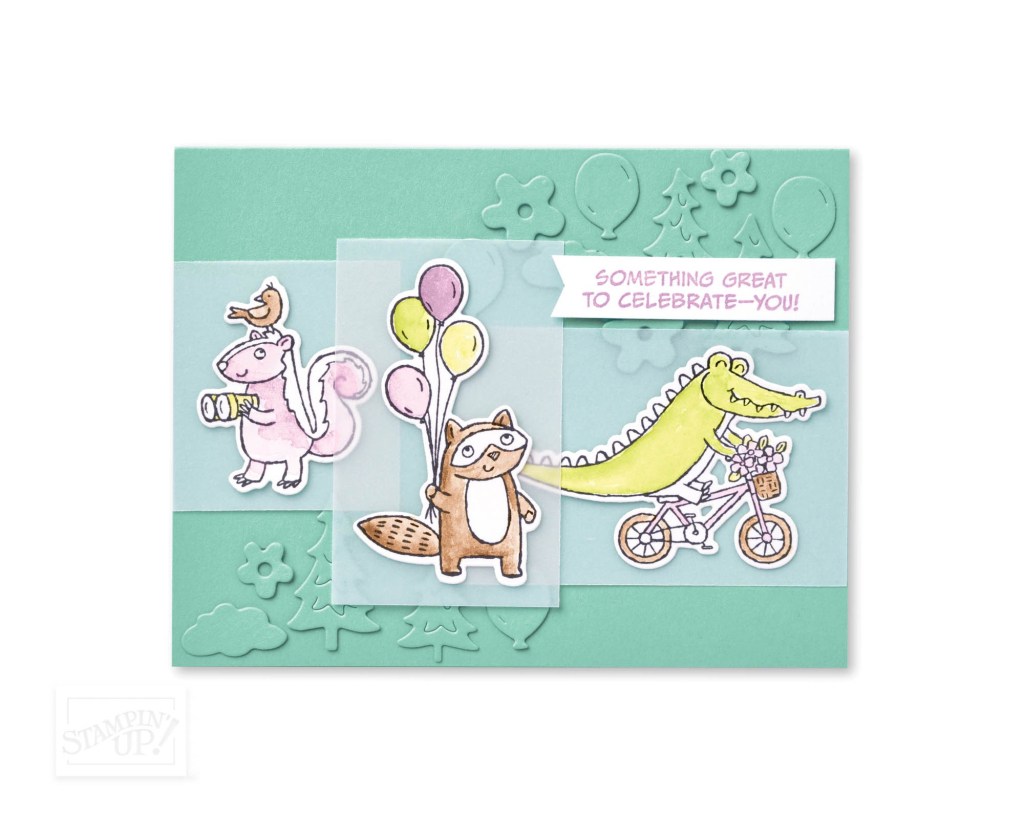
What I love about this particular fun fold design is that it is so easy and it makes TWO cards at one time. How about that for efficiency?! For this first design, I used the sing-along sheet of designer paper from the Zoo Crew pack to create a cute birthday card.

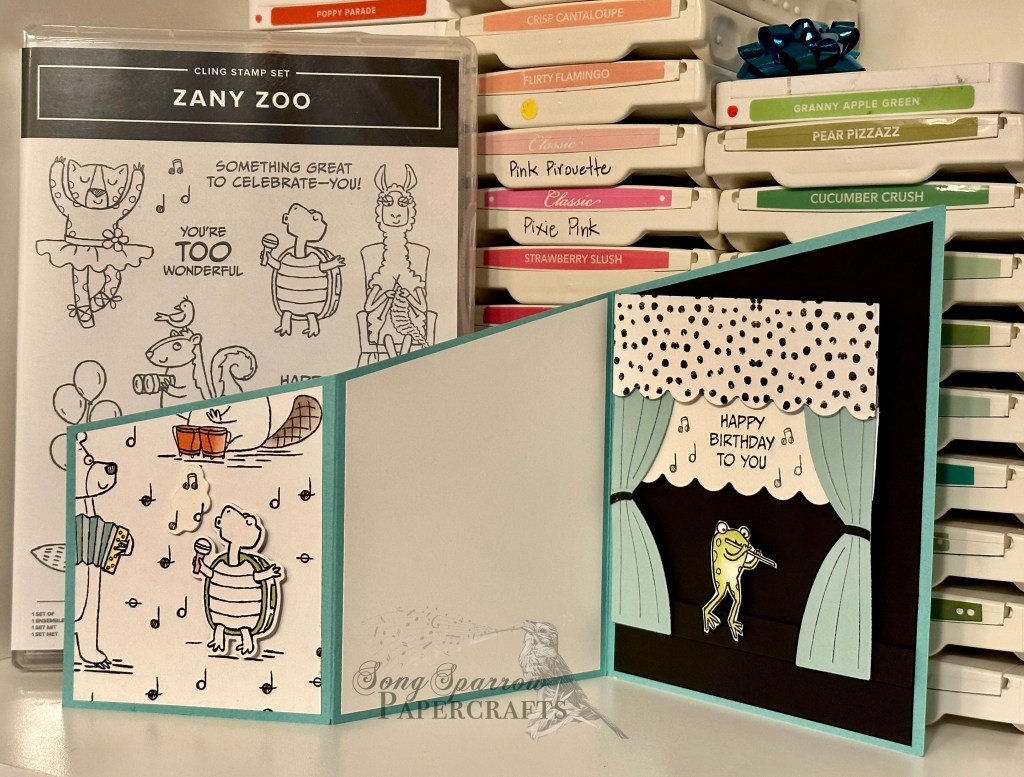
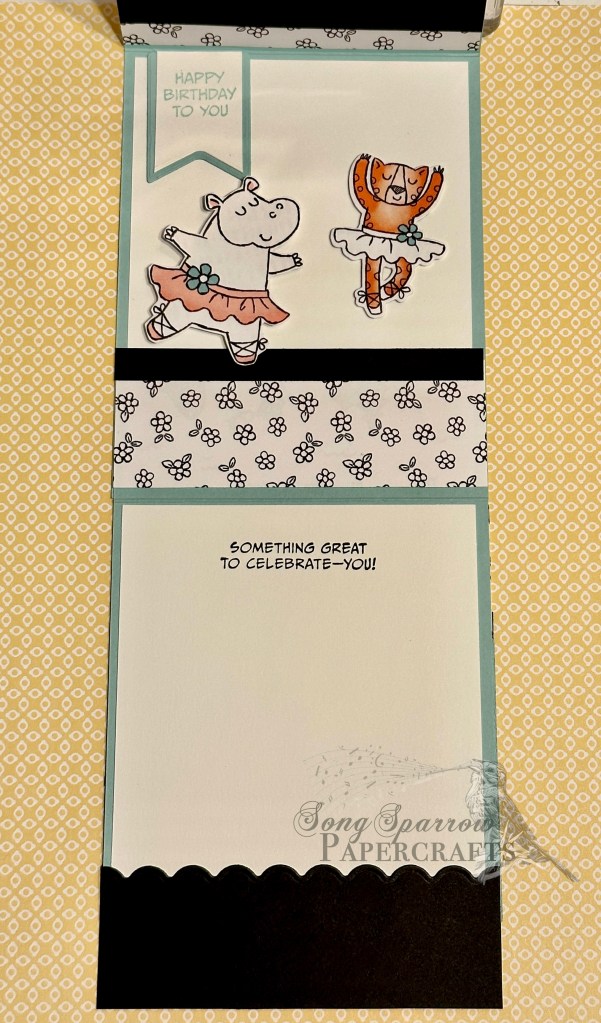
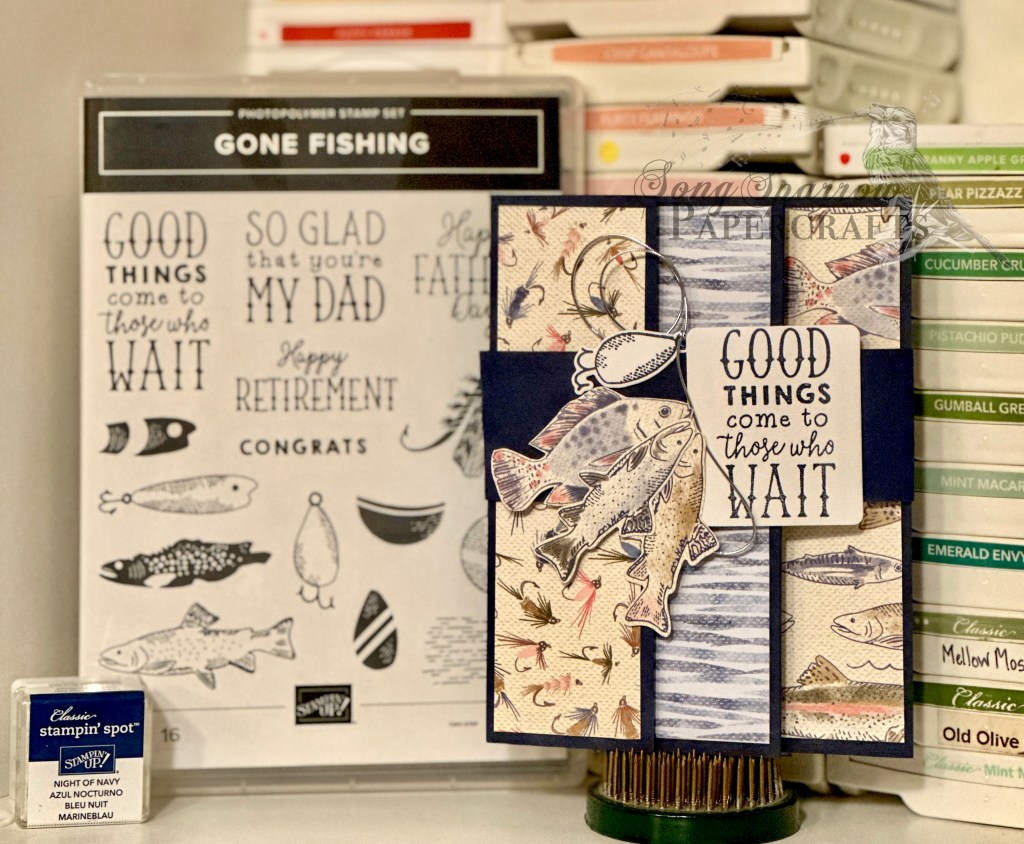
The base is Pool Party and the diagonal design is cut by marking the cardstock at 3” down/up on the short edge of both sides of the paper and then cutting a straight line between the two marks. Score one half at 3” and 6.75” and then fold to create the panels. The outward-facing panels are 2.75” wide, 3.25” wide, and 4” wide.

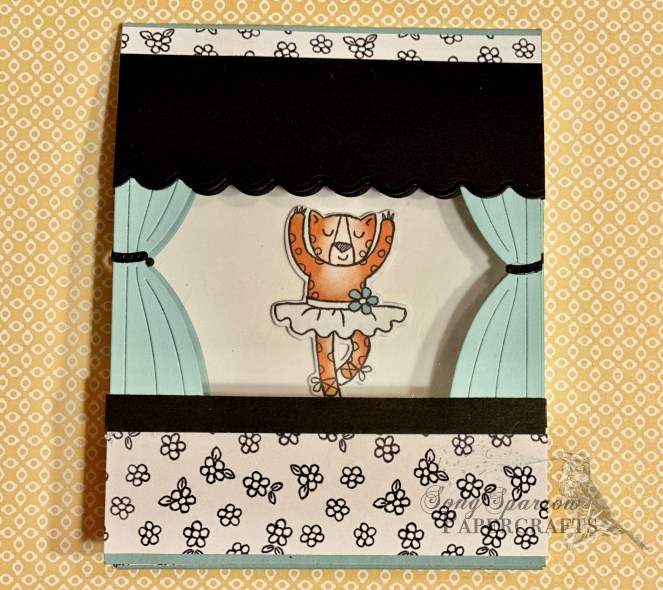
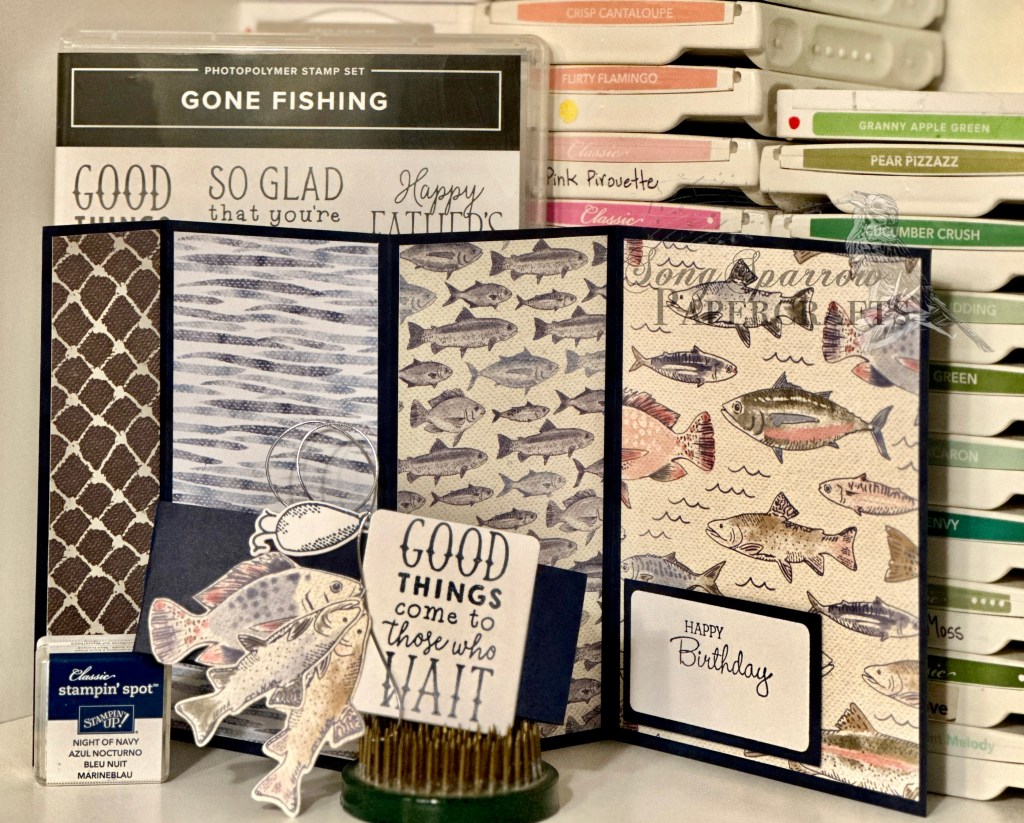
For this first design, I chose DSP for the front panel and diecut and popped up the singing turtle for effect. I chose a complimentary DSP from the Zoo Crew pack for the outward-facing center panel. I prefer to have the center inside panel be blank for a personal message and selected white for the message panel. I built a concert scene for the inside back panel using Pool Party, DSP, and black cardstock. I fussy cut the frog from the sing-along sheet and used lots of dimensionals for a more realistic look.

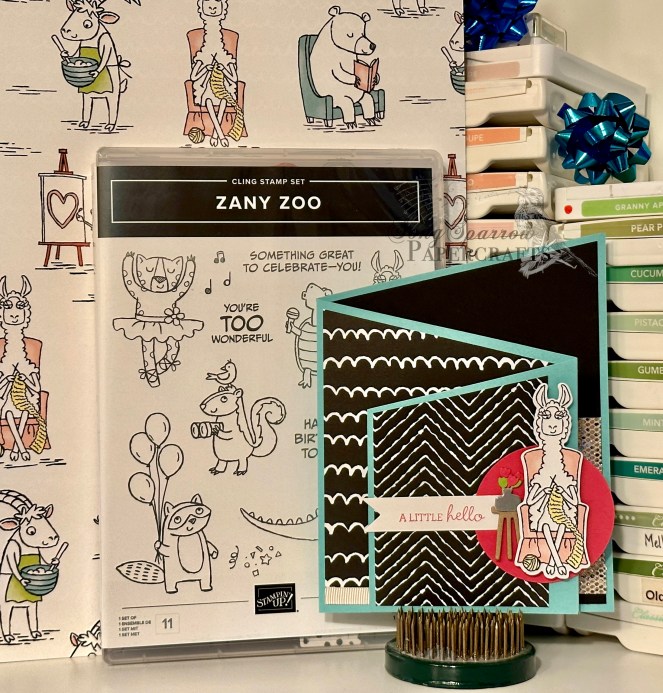
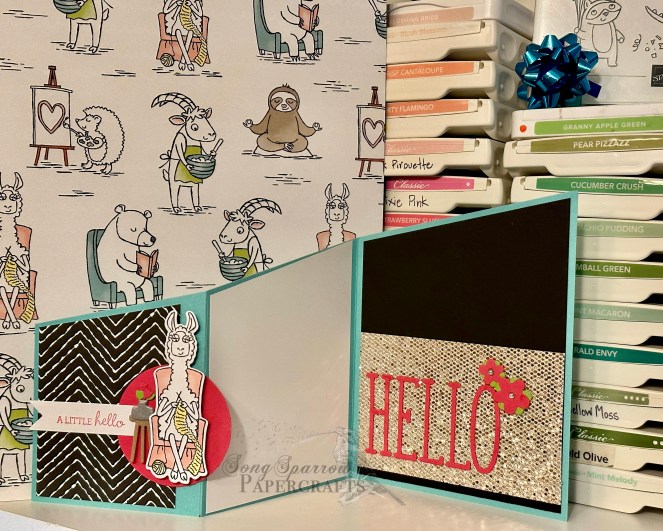
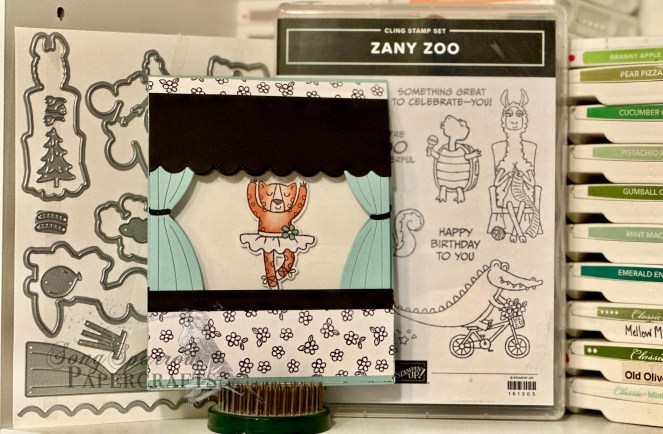
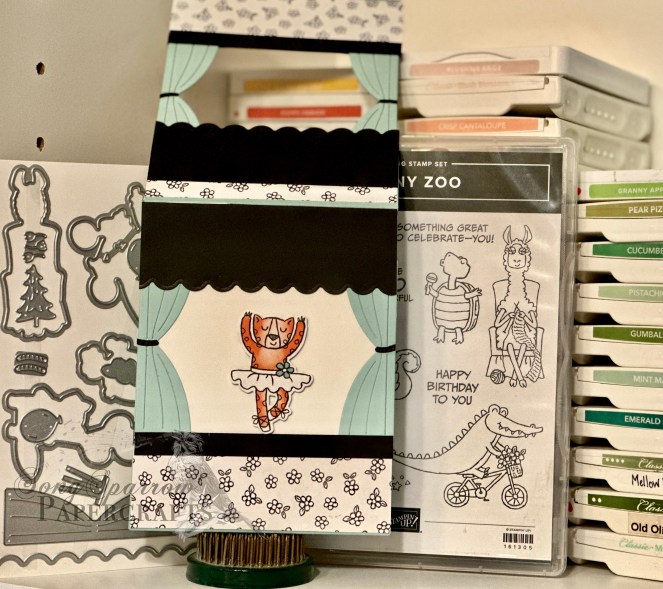
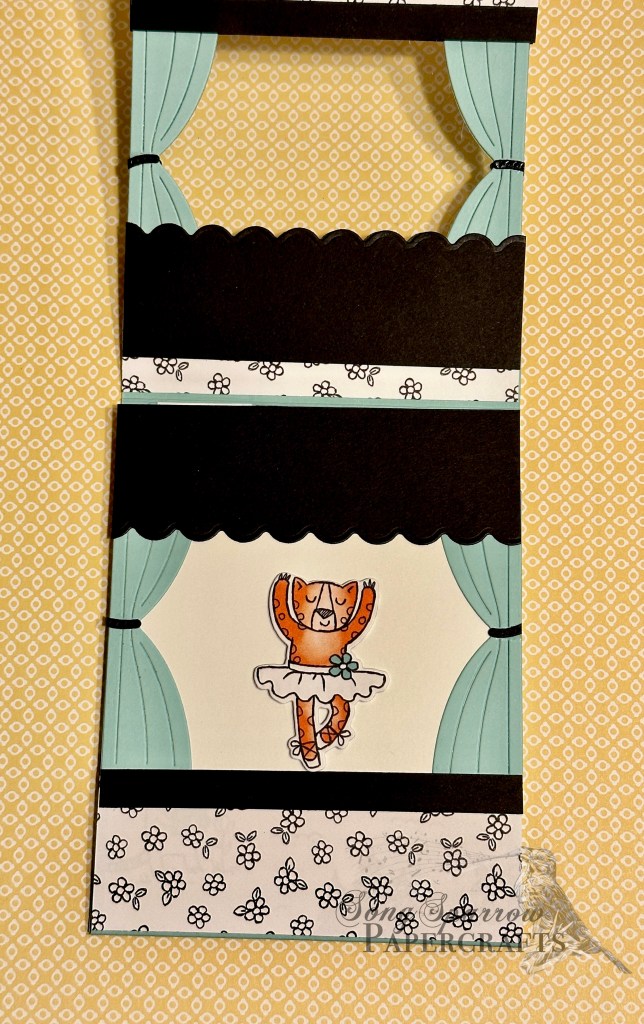
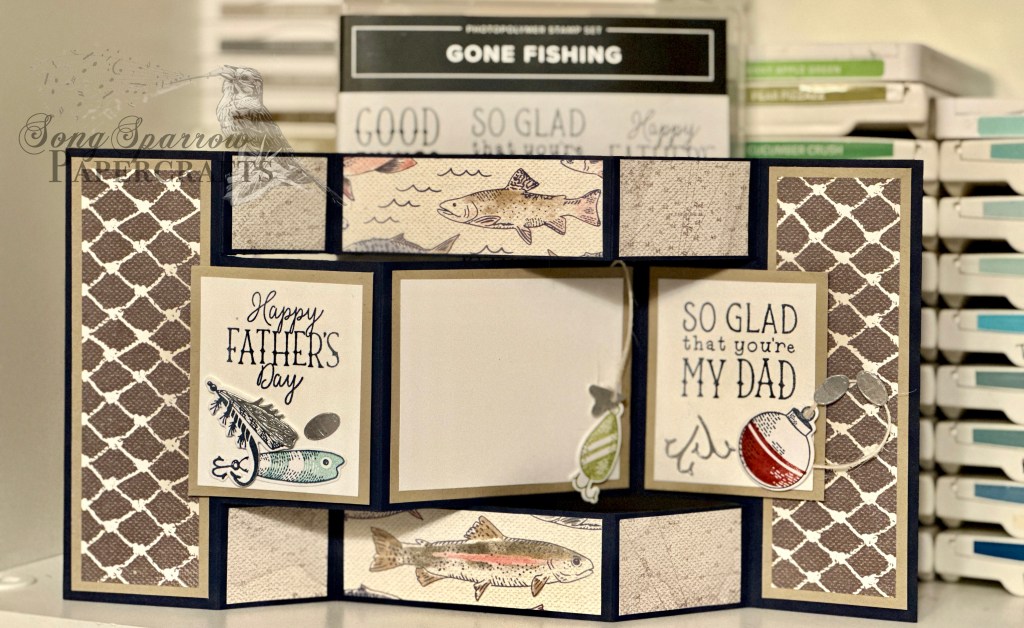
Using the second card base, I created this fun little Hello notecard. I used the dies to cut the crocheting llama from the arts & crafts sheet from the Zoo Crew paper pack. I punched a circle from Melon Mambo cardstock to use as the base under the llama. To complete the scene, I diecut the table, vase, and flowers using the Zany Zoo dies. I used a portion of a sentiment from the Pansy Patch stamp set and cut a banner strip from white paper. This entire scene is popped up on dimensionals for added drama and realism. The outward-facing center panel is a scrap of sing along sheet and finished with Petal Pink duo ribbon. I kept the very back panel very simple with black cardstock, a strip of champagne dazzle specialty paper, and a simple HELLO diecut using the Alphabet a la Mode set and cut from Melon Mambo cardstock. The flowers are diecut from Melon Mambo and Granny Apple Green and the centers are finished with festive pearls and sit atop dimensionals.

Products used:
Design 1
Zany Zoo stamps & dies
Zoo Crew DSP
Coastal Cabana, Pool Party, Basic Black & White cardstock
Dimensionals
Adhesives
Design 2
Zany Zoo dies
Alphabet a la Mode dies
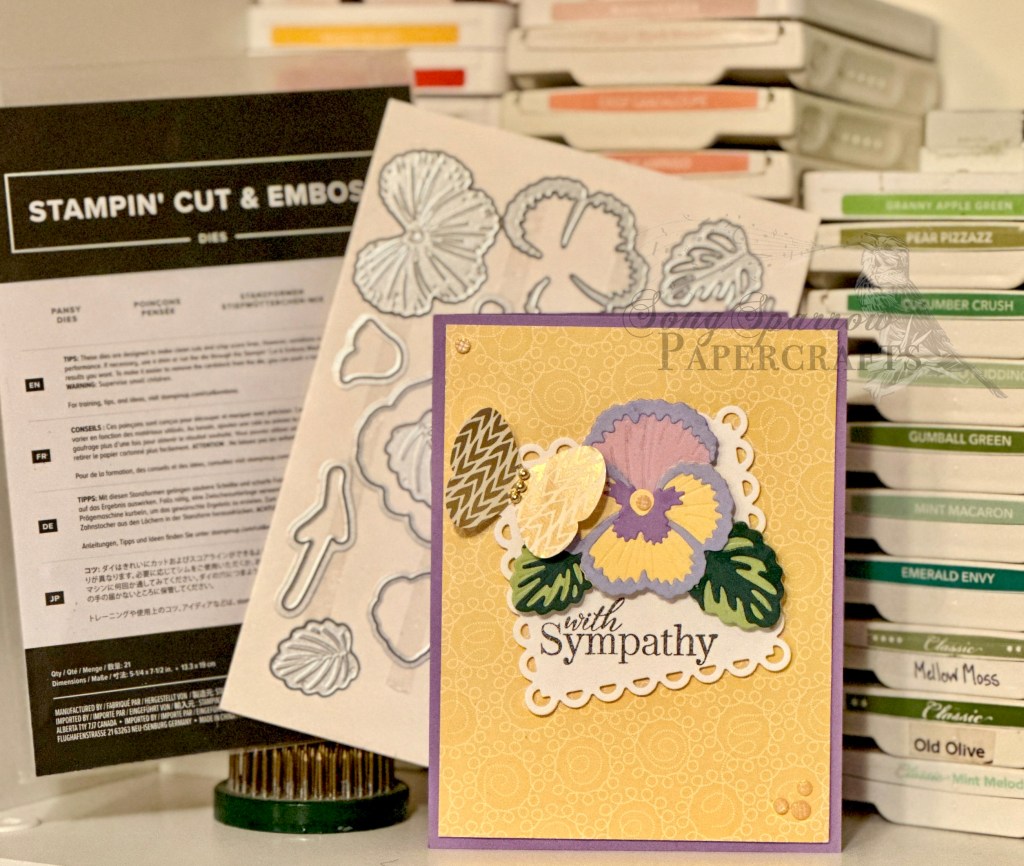
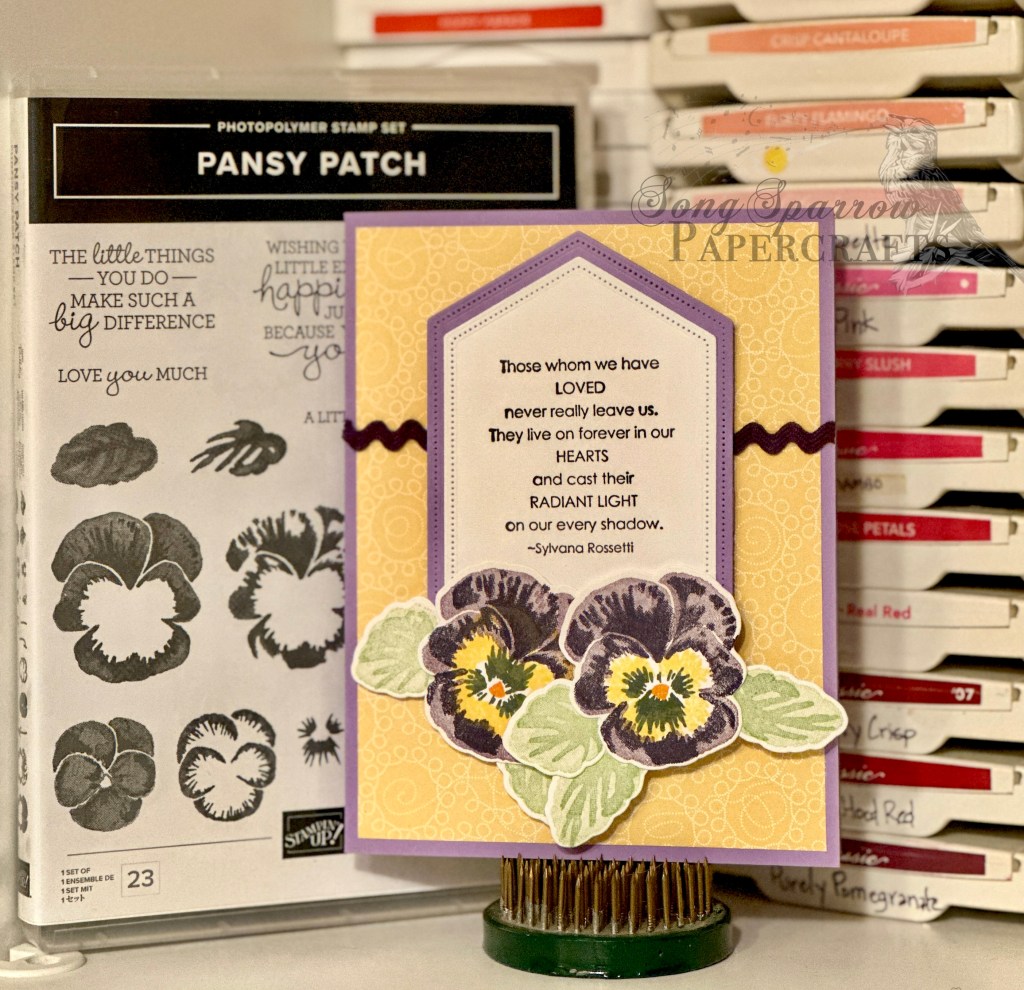
Pansy Patch stamps (sentiment)
Circle punch
Zoo Crew DSP
Champagne dazzle designer paper
Melon Mambo, Granny Apple Green, Basic Black & White cardstock
Festive pearls
Dimensionals
Adhesives

All ads on this site are posted by WordPress and are based on your personal browsing history. I do not control ad content.

Dies · Shop the catalog · Zany Zoo

Zoo Crew Accordion Fun Fold

Today’s design features an accordion fold and the Zany Zoo Suite of products. Inspiration for this card came from Tami White’s accordion fold tutorial. The three-panel design gives you so many opportunities to highlight both adorable designer paper and stamps. I wanted this design to tell a story of a birthday surprise.

The base of the card is Granny Apple Green cardstock, which is cut to standard size and scored to create the folds and panels. The first panel features the on-the-move sheet of paper from the Zoo Crew designer paper pack. To bring attention to the scootering fox but avoid fussy cutting, I used a circle punch to cut it out and dimensionals to pop it up. The second panel introduces the adorable alligator from the DSP. I cut the alligator and balloons using the coordinating dies, and I made the hilly background using the curtain die. The third panel features the raccoon stamp and die, which is colored using Stampin’ Write markers.

Products used:
Zany Zoo stamps & dies
Zoo Crew DSP
Granny Apple Green, Melon Mambo, Basic Black, Basic White cardstock
Stampin’ Write markers
Gold trim
Dimensionals
Adhesives

Dies · Shop the catalog · Zany Zoo

Zany Recital Window Card

I’m so excited to have received the Zany Zoo Suite in my SU! supply shipment today. I’ve been anxiously awaiting this bundle because it is just TOO cute!

I found a really fun window card tutorial in my search for inspiration on Pinterest, so I decided to give Lynn Dunn’s window card design a try. The only complaint I had with her original design was that there was no space to write a personal message inside the card. So I decided to try to incorporate a flip-down flap that I learned on Klompen Stamper’s Fun Folds Vol. 7 to allow room to write inside the card.

By adding the flap for a personalized message, that gives a total of four panels for this design. The card front is the window to the first inside scene of the dancing cat taking center stage. The dancing cat panel folds down to reveal another scene on stage of the cat doing a duet with the hippo on the center panel and the bottom panel for the personalized message. TIP: If you don’t have a piece of pristine acetate, use an extra piece from a stamp set. Just wipe it down on both sides with a microfiber cloth to remove any temporary impressions from stamps. I used the extra that came with Gone Fishing.

The base of the card and flap are Pool Party cardstock. The Zoo Crew designer paper provides all of the patterned elements. I die cut the dancing cats and fussy cut the hippo from the Zoo Crew DSP. Basic Black and Basic White round out the cardstock used. The curtains and banner were cut using the coordinating Zany Zoo dies. This card was super fun to make and would certainly come together more quickly with duplication. If there’s any interest, I may do a tutorial on this one down the road.

Products used:
Zany Zoo stamps
Zany Zoo dies
Zoo Crew DSP
Pool Party, Basic Black, Basic White cardstock
Acetate
Adhesives
Dimensionals

All ads on this site are posted by WordPress and are based on your personal browsing history. I do not control ad content.

Gone Fishing · Shop the catalog

Good Things Come Pop-Up Card

I ventured to try another fun fold technique today that I learned over at Klompen Stampers. I modified the template to create a pop-up card because I forgot how the template was supposed to fold, which created a whole lot of extra work. Because I was winging the pop-up portion of this design, there was way more cutting and measuring of smaller pieces than is really necessary for the original template. BUT in the end, I did like the result so I’m gonna go ahead and share my happy accident. (PRO TIP: just go back and rewatch a tutorial video when you can’t remember exactly how to make a fold work!)

I used the Gone Fishing Suite for this design. The front of the card is CASEd from the current catalog but flipped to accommodate the horizontal orientation of this design. The base of the card and pop-up segment is Night of Navy. I fussy cut the fish on the inside of the card and popped them up to give some depth of field.

Products used:
Night of Navy, Basic White cardstock
Gone Fishing stamps and dies
Let’s Go Fishing DSP
Silver embossing powder
Gold trim
Dimensionals
Adhesives
Sending You Thoughts stamps for inside sentiment (retired)

All ads on this site are posted by WordPress and are based on your personal browsing history. I do not control ad content.

Dies · Gone Fishing · Shop the catalog

Fishing Fun Fold Card

I’m excited to bring you another design using the Gone Fishing Suite and another fun fold technique. The StampingBae girls posted this terrific belly band fun fold card design today, and I just had to give it a whirl!

My favorite thing about this particular design is that it showcases so many of the wonderful elements of the Gone Fishing Suite, but especially the DSP. The card base is Night of Navy cardstock that is cut and scored. All of the patterned panels are comprised of strips of designer paper, and the sentiment panels are white cardstock. TIP: you can use the tackle box die to cut sentiment panels!

Products used:
Night of Navy, Basic White cardstock
Let’s Go Fishing DSP
Gone Fishing stamps
Gone Fishing dies
Silver Simply Elegant Trim
Adhesive
Dimensionals

Download the tutorial here!

All ads on this site are posted by WordPress and are based on your personal browsing history. I do not control ad content.

Dies · Gone Fishing · Shop the catalog

Father’s Day Tri-Fold

I’m excited to bring you another design using the Gone Fishing Suite. I also decided to tackle a new folding technique that Stampin’ with Kim shared this week, and I would highly recommend that you give it a try.

Today, we’re using the stamps, dies, and designer paper for this suite to create this stunning design. This design uses three sheets of the DSP—the swimming fish, the netting, and the map. The base of this design is made from Night of Navy cardstock. The matting is Crumb Cake cardstock, and the center panels are white. The tackle elements are stamped on white cardstock and cut out using the coordinating dies. The base of the card is cut and scored to create the folding portions of the design.

TIP: I wanted the sinkers, hooks, and spinner elements to be shiny but don’t have any silver paper right now. So I embossed a section of white cardstock with silver embossing powder and diecut these elements from the silver embossed section.

Here is a view of the card stretched out to see each of the panels and then a view of the collapsed card design.

Products used:
Let’s Go Fishing DSP
Night of Navy, Crumb Cake, Basic White cardstock
Gone Fishing stamps
Gone Fishing dies
Silver embossing powder
Linen thread
Dimensionals
Adhesives

All ads on this site are posted by WordPress and are based on your personal browsing history. I do not control ad content.

Dies · Gone Fishing

Hooked on Father’s Day

Thus far, I’ve showcased the Pansy Patch set from the new catalog. This week we’ll be taking a look at the Gone Fishing Suite. June is a busy month in our family between Father’s Day and birthdays, and this set will be perfect!

The Gone Fishing Suite includes the stamps, dies, designer paper, and the Twisted Rope 3D embossing folder. (Buy the suite here) For this design, I used the stamps, dies, and paper. I included jute ribbon in the background to give the look of netting and add a little visual interest. The center panel is popped up on dimensionals to ensure it stood out against the patterned paper, and the fishing tackle elements are also layered on dimensionals for visual interest.

I’m really loving this set so far and can’t wait to show you more designs with this suite all this week!

Products used:
Let’s Go Fishing DSP
Night of Navy cardstock
Gone Fishing stamp set
Gone Fishing dies
Adhesive-backed pearls
Dimensionals
Adhesives
Stitched Nested Labels dies (retired)
Jute ribbon (retired)

All ads on this site are posted by WordPress and are based on your personal browsing history. I do not control ad content.

Dies · Pansy Patch · Shop the catalog

Pansy Paper Piecing

As promised, today’s design features the Pansy Patch dies. The focal image of this card is 100% diecut from cardstock. I wanted to create a realistic focal image and selected a pansy variety that had pink, purple, and yellow hues and used the inspiration photo to guide my color cardstock selections.

Although the paper pieces are on the larger side, the width of the detailed pieces is narrow enough to make traditional adhesive runners a less than ideal choice for adhering the layers together. In cases such as these, I turn to one of two adhesives—the fine-tip glue pen or adhesive sheets. In this case, I elected to use the glue pen and it worked beautifully!

Products Used (current):
Pansy Dies
Cardstock—Daffodil Delight
Adhesive-backed gems
Adhesive-backed pearls
Dimensionals
Adhesives

Products Used (retired):
Cardstock—Almost Amethyst, Pale Plum, Lavender Lace, Handsome Hunter, Certainly Celery
Delicate Dots DSP
Butterfly Punch
Love & Sympathy sentiment

All ads on this site are posted by WordPress and are based on your personal browsing history. I do not control ad content.

Pansy Patch · Shop the catalog

Patch of Pansies

The long-awaited first batch of new SU! product arrived late this afternoon, and I’m just getting the opportunity to sit down and have a little crafting time. Knowing that I had two sympathy cards in the queue, I decided to start with the Pansy Patch stamps and dies. The stamps layer beautifully to create realistic-looking blossoms, and the dies cut snugly around each stamped image for a fussy-cut-free design. The die set also includes dies that paper piece blossoms and stems. Check back tomorrow to see the result!

Products used (current):
Pansy Patch stamps and dies
Adhesives
Dimensionals

Products used (retired):
Almost Amethyst cardstock
Delicate Dots DSP
Ribbon Originals rickrack
Stitched Nested Labels dies
Love & Sympathy sentiment

All ads on this site are posted by WordPress and are based on your personal browsing history. I do not control ad content.

On the way

New Designs on the Way

Does anyone remember the Marshall’s commercial with the lady standing outside the door drumming on the window saying, “Open! Open! Open!” I’m currently awaiting my latest SU! product order and find myself checking on shipping status updates in much the same way, thinking “Just get here already!”

I have several new suites of products headed my way, including Gone Fishing and Zany Zoo, and I can’t wait to unpack them to get started on the design ideas I have rattling around in my head! With Father’s Day and several birthdays in June, I have plenty of opportunities to put ink to paper. I hope you’ll keeping fly by the nest in the next couple of days to check out the new designs as soon as they fledge!