Do you ever see a card design and think, “man, that’s brilliant!” as you’re scrolling Pinterest or some other platform for inspiration? There are some cards that are just show stoppers! Today’s tri-fold card design was inspired by a stunning card posted by fellow demonstrator Stamp With Amy K, and as soon as I saw it, I knew that I had to give it a try for this week’s In the Woods card series.

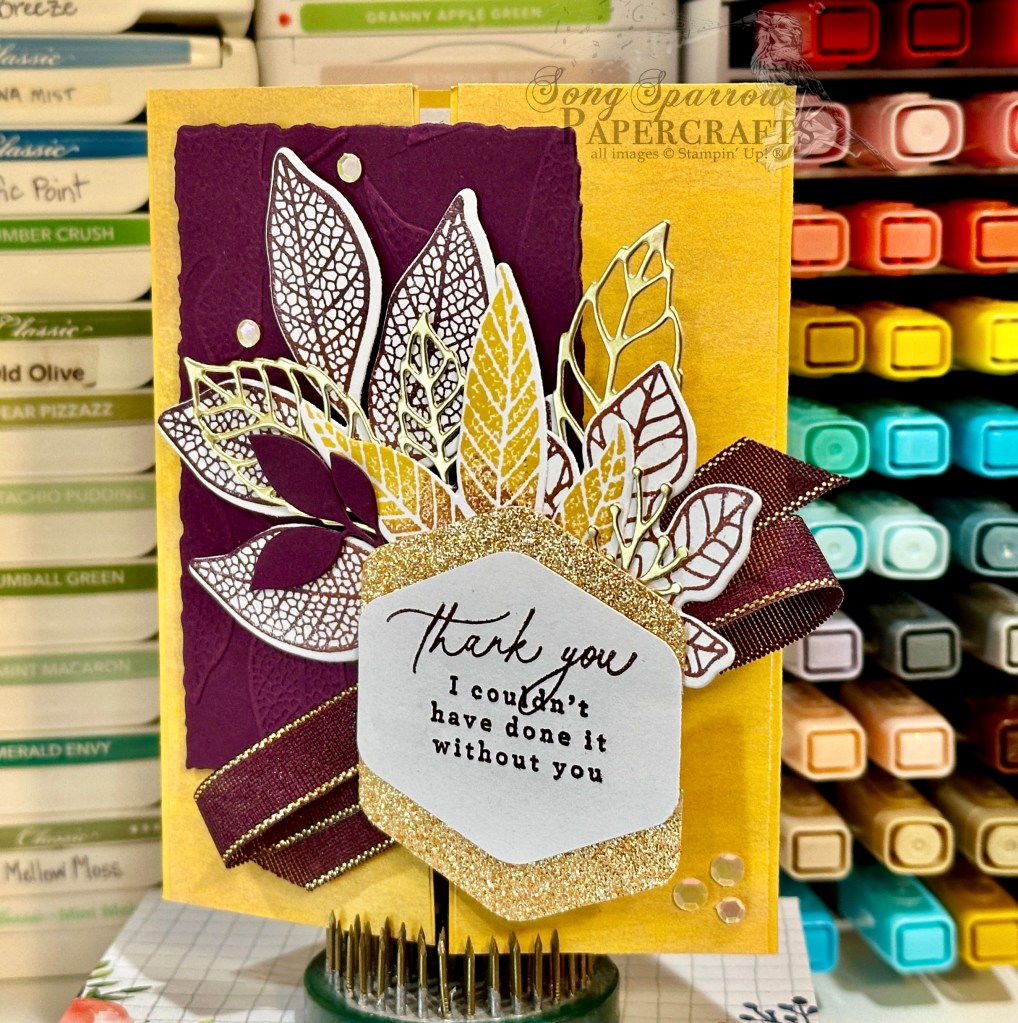
I knew that I wanted to spotlight a gorgeous sunrise scene paper from the upcoming Splendid Autumn paper pack. We get started with this super simple tri-fold fun fold design with a base of Blackberry Bliss cardstock. I laid the open tree grove die from the Grove die set over the sheet of paper to determine what portion I wanted to peek through to the card front and then diecut the front panel of Blackberry Bliss cardstock. I diecut two deer silhouettes in black cardstock with the Grove dies and then adhered them in the grove of trees with tear-n-tape. To keep the deer in place, a sheet of acetate is then adhered to the back of the card front. The focal sentiment from Adventurous Sky is stamped on Flirty Flamingo and diecut using the Happy Little Things banner die. It’s adhered over a ribbon of Blackberry Bliss & Gold, gold trim, and Peach Pie and then mounted to a textured gold hexagonal mat.

The sheet of Splendid Autumn is then cut to fit inside the card and the far right of the patterned paper panel is scored to create the fold-out portion. The inside card base is covered with white cardstock, which also serves to cover the anchor for the patterned paper sheet.
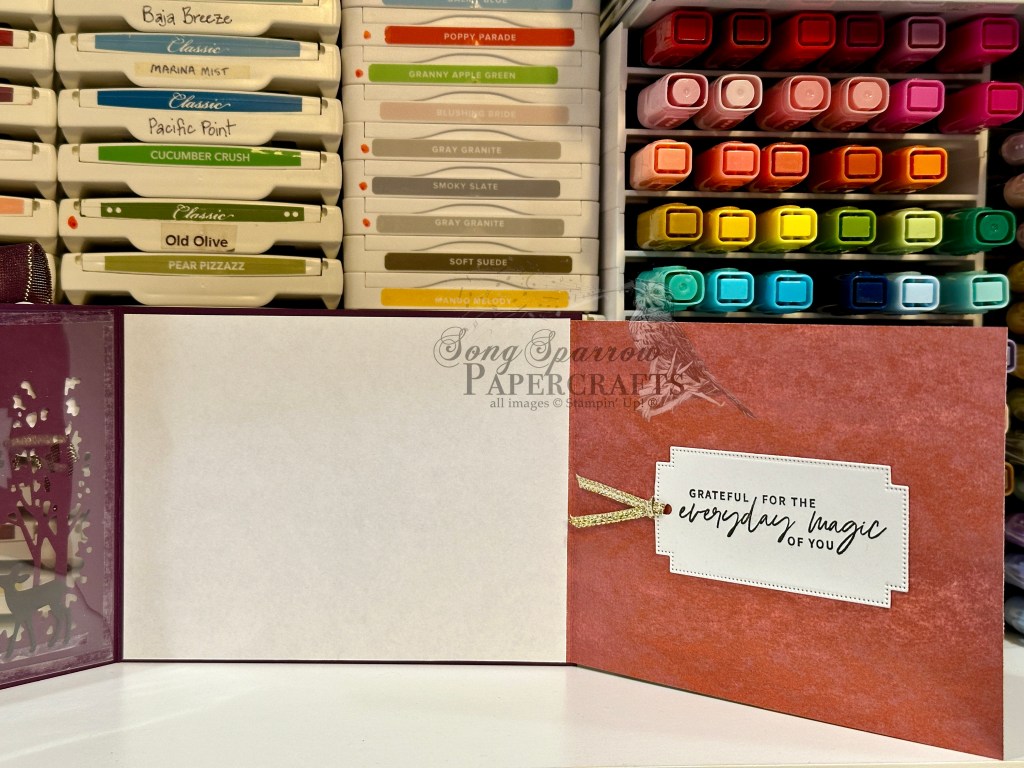
I stamped the sentiment from Something Fancy in black ink on white cardstock and then diecut with the Greetings of the Season die, adding some gold trim to finish things off before adhering to the fold-out panel. We finish off the whole design with careful placement of shiny sequins and sparkle gems to add twinkles on several of the panels to help draw the eye across and through the full tri-fold.
Although this card looks complicated, it comes together quickly and is even more stunning in person! Tomorrow, we’re going to be walking through a new-to-me design technique. I hope you’ll pop by and check it out!
Products used in today’s card:
Blackberry Bliss, Flirty Flamingo, Basic Black, Basic White cardstock
Splendid Autumn (coming soon!), textured gold DSP
Acetate window sheets
Something Fancy, Adventurous Sky stamps
Grove, Autumn Leaves, Happy Little Things dies
Heartfelt Hexagon punch
Peach Pie bordered ribbon, Blackberry Bliss & gold textured ribbon (coming soon!), gold trim
In Color shimmer gems, shiny sequins
Adhesives


")
")


 Bordered Ribbon")
 Trim Combo Pack")


 Specialty Paper")


")
")