Happy Saturday, crafty friends! Today is class day here in the studio and class prep took a bit longer than anticipated, which is why Sketchy Fridays was a no-go this week. Sometimes it just works out that way and we have to pivot. BUT I have lots to share with you today!
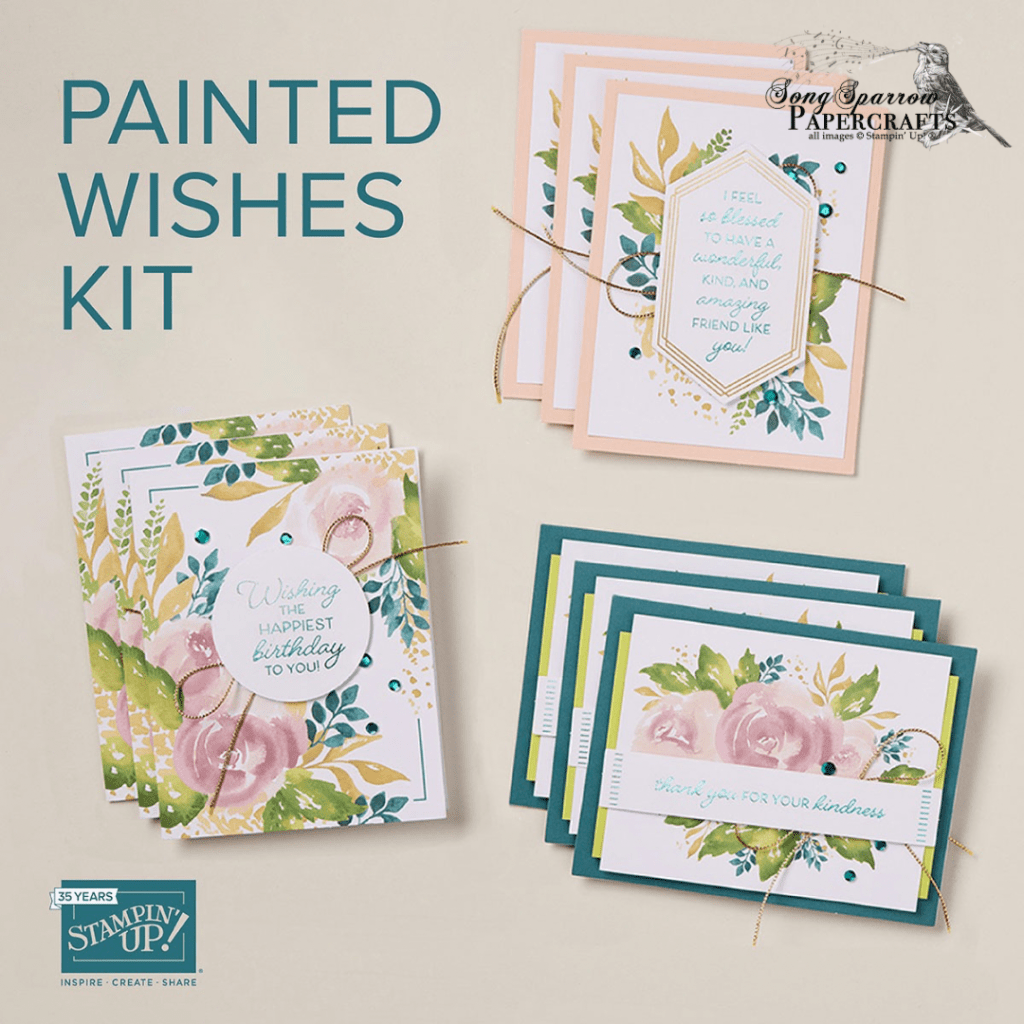
In today’s class, we’re going to be working with the Painted Wishes Kit by Stampin’ Up! These kits are terrific for those who are new to paper crafting or for seasoned pros with not enough time for a full-on crafting session. This is an all-in-one kit, meaning it comes with everything you need to make beautiful cards. You can make them exactly as shown and have 3 birthday cards, 3 thank you cards, and 3 friendship cards. OR with a few things from your crafty stash, you can elevate the card designs into beautiful alternatives. Today, I’m going to show you how I adapted this kit to make 6 alternative designs.
For our first 3 design alternatives, we’re adding some paper and ribbon from the crafty stash and otherwise just taking liberties with the way things are combined and how they look.
Alternative 1
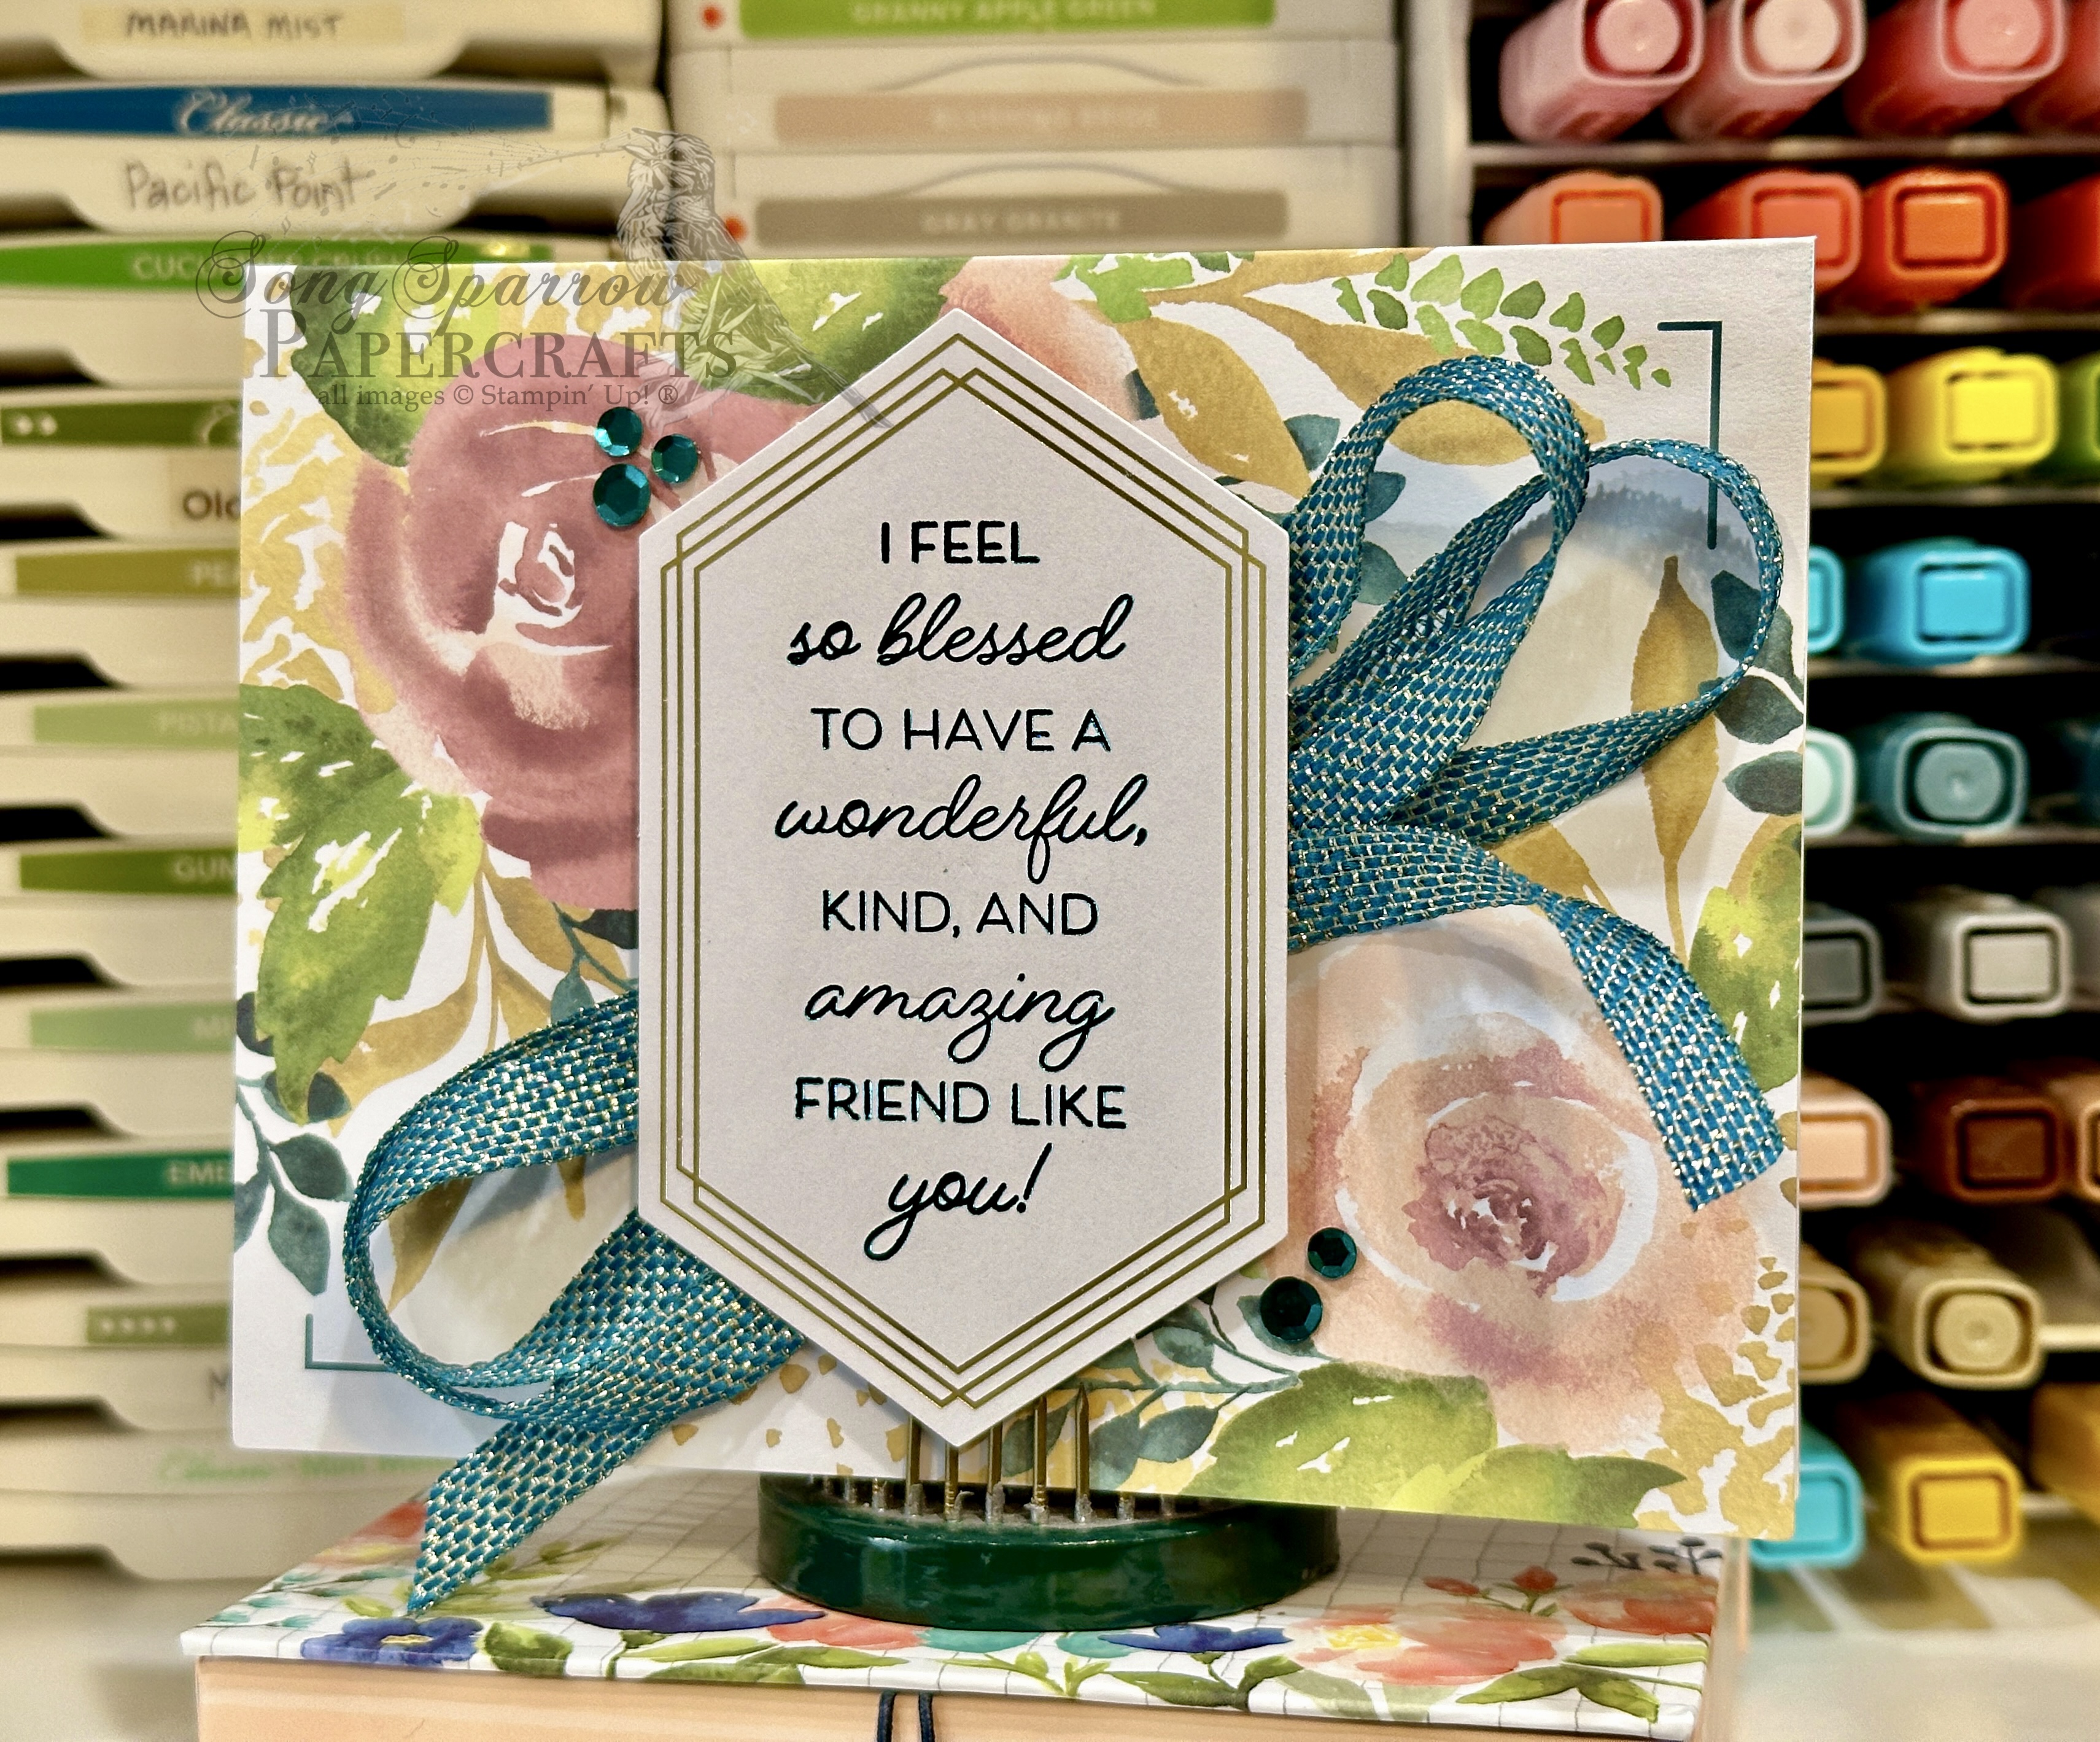
The kit uses the birthday sentiment with the rose card base, but here we’re substituting the friendship sentiment and adding Pretty Peacock & Gold metallic ribbon behind the sentiment to help it stand out.
Alternative 2

To punch up the backdrop for our sentiment panel, we’re adding a panel of the Pretty Peacock Season of Elegance paper over the peacock card base. I’ve also cut around the greenery to give more delicate detailing to the sentiment panel, along with adding gold foil specialty paper behind the sentiment to help it stand out. Some Pretty Peacock & Gold metallic ribbon ties everything together.
Alternative 3
For our third alternative, we’re cutting our rose panel into two pieces and giving them lots of detailing along the edges. I’ve also used the Spotlight on Nature dies to add the edging detail to the circle sentiment panel. Isn’t it amazing how those two simple things totally transform these kit elements?

Two of our next three kit design alternatives incorporate items from the crafty stash to punch things up.
Alternative 4

I wanted the gold foiling in the sentiment panel to pop as the main design element, so I chose a lovely foiled leaf pattern paper from the Nature’s Sweetness paper pack and diecut it using the Countryside Corners dies. A little crisscross of Pretty Peacock & gold metallic ribbon behind the sentiment helps it pop. I cut apart the rose panel and used just the greenery as the side accent for the sentiment. The detailing of the greenery pulls together the leaf elements.
Alternative 5
The rose card base is gorgeous all by itself, and I wanted as much of the watercolor beauty to stand out as possible, so we’re keeping things simple behind our sentiment panel with just a few sparkly diecut pieces. I cut a circle from the gold mercury vellum using the Spotlight on Nature dies and then added a Pretty Peacock banner die cut with the Countryside Corners set. A faux bow of the Pretty Peacock & gold metallic ribbon ties all of our sparkly elements together and makes the sentiment pop.

Alternative 6

Our final alternative design uses all of the kit elements but in an unexpected way. First, I mounted each of the background panels a little askew for some visual interest. This really helps pull all of the subtle colors to the forefront and give the card a sense of movement. Using the other portion of the rose panel I cut for card #4, I mounted it along with the sentiment on dimensionals, giving us two planes of view for our greenery.
It doesn’t take much from the crafty stash to transform kit elements into elevated designs. Dig through your stash of leftover kit elements, scraps of paper, or extra diecuts and see what you can pull together.
Next week, we’re taking to the sky with the Everyday Skies designer series paper. I hope you’ll come along and check out all the fun ways we can make this paper soar!
Product List
 Specialty Designer Series Paper")
 Specialty Designer Series Paper")
 Specialty Paper")

 Specialty Designer Series Paper")


 Metallic Ribbon")
