We’re finishing out this week’s tour of the Flowering Zinnias suite with a beautiful fun fold featuring the designer series paper. The paper in this suite is what initially caught my eye, but once it was all said and done, I ended up with all of the coordinating products after being inspired by what other crafters were able to do with the suite as a whole.
Today’s card design uses a double fold-over panel fun fold and showcases the Flowering Zinnias DSP. We’re using the coordinating Simply Zinnia dies to accentuate elements of the gorgeous paper.
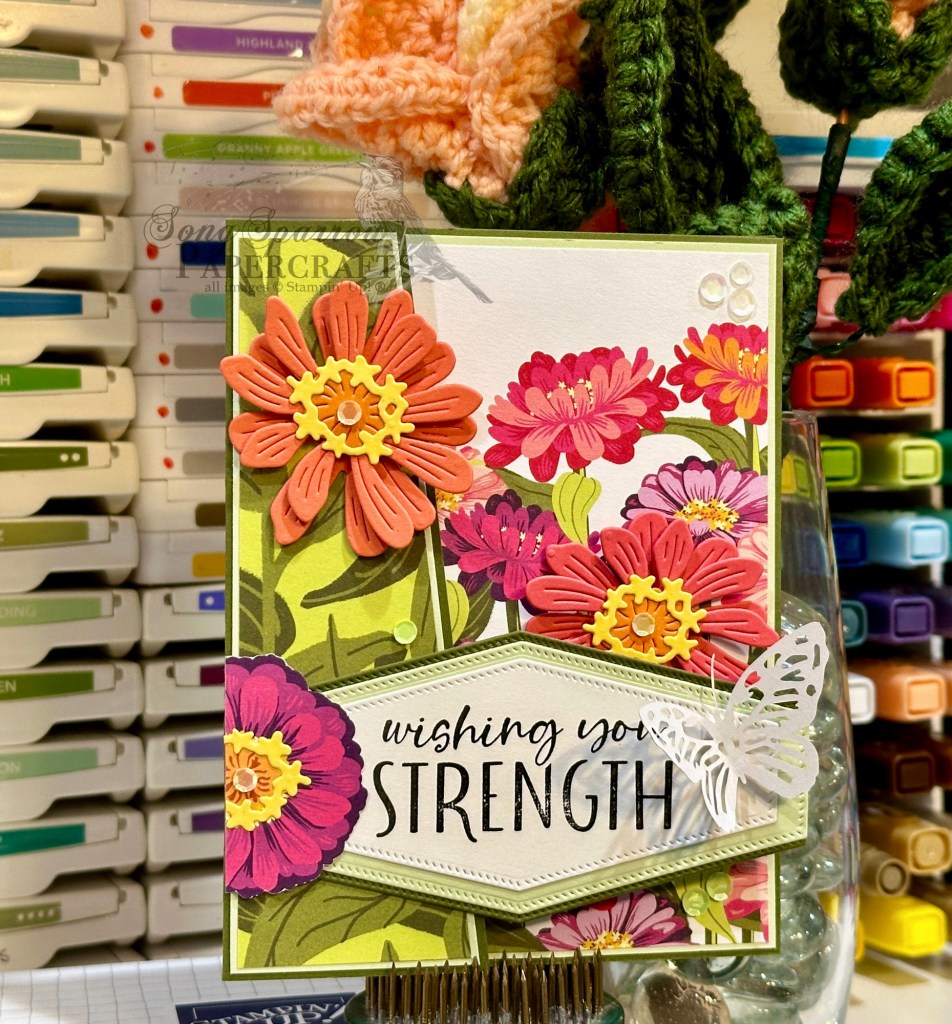
We start this card with a standard base of Mossy Meadow cardstock, which is scored in the center. The front panel is cut diagonally to make a smaller fold-over panel in order to reveal more of the gorgeous designer paper on the fold-over panel underneath. This small panel is then covered with the leaves and stems patterned sheet from the Flowering Zinnias paper pack, which is matted with a piece of Soft Sea Foam cardstock. Each layer is 1/8-inch smaller than the next.
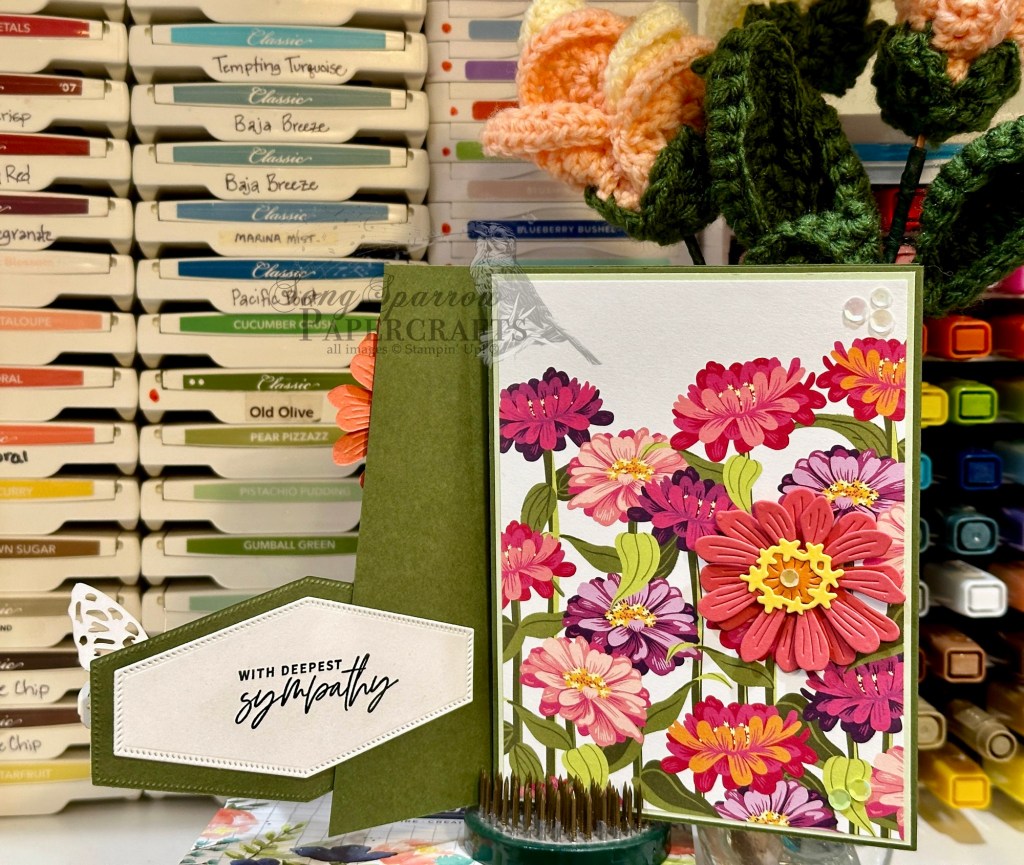
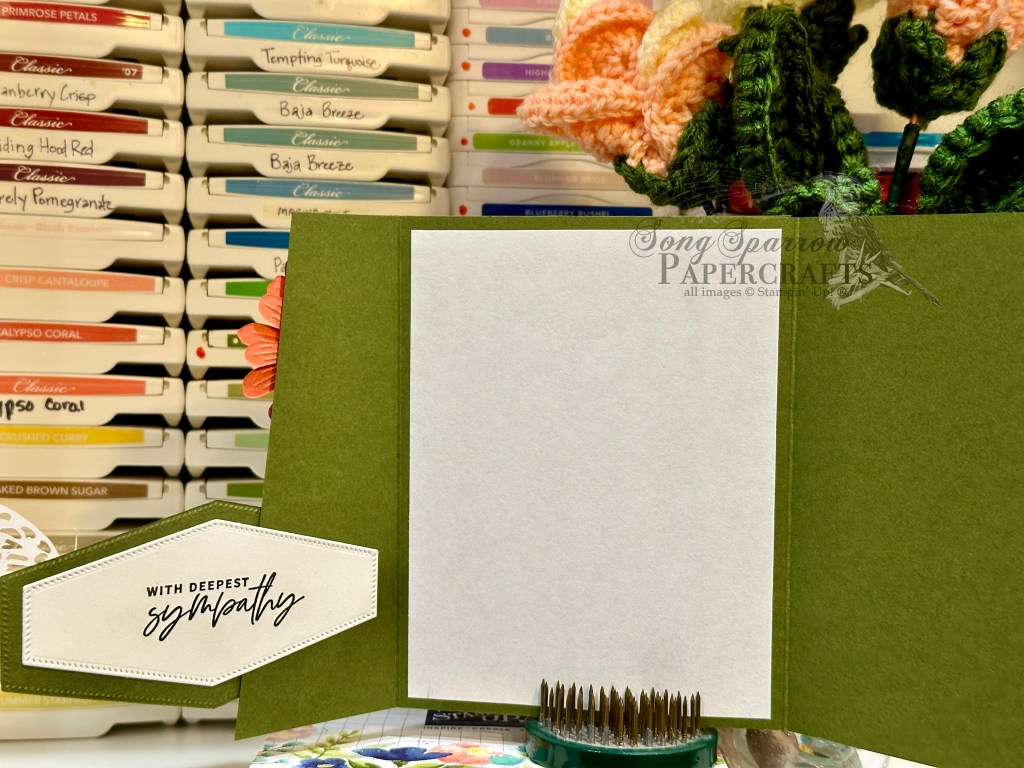
Next, we move to assembling the overlapping front sentiment panel. The base layer is Mossy Meadow cardstock that has been diecut with the second largest hexagon from the Nested Essentials die set. Cut an identical size hexagon from Soft Sea Foam and then cut a sliver from the center so that a small border of Mossy Meadow is exposed on either side at top and bottom when the two hexagons are adhered together. The sentiment panel is cut from white cardstock with the next-smallest nesting hexagon from the die set and the sentiment from the Inspiring Snapdragons stamp set is stamped in the center. All three layers are adhered together in one flat panel and adhered directly to the bottom of the front fold-over panel. I cut a second sentiment panel from white cardstock and stamped the sentiment from Something Fancy in the center. This is adhered to the back of the hexagon on the inside of the small fold-over panel.
Now we move to assembling the inside fold-over panel. This panel also begins with a base of Mossy Meadow cardstock, which is cut so that there is a 1-inch flap to adhere to the card base and serve as the hinge for this panel. The sheet of designer paper from the Flowering Zinnias pack is matted with a sheet of Soft Sea Foam and then adhered to the flap base. Each layer is 1/8-inch smaller than the one underneath. The inside message panel is a plain white sheet of paper that has been left blank for an extended message.
We finish off the card design by accentuating the zinnias in the patterned paper panel. Using the Simply Zinnia dies, I assembled two blooms. The petals are cut from Calypso Coral and Flirty Flamingo, while the flower centers are cut from Daffodil Delight and Pumpkin Pie. I also cut a single bloom from the edge of the sheet of blooms paper from the paper pack and adhered a flower center to the top to add that bit of realism to it, as well. The partial flower is adhered to the left side of the sentiment panel to cover the center seam of the Soft Sea Foam layer. The two diecut zinnia blooms are placed so that they give some life and realism to the two DSP panels—one over the stems and leaves flap and one nestled in the floral DSP panel just under the sentiment. Everything is finished off with sequins and a butterfly.
Click here to download the detailed PDF tutorial for today’s card. Don’t be intimidated by the number of steps! I break things up into bite-sized pieces to help ME not miss a step the next time I pull out my directions. *wink*
Tomorrow we’re (finally) going to get a look at those By Your Side Kit alternatives. I hope you’ll pop in to see how you can make a few little tweaks to kits to give them a fresh look.
Products used in today’s card design:
Mossy Meadow, Soft Sea Foam, Calypso Coral, Flirty Flamingo, Pumpkin Pie, Daffodil Delight, Basic White cardstock
Flowering Zinnias DSP
Simply Zinnia, Nested Essentials dies
Inspiring Snapdragons, Something Fancy stamps
Paper butterfly
Shiny sequins, sequins trio
Dimensionals
Adhesives
