Sketchy Fridays

Sketchy Fridays: You Are Loved

TGIF, everyone, and happy Valentine’s Day! Do you have special plans for the evening? We enjoyed a nice meal and exchanged a few things to mark the day. We don’t ordinarily celebrate the day in the traditional sense but don’t let the day go by without marking it in some way.

But let’s go down to the real business – Sketchy Fridays! For those of you who are new here, Sketchy Fridays is a weekly series where we’re using a card sketch to design our featured card. Right now, we’re working through a full series of designs using the card sketches found in current Stampin’ Up! catalogs.

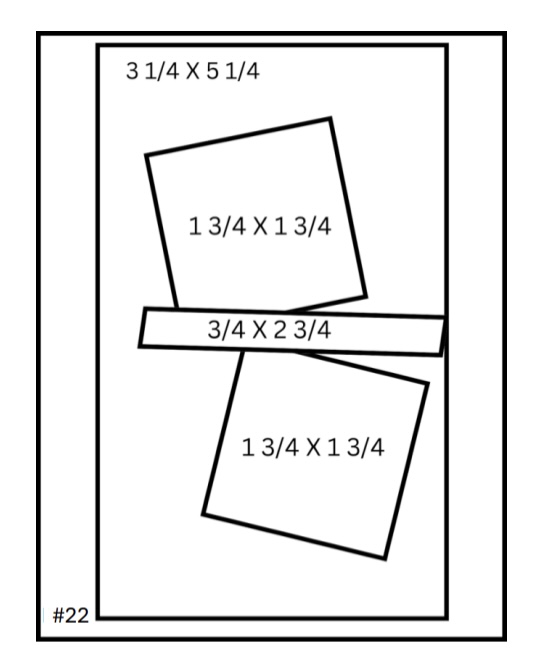
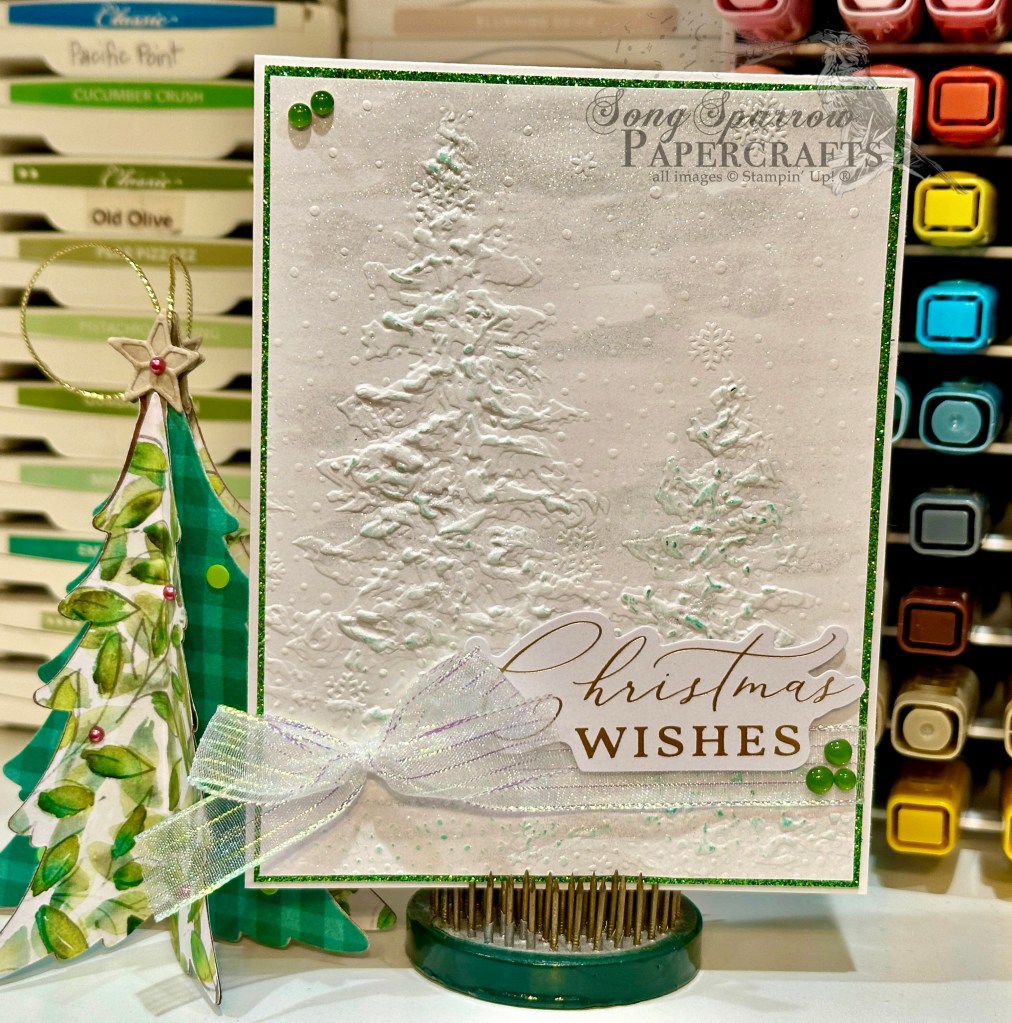
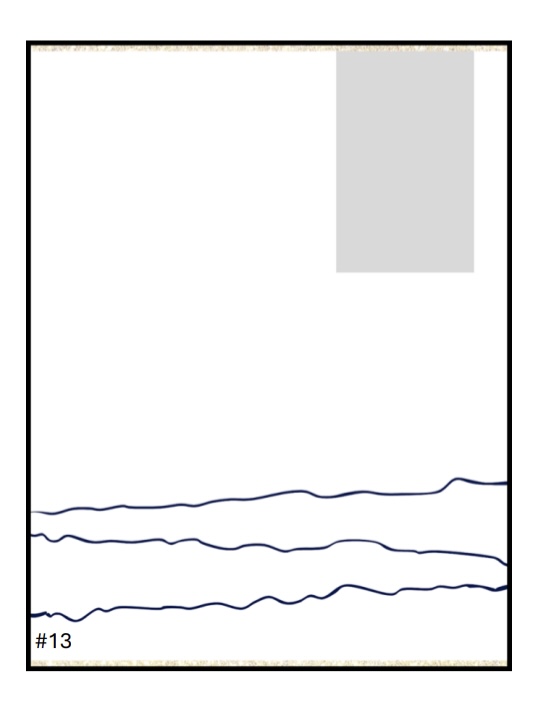
This week’s card is based on Sketch #22 from the Stampin’ Up! Annual Catalog. Today, we’re pairing up several embossing folders and a recent retired set called Softly Said to create this lovely Valentine design.

We get started with a base of Pretty Pink cardstock. Our Real Red background panel is machine embossed with the Dotted Circles embossing folder and then wrapped with the Real Red & White baker’s twine before being adhered to the background panel with dimensionals. I ran a sheet of Flirty Flamingo through the Plaster Painting embossing folder and a sheet of Melon Mambo through the Painted Texture embossing folder before cutting a heart from each using the Friends for Life dies. The hearts are adhered on varying levels of dimensionals to our embossed background panel. The sentiment from Softly Said is stamped in Cherry Cobbler on vellum and then diecut with the Nested Essentials dies. I adhered the sentiment panel over the hearts with glue dots and then added iridescent discs and heart sequins to finish things off with some shimmery sparkle.

Adding several different textures to a card design gives lots of visual interest and helps your elements stand out against a busier background. We’ll finish off our texture & sentiment design series tomorrow with a fun fold. I hope you’ll join me!

Products used in today’s card:
Pretty in Pink, Real Red, Melon Mambo, Flirty Flamingo cardstock
Vellum
Dotted Circles, Plaster Painting, Painted Texture embossing folders
Simply Said stamps
Nested Essentials, Friends for Life dies
Real Red & White baker’s twine
Iridescent discs, heart sequins
Dimensionals
Adhesives

Inspiration

Birthday Waves

This week, our designs are focused on the combination of texture and sentiments. Today, I’m veering away from the simplicity of the design theme just a smidge as I incorporate more products in this design as we combine the Soft Waves embossing folder with the Wildflower Birthday accessories. And you may notice that while this design has a lot more accoutrement, it lacks nothing in the texture department – from embossing to chunky glimmer paper, there’s a lot going on here!

Our card gets started with a base of Flirty Flamingo cardstock. The background is a quarter-sheet of Flirty Flamingo that has been machine embossed with the Soft Waves embossing folder and then mounted on a mat of Night of Navy cardstock. Our focal section has a lot of elements from the Wildflower Birthday accessories, including the strip of blue polka-dotted paper that serves as the anchor element. Then we have the foiled and striped tag that serves as the base for everything else in our focal panel. Our cupcakes sit atop a piece of the pastel ombre glimmer paper that is diecut with the Mixed Labels dies and the small circle cut with the Spotlight on Nature dies. Dimensionals provide some depth and give plenty of room for our pop of gold thread. The sentiment from Simply Said is stamped in Night of Navy on white and then cut with paper snips and mounted on top of the decorative banner cut with the Mixed Labels die from a sheet of Petunia Pop glimmer paper. Petal Pink foil gems finish things off and tie all our peachy colored elements together.

Tomorrow we’ll be pairing up our weekly design theme with a sketch. Any guesses on what catalog I may choose?

Product List
Inspiration

Blissful Thanks

This week, our designs feature texture and sentiments. It’s so easy to grab for the pretty paper, but our embossing tools allow us to add texture that can be just as stunning and eye-catching as a beautiful sheet of patterned paper. Today, we’re combining the Distressed Tile embossing folder with the With You in Mind stamp set.

Our design begins with a base of Blackberry Bliss cardstock. I machine embossed a quarter-sheet of Pool Party cardstock with the Distressed Tiles embossing folder and then cut it down to leave about one-third of the base showing at the top. I covered the seam between the two colors with a combination of Very Vanilla satin ribbon and Blackberry Bliss & gold ribbon. The sentiment from With You in Mind is stamped in Blackberry Bliss on Very Vanilla and then diecut using the Something Fancy set. The sentiment mat is cut from pastel ombré glimmer paper. I added some regal foil gems to the sentiment panel for a little sparkle. The sentiment panel is adhered over the ribbon with dimensionals. Some vanilla natural tones shimmer gems across the front finish things off and help the eye move across our design.

A fairly clean and simple design that packs some eye-catching punch, don’t you think? Tune in tomorrow to see where our design theme takes us next!

Product List
Inspiration

Hey Friend

This week, we’re having fun with textures and sentiments. While we all love to reach for those gorgeous patterned papers, we can make equally as wonderful designs when our embossing tools take center stage. Today we’re combining a new Sale-a-Bration embossing folder called Starstruck with the Friends for Life bundle and a selection of In Colors to create a cheery design for a friend.

Our card design gets started with a base of Petunia Pop cardstock. Our background panel of Peach Pie is machine embossed with the SAB Starstruck embossing folder and oriented so that the negative side is facing up. I tied a strip of Summer Splash trim around the center of the embossed panel before adhering it to the base with dimensionals. The sentiment from Saying Hey is stamped in Petunia Pop ink before getting punch with the Heartfelt Hexagon punch and then adhered over the ribbon with dimensionals. I cut the word FRIEND from two different glimmer papers. The outline is from Summer Splash glimmer paper while the word FRIEND itself is from the pastel ombre glimmer paper. An extra layer of dimensionals helps FRIEND to stand out. A few purple sequins and some Sunny Days transparent dots bring the eye squarely to the party in the middle.

I just love how the embossed panel in this design almost looks to be a sheet of patterned paper, and it does make you think about how patterned papers ultimately get started. Sometimes the inspiration is literally a textured pattern.

Tune in tomorrow as things turn a bit more regal for some thankful thoughts.

Product List
Inspiration

He Will Direct Your Path

Welcome to a bright and shiny new week, crafty friends! It was a busy weekend around here as we did indeed finish up our big storage unit swap. Not something I really wanted to do but it was great to clean out and pare down through the process. We had record high temps here in North Texas, so we were completely spent by the time we wrapped up our big project!

BUT a cold and dreary day on Sunday meant an afternoon playing in the crafty goodness, working on designing for this week’s theme. I’ve been dialed in in all of the pretty patterned papers here lately and have been neglecting some of my favorite crafty tools—embossing tools. This week, our designs will focus on texture and sentiments. And today we get started with the Beautiful Butterflies embossing folder and the scripture from the You Are Beautiful stamp set.

We get started with a base of white cardstock. Our textured backdrop is a sheet of Lost Lagoon cardstock that is machine embossed with the Beautiful Butterflies embossing folder. I stamped the scripture from You Are Beautiful in Pretty Peacock on white cardstock and then cut using the Countryside Corners die. Two sparkly banners cut from Pretty Peacock glimmer paper with the Nested Essentials dies flank our sentiment and make it the eye-catching showpiece of our design. I looped a faux bow of iridescent striped ribbon behind the sentiment panel and riverside irregular pearls on either side of the panel for some added pop.

Tomorrow we’re paying homage to our friends with a fun and funky color palette. I hope you’ll come check it out!

Product List
Holidays · Winter

Stopping on a Snowy Evening

We’re finishing off this week’s stopping by the woods on a snowy evening card series with this clean and simple card design. I’ve been wanting to try the double embossing technique, and this card gave the perfect opportunity to layer snowflakes and evergreens. Let’s take a closer look at how this stunningly simple card comes together.

I wanted this snowy scene to literally sparkle, so I started by covering a quarter panel of white cardstock with a heavy layer of Wink of Stella. You want the layer to be fairly heavy without completely saturating the paper, which will drastically impact drying time. I allowed about an hour of air dry time and then finished things off with the heat gun. Next came the embossing, and I learned that even when you think your paper is dry, it’s probably still too wet to emboss just how a truly dry sheet will. I also learned that the Snowflake Sky embossing folder seems to emboss more deeply than the Painted Trees, so while I wanted the snow to be drifting in front of the evergreens, I had to emboss them a second time to ensure that they were actually visible through the snowfall. I used my finger to apply a very light layer of Shaded Spruce ink over the evergreens to help them stand out. I adhered this panel over a mat of festive glimmer paper and then wrapped the bottom with iridescent striped ribbon and tied a small bow. The sentiment from the Joyful Sayings ephemera pack is adhered over the ribbon with dimensionals. Green transparent dots finish things off by drawing the eye across the card design. This whole card just shimmers in the smallest amount of light.

I thought it would be fun to leave you with this week’s inspiration, and one of my favorite Robert Frost poems, to really bring this theme to life.

Stopping by the Woods on a Snowy Evening
by Robert Frost

Whose woods these are I think I know.
His house is in the village though;
He will not see me stopping here
To watch his woods fill up with snow.

My little horse must think it queer
To stop without a farmhouse near
Between the woods and frozen lake
The darkest evening of the year.

He gives his harness bells a shake
To ask if there is some mistake.
The only other sound’s the sweep
Of easy wind and downy flake.

The woods are lovely, dark and deep,
But I have promises to keep,
And miles to go before I sleep,
And miles to go before I sleep.

As we are entering the hustle and bustle of the holiday season, how might you be able to stop and take it all in like the man on the horse? To observe the wonder and joy of the everyday moments that make up this thing we call life? I hope we can all take a few mindful moments when we’re enjoying time with family and friends this holiday season to just breathe and take it all in.

Product List
Christmas · Holidays · Winter

Sketchy Fridays: Snowy Wonder and Happiness

I really, really love this week’s theme, which is one of the reasons that I wanted to spend today showing you the designs I had planned for you throughout the last week. One of the most valuable things I have learned over the last several years is that flexibility is key when things don’t work out exactly as you planned.

So this post is the ode to Sketchy Fridays. Each week we’re using a card sketch to design our featured card. Right now, we’re working through a full series of designs using the card sketches found in current Stampin’ Up! catalogs.

This week’s card is based on Sketch #13 from the Stampin’ Up! Annual Catalog and features the Peaceful Evergreens and In the Grove Dies, along with the ever-lovely Snowflake Sky embossing folder. Today’s card design is inspired by the very talented demo known on Instagram as Craftsomnia.

This week’s design theme is stopping by the woods on a snowy evening. This Robert Frost poem is all about taking the time to bask in the wonder of falling snow, and I can’t help but think how well the idea of stopping to take in the wonder and joy everyday moments of life has to be one of the best life lessons. And outside of this wonderful life lesson, the theme lends itself so well to a variety of lovely winter cards, don’t you think?

We get started with a base of Balmy Blue cardstock. Our backdrop is a panel of Night of Navy that is machine embossed with the Snowflake Sky embossing folder and then lightly brushed with white craft ink to really bring out the beautiful soft snowflakes. Our snowbank is a simple piece of white cardstock that is torn to create the soft edges of a snowy hill. The Mossy Meadow trees are diecut with a combination of the In the Grove and Peaceful Evergreen dies. A touch of craft ink to the edges of the treeline and a bit of white glimmer paper on the larger evergreens in the foreground make for the perfect dusted evergreen grove. The sentiment from the Peaceful Season stamp set is stamped in Night of Navy in the center of a white banner cut with the Radiating Stitches die and then finished in the snowbank. Dimensionals help give lots of depth to our scene, and the silver trim and iridescent faceted gems lend the sparkle.

This design is even more stunning in person as the lighting in my craft room just wasn’t quite right today to capture the true colors and details. I hope you’ll drop in a little later as I bring you one final clean & simple design in this series.

Product List
Winter

Loads of Holiday Cheer

Well, to say that my week didn’t exactly go as planned is likely obvious to you all by now. I had everything planned out, but when all was said and done, I simply didn’t have the time to execute. I had to travel out of town for work and then had some other obligations that simply overran the time I allotted for them. Such is life sometimes, eh? So today, I’m going to play a little catchup and bring you all the content I had planned for Thursday, Friday, and Saturday of this week.

If you’re new here, for the last month or so, I’ve been working with themes to inspire designs. This week, we’re stopping by the woods on a snowy evening. And today’s card was inspired by a design that was recently posted by Stampin’ Up! Artisan crafter the Crafty O’ Ink Pen. When I saw her design, I knew it would be perfect for this week’s theme, and I wanted to do my own take on it. That’s the wonderful thing about design inspiration — you get to make it your own!

So we get started with a base of Night of Navy cardstock. The background panel is a sheet of Pool Party that is machine embossed with the Snowflake Sky embossing folder, which is then lightly inked with a sponge dauber and Pool Party ink to give the look of a cloudy sky. To create the snowdrifts, I tore a quarter panel of white cardstock in half and then very lightly inked the torn edges with the Pool Party ink to give some definition and detail and layered them to the snowdrifts. They’re ultimately adhered to the background panel with dimensionals. Using the Merriest Trees dies, I cut two of the smaller sized trees from Shaded Spruce cardstock and lightly rubbed some craft ink over the tops to give them the look of having a dusting of snow. They’re tucked in and behind the snowdrifts to give depth and dimension to the scene. The sled is diecut with the Sophisticated Sled and Filled With Fun die sets from gold foil and Early Espresso cardstocks and then cut in half to create the side view of our sled. Isn’t this brilliant?! Such a great idea, Crafty O’ Ink Pen! The sled is filled with holiday goodness which has been stamped on white cardstock using the Filled With Cheer stamp set and then colored with Stampin’ Blends. Our sentiment from Filled With Cheer is stamped in Night of Navy on white cardstock and then diecut using the Peaceful Season small banner die and adhered with dimensionals over some gold trim. Adhesives snowflakes finish our snowy scene with a little sparkle.

Check back in a little later in the afternoon for our Sketchy Fridays snowy evening design.

Product List
Winter

Snowy Thoughts

It’s a super busy week around the Song Sparrow household. Yesterday, the kiddo’s basketball team had their first game of the season. It was a fairly solid loss, but I think the kids learned a lot and could see areas that still need some work and improvement. Everyone seemed to have fun, and that’s all that really matters in sports, as far as I’m concerned. I’m over here prepping for some out-of-town training and a big meeting for work, so I’m burning the candle pretty low.

This week, we’re working around the theme of stopping in the woods on a snowy evening. I kept it pretty simple with this first design. We’re using a layout by the lovely Did You Stamp Today demo as our inspiration.

We get started with a base of Shaded Spruce cardstock. Our focal panel is a strip of the snowy evergreen forest pattern from the Winter Meadow designer series paper pack that is matted with Pool Party to really bring out the more subtle blues. Our sentiment panel is cut from the blue woodgrain from the Country Woods patterned paper using the Spotlight on Nature dies. He sentiment from Friends for Life is stamped in Pretty Peacock. Our focal trees are from the Frosted Forest die set and are diecut from Shaded Spruce and adhered over a strip of layered Shaded Spruce satin ribbon and white diagonal trim. A few carefully placed regal foiled dots finish things off with a little pop of color and sparkle.

I’ve really enjoyed working with design themes the last several weeks. I find it especially useful if I want to highlight a bunch of different products rather than focusing on just one. What about you? Which format do you like best? Let me know in the comments!

Thursday we’ll continue our stop in the woods with the Sophisticated Sled set. I hope you’ll pop in!

Product List
Clean and Simple · Winter

Woodsy Thoughts

I don’t ordinarily post twice in one day or even on Sundays, for that matter. But sometimes our schedules get a little off-kilter and we have to make some quick adjustments. I returned to working full-time in September, and as things are beginning to pick up at work, maintaining a good balance has become a little challenging. So hopefully you guys will bear with me as I work to find that perfect balance between enjoying down time with the family and time doing things I love, like crafting.

This week, we’ve been designing around the theme of in the woods. And I wanted to finish off with a really simple design that combines paper, a die, and ephemera.

We get started with a base of Mossy Meadow cardstock. Our focal panel has a sparkly backdrop of white glimmer paper with a panel of Garden Green diecut with the Winterly Treetops die and mounted with dimensionals to give us the look of peeking through the evergreens. Two reindeer from the Joyful Images ephemera pack are standing in the open glen as snow is softly falling (represented by the iridescent faceted gems). Our sentiment comes from the Joyful Sayings ephemera pack and is matted with a textured gold banner. I just love how simple and elegant this design turned out.

This next week will be a little hit and miss with card designs as I have to fly out of town midweek for some training. Our new design theme will be stopping by on a snowy evening. I hope to give you some fun ideas for working with this theme with some unexpected product combinations.

Product List