Christmas

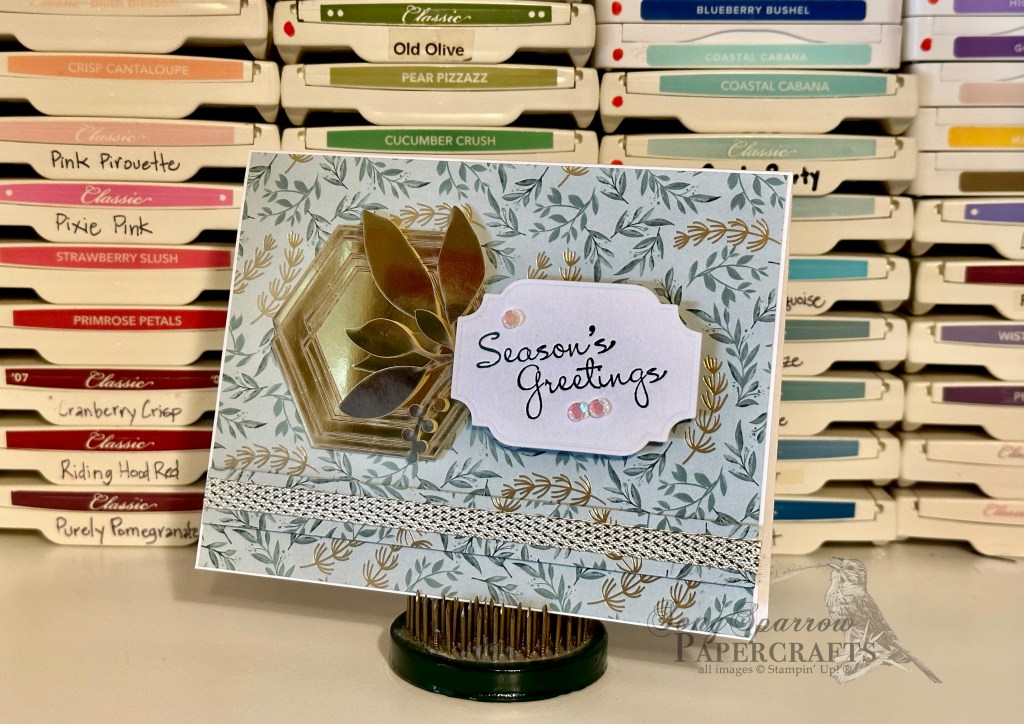
Joyful Tidings

The third design in the Christmas Ephemera card pack is called Joyful Tidings. This gorgeous card features a leafy patterned background with gold foiled berries. The gold leaves and berries behind the sentiment panel draw out these smaller details of the background. The ornate font used in the sentiment mimic the trailing ends of vines and solidify the leafy theme. The iridescent sequins help draw the eye from top to bottom and across the card design. I really love the simplicity of this card!

The Christmas Ephemera card pack is available now in the Etsy shoppe! Check it out here.

Products used:
Basic White cardstock
Shimmer cardstock
Ever Eden DSP (retired)
Expressions in Ink Ephemera pack
Christmas Messages stamps (retired)
Stitched Nested Labels dies (retired)
Dimensionals
Adhesives

All ads on this site are posted by WordPress and are based on your personal browsing history. I do not control ad content.
Christmas

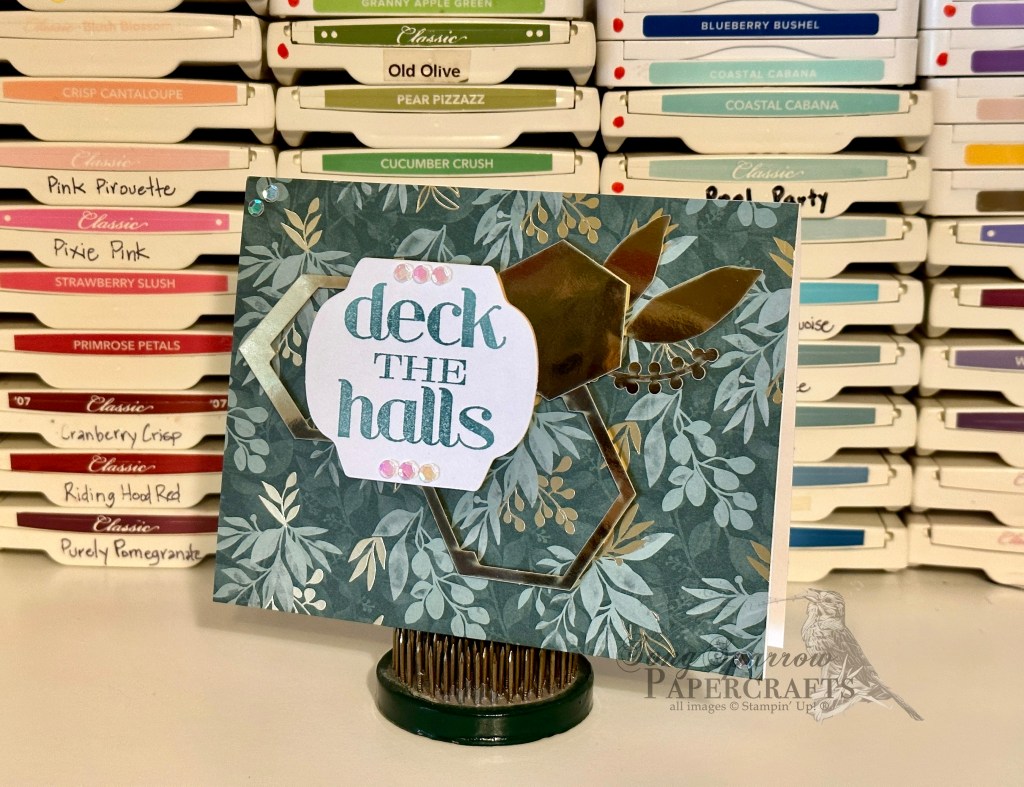
Christmas Wishes

Today we’re taking a look at the second design in the Christmas Ephemera card pack — Christmas Wishes. I love how each design of this card pack coordinate and yet are uniquely different.

This card uses two sheets of the SU! Ever Eden designer series paper to create a beautiful layered background. Each distinctive pattern compliments an element of another, helping the eye move pleasingly across the card. The gold leaves and berries bind the design together and bring focus on the center sentiment panel.

The Christmas Ephemera card pack is available now in the Etsy shoppe! Check it out here.

Products used:
Basic White cardstock
Ever Eden DSP (retired)
Expressions in Ink Ephemera pack
Ornamental Pine stamps (retired)
All That dies
Dimensionals
Adhesives

All ads on this site are posted by WordPress and are based on your personal browsing history. I do not control ad content.

Christmas

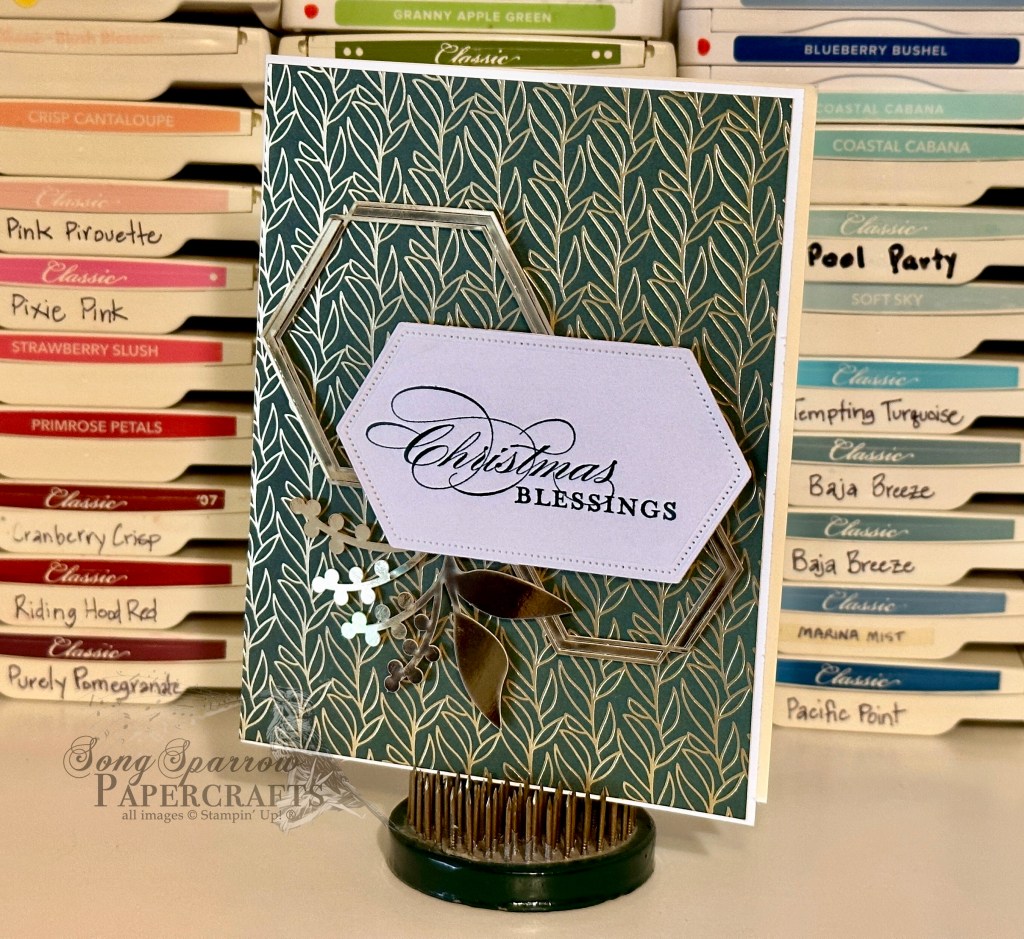
Christmas Blessings

Is it too early for Christmas? For paper crafters, it’s never too early for Christmas. That’s because our Christmas designs are often more ornate and take more time to design and create. So you are likely already seeing many crafters posting Christmas designs.

And that brings us to the first design reveal on the first Christmas card pack of the season — Christmas Ephemera. If you follow me on Facebook or Instagram, you’ve already seen the Etsy shoppe posting with a sneak peak of each of the designs. But we’ll be taking a closer look at each one over the course of the next several days. The entire pack of cards features a gorgeous foiled SU! designer paper series called Ever Eden and a set of embellishments called Expressions in Ink Ephemera. These pair together beautifully to give stunning results, even with the simplest layout — sure to be show stoppers for each of your recipients.

This is the first of five designs and is called Christmas Blessings. The background features the vine design paper with the gold leaf and berry complimenting the designer paper. The geometric gold elements pair well with the geometric stitched sentiment panel. Simple but stunning, don’t you think?

The Christmas Ephemera card pack is available now in the Etsy shoppe! Check it out here.

Products used:
Basic White cardstock
Ever Eden DSP (retired)
Expressions in Ink Ephemera pack
More Merry Messages stamps (retired)
Stitched Nested Labels dies (retired)
Dimensionals
Adhesives

All ads on this site are posted by WordPress and are based on your personal browsing history. I do not control ad content.
Trucking Along

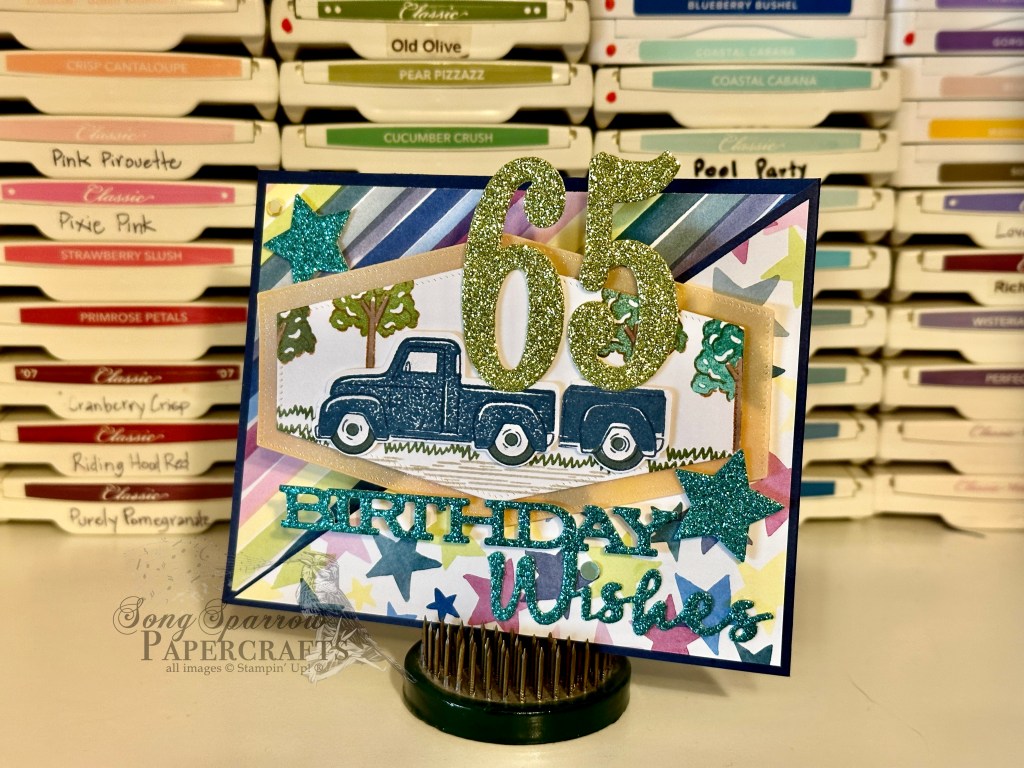
Birthday Delivery

Today’s design was super fun to create. A fellow demonstrator (if I can remember who, I will update with a link) posted a design with a truck and trailer, which I thought was brilliant! Because this is a personal design going to a friend, I dug into my stash of some of my favorite retired product, as well as using some fun current products, to make this card pop with lots of flashy flare!

I decided to make this a diagonal split fold to incorporate some of my favorite Bright & Beautiful designer paper patterns and to really make the center image panel stand out. I stamped the background scene on a piece of white cardstock before I diecut using the Nested Essentials die. I then stamped and punched the tuck separately to add depth to the scene and allow the truck and numbers to stand out. To make the trailer, I first stamped the entire truck and then punched out just the back portion. The numbers were cut using a retired set of dies called Number of Years and I gave them an extra layer of dimensionals to allow them to stand up taller than anything else on the image panel. This design is even cuter in person and I’m really hoping that the recipient loves it!

Products used:
Night of Navy, Basic White cardstock
Bright & Beautiful DSP
Glimmer vellum (retired)
Glitter paper (retired)
Kaiserkraft glitter cardstock (retired)
Trucking Along stamps & punch
Nested Essentials dies
Papertrey Ink dies (front sentiments) (retired)
Curvy Keepsakes dies (stars) (retired)
Number of Years dies (retired)
Adhesive-backed sequins
Dimensionals
Adhesives

All ads on this site are posted by WordPress and are based on your personal browsing history. I do not control ad content.
Clean and Simple · Trucking Along

Sunny Thoughts

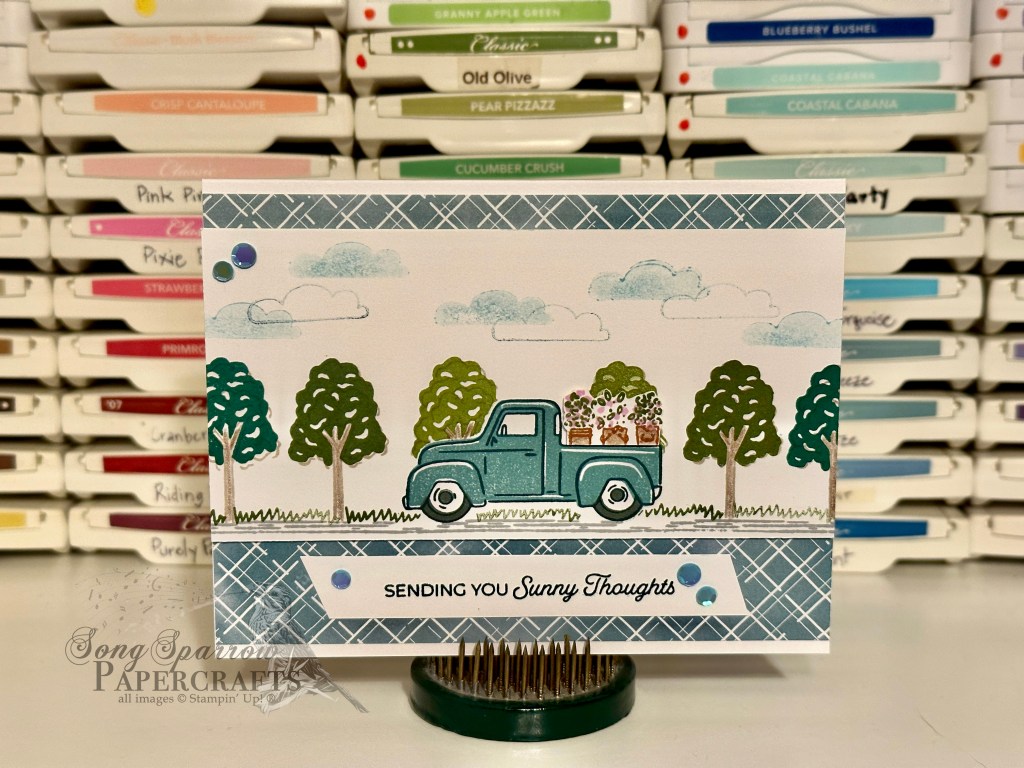
Now it’s my turn to play with the new Trucking Along stamp set. You just might get tired of seeing this little truck, but I sure hope not because I have LOADS of ideas. (Get it?)

I actually built this little scene with the intention of using a diecut to snip just a portion of it, but as I was placing the diecut, my son walked by and said, “you’re not going to cut that up, are you?” I told you I might just have to hire him to help out in the studio! And so I kept the whole scene, which has way better balance anyway.

This is a very simple design that came together in less than 30 minutes from start to finish. The design sits atop a white card base. The image panel is on a single layer of dimensionals atop a piece of Hello Irresistible designer paper. I made a mask of the truck using the punch and plain paper in order to stamp the trees and grass around the truck without covering it in any way. The load of flowers in the back of the truck has been fussy cut and is popped up. And that’s only because I forgot about them and stamped a tree in that space, but it turned out to be a happy little accident.

Products used:
Basic White cardstock
Hello Irresistible DSP
Trucking Along stamps
Wink of Stella
Adhesive-backed sequins
Dimensionals
Adhesives

All ads on this site are posted by WordPress and are based on your personal browsing history. I do not control ad content.
Clean and Simple · Trucking Along

Out for a Test Drive

It was super fun to take the new Trucking Along bundle by Stampin’ Up! out for a spin. I think my son was as excited as I was about this new set, and HE actually got to christen the stamps by making the very first card design with them. And I’m thinking that I might have to hire him to help out from time to time because he came up with this entire card by himself!

Is this not the cutest card you’ve ever seen? He played around with his design on a piece of scratch paper. He got about halfway done and said, “I’m ready for the real thing now” and proceeded to make this little masterpiece. I love how the trucks look like they’re stopped on the shoulder of a roadway and how he was so careful to stamp all of the little details, like the grass and fence and trees. He had fun digging through ALL of the ink choices to find just the right colors …. and there are a LOT of choices because I have all of the retired colors.

What do you think of his test drive of the new Trucking Along stamp set? I’d say he passed for sure!

Here’s his card recipe:
Basic White cardstock (base)
Cherry Cobbler, Real Red, Early Espresso, Basic Black, Cajun Craze, Always Artichoke, Mossy Meadow, Old Olive, Garden Green, Bashful Blue, Fresh Freesia inks
Nested Essentials die
Dimensionals

All ads on this site are posted by WordPress and are based on your personal browsing history. I do not control ad content.

On the way

New Product = New Designs

A new box of SU! product has arrived and I’m super excited to get started on some new designs. Guess what came in the box? The Trucking Along bundle! This new set, which includes stamps and punch, has been SO popular that it’s been called the “truck that broke the internet!” Many moons ago there was a similar set, which I still have by the way, that I just adored for its versatility and overall adorable images. So I can’t wait to get started on designs with this new bundle!

What else came in the box, you may be wondering? Well, there happen to be some goodies that will be perfect for some Christmas designs. I know what you’re thinking….you too???!!!! But the reason paper crafters get started on Christmas designs in July is because we typically design cards that are a bit more time consuming to create from start to finish. And we’re usually pretty excited about how they turn out and want to share these beauties with you!

So, all of that is to say, brace yourselves for some new stuff that includes Christmas!

All ads on this site are posted by WordPress and are based on your personal browsing history. I do not control ad content.
Card Sets · Hello Irresistible

Irresistible Butterfly

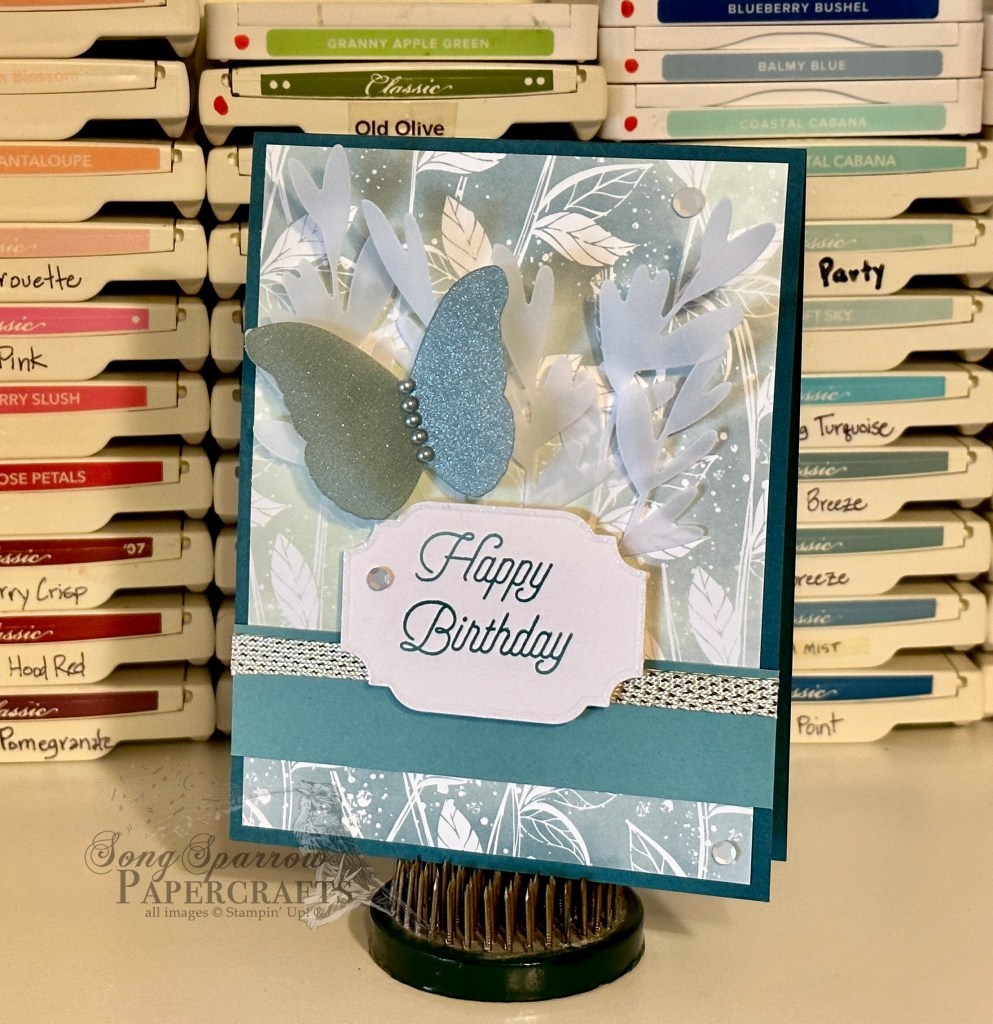
Today features the fifth of five designs in the newest card pack up in the Etsy shoppe. Irresistible Birthday highlights the Stampin’ Up! designer series paper pack called Hello Irresistible. This coordinating pack of paper has just been delightful to work with because it allows you to go so many different directions with designs. Let’s take a look at today’s card.

Funny enough, as I was working with the papers I had originally picked out for this design, it suddenly just seemed all wrong. I couldn’t quite get things to work together. I knew I wanted to have a more neutral design — one suitable for any recipient. But it had to have a wow factor that I just wasn’t finding with my paper choices. As I was flipping and rearranging things, I caught glimpse of the back of a piece of paper and stopped in my tracks. Aha! I found the wow. The grassy background in this card made me think of a fairy garden, but to keep the design more neutral, I focused on a softer, more ethereal feel. I’m thrilled with how it turned out!

To give a little life and depth to the grassy background but still keep the overall design soft and versatile, I cut branches from vellum and tucked them behind the sentiment panel and added a butterfly cut from glimmer vellum. The gold-laced ribbon and white sequins, along with the touch of Wink of Stella around the sentiment panel, add to the magical feel. Can you think of someone who would like this card?

Products used:
Hello Irresistible DSP
Lost Lagoon, Pretty Peacock, Basic White, vellum cardstock
Glimmer vellum (retired)
Gold-laced trim (retired)
All That dies
Special Moments stamps (retired)
Wink of Stella
Adhesive-backed sequins and pearls
Dimensionals
Adhesives

All ads on this site are posted by WordPress and are based on your personal browsing history. I do not control ad content.

Card Sets · Fun Folds · Hello Irresistible

Irresistible Center Barn Fold

Today’s card design is the fourth in the Irresistible Birthday card pack series. This designer series paper has been so fun to work with because it lends itself to so many possibilities. And this card leans much more feminine in both palette and overall feel.

I really have a hard time working with shades of orange. Believe it or not, this card base is a shade of coral, and this card came together easily. Hello Irresistible has really been a delight to work with for that very reason.

This design plays to the feminine vibes with all of the sparkle. From the gold-laced ribbon to pops of gold in sequins to the tiniest sparkle around the sentiment panel with Wink of Stella, this card really shines!

This fun fold reminds me of a barn door with the card opening in the center. Don’t you think? If you’re interested in how this design came together, go check it out over on Instagram!

Products used:
Hello, Irresistible DSP
Calypso Coral, Basic White cardstock
Bold Bouquet stamps
Deckled Rectangles dies
Flirty Flamingo ribbon
Adhesive-backed sequins
Wink of Stella
Dimensionals
Adhesives

Download the tutorial here!

All ads on this site are posted by WordPress and are based on your personal browsing history. I do not control ad content.

Card Sets · Fun Folds · Hello Irresistible

Irresistible Birthday Garden

Today we’re taking a look at the third design in the new birthday pack called Irresistible Birthday that will be up in the Etsy shoppe later this week. This design is based on a new fun fold I learned from Sharon Armstrong. The original design has been adapted to exclude a few layers in order to lighten up the design, but it does not lose any of the drama of this unique fun fold.

This showcases yet another sampling of the SU! Hello, Irresistible designer paper. One of the things I really loved about this design was the ability to use every scrap of the gorgeous paper on both the inside and outside panels of the card. And who says a masculine card can’t have a little sparkle? This design is punched up with a few eye-catching features — silver pearls, iridescent sequins, and the touch of Wink of Stella around the edges of the sentiment elements.

Products used:
Hello, Irresistible DSP
Lost Lagoon, Pretty Peacock, Basic White, vellum cardstock
Pansy Patch stamps
Nested Essentials, All That dies
Adhesive-backed pearls
Adhesive-backed sequins
Wink of Stella
Dimensionals
Adhesives

Download the tutorial here!

All ads on this site are posted by WordPress and are based on your personal browsing history. I do not control ad content.