Terrific Tuesdays

Trucking In a Heartfelt Hello

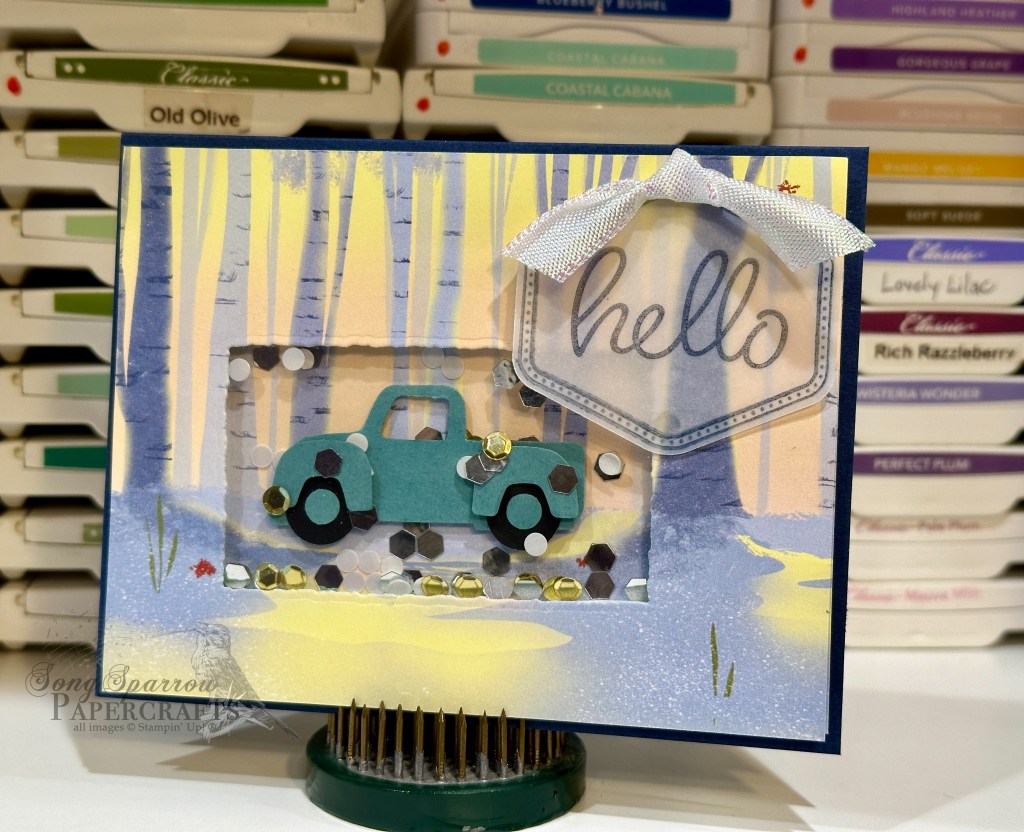
Just because we’re looking to create a more masculine design doesn’t mean we have to leave fun at the door! I don’t often make shaker cards and so I thought this would be a perfect opportunity to stretch the ol’ creative wings. With the idea of making it fun, I decided a truck scene would be just the ticket.

This card is built on a base of Night of Navy to help the scene stand out in a dramatic way. I used two identical sheets of designer series paper from the One Horse Open Sleigh pack — one serves as the forefront, while the other gives the backdrop for the truck in the shaker window. I used a Deckled Rectangle die to cut the window out of the front panel for the truck, making sure that the window allowed just enough room for the truck to be visible and allow space for the shaker elements. A piece of acetate is adhered to the back of the window on the front panel and then the back edges of the window are lined with foam adhesive strips to create a box in which the shaker elements will be poured and then closed in with the back panel. The truck is punched from Lost Lagoon and black using the Trucking Along punch and adhered to the back panel with dimensionals. The sentiment from Heartfelt Hellos is stamped in Night of Navy on vellum and then punched with the coordinating hexagon punch. The vellum panel allows the scene to show through.

Interested in a few more conventional masculine card designs? Check out this week’s Terrific Tuesdays episode where we made 3 masculine cards together.

Products used in today’s design:
Night of Navy, vellum, acetate cardstock
One Horse Open Sleigh DSP
Heartfelt Hexagon stamps & punch
Heartfelt Hellos stamps
Sequins for Everything (retired)
Foam adhesive strips
Iridescent ribbon (retired)
Glue dots
Dimensionals
Adhesives

All ads on this site are posted by WordPress.  Song Sparrow Papercrafts is not responsible for ad content.
Luv 2 Stamp Artisan Design Team · Terrific Tuesdays

Heartfelt Love You

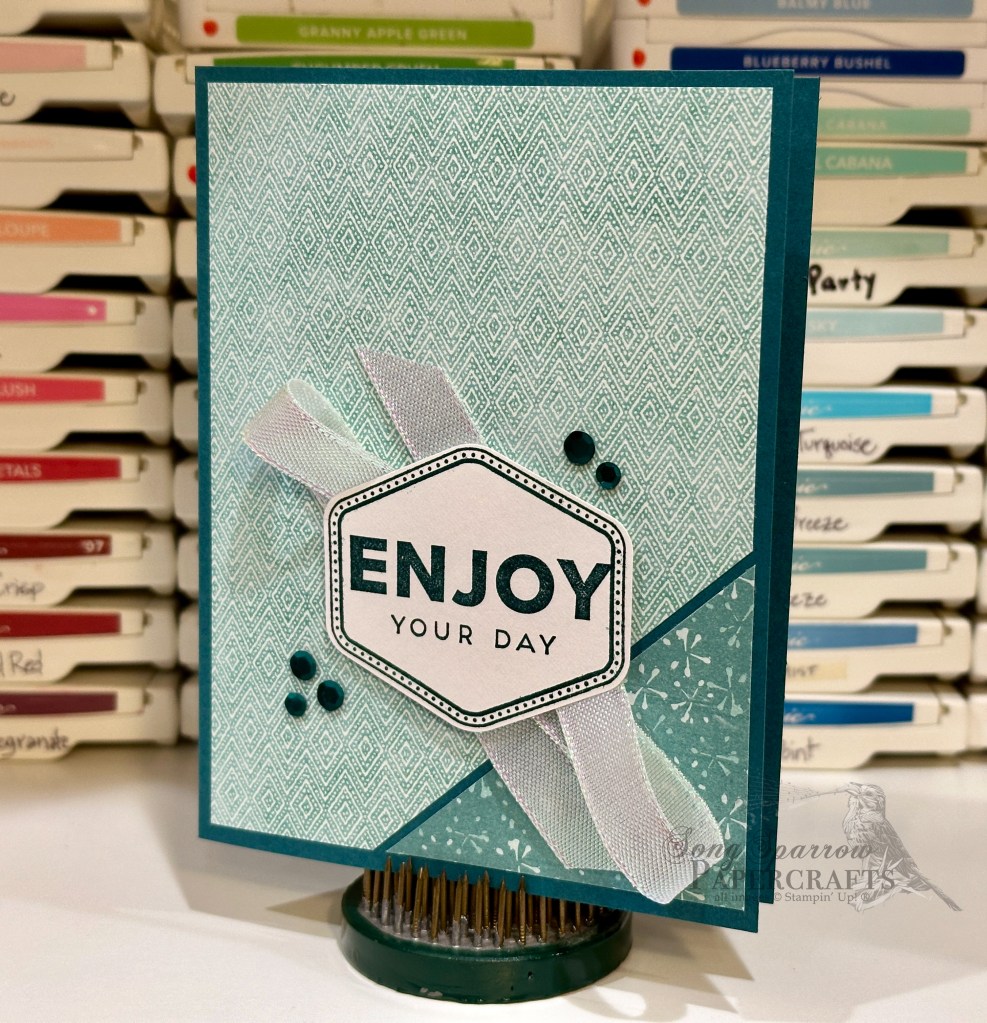
This week’s project focus is masculine cards using the Heartfelt Hexagon bundle, including the fabulous coordinating Sale-a-Bration set called Heartfelt Hellos which will be available with qualifying orders beginning tomorrow. I don’t know about you, but sometimes I really struggle to make cute designs for the guys. So we’ll be exploring how we can look at our stash in new ways to make gorgeous projects with a more masculine feel.

For me, the hardest part of making more masculine feeling cards is finding a good color palette amongst my patterned paper stash. I absolutely fell in love with the Garden Walk designer series paper from the Holiday Mini Catalog. I was initially drawn to the beautiful mix of floral patterns in this paper pack, but as I was looking through my stash of DSP to design this card, I found so many lovely masculine options on the reverse sides of the florals in the Garden Walk pack. So my first tip for designing masculine cards is to never count out a pack of DSP simply because one side leans more to a more feminine feel — turn those pages over and look at the other side because you are bound to find some surprises!

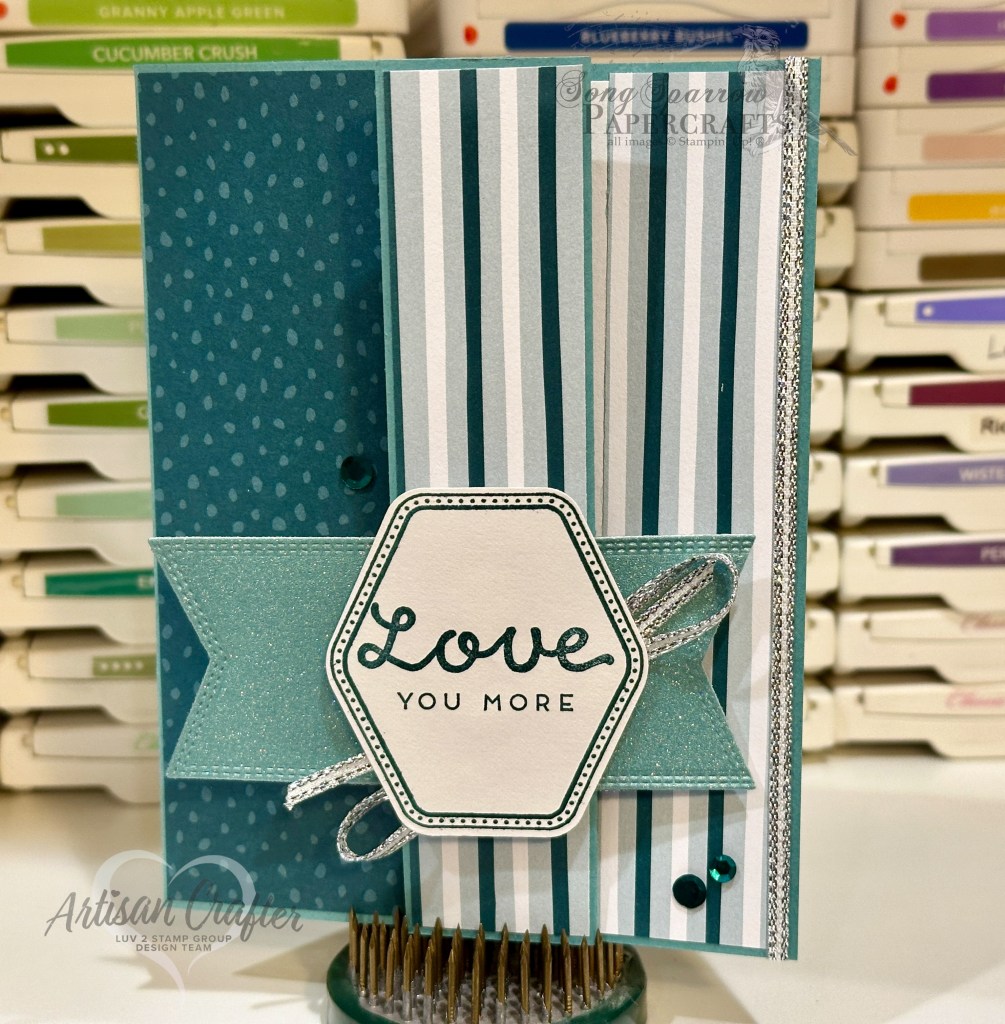
So this fun fold design is all about showcasing beautiful patterned paper. We begin with a base of Lost Lagoon cut to standard size. It’s scored as usual but with an added 1-inch fold-back panel on the card front to reveal a section of the inside card base. I chose two separate patterns of Lost Lagoon and Pretty Peacock from the Garden Walk DSP pack and decided the striped pattern worked perfectly for the fold-back and peek-through sections of the design. The speckled pattern is adhered to both sides of the small panel on both the card front and inside panel.

The sentiment from Heartfelt Hellos is stamped in Pretty Peacock on white cardstock punched with the Heartfelt Hexagon punch. For some pop, the sentiment panel is mounted with dimensionals atop a banner diecut from Lost Lagoon soft shimmer paper using the Nested Essentials banner dies. I added a little silver trim underneath the sentiment panel and along the peek-through edge for some sparkle because even our guys deserve a little sparkle! A few Pretty Peacock sequins bring a little extra emphasis to the sentiment.

Don’t you just love how this turned out?! A lovely fun fold and some out-of-the-box thinking about patterned papers helped bring this lovely masculine design to life.

Interested in seeing some other ways to make masculine cards using your patterned paper stash? Check out this week’s Terrific Tuesdays episode for more design ideas!

Products used in today’s design:
Lost Lagoon, Basic White cardstock
Lost Lagoon soft shimmer, Garden Walk (retiring today!) DSP
Heartfelt Hexagons stamps & punch
Heartfelt Hellos stamps
Nested Essentials dies
Silver trim
Sequins trio
Dimensionals
Adhesives

All ads on this site are posted by WordPress.  Song Sparrow Papercrafts is not responsible for ad content.
Terrific Tuesdays

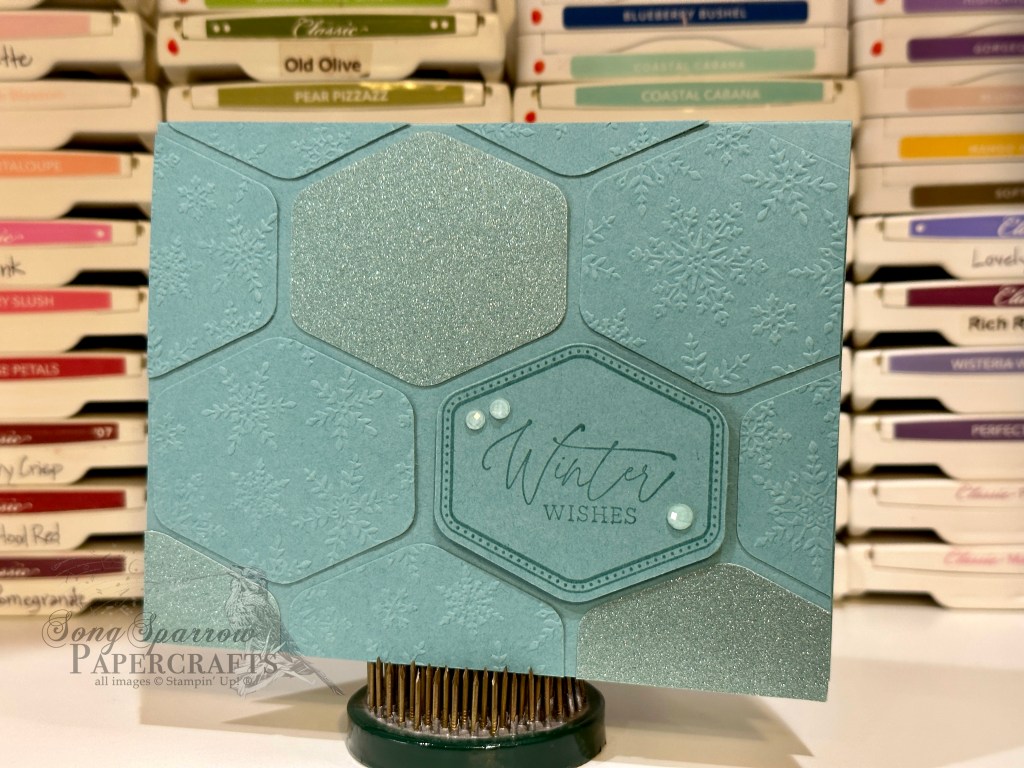
Tiled Winter Wishes

This week, we’re looking at all of the wonderful projects that we can make when we combine the Heartfelt Hexagon bundle and more masculine color palettes. Today’s card is a monochromatic design and I’m in love with how it turned out!

I’ve recently seen quite a few card designs that use this tiled layout with the Heartfelt Hexagon bundle, and I just knew I had to give it a try. I’ve seen it with designer paper, embossed cardstock, and all sorts of variations in between. I have a new pack of shimmer paper that I wanted to break open, and that’s where this design got started.

The base of this card is a sheet of Lost Lagoon cardstock. After cutting the card base, I halved the remaining portion to use in creating the hexagon pattern on the card front. I stamped the more decorative hexagon frame from the Heartfelt Hexagon set and the sentiment from the Magical Meadow set using Pretty Peacock ink to give a bit more contrast. The remainder of the panel was embossed with the Winter Snow embossing folder and then punched with the hexagon punch. I cut a strip of the Lost Lagoon shimmer paper and punched a few hexagons from that, as well. Because they’re just adding a little sparkle to the design, only a few will be needed.

To build the tiled background, I began by placing the sentiment panel first. To give it more prominence, I added dimensionals and then adhered into place on the card front. I filled in the sentiment row with embossed hexagons and then worked my way down and then up the card design from there. I laid out everything before adhering to get the placement just right. When cutting the portions that hang over the edges, be sure to retain those scraps as they’re used to fill in smaller gaps along the edges across the design.

While I’m not a huge fan of fussy cutting, this card came together quickly and easily with the scraps which meant no scraps leftover!

Would you like to see the projects featured in this week’s Terrific Tuesdays episode? Hop on over to my YouTube channel and check it out by clicking on the link below:

Products used in today’s design:
Lost Lagoon, soft shimmer cardstock
Heartfelt Hexagon stamps and punch
Winter Snow embossing folder (retired)
Magical Meadow stamps
Fine sparkle gems
Dimensionals
Adhesives

All ads on this site are posted by WordPress.  Song Sparrow Papercrafts is not responsible for ad content.
Terrific Tuesdays

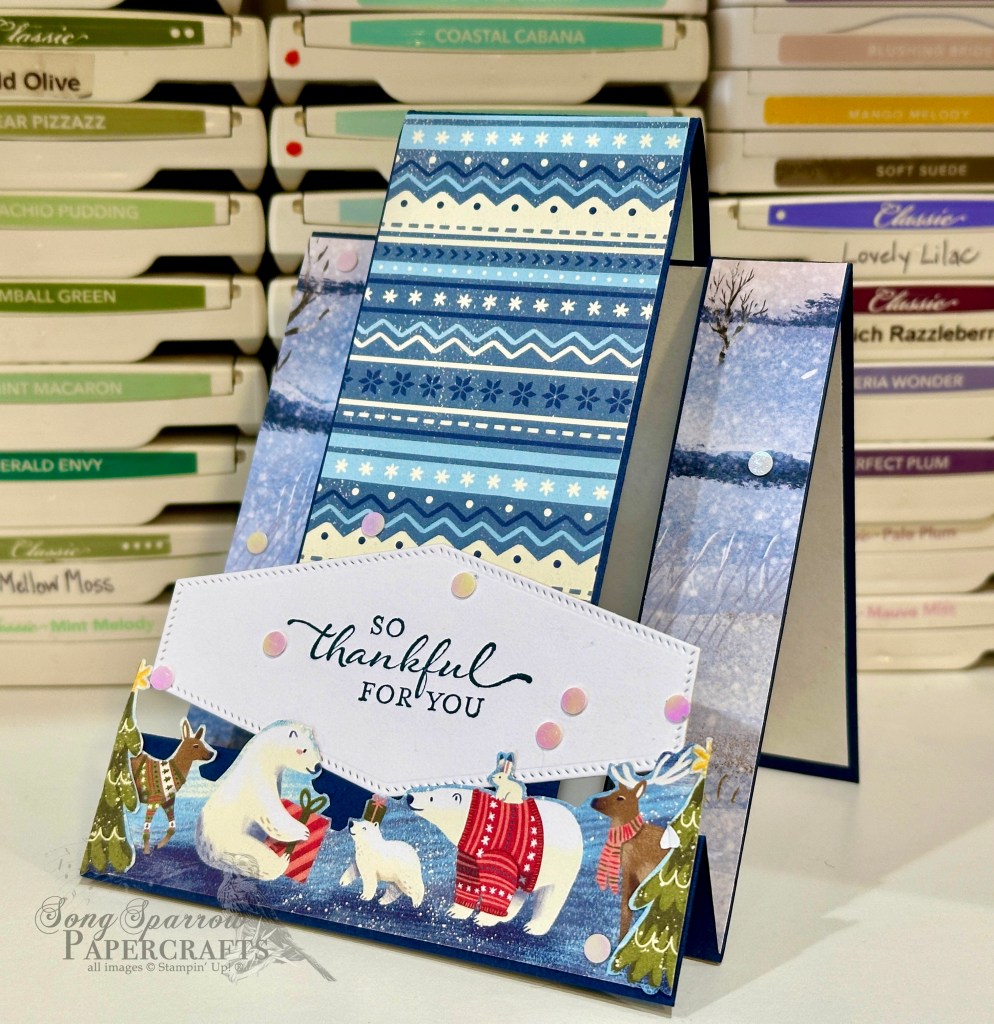
Grateful Fun Fold

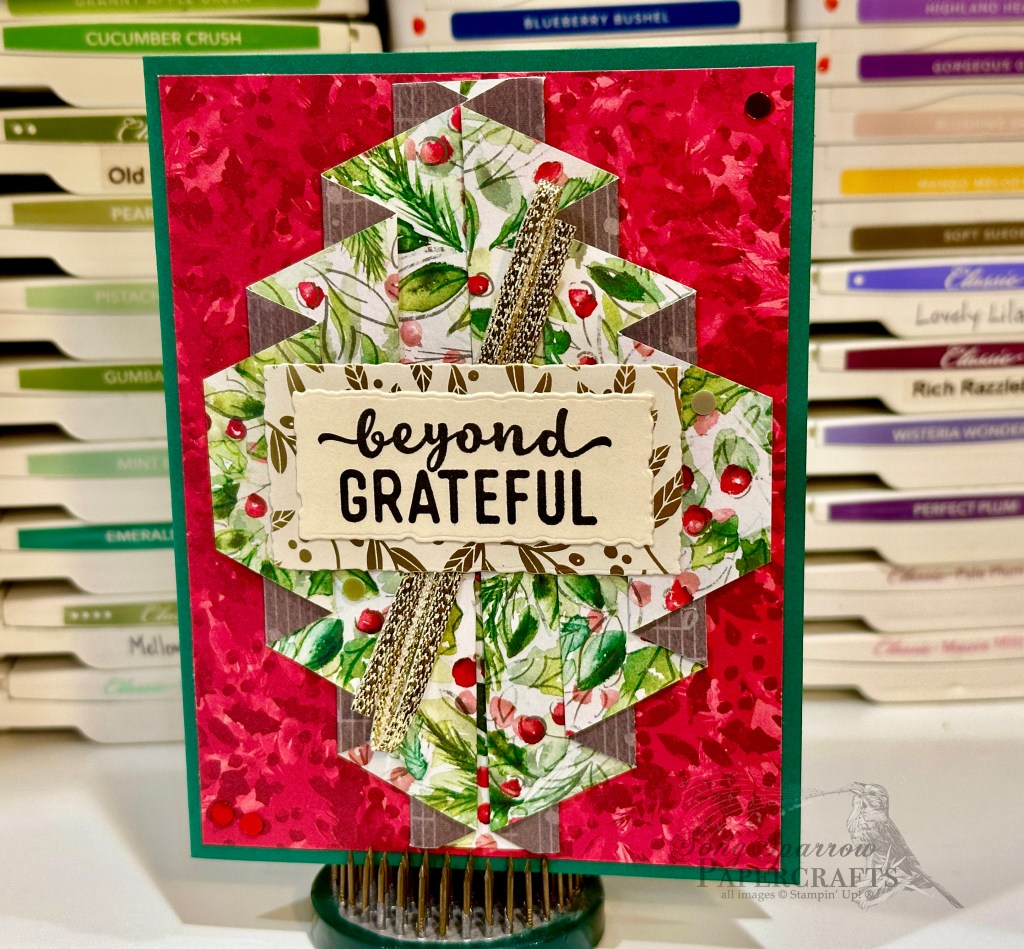
This week, we’ve been exploring all of the ways we can use our designer series papers to make holiday thank you cards. Today’s card design is introducing a new fun fold. I learned how to make the Center Step Fun Fold this week thanks to fellow Luv to Stamp team member Patti Dolan.

This card is built on a base of Night of Navy cardstock. I used two different patterns of the One Horse Open Sleigh designer series paper pack to complete the card front and inside panels. The trees and bear are cut from a sheet of A Walk in the Forest. The Merriest Trees die set coordinates perfectly with the trees and the Beary Cute punch easily punches the bear. The sentiment from the Charming Sentiments set is stamped on a shimmer white panel diecut using the Nested Essentials dies. Some iridescent discs add a little touch of sparkle and draw the eye across the card. You can find the instructions for this fun fold here.

I tried a portrait variation of this fun fold using Jackie Bolhaus’s design, but I definitely need to work on it as things didn’t exactly line up as they should have so it sits a little catterwompass. But it turned out really cute, so I’m going to show it to you anyway. Haha! I combined One Horse Open Sleigh with the Beary Cute Memories and More products.

You can see all of the other fun designs that we made together in this week’s Terrific Tuesdays video by clicking below for the full video.

Products used for today’s featured design:
Night of Navy, shimmer white cardstock
A Walk in the Forest (retired), One Horse Open Sleigh DSP
Nested Essentials, Merriest Trees dies
Beary Cute punch (retired)
Iridescent discs
Dimensionals
Adhesives

All ads on this site are posted by WordPress.  Song Sparrow Papercrafts is not responsible for ad content.

Terrific Tuesdays

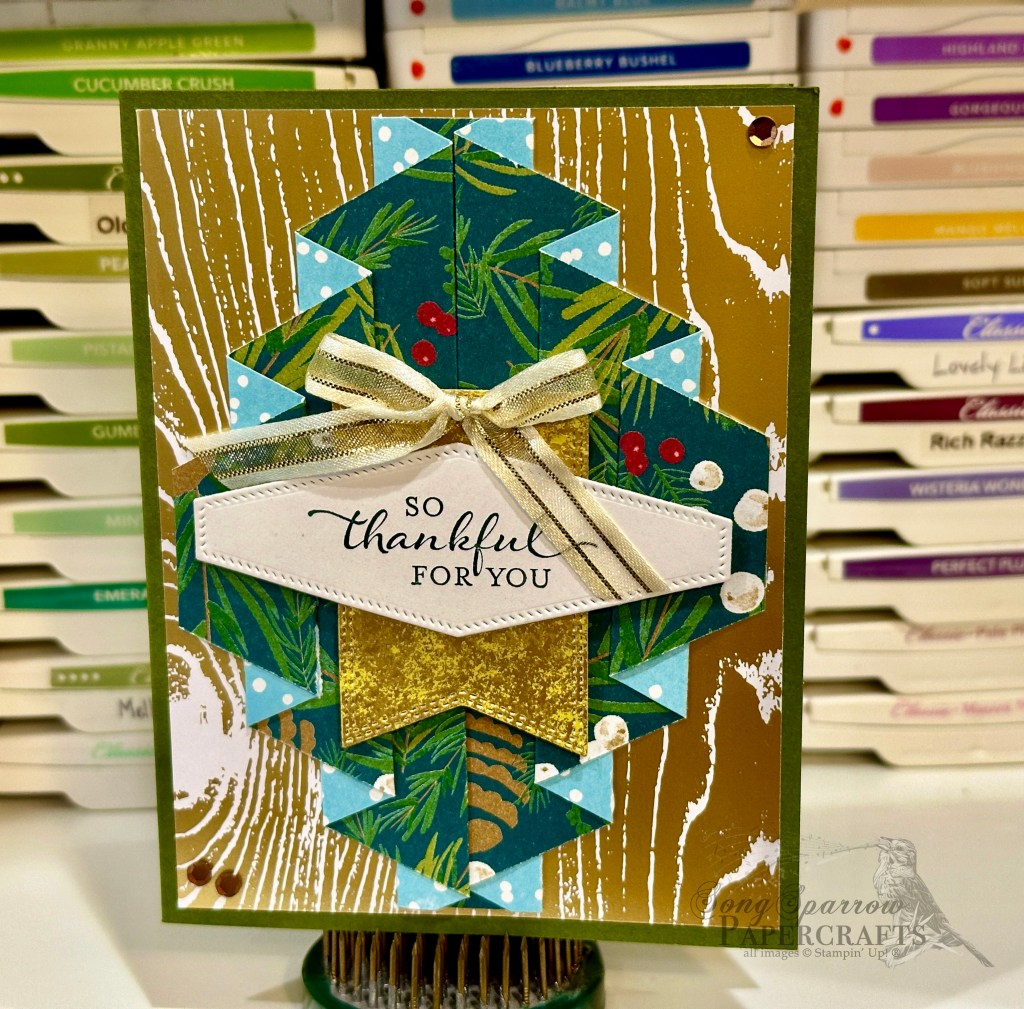
Thankful Curtain Fold

Stampin’ Up! has so many wonderful holiday designer series paper packs to choose from, and each one offers a whole world of possibility for card designs. On this week’s episode of Terrific Tuesdays, we’ve walked through several ways to make beautiful holiday thank you cards. And today, I want to show you another fun way to show off your stunning DSPs.

Today’s card features a new-to-me fun fold called a curtain fold. At first glance, it looks a little complicated, but it’s a very straight forward set of folds that make a beautiful pleated paper pattern as the focal point. I chose a sheet of Mossy Meadow as the base for this card and a sheet of Joyful designer series paper is the mat for the focal point. I used a sheet of A Walk in the Forest for the pleated fold portion. The sentiment is diecut from white cardstock using the Nested Essentials dies. The sentiment from the So Sincere stamp set is stamped in Pretty Peacock. A banner diecut from Distressed Gold cardstock is diecut using the banner die from the Nested Essentials die set. This card is finished off with a gold & very vanilla ribbon bow and a few sequins.

I love how the look of the card changes as you switch up the designer papers that you pair together. There are just so many possibilities. The first thing that pops to mind for me are wedding cards, but really this fold will be great for so many different occasions! Check out these two variations:

You can see all of the other fun fold designs that we made together in this week’s Terrific Tuesdays video by clicking below for the full video.

Tune in tomorrow for another fun fold you can create using Stampin’ Up! holiday designer series papers.

Products used in today’s featured design:
Mossy Meadow, Basic White, Distressed Gold cardstock
Joyful, A Walk in the Forest DSP
Very Vanilla & Gold satin-edged ribbon
Neutrals sequins
Dimensionals
Adhesives

All ads on this site are posted by WordPress.  Song Sparrow Papercrafts is not responsible for ad content.
Terrific Tuesdays

Wonderful Winter

Have you seen this week’s episode of Terrific Tuesdays? We’re focusing on holiday thank you card designs using several of the wonderful designer series paper packs offered by Stampin’ Up! I really love the suite of holiday papers offered this year and will be sad to see so many of them go in a few weeks, which is all the more reason to put them to good use as we send our thanks or maybe even some belated holiday hellos.

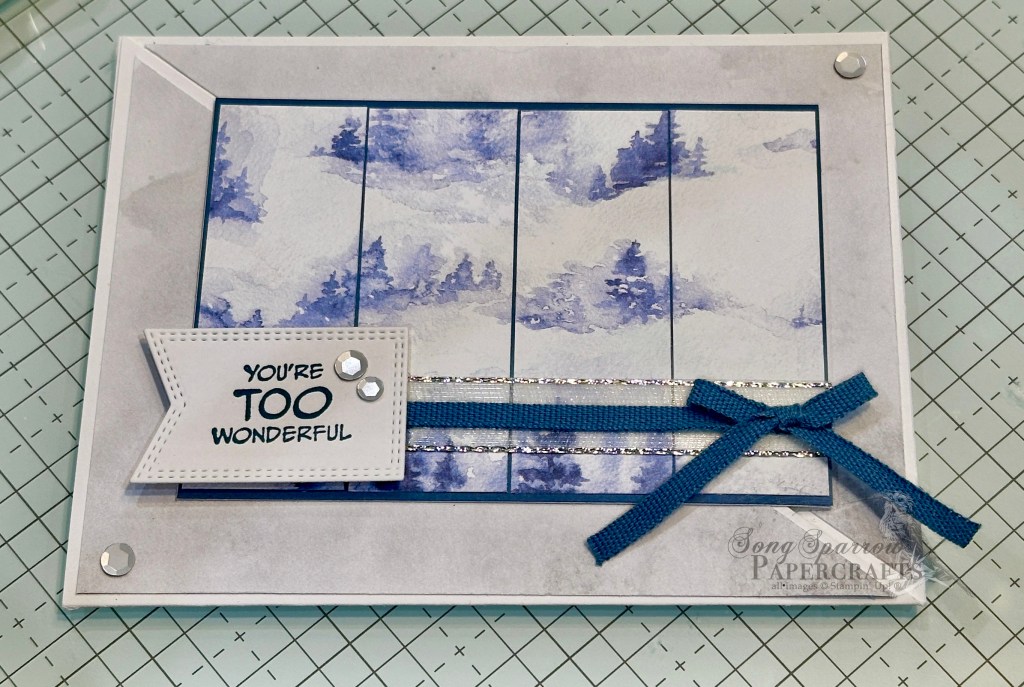
Today’s card features a twist on a simple diagonal fun fold and doubles as a one sheet wonder to boot. This horizontal design is built on a Basic White cardstock base, and the front panel of the card is halved on the diagonal. A single sheet of Winter Meadow designer series paper will cover all of the required areas in this design, and I selected the Winter Meadow blue evergreen paper pattern with the grey haze on the reverse side. One panel of the DSP is cut just short of standard size to allow for a narrow border around the card edge. This panel is halved on the diagonal with half of the sheet adhered to the front card panel and the other portion adhered to the inside card base on the portion that is exposed when the card is closed. I chose to use the grey hazy side of the paper for these portions.

Next, we work with the fold-over panel by cutting a sheet of white cardstock and scoring in the center. A piece of Misty Moonlight cardstock covers the front of the smaller white notecard and serves as the mat for the blue tree pattern of the Winter Meadow DSP. The patterned sheet is divided into equal sections and narrowly separated to create a grout effect. Use ribbon to make a band around the panel. You can layer ribbons to create different effects, like I did here to create a sparkly border on either side of the Misty Moonlight trim. The sentiment is cut from white cardstock using the Nested Essentials die and the sentiment is stamped in Misty Moonlight using the Zany Zoo stamps. A few white sequins provide a little extra sparkle and draw the eye diagonally across the design. This is such a fun and easy fun fold and can easily be adapted to any patterned paper.

You can see all of the other fun designs that we made together in this week’s Terrific Tuesdays video by clicking below for the full video.

Tune in the rest of the week to see more projects you can create using Stampin’ Up! holiday designer series papers.

Products used in today’s design:
Basic White, Misty Moonlight cardstock
Winter Meadow DSP
Zany Zoo stamps
Nested Essentials dies
Silver & white sheer ribbon
Misty Moonlight cotton trim
Neutrals sequins
Dimensionals
Adhesives

All ads on this site are posted by WordPress.  Song Sparrow Papercrafts is not responsible for ad content.

Terrific Tuesdays

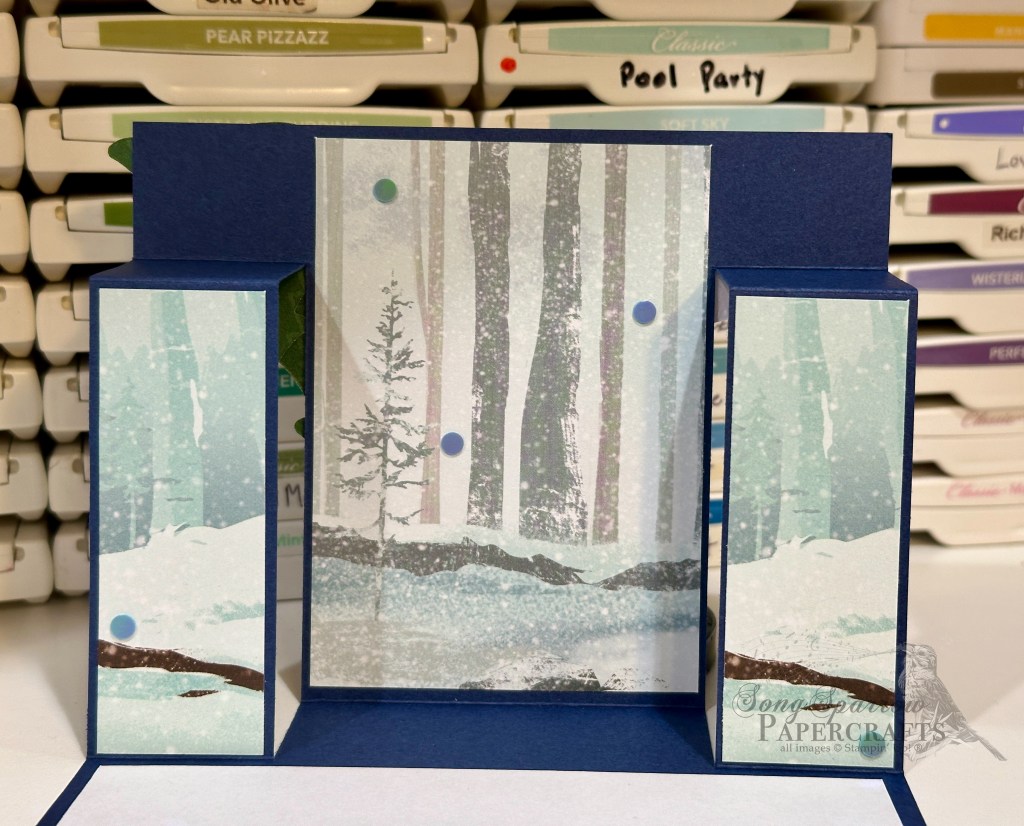
Sprig of Kindness

This week’s episode of Terrific Tuesdays features holiday thank you card designs using several of the wonderful designer series paper packs offered by Stampin’ Up! These papers allow for so much creativity and variety in design, and we’ll be exploring more designs together throughout the week.

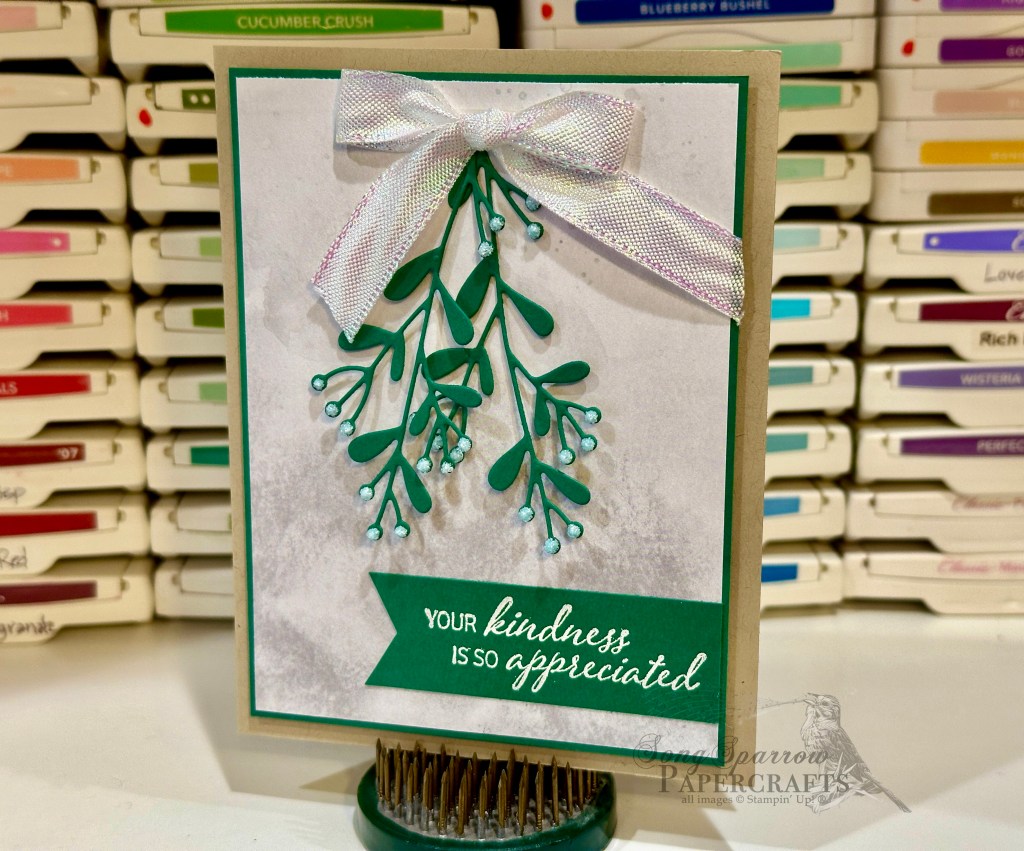
Today’s card uses an easy-to-miss sheet of paper in the Winter Meadow paper pack. At first glance, the sheet of grey haze is unimpressive, but it’s a terrific neutral with the interest of a varied pattern that affords you lots of design choices. Here, it serves as a backdrop that allows the focal elements of the card to pop. We start with a base of Crumb Cake cardstock. The lovely grey hazy sheet of DSP is matted by a sheet of Shaded Spruce, which helps draw the eye to the focal elements which are set atop in the same color. The sentiment from the So Sincere stamp set is stamped in Versamark and heat embossed in white atop the banner cut from Shaded Spruce. The sentiment is adhered directly to the grey backdrop to allow the hand-tied sprigs of mistletoe to be the only three-dimensional elements on the focal panel. The mistletoe is diecut from Shaded Spruce using the Magical Meadow dies. The berries are dots of Frosted Lace Stickles, and the whole bunch is held together with a white iridescent ribbon.

I love the simplicity of the design and how lovely the green elements look against the hazy grey backdrop. What do you think about the combination?

You can see all of the other fun designs that we made together in this week’s Terrific Tuesdays video by clicking below for the full video.

Tune in the rest of the week to see more projects you can create using Stampin’ Up! holiday designer series papers.

Products used in today’s design:
Crumb Cake, Shaded Spruce cardstock
Winter Meadow DSP
So Sincere stamps
Iridescent ribbon
White embossing powder
Frosted Lace Stickles
Dimensionals
Adhesives

All ads on this site are posted by WordPress.  Song Sparrow Papercrafts is not responsible for ad content.
Christmas

Better Together

I just love finding great design shortcuts, don’t you? Stampin’ Up!’s Memories and More product line is just one way that I’ve found to make quick work of adorable handmade cards. I finished up our Christmas cards over the weekend and was able to make a boatload of cards in no time flat using the Beary Christmas Memories and More products.

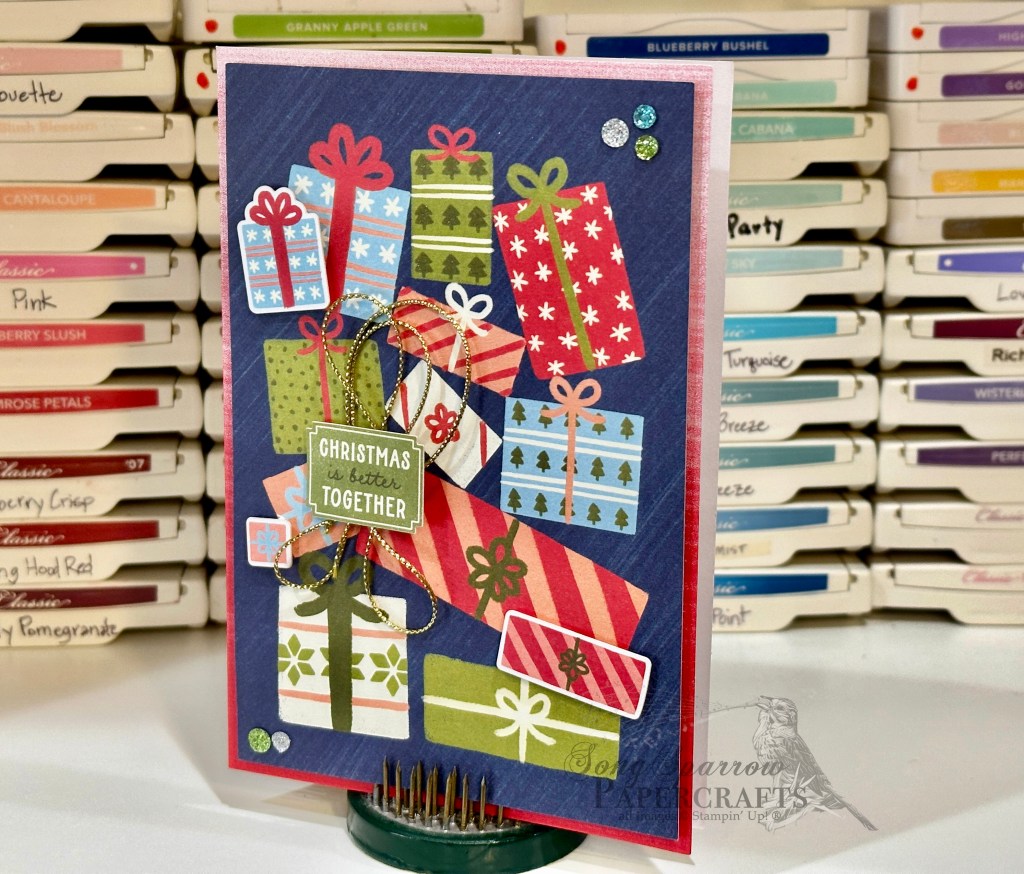
Today’s card begins with the red card base from the Memories and More cards and envelopes pack. The adorable present background is a notecard from the Memories and More card pack. I chose coordinating package stickers from the sticker sheet included in the card pack and popped them up with dimensionals. I nestled each package next to its coordinating counterpart on the notecard background and just love the effect. The sentiment is yet another sticker from the sticker sheet. I used gold cord to draw the eye to the sentiment since it’s a smaller element than I would have ordinarily chosen. A few glitter sequins in opposing corners really allow the eye to make the diagonal movement over the card design.

I’m looking forward to trying some of the other Memories and More products when I need to create a bunch of cards in short order.

Products used:
Beary Christmas Memory and More cards and envelopes
Beary Christmas Memory and More card pack
Gold cord
Glitter sequins
Dimensionals
Adhesives

All ads on this site are posted by WordPress and are based on personal browsing history.  Song Sparrow Papercrafts is not responsible for ad content.
Christmas

Let it Snow

Today we’re taking a look at another card that I was able to make using Memories and More products from Stampin’ Up! This adorable set is called Beary Christmas. By pairing the cards and envelopes and the mini kit card pack, I was quickly able to finish up my Christmas cards over the weekend.

This card design is built on a blue card base from the Memories and More cards and envelopes. The adorable bear scene is a notecard from the Memories and More card pack. The sentiment is cut from a smaller notecard from the card pack and mounted on dimensionals. A strip of silver and white sheer ribbon is twisted behind the sentiment panel for interest and sparkle.

Card designs don’t have to be complicated. And when you’re pressed for time, the Memories and More products allow for adorable designs that come together in a flash.

Products used:
Beary Christmas Memory and More cards and envelopes
Beary Christmas Memory and More card pack
Silver & white sheer ribbon
Glitter sequins
Dimensionals
Adhesives

All ads on this site are posted by WordPress and are based on personal browsing history.  Song Sparrow Papercrafts is not responsible for ad content.
Christmas

Christmas Together

Have you gotten all of your Christmas cards made and in the mail? I was able to put the last batch in the mail over the weekend. I was able to quickly put together the last batch by using a tried-and-true shortcut method — a Stampin’ Up! mini kit called Beary Christmas. I paired the Memories and More card pack and cards and envelopes for some super cute quick and easy designs. You can find all of the coordinating Beary Christmas products here. Over the next day or two, we’ll be taking a look at a few of the cute designs that came together from this suite of products.

The base of this card design is the blue card base from the Memory and More card and envelope pack. The snowflake background is a full notecard from the Memories and More card pack. The polar bear scene is fussy cut from the notecard and then popped up on dimensionals to stand out above the snowflake background. The remaining sentiment section is cut to break up the words of the sentiment and then adhered with dimensionals across the card front. A few glitter sequins and some gold cord add sparkle and help the eye move across the design.

Stampin’ Up! has an excellent selection of kits and mini kits that allow you to assemble a whole set of adorable cards in no time flat. If you’re in a time crunch but still want to have the personal touch of a handmade card, kits are the way to go!

Products used:
Beary Christmas Memory and More cards and envelopes
Beary Christmas Memory and More card pack
Gold cord
Glitter sequins
Dimensionals
Adhesives

All ads on this site are posted by WordPress and are based on personal browsing history.  Song Sparrow Papercrafts is not responsible for ad content.