Clean and Simple

True Blessing

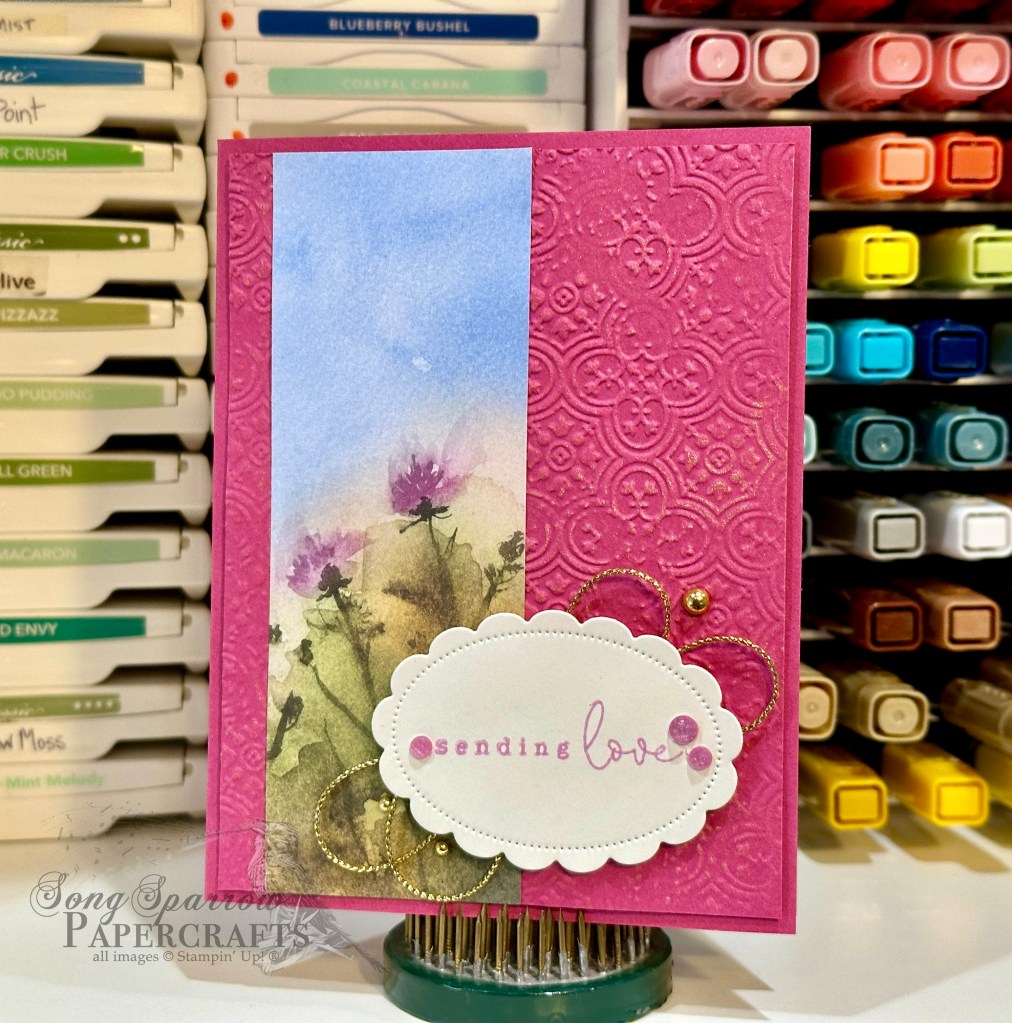
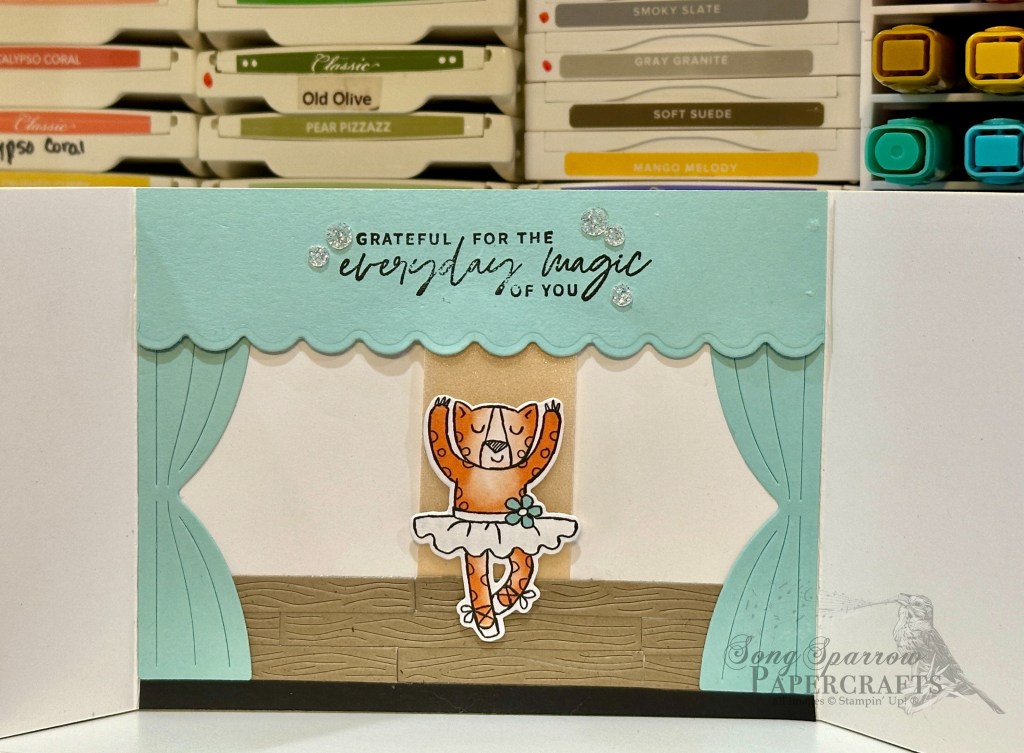
Thus far this week, we’ve been exploring how a sketch and a few supplies can give you to terrific cards in no time flat. Today’s card is a slight variation on yesterday’s card design with a slightly wider designer paper section that begins on the edge of the embossed panel.

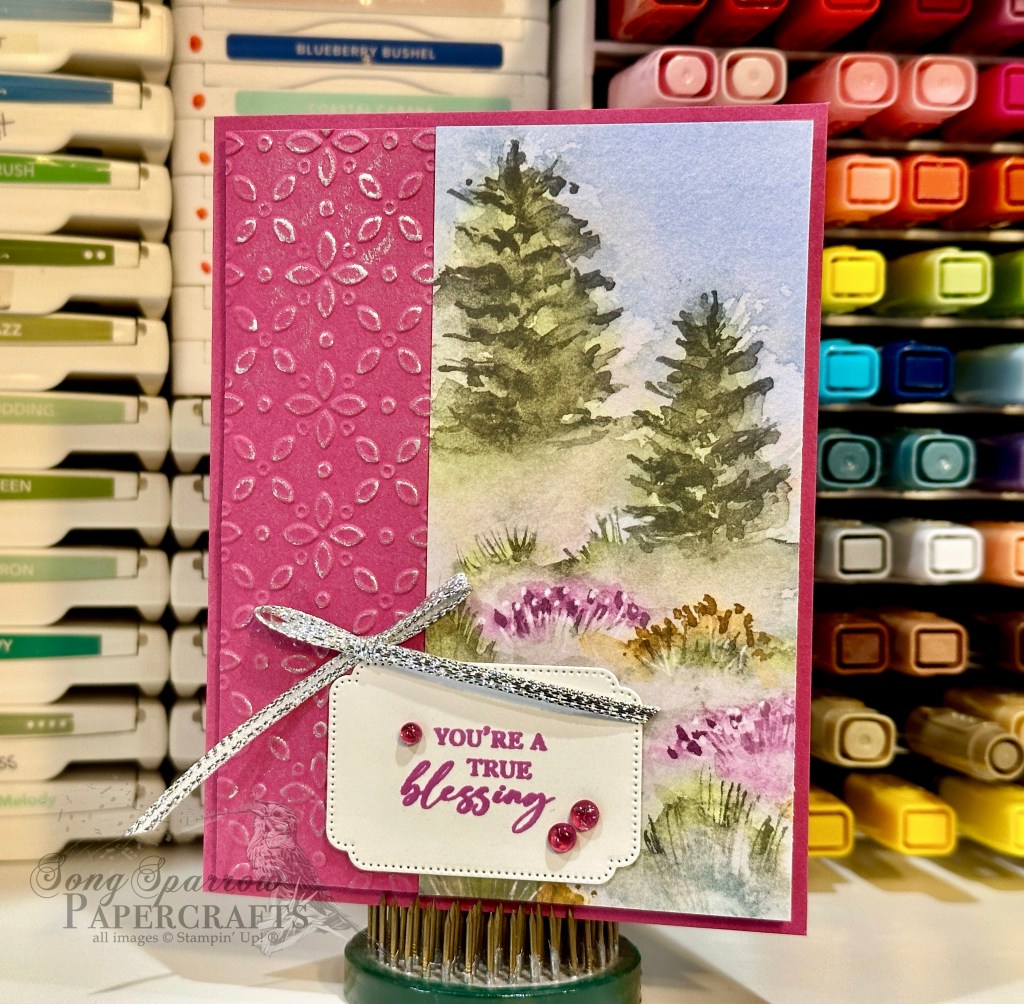
I really love this particular sheet of the Thoughtful Journey designer paper pack. The cedars set on the hill with the wildflowers down below reminds me of the prairie that was behind my childhood home.

This card begins with a base of Berry Burst. I cut an additional quarter-panel and embossed with the Eyelet embossing folder then cut the panel down to be one-quarter inch smaller, leaving just a small border behind on the base. I wanted to ensure that the beautiful embossed pattern stood out to compliment the soft white in the patterned paper, so I used my finger to rub a thin layer of silver ink over the top of the pattern. Then I adhered the designer paper panel to the right side of the embossed panel before adhering the full panel to the base using dimensionals. The sentiment from Unbounded Love is stamped on white cardstock diecut using the coordinating Unbounded Love dies. To draw the eye to the sentiment, I finished the card with tinsel gems and silver trim tied in a small bow.

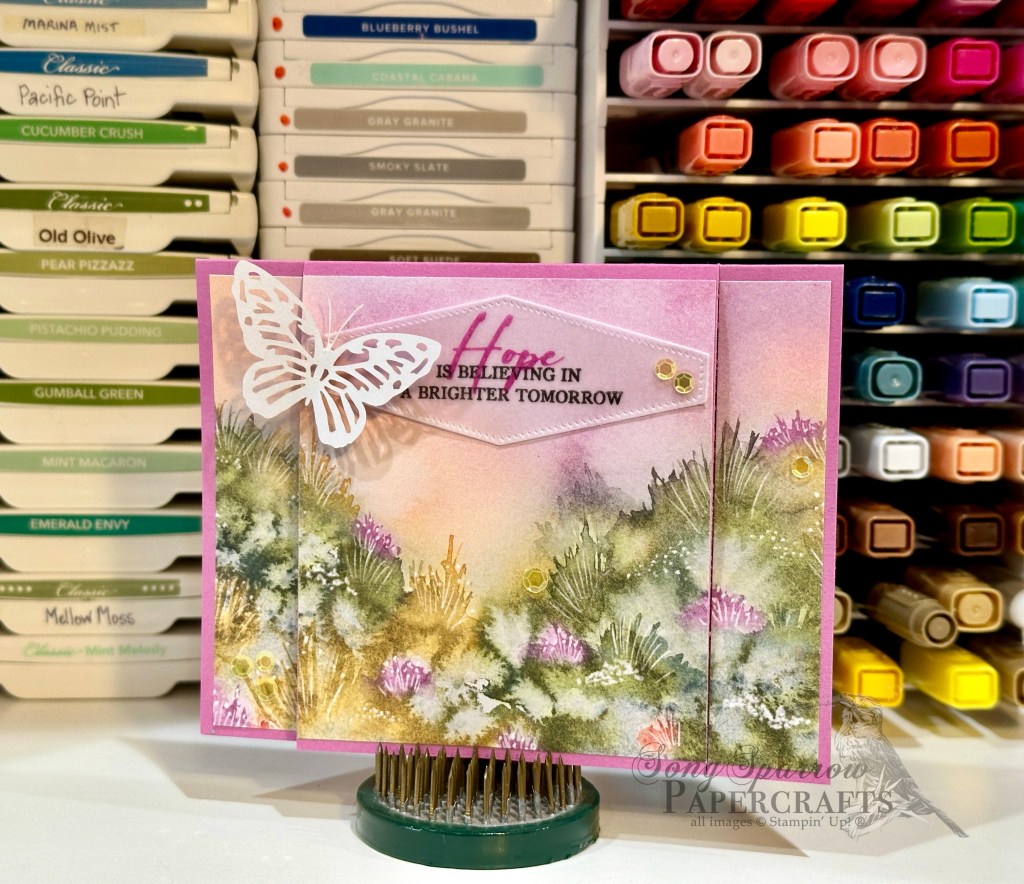
Tomorrow, I’ll be rounding out this series with one final variation. I hope you’ll come check it out!

Products used in this card design:
Berry Burst, Basic White cardstock
Thoughtful Journey DSP
Unbounded Love stamps & dies
Eyelet embossing folder
Tinsel gems
Silver trim
Dimensionals
Adhesives

Clean and Simple

Sending Love

When you’re low on crafting time, keeping things simple is key. I typically choose a simple sketch and a few coordinating supplies when I’m needing to make a card but don’t have time for lots of layers or fussy cutting. The beautiful thing about the products Stampin’ Up! offers is how wonderfully they coordinate to give you consistent results each and every time. And I don’t say that simply because I’m a demonstrator. It’s one of THE reasons that I became a demonstrator!

We begin our card today with a base of Berry Burst cardstock. The background panel is cut a tad smaller than the card base and then machine embossed using the Distressed Tile embossing folder. I decided from the get-go that I wanted metallic gold to be an accent color for this card design, so after embossing the Berry Burst quarter-sheet and cutting it to size, I used my finger to lightly rub metallic gold ink across the card front to bring out the gorgeous pattern. A two-inch strip of Thoughtful Journey designer paper is adhered to the left side of the embossed panel, leaving a small strip of the panel exposed on the left so that the pattern goes from edge to edge in the background. This whole panel is then adhered to the base using dimensionals. The sentiment from Country Flowers is stamped on white cardstock diecut using the Unbounded Love dies and it, too, is adhered with dimensionals. A twist of gold trim and a few gold Blooming Pearls add that bit of sparkle and bring out the golden hues in the designer paper. And a few In Color shimmer gems on either side of the sentiment ensure your eye lands here last.

Tune in tomorrow to check out a variation on this card layout that gives us a very different look but results in a card that’s just as stunning!

Products used for today’s card:
Berry Burst, Basic White cardstock
Thoughtful Journey DSP
Country Flowers stamps
Unbounded Love dies
Distressed Tile embossing folder
In Color shimmer gems, Blooming Pearls
Gold trim
Dimensionals
Adhesives

Fun Folds

Brighter Tomorrow

Hello, friends! I hope your week has gotten off to a good start. Thanks so much for hanging with me as I took a little break to tend to my hubby who was in the hospital. I’m pleased to report that we are now home! And as the saying goes, there really IS no place like home!

Over the weekend, I had a small bit of time to play around with some of the products I purchased from the new Annual Catalog. I kept things really simple and used a few sketches that I pulled from my sketch book.

Today’s card is a faux fold-over fun fold card. The center section lifts up, just as a fold-over would, but this card is constructed entirely of the card base without any extra layers like the usual fold-over design has. The front panel of the card is cut to give you a large center section and the two small side sections are adhered to the card base so that, rather than the entire card front opening, only the panel in the middle opens. I like to call this a fun fold cheat because it has all the pretty and half as much work — haha!

We begin with a base of Petunia Pop cardstock, which is one of the new In Colors. The base is cut to standard size and scored in the center. After selecting a side to serve as the card front, cut a one-inch strip on each side of the card front, leaving a larger panel in the center. Be sure you’re only cutting from the bottom edge to the center score line. Next, choose and cut a piece of the Thoughtful Journey designer paper so that it is slightly smaller than the entire card front. Then cut a three-quarter inch strip from each side. This will leave you a center piece of designer paper that should lay perfectly over the entire center flap of the card front, leaving only the small border of Petunia Pop on the top and bottom. The sentiment from Unbounded Love is stamped in Petunia Pop and black on a piece of vellum diecut using the Nested Essentials set. It’s adhered to the center section using glue dots on each end. A few sequins and a paper butterfly finish things off and draw the eye across the card to rest on the sentiment.

I have a few more cards to share this week from my weekend crafting mini session and hope to get back into the swing of things as we settle into an appointment schedule here at home.

Products used in today’s card:
Petunia Pop, vellum cardstock
Thoughtful Journey DSP
Unbounded Love stamps
Nested Essentials dies
Paper butterflies
Shiny sequins
Dimensionals
Adhesives

About Me

Are You a Pet Person?

Have you checked out all of the new products that dropped into the online store yesterday? If not, you can click HERE to check them all out. So much good stuff!

I’m still bouncing between the hospital and home, so I haven’t had time to be in the craft room. But I thought this might be a good opportunity to share a few fun facts with you. Who’s up for it?

I grew up in the country on a family farm and actually have a degree in agriculture. I’m an animal lover and have been since I was an itty bitty girl. I even got chickens for my second birthday! When I took my first job out of college, I couldn’t wait to have a place of my own where I could go back to having pets since pets were a no-no at college housing. I’m a big cat person, and cats certainly fit my work schedule much better than doggos. And I’ve continuously had cats ever since. Thankfully, my hubby is also a cat person. *wink*

For those of you who’ve been following a long for a little while, you may remember a few photos of our newest addition Nolan. He’s a spunky kitten we rescued from the local animal shelter when he was just barely old enough to be away from mom. We also have two older cats that were also rescued from local shelters—Pudge and Leo. They were both abandoned at shelters after their owners passed away.

But our “collection” of cats doesn’t stop there. A couple of years ago, we regularly started feeding the feral cats on our street. And we now have about 9 who regularly come for snacks on our back porch and we’ve managed to snap photos of most of them. One of the feral mommas Smokey left us her three kittens in January and they’ve called our house home ever since. The kiddo went with a shoe theme and named them Socks, Boots, and Mittens. We can now pet and handle 3 of our regulars—Shadow, Socks, and Boots—and they come looking for love often.

Do you have pets? I would love to hear about them! Please share in the comments!

Shop the catalog

New Annual Catalog TODAY

Hello, everyone! As I mentioned late last week, I’ve taken a little break from posting after my husband’s major surgery last week. Bouncing back and forth between the hospital and home life is pretty hectic. So thanks for your patience as we work to get hubby home and settled in sometime soon.

In the meantime, do you know what today is? Catalog launch day! The brand new 2024-25 Stampin’ Up! Annual Catalog is LIVE today, and I am SO excited! Have you checked out the new goodies yet? If not, you can hop on over to my online store and check out all of the new stuff by clicking HERE.

Here are a few of my favorites from the new catalog:

These are a few of the new goodies that hopped right into my cart this morning, and my mind is already turning with all sorts of ideas. I’m looking forward to being back in the craft room soon to bring you some new designs for all of the brand new catalog items that are making a home in my stash.

After taking a look at the new items in the store, what things are going on your shopping list? I can’t wait to hear!

join my team · SU! Promotions

Joining Special

Have you ever thought about joining Stampin’ Up! as a demonstrator? Did you know you can join just for the discount?

Whether you are an avid paper crafter and interested in starting a business or you’re just into stamping as a hobby and want great products at a discount, being a Stampin’ Up! Demonstrator is for you. This community of creativity is supportive, encouraging, and just plain fun!

Beginning May 1st, Stampin’ Up! is offering an incredible discount for all new demos. Your starter kit will include 4 sets of In Color products for FREE, including ink pads, cardstock, designer series paper, and Stampin’ Write Markers! Your new demo kit will also include $125 worth of product for just $99 AND free shipping AND free business supplies. All of these FREE perks amount to a HUGE savings to everyone who signs up in May!

But more importantly, I would love for you to join my team for the camaraderie, encouragement, and fun we will share. As demonstrators, we get to preview new product, enjoy special product credits, receive FREE training, have access to demonstrator-only events, and so much more! Let’s put our creative heads together and share what we love with others!

Have questions? Let’s chat.

Ready to join my team? Click here to get started.

Retiring · Zany Zoo

Something Great

We’re rounding out this week with our zoo pals at the theatre. Before my son was born, I spent quite a bit of time in theatres in my area performing opera, musical theatre, and sacred music. There’s nothing quite like the feeling of being onstage, and I’ve been pleased to be able to return to some singing over the last year.

Today’s card actually combines two card designs that I saved in my inspiration folder quite some time ago. And I decided to combine them by using the barn fold fun fold to build the drama of waiting for the curtains to open and then starting the show.

We start with a base of Basic White cardstock. The standard sized base is scored so that there are two equal sized flaps serving as the card front, which creates the barn fold. A piece of Lemon Lolly cardstock and a strip of Basic Black serve as the background. Using the Zany Zoo dies, I diecut curtain panels from Pool Party cardstock. The curtain tie backs are cut from Distressed Gold specialty paper using the tie back die. The chairs are cut from Real Red using the base of the llama die. The silhouettes of the audience members are diecut from Basic Black using the llama and ballerina dies. The canned lights are diecut from black using the vase die and strips of vellum serve as light beams pointing to the sentiment in the center. The sentiment from Zany Zoo is stamped on white cardstock and then diecut using the Hot Air Balloon dies. The sentiment panel is adhered to the left panel of the card front using dimensionals.

The interior scene has another set of Pool Party curtain panels. The sentiment from Something Fancy is stamped in black on the center panel. The stage floor panels are diecut from Crumb Cake cardstock using the Filled With Fun wagon panels that I cut apart using paper snips. The base of the stage is a strip of black cardstock. The spotlight coming down center stage is a strip of gold vellum. The adorable ballerina is diecut from the Zoo Crew designer paper using the coordinating dies. I’ve placed her on a double layer of dimensionals to ensure she stands above the scene and really catches the eye. Things are finished off with some glitter sequins to reinforce the *magic* of the scene.

I’ve had a lot of fun taking our zoo friends on adventures this week, and I hope you’ve enjoyed tagging along! I’ll be taking a few days off next week to be with my hubby in the hospital. But I’ll be back with some more crafting goodness soon!

Products used in today’s card:
Pool Party, Crumb Cake, Real Red, Lemon Lolly, Basic Black, Basic White, vellum cardstock
Zoo Crew, Distressed Gold DSP
Something Fancy, Zany Zoo stamps
Zany Zoo, Hot Air Balloon, Filled With Fun dies
Glitter sequins
Dimensionals
Adhesives

Retiring · Zany Zoo

Celebrate with Confetti

Thanks for joining me today for another Zoo Crew adventure. This week, we’ve been following along as the members of the Zany Zoo have taken their turns in the spotlight before they bid adieu one final time as the 2023-24 Annual Catalog retires. Today, we get to tag along with the birthday puppers as he celebrates a special someone’s big day.

The fun fold card is known as a double flap fold-over or flip top fun fold. I first learned this fold from fellow Stampin’ Up! demo Jackie Bolhuis over at Klompen Stampers. This fold is great when you have designer paper you’d like to showcase or perhaps multiple images you want to display in one card design. For this particular card design, I wanted to highlight the fun patterns on the backs of the Zoo Crew designer paper.

We get started with a standard base of Pool Party cardstock. I cut the black herringbone pattern so that there’s a quarter-inch border around each edge. For the fold-over portion, I chose a piece of Lost Lagoon cardstock. Most of the sheet serves as the front fold-over panel. I elected to have a one-inch portion serve as the anchor on the inside of the card base, which is covered by the message panel. The fold-over panel is covered with the white polka dot pattern for a nice contrast of dark and light. The focal image panel is a piece of Pretty Peacock soft shimmer paper that is diecut using the Perennial Postage dies. The cute puppers is fussy cut from the sheet of Zoo Crew designer paper and mounted on dimensionals. The sentiment from the Unbounded Love stamp set (coming soon!) is stamped on white cardstock and diecut using the Everyday Details dies. I added an extra layer of dimensionals to adhere the sentiment to ensure it stands out against the busy background. A twist of Pool Party crinkle ribbon and a few adhesive-backed glitter sequins finish things off nicely.

I hope you’ll pop in tomorrow to check out a fun way to use those Zany Zoo dies!

Products used in today’s card:
Pool Party, Lost Lagoon, Basic White cardstock
Zoo Crew, soft shimmer DSP
Unbounded Love stamps (coming soon!)
Pool Party crinkle ribbon (retired)
Glitter sequins (retired)
Dimensionals
Adhesives

Retiring · Zany Zoo

S’more For You

We’re tagging along with the Zoo Crew this week as they take a few more adventures before retiring with the 2023-24 Annual Catalog. I’m going to miss these guys! The stamps and designer papers have offered so many fun design opportunities.

Today’s card has us gathering with friends around a campfire. We get started with a base of Pretty Peacock cardstock. The focal section of the card consists of a background of two patterns of designer series paper — Inked Botanicals and Bright & Beautiful — and a piece of white cardstock. Using the outdoor adventure sheet of the Zoo Crew designer series paper, I fussy cut several characters, as well as groups of trees and several mountain ranges, to build this scene. Dimensionals help give the scene depth. The sentiment from Charming Sentiments is stamped on Lemon Lime Twist and diecut with the Zany Zoo banner die. A strip of the ribbon duo tied off with linen thread, along with the bits of sparkle from the sequins, tinsel gems, and glitter sequins, finish things off by moving the eye across the design.

Tune in tomorrow to see what our zoo friends get up to next!

Products used in today’s card:
Pretty Peacock, Lemon Lime Twist, Basic White cardstock
Zoo Crew, Inked Botanicals, Bright & Beautiful DSP
Charming Sentiments stamps
Ribbon duo, linen thread
Pastel sequins, Tinsel gems, Glitter sequins (retired)
Dimensionals
Adhesives

Retiring · Zany Zoo

Hooray for Birthdays

This week, the Zoo Crew is taking us on one last adventure before they retire with the 2023-24 Annual Stampin’ Up! Catalog. These guys are so easy to incorporate into designs. I’m still a little surprised that this crew of adorable critters isn’t carrying over into the new catalog! Maybe we can all petition for them to stay on as Online Exclusives. *grin*

Today, the fox is riding in to bring some birthday wishes. We get started with a base of Lost Lagoon cardstock. The background panel is a piece of the Zoo Crew designer series paper cut so that there is a half-inch border on either side. Our cute fox is punched from the DSP using the Decorative Circle punch and matted with a slightly larger plain circle punched from a different sheet of the DSP. Both are then matted on a piece of the Lost Lagoon soft shimmer paper that has been punched with the 2 3/8-inch circle. The sentiment from Hot Air Balloon is stamped on white cardstock and then diecut with the Nested Essentials dies using the extension method, which gives just a smidge of added length to the banner to allow for the whole sentiment. I tied some Lost Lagoon bordered ribbon around the card and tucked it behind the focal image panel and then added some rainbow adhesive-backed dots to create a visual triangle between the focal image and sentiment.

Today’s layout is inspired by my upline and Luv 2 Stamp team leader Patty Bennett. One of the things I love about this card layout is how quickly everything comes together. This is a go-to in my sketch book. Do you have any go-to layout favorites?

I hope you’ll join me tomorrow for another wild Zoo Crew adventure!

Products used in today’s card:
Lost Lagoon, Basic White cardstock
Zoo Crew, soft shimmer DSP
Hot Air Balloon stamps
Decorative circle, 2 3/8” circle punch
Nested Essentials dies
Lost Lagoon bordered ribbon
Rainbow adhesive-backed dots
Dimensionals
Adhesives