Terrific Tuesdays

Brightest & Best Holiday

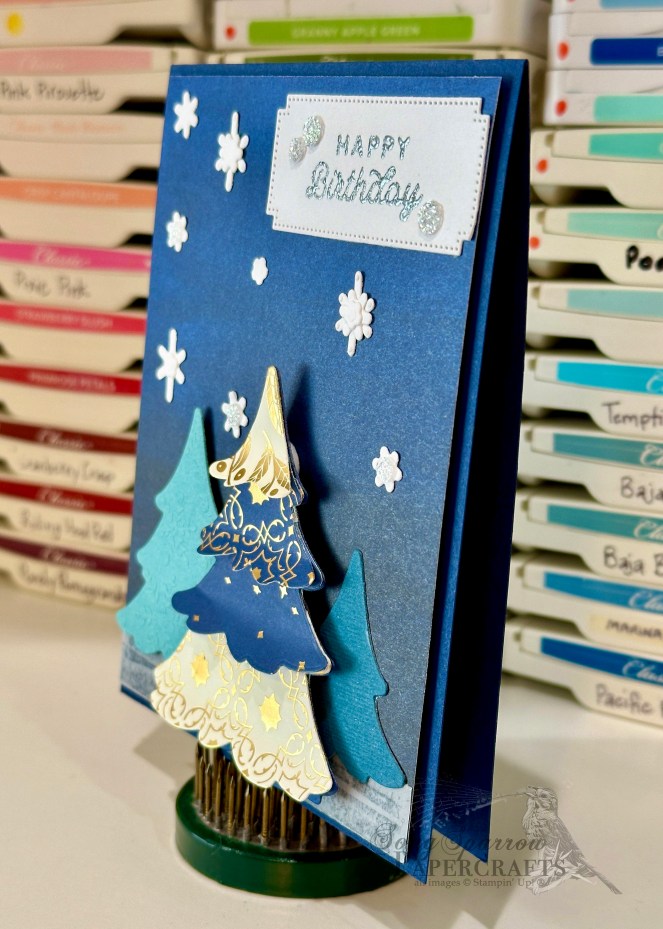
This week, we’ve been making beautiful cards with products from the O Holy Night suite by Stampin’ Up! And I wanted to share a bonus post with you this afternoon.

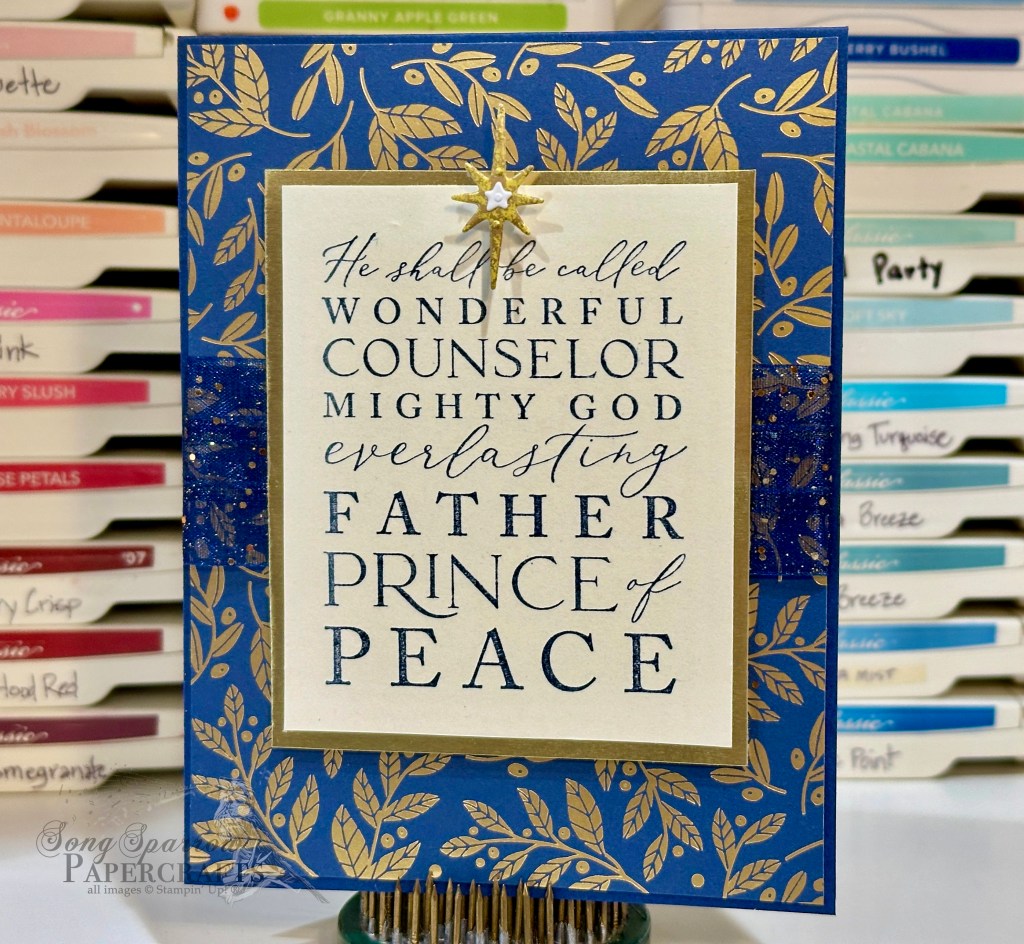
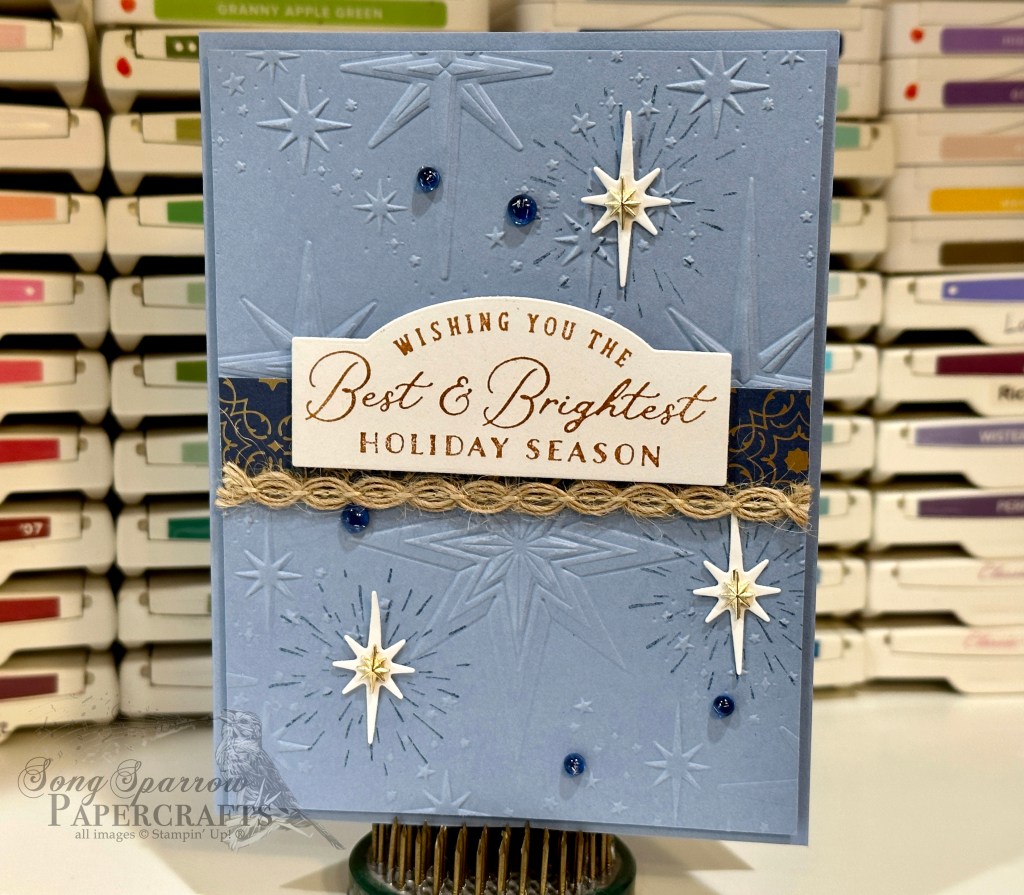
This card design is CASEd from the Holiday Mini catalog on page 17. Have you ever looked to the catalogs for design inspiration? When you’re short on time or ideas, catalogs are a great resource. One of our team challenges last month was to CASE (copy and stamp exactly) a project from the Holiday Mini. I knew I wanted to use part of the O Holy Night suite, so I began looking at all of the samples included in the catalog. What I love about this design is the combination of the hybrid embossing folder and stamping on the same panel. The small strip of the specialty paper in the center of the embossed panel is also a great use of smaller scraps.

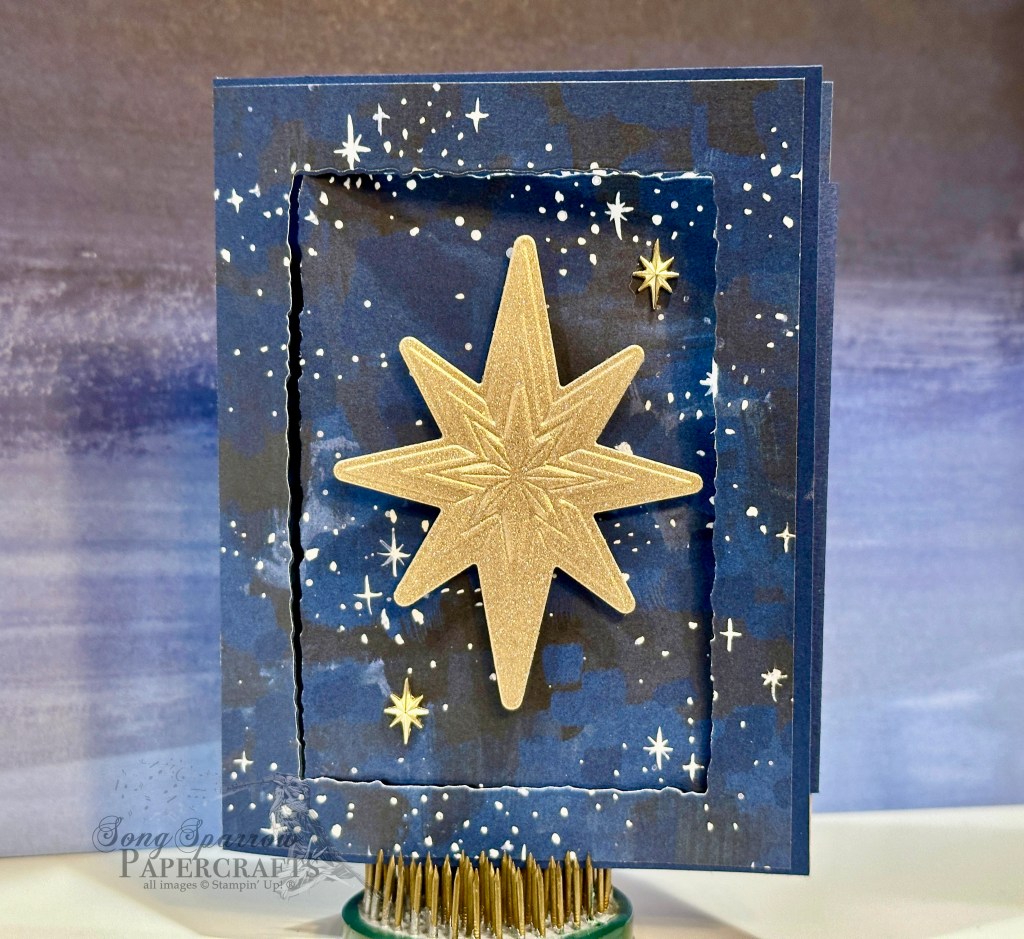
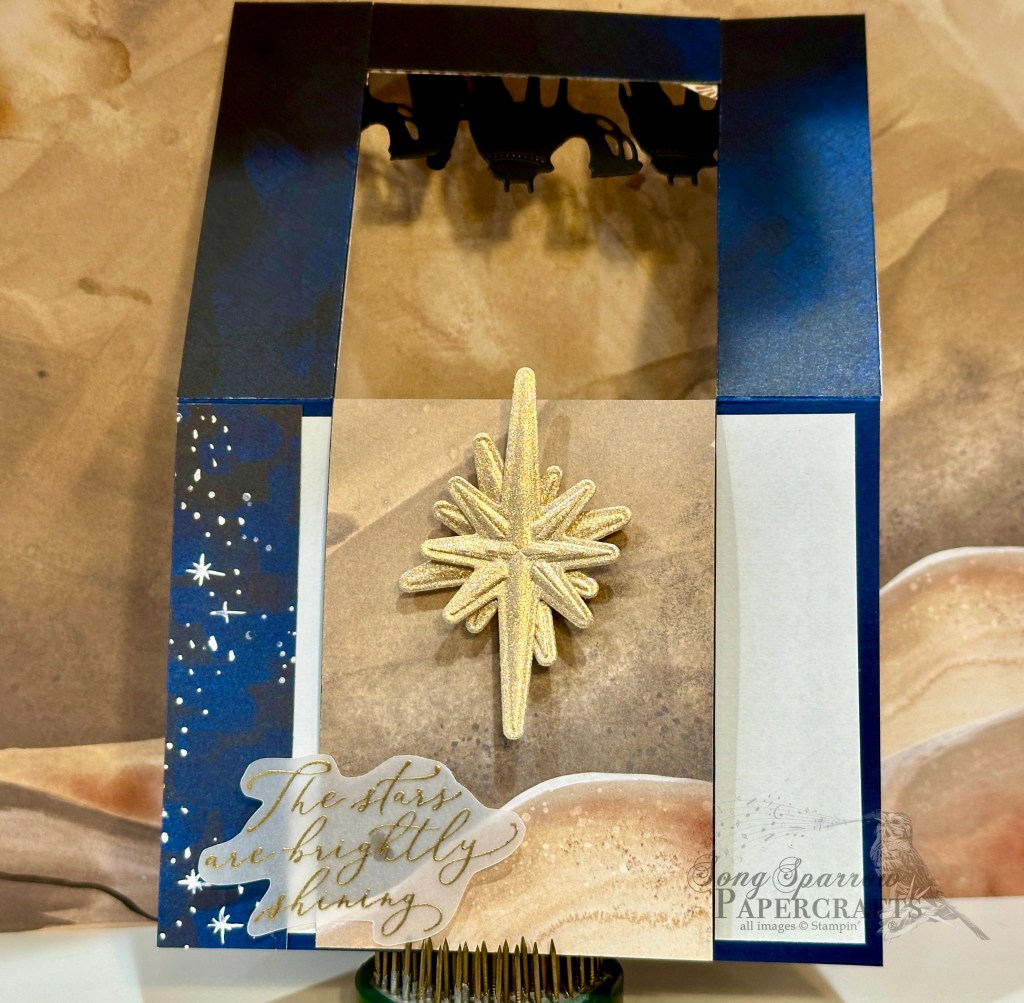
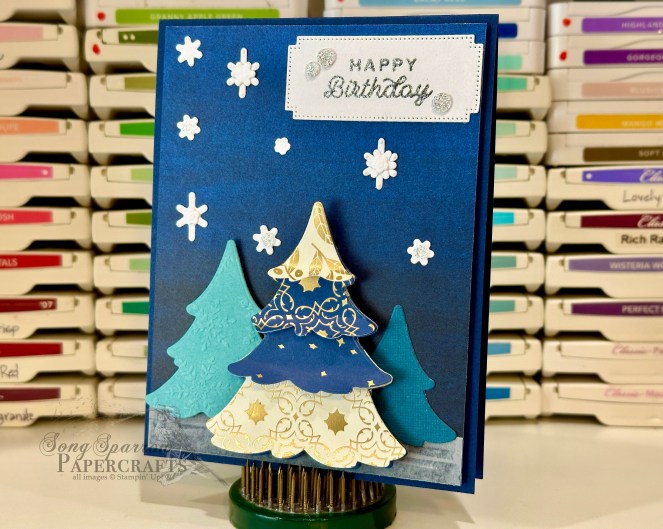
The base of this card design is Boho Blue. A smaller panel of Boho Blue is embossed with the Stars at Night hybrid embossing folder. Several starbursts are stamped over the embossed panel in Misty Moonlight. Smaller stars diecut from white cardstock are adhered with glue dots over the stamped starbursts. A star trinket serves as the center of each diecut star. A narrow strip of Shining Brightly designer paper is mounted in the center of the embossed panel with a strip of natural wavy trim serving as the accent below. The sentiment from the Stars at Night stamp set is stamped atop white cardstock in Copper Clay. The sentiment is then diecut using the coordinating die from the Stars at Night dies and then elevated using dimensionals. Night of Navy tinsel gems finish the design and help draw the eye across the panel.

If you’re interested in seeing the cards we made during this week’s Terrific Tuesdays episode, you can catch it here:

Products used in today’s card:
Boho Blue, Basic White cardstock
Shining Brightly DSP
Stars at Night hybrid embossing folder
Stars at Night stamps & dies
Natural wavy trim
Tinsel gems
Star trinkets
Dimensionals
Adhesives

All ads on this site are posted by WordPress and are based on personal browsing history.  Song Sparrow Papercrafts is not responsible for ad content.

Terrific Tuesdays

Holy Night Fun Fold

This week is all about the products included in the O Holy Night suite by Stampin’ Up! And the two featured product bundles this week — Night Divine and Stars at Night — are both included in the current seasonal sale. Have you been enjoying the design inspiration?

Today I’m sharing another card design using the O Holy Night designer series paper. And the paper is the star of the show (pun only kind-of intended)! This card features the single flap window fun fold. The card base is Night of Navy. The front card panel consists of a sheet of the starry night design from the paper pack. The window is diecut using the Deckled Rectangles die set. The Star of Bethlehem takes center stage in the window. It’s diecut and embossed from gold glimmer paper using the Stars at Night hybrid embossing folder. A few star trinkets in each corner help draw the eye across the card front.

When the card is opened, another scene is revealed. The “O Holy Night” sentiment is heat embossed in gold at the bottom of the sheet of designer series paper. The back side of the flap serves as the message panel and is left blank to allow for a personalized message to the recipient.

Interested in watching this week’s episode of Terrific Tuesdays to see what we made using the two featured product bundles? You can watch it here:

Products used in today’s card:
Night of Navy cardstock
O Holy Night, shimmer (retired) DSP
Stars at Night hybrid embossing folder & dies
Gold embossing powder
Dimensionals
Adhesives

All ads on this site are posted by WordPress and are based on personal browsing history.  Song Sparrow Papercrafts is not responsible for ad content.

Terrific Tuesdays

Stars Shining Brightly

This week we have been exploring all of the beautiful project possibilities with the O Holy Night and Shining Brightly designer series papers that were offered alongside this week’s featured product bundles — Night Divine and Stars at Night. While the papers are sold out, I wanted to offer design possibilities for those of you who purchased these beautiful paper packs.

Today’s fun fold card design uses the O Holy Night papers and Night Divine dies to build a scene. This spanner fun fold by fellow demonstrator Jackie Bolhuis with Klompen Stampers is the perfect design for this project. The front card panel is split to allow for a double flip-up as the card is opened. I chose to feature the Journey of the Wise Men on this design.

Night of Navy cardstock as the base. The starry sky and desert paper designs are both from the O Holy Night designer series paper pack. The camels and wise men are diecut from Basic Black cardstock using the Night Divine dies. The camels are reversed to have them traveling in the same direction with the wise men, and each wise man is elevated on mini dimensionals to give depth to the scene. The Star of Bethlehem shines brightly in the sky and is diecut from gold shimmer paper and embossed using the Stars at Night hybrid embossing folder and dies. Dimensionals separate each layer of the star to draw the eye and emphasize its prominence above all other stars in the night sky. The star panel remains as you lift the top section of the card front, and this reveals the sentiment which has been heat embossed in gold atop a vellum sheet. The message panel underneath has been left blank for a personalized note to the recipient.

I really debated about whether to add the sentiment on the center panel, but I am pleased with the result. What do you think? Would it be better to have no sentiment on this design?

Did you miss this week’s Terrific Tuesdays video and would like to know what all the fuss is about? You can check it out here:

Products used in today’s card:
Night of Navy, Basic Black, vellum cardstock
O Holy Night, gold shimmer (retired) DSP
Night Divine stamps
Stars at Night dies
Stars at Night hybrid embossing folder
Gold embossing powder
Dimensionals
Adhesives

All ads on this site are posted by WordPress and are based on personal browsing history.  Song Sparrow Papercrafts is not responsible for ad content.

Terrific Tuesdays

Bright Christmas

This week, we’re making gorgeous Christmas cards with the Stars at Night and Night Divine bundles. Specifically, we are looking at designs that use the coordinating designer series and specialty paper packs called O Holy Night and Shining Brightly. Although both of these paper packs are sold out, I wanted to provide some design inspiration for those of you who purchased these papers or maybe have something that looks similar in your stash.

For today’s fun fold card design, we begin with a base of Night of Navy card stock. The base is scored at 1 1/2-inches and 4-inches to achieve the fun fold. The left panel consists of a sheet of the starry Very Vanilla Shining Brightly paper that has been embossed with the Stars at Night hybrid embossing folder. I made sure to place the largest star as close to the center of the panel as I could. The smaller fold-over panel is adorned with a strip of More Dazzle specialty paper. The sentiment panel has a circular base of Night of Navy and is wrapped in gold trim. The sentiment from Stars at Night is heat embossed in gold atop vellum, cut with a small border using paper snips, and rests atop the gold trim. Two sprigs of greenery from Stars at Night are heat embossed in gold on Very Vanilla and diecut using the coordinating Stars at Night dies. A strip of gold satin edged ribbon is tied in a bow and affixed under the greenery. The entire panel is elevated on dimensionals for some added drama and emphasis. The sentiment panel is intended to look like a cross between a wreath and an ornament, and I really love the effect. What do you think?

Would you like to know more about all of the designs we made with the Night Divine and Stars at Night stamps and dies in this week’s episode of Terrific Tuesdays? Check out this week’s video to see them all!

Products used in today’s card:
Night of Navy, Very Vanilla cardstock
Shining Brightly, More Dazzle DSP
Stars at Night stamps & dies
Stars at Night hybrid embossing folder
Gold satin edged ribbon
Gold trim
Gold embossing powder
Dimensionals
Adhesives

All ads on this site are posted by WordPress and are based on personal browsing history.  Song Sparrow Papercrafts is not responsible for ad content.

Terrific Tuesdays

Wonderful Counselor

Have you seen the latest episode of Terrific Tuesdays? This week, we’re working with the Stars and Night and Night Divine bundles to make gorgeous Christmas cards. These two bundles of products are part of a larger suite called O Holy Night, which included designer series paper, specialty paper, ribbon, and star trinkets. Unfortunately, the papers and trinkets are sold out. But for those of you who purchased these products and are wondering what to do with them, I wanted to show you how they pair with the rest of the suite.

For today’s card design, we begin with a base of Night of Navy card stock. A sheet of the Night of Navy foiled Shining Brightly cardstock, which is wrapped in Night of Navy & gold glittered ribbon, serves as the dramatic backdrop for the sentiment panel. The sentiment panel is matted with gold foil specialty paper. The sentiment from the Night Divine stamp set is stamped in Night of Navy atop a Very Vanilla base. The sentiment panel is finished with a star diecut from Distressed Gold specialty paper and popped up on mini dimensionals. The entire sentiment panel is elevated on dimensionals for an eyecatching finish.

Would you like to know more about all of the designs we made with the Night Divine and Stars at Night stamps and dies in this week’s episode of Terrific Tuesdays? Check out yesterday’s video to see them all!

Products used in today’s card:
Night of Navy, Very Vanilla, Basic White cardstock
Shining Brightly, Gold Foil, Distressed Gold DSP
Night Divine stamps
Stars at Night dies
Night of Navy & Gold glittered ribbon
Dimensionals
Adhesives

All ads on this site are posted by WordPress and are based on personal browsing history.  Song Sparrow Papercrafts is not responsible for ad content.

January Mini Catalog · Sale-a-Bration

Making a List and Checking It Twice

One of the many benefits of being a Stampin’ Up! demonstrator is getting to check out all of the goodies in the upcoming catalogs before they release. My faithful office assistant Nolan and I are making our must-have list from the upcoming January Mini and Sale-a-Bration catalogs.

Would you like to receive a copy of the upcoming catalogs but don’t have a SU! demonstrator? Drop me an e-mail and I’ll send you one!

Would you rather see everything early for yourself? The only way to do that is to become a demonstrator. And did you know that you don’t have to become a demonstrator for the purposes of making it a business? There are plenty of hobby demonstrators who have joined to receive a discount on all of their favorite products and for the chance to see all of the new products before they officially release. Want to know more? Drop me a line and we’ll chat!

All ads on this site are posted by WordPress and are based on personal browsing history.  Song Sparrow Papercrafts is not responsible for ad content.

Terrific Tuesdays

Merriest Evergreens

Have you been enjoying all of the cards using this week’s featured bundle of products called Merriest Trees? During this week’s episode of Terrific Tuesdays we looked at all the ways we can use the Merriest Trees bundle to create beautiful holiday cards, and today we’re focusing on how the stamps can do all the work.

Today’s card is one of the designs we made during the Terrific Tuesdays video. The stamps do all the heavy lifting in this card design—from the background to the focal point and everything in between. The coordinating suite of dies make cutting out the beautiful evergreen trees a breeze, even down to the stars on top.

This holiday card is built on a base of Shaded Spruce. The focal panel is matted with Pretty Peacock. The trees are stamped in a variety of colors to give a realistic look. The sentiment is nestled in the corner. I finished off the design with a sprinkling of Wink of Stella across the focal panel, which gives it a fine shimmer as it catches the light.

Wanna know more about how this card came together? Do you want to see what other designs we made using the Merriest Trees bundle? Check out this week’s Terrific Tuesdays video to learn more!

Products used for today’s card design:
Shaded Spruce, Pretty Peacock, Crushed Curry, Basic White cardstock
Merriest trees bundle
Wink of Stella
Faceted gems trio
Dimensionals
Adhesives

All ads on this site are posted by WordPress and are based on your personal browsing history. I do not control ad content.

Terrific Tuesdays

Merriest Sleigh Ride

Did you catch this week’s Terrific Tuesdays video? This week’s episode we looked at all the ways we can use the Merriest Trees bundle to create beautiful holiday cards, including pairing it with some of Stampin’ Up!’s popular designer series paper packs.

Today’s card is one of the designs we made during the Terrific Tuesdays video. I really love how the One Horse Open Sleigh paper provides the perfect backdrop for a single stamped image of the largest evergreen tree from the Merriest Trees stamp set. The coordinating set of dies makes it super easy to cut out the tree image. Pretty Peacock is currently one of my favorite shades of blue-green in the Stampin’ Up! color palette, and it takes center stage in this design.

Wanna know more about how this card came together? Do you want to see what other designs we made using the Merriest Trees bundle? Check out this week’s Terrific Tuesdays video to learn more!

Products used for today’s card design:
Pretty Peacock, Basic White cardstock
One Horse Open Sleigh DSP
Merriest trees bundle
Faceted gems trio
Dimensionals
Adhesives

All ads on this site are posted by WordPress and are based on your personal browsing history. I do not control ad content.

Terrific Tuesdays

Merriest Bobbles & Packages

Happy Thursday, crafty friends! I hope your week has been going well. For me, things are really gearing up in the singing department, so I’ve been busy rehearsing while working in the craft room. Do you ever multi-task during your crafting time?

Today, we’re taking a look at more of the detailed elements of the Merriest Trees bundle. The combination of stamps and dies allows you so much versatility and variety in your designs. This card design highlights yet another way you can build a beautiful scene with this bundle of products.

The base of today’s card is Cherry Cobbler cardstock. And in the spirit of this musical week, I also incorporated some Merry Melody in today’s card design by using the embossing folder for the top portion of the focal panel. I finished the focal panel with the fun argyle print from the Shining Christmas designer series paper pack, which is very sadly sold out. The four-panel tree is diecut from Mossy Meadow and adorned with gold trim and a star cut from Distressed Gold and sparkly ornaments cut from glitter paper. The packages under the tree are diecut from gold shimmer paper with the bows diecut from Distressed Gold and then the bow stamped in Early Espresso to give the details. The sentiment from Merriest Trees is stamped in gold and then heat embossed in gold on top of a Nested Essentials banner. The silver and gold trim in the center helps merry the two sections with a cohesive sparkle. I just love how Merriest Trees allows you to incorporate so much detail into a design without much effort.

A few tips from today’s card design:

  • Using an adhesive sheet on the back of your paper when cutting the finer elements, like the tree trim and star, allow for very easy application of your diecut element onto your tree.
  • Mini dimensionals are perfect for popping up the ornaments. Half of a mini dimensional is just right for the long, narrow ornament.
  • For a richer color when embossing metallics, try stamping tone-on-tone metallic ink instead of Versamark. For example, here I used Tsukineko Galaxy Gold ink under the layer of SU! gold embossing powder.

Wanna know the other ways we learned to use the Merriest Trees bundle? Check out this week’s episode of Terrific Tuesdays!

Products used for today’s card design:
Cherry Cobbler, Mossy Meadow cardstock
Shining Christmas, Distressed Gold DSP
Glitter and shimmer paper
Merriest Trees stamps and dies
Nested Essentials dies
Merry Melody embossing folder
Gold embossing powder
Gold & silver trim
Dimensionals
Adhesives

All ads on this site are posted by WordPress and are based on your personal browsing history. I do not control ad content.

Terrific Tuesdays

Layering Merriest Trees

Wonderful Wednesday, everyone! We’re beginning to have the chill of winter weather in the air here in North Texas and many mornings of heavy frost. Is it beginning to feel more like winter in your area?

And speaking of winter, today’s card tips the hat to winter birthdays AND shows yet another way that you can use the Merriest Trees bundle to create beautiful projects. Today, I wanted to share how you can layer the tree dies to give realistic depth and dimension to the trees on your projects.

In this week’s Terrific Tuesdays video, we spoke briefly about the various sizes of trees in the suite of dies. Not only does this make it quick and easy to cut trees of all sizes, but it also allows you to create beautiful layers on single tree for a more realistic look. This card design shows you both.

The base of this card is a sheet of Night of Navy cardstock. The background panel is the ombre night sky patterned sheet from the O Holy Night designer series paper pack. I decided on a trio of trees as the focal scene with the center tree as the focal image. I stuck with shades of blue and blue-green for a more visually unified scene. I used vellum as the backdrop for the trees. The smallest tree in the background is diecut from Pretty Peacock using the two-panel tree die. The medium-sized tree closer to the foreground is embossed with an older snowflake embossing folder (you could easily substitute the Snowflake Sky EF) and then diecut from Lost Lagoon using the three-panel tree. The base of the focal tree in the foreground is Night of Navy and is diecut using the four-panel tree die. I used several different sheets of the Shining Brightly designer series paper as the layers for the focal image, which are adhered to the tree base. Each tree layer is cut using a different sized tree die from the suite, which makes for very quick and easy layering without any fussy cutting. The edges of each of the layers is curled up for a realistic look of fluffy layers in the tree. Isn’t this a stunning effect? I finished off the scene with some snowflakes diecut from white cardstock and a sentiment. While the snowflake dies I used are from a retired set, there are beautiful snowflakes in a number of sets in the Holiday Mini Catalog, including Merriest Trees, Stars at Night (on sale), and Wishes All Around (on sale).

Wanna know the other ways we learned to use the Merriest Trees bundle? Check out this week’s episode of Terrific Tuesdays!

Products used for today’s card design:
Night of Navy, Basic White cardstock
Vellum
O Holy Night (sold out), Shining Brightly (sold out) DSP
Merriest Trees, Autumn Leaves, Twinkling Lights (retired) dies
Winter Snow (retired) embossing folder
Circle Sayings stamps
Silver embossing powder
Glitter sequins
Dimensionals
Adhesives

All ads on this site are posted by WordPress and are based on your personal browsing history. I do not control ad content.