Happy Friday, craft friends! We have made it to the end of the week and the weekend is fast approaching. What do you have on your weekend to-do list? We haven’t decided if this is going to be a productive weekend or not. Ever have those where you just decide to do fun stuff instead of the things on the to-do list? *wink*
This week, we’re having a good time going through my stash of “must try” fun folds. And today, we’re trying out the Flip Flap fun fold that I saw over at Stampin’ on the Back Porch. I thought it would be super fun to build an unfolding Halloween scene with the SU! Spooky Sweet paper pack. And it turned out sooooo cute, if I do say so myself! Of all the cards I’ve made recently, I dare say this one is the simplest as far as the supply list goes. And the fold itself? Also easy peasy?
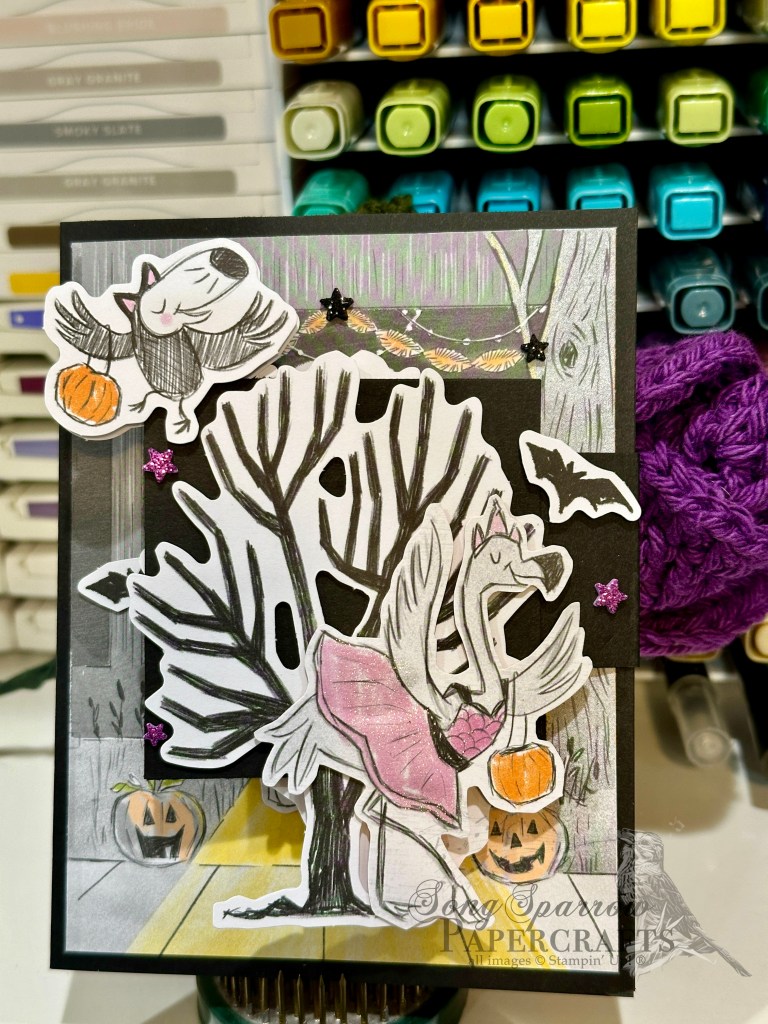
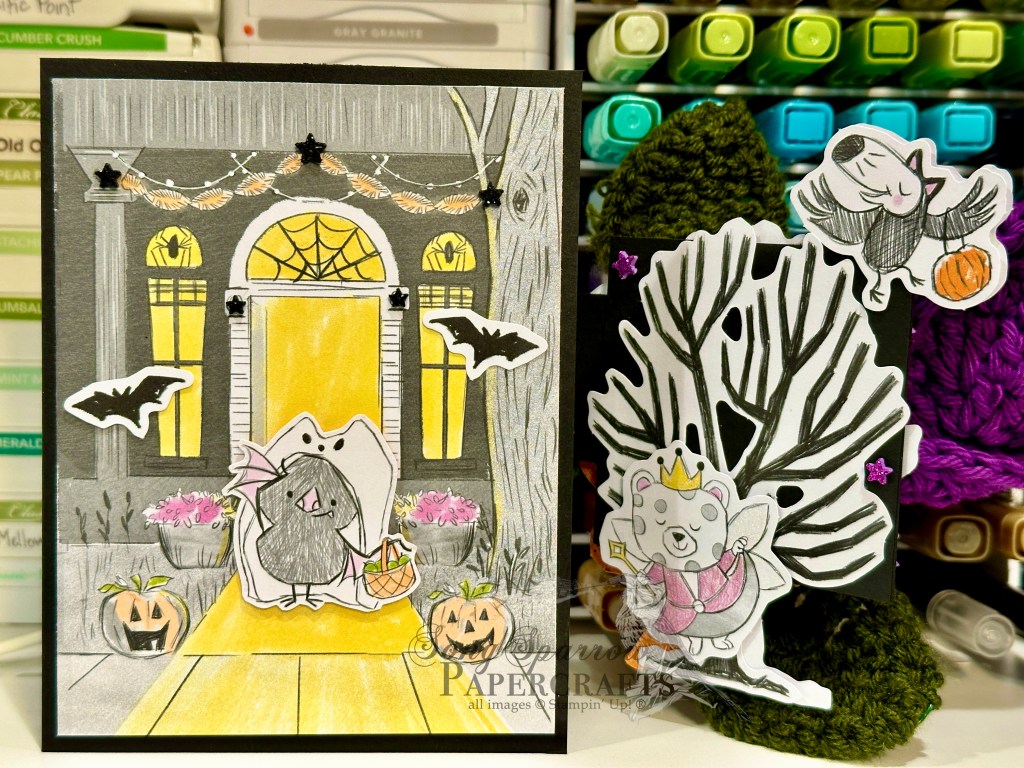
We get started with a standard sized base of Basic Black cardstock. This design uses most of a full 8 1/2 x 11 sheet. Half is dedicated to the card base, while the other goes into making the two-sided flap. I chose the door scene from the scene sheet found in the Spooky Sweet paper pack. This scene panel is adhered directly to the card base. I made my flaps next so I could get the placement of the fold correct. And then I used a combination of ephemera characters and a few characters cut from a sheet of the Spooky Sweet paper to create the scenes for each layer. The fold-over flap hides the final scene on the card front. And it’s all about the layers to make these scenes come to life, which means we’re using my most favorite tool – dimensionals!
So what do you think? Is it eerily delightful? Or just plain frightful?
Love this card and wanna give it a whirl yourself? You can download the free PDF instructions here.
Product List![Basic Black 12" X 12" (30.5 X 30.5 Cm) Cardstock [ 166786 ]](https://assets1.tamsnetwork.com/images/EC042017NF/166786s.jpg "Basic Black 12\" X 12\" (30.5 X 30.5 Cm) Cardstock [ 166786 ]")
![Spooky Sweet 12" X 12" (30.5 X 30.5 Cm) Specialty Designer Series Paper [ 166191 ]](https://assets1.tamsnetwork.com/images/EC042017NF/166191s.jpg "Spooky Sweet 12\" X 12\" (30.5 X 30.5 Cm) Specialty Designer Series Paper [ 166191 ]")
![Clear Wink Of Stella Glitter Brush [ 141897 ]](https://assets1.tamsnetwork.com/images/EC042017NF/141897s.jpg "Clear Wink Of Stella Glitter Brush [ 141897 ]")
![Shimmer Star Foam Stickers [ 166202 ]](https://assets1.tamsnetwork.com/images/EC042017NF/166202s.jpg "Shimmer Star Foam Stickers [ 166202 ]")
![Mini Glue Dots [ 103683 ]](https://assets1.tamsnetwork.com/images/EC042017NF/103683s.jpg "Mini Glue Dots [ 103683 ]")
![Stampin' Dimensionals [ 104430 ]](https://assets1.tamsnetwork.com/images/EC042017NF/104430s.jpg "Stampin' Dimensionals [ 104430 ]")
![Mini Stampin' Dimensionals [ 144108 ]](https://assets1.tamsnetwork.com/images/EC042017NF/144108s.jpg "Mini Stampin' Dimensionals [ 144108 ]")

![Highland Heather 8-1/2" X 11" Cardstock [ 146986 ]](https://assets1.tamsnetwork.com/images/EC042017NF/146986s.jpg "Highland Heather 8-1/2\" X 11\" Cardstock [ 146986 ]")
![Purple Fine Shimmer Gems [ 162611 ]](https://assets1.tamsnetwork.com/images/EC042017NF/162611s.jpg "Purple Fine Shimmer Gems [ 162611 ]")
![Rhinestone Basic Jewels [ 144220 ]](https://assets1.tamsnetwork.com/images/EC042017NF/144220s.jpg "Rhinestone Basic Jewels [ 144220 ]")

![Basic Black 8-1/2" X 11" Cardstock [ 121045 ]](https://assets1.tamsnetwork.com/images/EC042017NF/121045s.jpg "Basic Black 8-1/2\" X 11\" Cardstock [ 121045 ]")
![Pastel Ombre Glimmer 12" X 12" (30.5 X 30.5 Cm) Specialty Paper [ 164851 ]](https://assets1.tamsnetwork.com/images/EC042017NF/164851s.jpg "Pastel Ombre Glimmer 12\" X 12\" (30.5 X 30.5 Cm) Specialty Paper [ 164851 ]")
![Strawberry Slush & Pretty In Pink Gems [ 165615 ]](https://assets1.tamsnetwork.com/images/EC042017NF/165615s.jpg "Strawberry Slush & Pretty In Pink Gems [ 165615 ]")
