Welcome to the weekend. I hope you enjoyed some weather as lovely as we did here today. It was spring in every way — warm temps, breezy, and sunny. We got some spring cleaning done both inside and outside today.
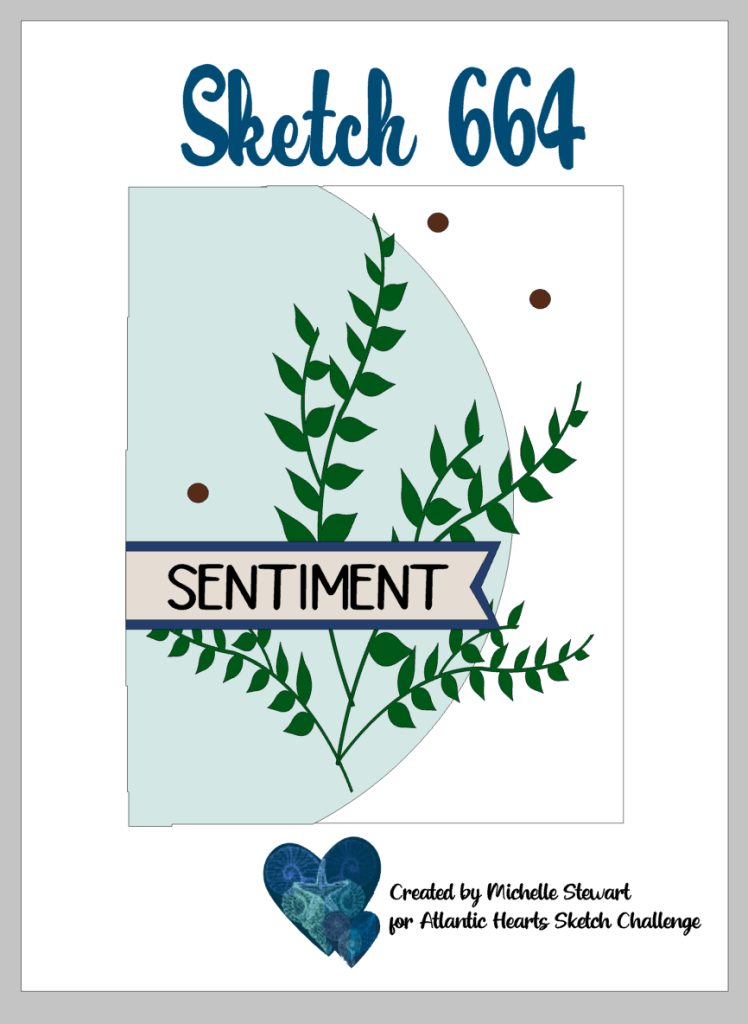
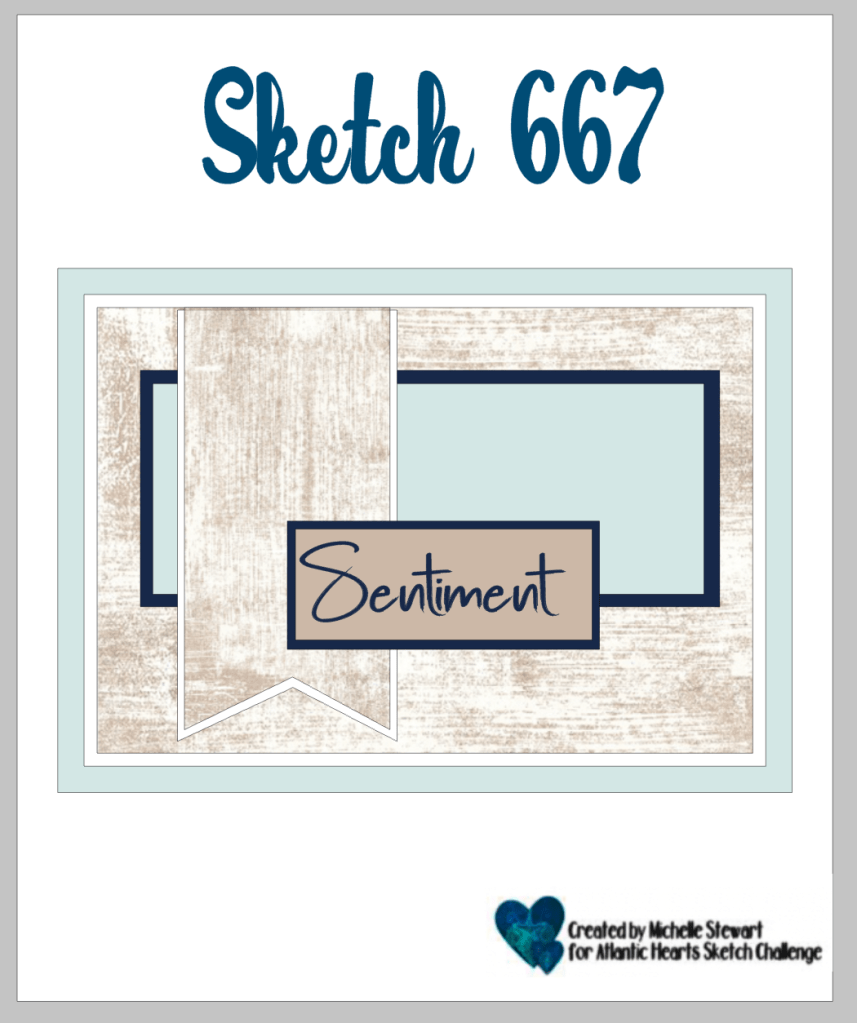
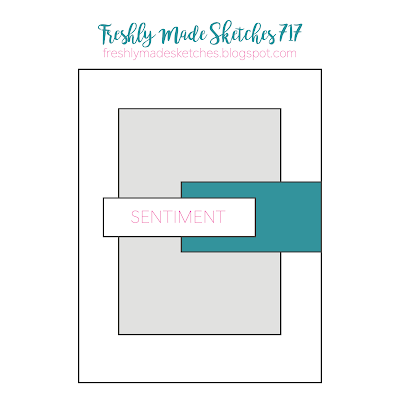
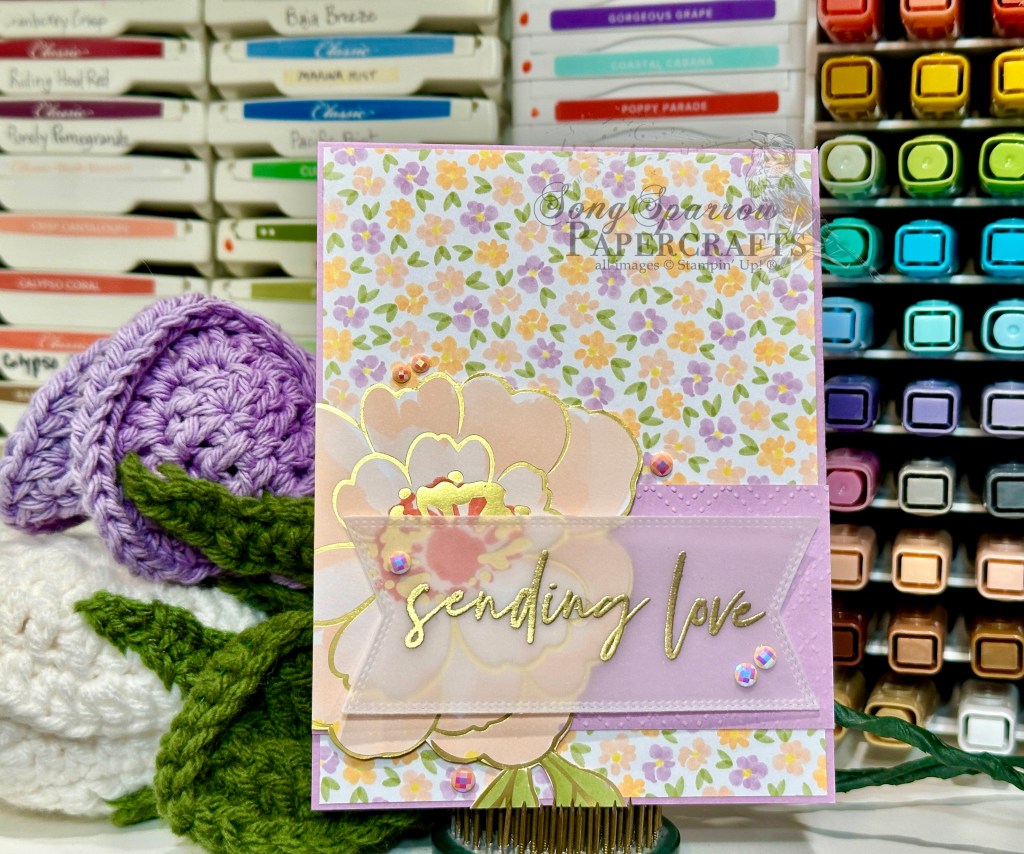
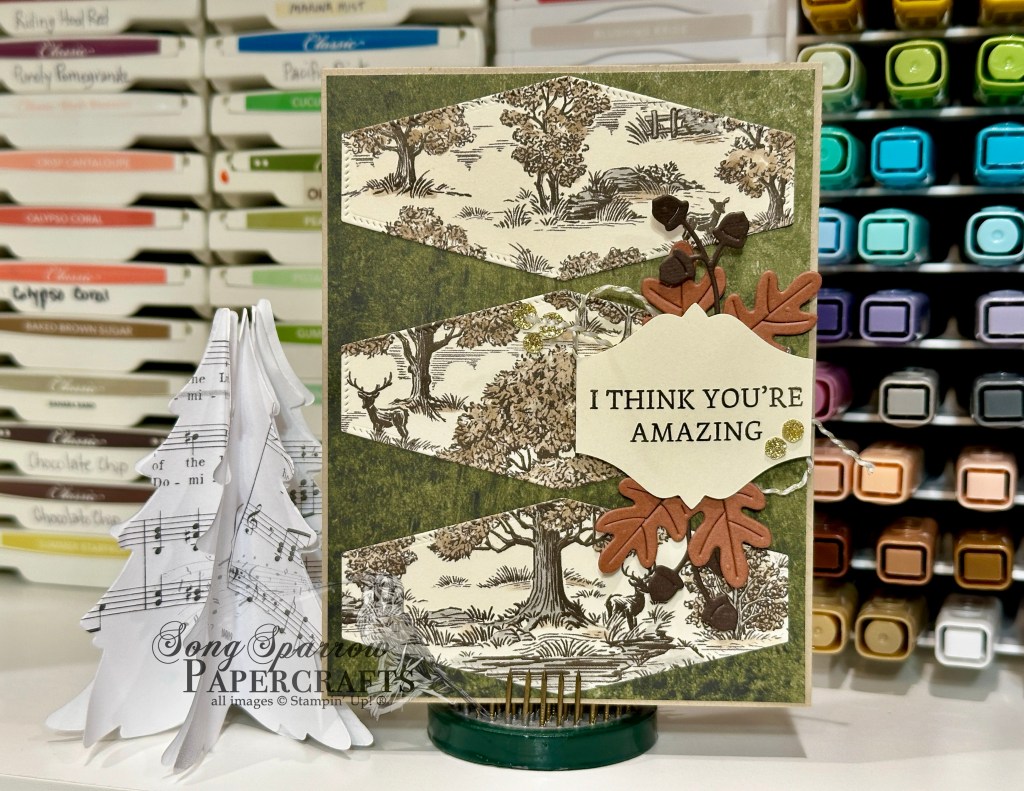
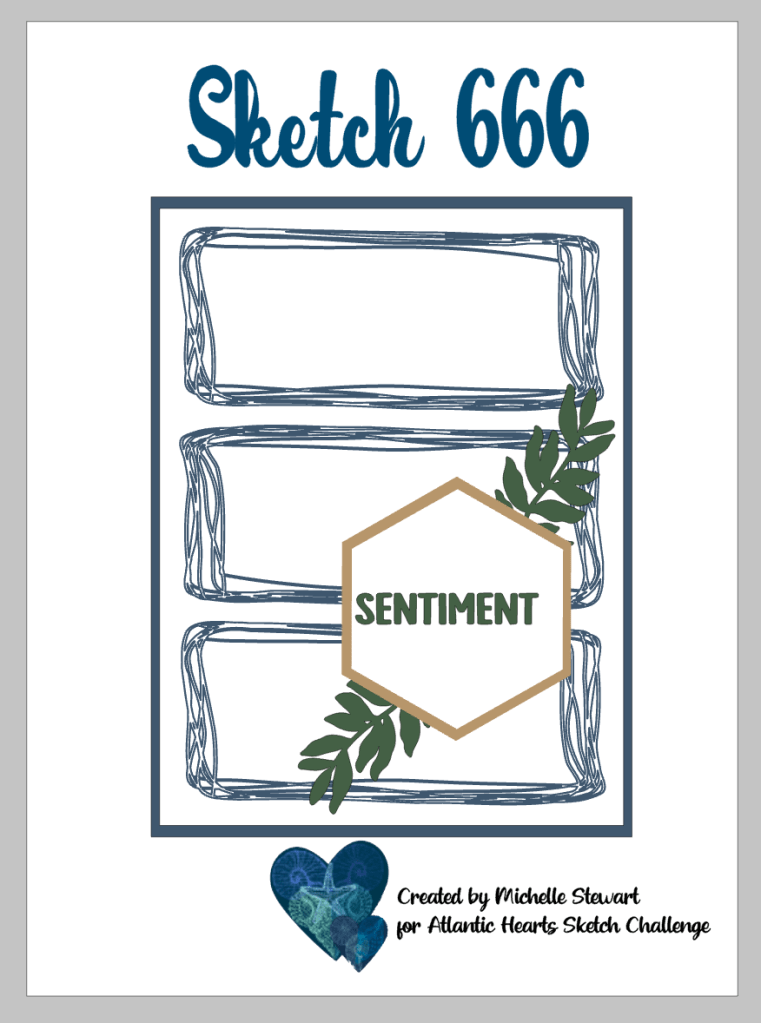
And speaking of spring, this week we’ve been using all the spring flowers to create our projects and using a sketch as design inspiration. Today we’re pairing up the Delicate Dreams paper with a sketch from the gold folks over at the Global Design Project.
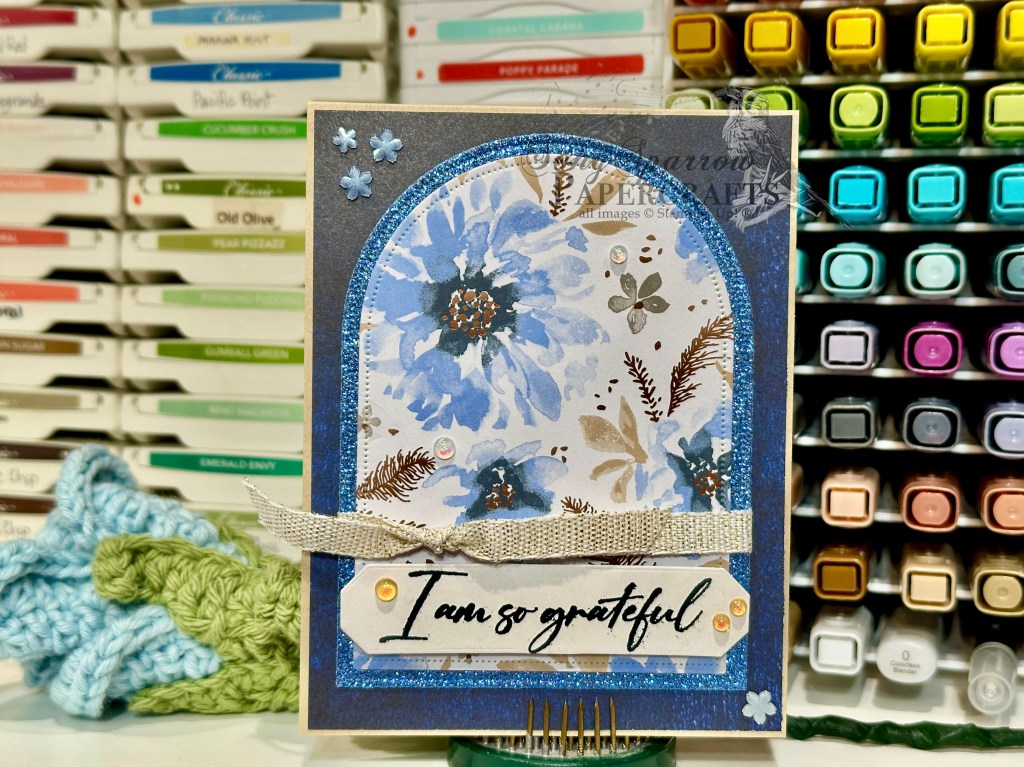
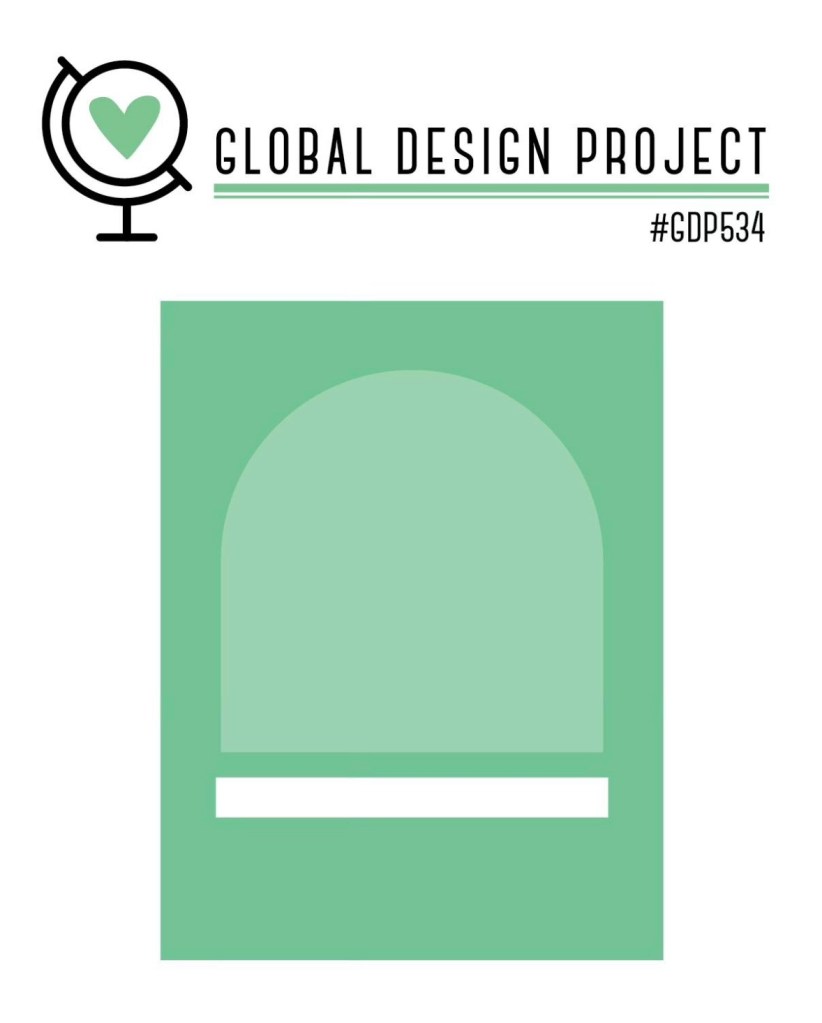
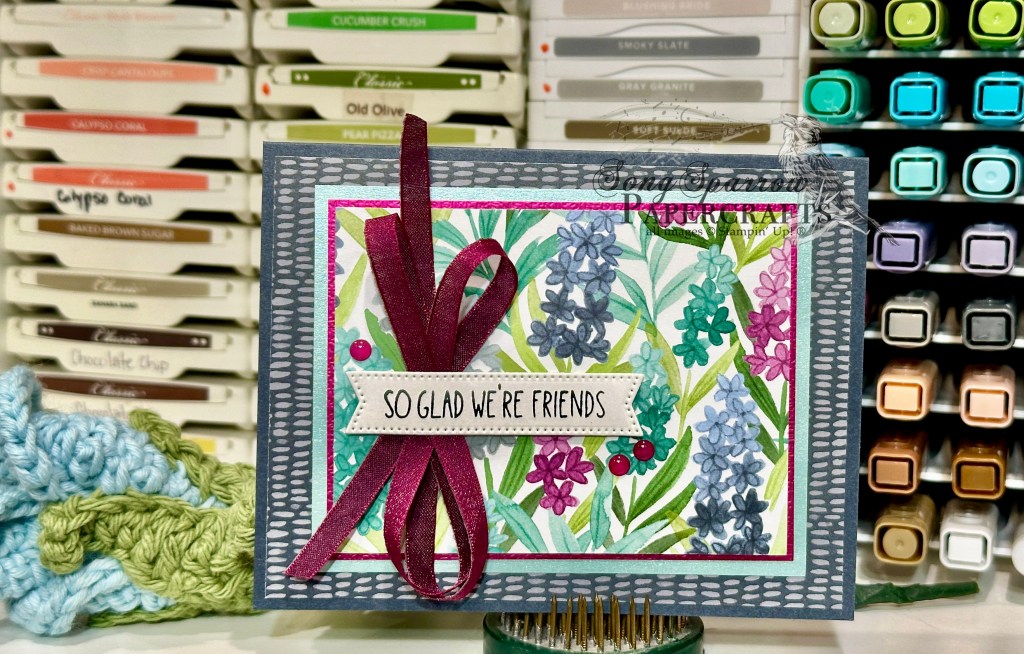
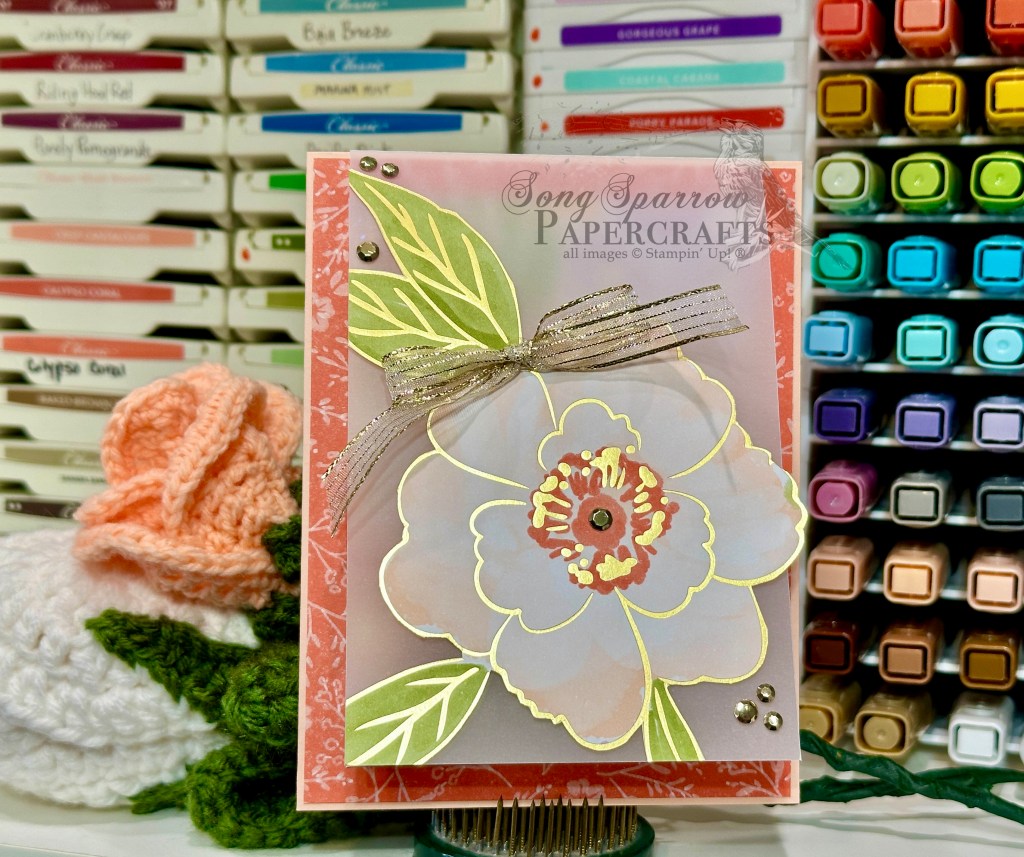
We get started with a base of Crumb Cake cardstock. our background panel comes from the Nature Walk paper pack. I used the Everyday Arches dies to create our focal panel. Our mat is a sheet of Misty Moonlight glimmer paper from the Peaceful Garden glimmer pack and then our focal panel is from the Delicate Dreams pack. The panel is wrapped with some white & gold ribbon tied in a decorative knot. The sentiment from the Sentimental Framing stamp set is stamped in Secret Sea on white cardstock and then diecut with the Word of Beauty dies and then adhered at the base of the focal panel with dimensionals. We finish things off with opal rounds and hues of blue flowers.
Thanks for hopping along with me this week. I hope you’ve enjoyed this series.
Product List![Crumb Cake 8-1/2" X 11" Cardstock [ 120953 ]](https://assets1.tamsnetwork.com/images/EC042017NF/120953s.jpg "Crumb Cake 8-1/2\" X 11\" Cardstock [ 120953 ]")
![Basic White 8 1/2" X 11" Cardstock [ 166780 ]](https://assets1.tamsnetwork.com/images/EC042017NF/166780s.jpg "Basic White 8 1/2\" X 11\" Cardstock [ 166780 ]")
![Delicate Dreams 12" X 12" (30.5 X 30.5 Cm) Specialty Designer Series Paper [ 167498 ]](https://assets1.tamsnetwork.com/images/EC042017NF/167498s.jpg "Delicate Dreams 12\" X 12\" (30.5 X 30.5 Cm) Specialty Designer Series Paper [ 167498 ]")
![Peaceful Garden 12" X 12" (30.5 X 30.5 Cm) Glimmer Paper [ 165929 ]](https://assets1.tamsnetwork.com/images/EC042017NF/165929s.jpg "Peaceful Garden 12\" X 12\" (30.5 X 30.5 Cm) Glimmer Paper [ 165929 ]")
![Sentimental Framing Photopolymer Stamp Set (English) [ 165475 ]](https://assets1.tamsnetwork.com/images/EC042017NF/165475s.jpg "Sentimental Framing Photopolymer Stamp Set (English) [ 165475 ]")
![Everyday Arches Dies [ 164629 ]](https://assets1.tamsnetwork.com/images/EC042017NF/164629s.jpg "Everyday Arches Dies [ 164629 ]")
![Words Of Beauty Dies (English) [ 167089 ]](https://assets1.tamsnetwork.com/images/EC042017NF/167089s.jpg "Words Of Beauty Dies (English) [ 167089 ]")
![Secret Sea Classic Stampin' Pad [ 165285 ]](https://assets1.tamsnetwork.com/images/EC042017NF/165285s.jpg "Secret Sea Classic Stampin' Pad [ 165285 ]")
![Hues Of Blue Flowers [ 165930 ]](https://assets1.tamsnetwork.com/images/EC042017NF/165930s.jpg "Hues Of Blue Flowers [ 165930 ]")
![Opal Rounds Assortment [ 163298 ]](https://assets1.tamsnetwork.com/images/EC042017NF/163298s.jpg "Opal Rounds Assortment [ 163298 ]")
![White With Gold 3/8" (1 Cm) Ribbon [ 166979 ]](https://assets1.tamsnetwork.com/images/EC042017NF/166979s.jpg "White With Gold 3/8\" (1 Cm) Ribbon [ 166979 ]")
![Stampin' Dimensionals [ 104430 ]](https://assets1.tamsnetwork.com/images/EC042017NF/104430s.jpg "Stampin' Dimensionals [ 104430 ]")
![Perennial Lavender 12" X 12" (30.5 X 30.5 Cm) Designer Series Paper [ 162593 ]](https://assets1.tamsnetwork.com/images/EC042017NF/162593s.jpg "Perennial Lavender 12\" X 12\" (30.5 X 30.5 Cm) Designer Series Paper [ 162593 ]")
![Garden Textures 12" X 12" (30.5 X 30.5 Cm) Specialty Foil Sheets [ 167125 ]](https://assets1.tamsnetwork.com/images/EC042017NF/167125s.jpg "Garden Textures 12\" X 12\" (30.5 X 30.5 Cm) Specialty Foil Sheets [ 167125 ]")
![Pastels Shimmer 12" X 12" (30.5 X 30.5 Cm) Specialty Paper [ 167198 ]](https://assets1.tamsnetwork.com/images/EC042017NF/167198s.jpg "Pastels Shimmer 12\" X 12\" (30.5 X 30.5 Cm) Specialty Paper [ 167198 ]")
![Cutest Crew Photopolymer Stamp Set (English) [ 167146 ]](https://assets1.tamsnetwork.com/images/EC042017NF/167146s.jpg "Cutest Crew Photopolymer Stamp Set (English) [ 167146 ]")
![Stylish Shapes Dies [ 159183 ]](https://assets1.tamsnetwork.com/images/EC042017NF/159183s.jpg "Stylish Shapes Dies [ 159183 ]")
![Gorgeous Grape Classic Stampin' Pad [ 147099 ]](https://assets1.tamsnetwork.com/images/EC042017NF/147099s.jpg "Gorgeous Grape Classic Stampin' Pad [ 147099 ]")
![Bubble Bath 1/8" (3.2 Mm) Faux Linen Ribbon [ 167075 ]](https://assets1.tamsnetwork.com/images/EC042017NF/167075s.jpg "Bubble Bath 1/8\" (3.2 Mm) Faux Linen Ribbon [ 167075 ]")
![Purple Fine Shimmer Gems [ 162611 ]](https://assets1.tamsnetwork.com/images/EC042017NF/162611s.jpg "Purple Fine Shimmer Gems [ 162611 ]")
![Mini Stampin' Dimensionals [ 144108 ]](https://assets1.tamsnetwork.com/images/EC042017NF/144108s.jpg "Mini Stampin' Dimensionals [ 144108 ]")

![Secret Sea 8 1/2" X 11" Cardstock [ 165624 ]](https://assets1.tamsnetwork.com/images/EC042017NF/165624s.jpg "Secret Sea 8 1/2\" X 11\" Cardstock [ 165624 ]")
![Peaceful Garden 12" X 12" (30.5 X 30.5 Cm) Designer Series Paper [ 165917 ]](https://assets1.tamsnetwork.com/images/EC042017NF/165917s.jpg "Peaceful Garden 12\" X 12\" (30.5 X 30.5 Cm) Designer Series Paper [ 165917 ]")
![Layers Of Beauty Bundle (English) [ 163519 ]](https://assets1.tamsnetwork.com/images/EC042017NF/163519s.jpg "Layers Of Beauty Bundle (English) [ 163519 ]")
![Rolling Waves Photopolymer Stamp Set [ 167142 ]](https://assets1.tamsnetwork.com/images/EC042017NF/167142s.jpg "Rolling Waves Photopolymer Stamp Set [ 167142 ]")
![Granny Apple Green Stampin' Blends Combo Pack [ 154885 ]](https://assets1.tamsnetwork.com/images/EC042017NF/154885s.jpg "Granny Apple Green Stampin' Blends Combo Pack [ 154885 ]")
![Daffodil Delight Stampin' Blends Combo Pack [ 154883 ]](https://assets1.tamsnetwork.com/images/EC042017NF/154883s.jpg "Daffodil Delight Stampin' Blends Combo Pack [ 154883 ]")
![Old Olive 3/8" (1 Cm) Specialty Rickrack [ 167006 ]](https://assets1.tamsnetwork.com/images/EC042017NF/167006s.jpg "Old Olive 3/8\" (1 Cm) Specialty Rickrack [ 167006 ]")
![Clear Wink Of Stella Glitter Brush [ 141897 ]](https://assets1.tamsnetwork.com/images/EC042017NF/141897s.jpg "Clear Wink Of Stella Glitter Brush [ 141897 ]")
![Sparkle Dot Essentials [ 166991 ]](https://assets1.tamsnetwork.com/images/EC042017NF/166991s.jpg "Sparkle Dot Essentials [ 166991 ]")
![Florals In Bloom 12" X 12" (30.5 X 30.5 Cm) Designer Series Paper [ 165175 ]](https://assets1.tamsnetwork.com/images/EC042017NF/165175s.jpg "Florals In Bloom 12\" X 12\" (30.5 X 30.5 Cm) Designer Series Paper [ 165175 ]")
![Berry Burst 1/4" (6.4 Mm) Shiny Ribbon [ 167126 ]](https://assets1.tamsnetwork.com/images/EC042017NF/167126s.jpg "Berry Burst 1/4\" (6.4 Mm) Shiny Ribbon [ 167126 ]")
![Garden Epoxy Dots [ 167124 ]](https://assets1.tamsnetwork.com/images/EC042017NF/167124s.jpg "Garden Epoxy Dots [ 167124 ]")
![Cloud Cover 8 1/2" X 11" Cardstock [ 165621 ]](https://assets1.tamsnetwork.com/images/EC042017NF/165621s.jpg "Cloud Cover 8 1/2\" X 11\" Cardstock [ 165621 ]")
![Lovely Blossoms 12" X 12" (30.5 X 30.5 Cm) Designer Series Paper [ 167168 ]](https://assets1.tamsnetwork.com/images/EC042017NF/167168s.jpg "Lovely Blossoms 12\" X 12\" (30.5 X 30.5 Cm) Designer Series Paper [ 167168 ]")
![Cloud Cover 5/8" (1.6 Cm) Textured Ribbon [ 167182 ]](https://assets1.tamsnetwork.com/images/EC042017NF/167182s.jpg "Cloud Cover 5/8\" (1.6 Cm) Textured Ribbon [ 167182 ]")
![Gray Granite 1/4" (6.4 Mm) Variegated Trim [ 167511 ]](https://assets1.tamsnetwork.com/images/EC042017NF/167511s.jpg "Gray Granite 1/4\" (6.4 Mm) Variegated Trim [ 167511 ]")
![Moody Palette Glossy Dots [ 167180 ]](https://assets1.tamsnetwork.com/images/EC042017NF/167180s.jpg "Moody Palette Glossy Dots [ 167180 ]")
![Mini Glue Dots [ 103683 ]](https://assets1.tamsnetwork.com/images/EC042017NF/103683s.jpg "Mini Glue Dots [ 103683 ]")
![Petal Pink 8-1/2" X 11" Cardstock [ 146985 ]](https://assets1.tamsnetwork.com/images/EC042017NF/146985s.jpg "Petal Pink 8-1/2\" X 11\" Cardstock [ 146985 ]")
![Lovely & Beautiful 12" X 12" (30.5 X 30.5 Cm) Specialty Designer Series Paper [ 166957 ]](https://assets1.tamsnetwork.com/images/EC042017NF/166957s.jpg "Lovely & Beautiful 12\" X 12\" (30.5 X 30.5 Cm) Specialty Designer Series Paper [ 166957 ]")
![Vellum 12" X 12" (30.5 X 30.5 Cm) Specialty Paper [ 167099 ]](https://assets1.tamsnetwork.com/images/EC042017NF/167099s.jpg "Vellum 12\" X 12\" (30.5 X 30.5 Cm) Specialty Paper [ 167099 ]")
![With You In Mind Photopolymer Stamp Set (English) [ 169063 ]](https://assets1.tamsnetwork.com/images/EC042017NF/169063s.jpg "With You In Mind Photopolymer Stamp Set (English) [ 169063 ]")
![Versamark Pad [ 102283 ]](https://assets1.tamsnetwork.com/images/EC042017NF/102283s.jpg "Versamark Pad [ 102283 ]")
![Metallics Wow! Embossing Powder [ 165678 ]](https://assets1.tamsnetwork.com/images/EC042017NF/165678s.jpg "Metallics Wow! Embossing Powder [ 165678 ]")
![Adhesive Backed Metallic Gems [ 163780 ]](https://assets1.tamsnetwork.com/images/EC042017NF/163780s.jpg "Adhesive Backed Metallic Gems [ 163780 ]")
![Pearlized Faceted Circles [ 166978 ]](https://assets1.tamsnetwork.com/images/EC042017NF/166978s.jpg "Pearlized Faceted Circles [ 166978 ]")
![Gold Striped 3/8" (1 Cm) Mesh Ribbon [ 165599 ]](https://assets1.tamsnetwork.com/images/EC042017NF/165599s.jpg "Gold Striped 3/8\" (1 Cm) Mesh Ribbon [ 165599 ]")

![Fresh Freesia 8 1/2" X 11" Cardstock [ 155613 ]](https://assets1.tamsnetwork.com/images/EC042017NF/155613s.jpg "Fresh Freesia 8 1/2\" X 11\" Cardstock [ 155613 ]")
![Beautiful Pattern 3 D Embossing Folder [ 167097 ]](https://assets1.tamsnetwork.com/images/EC042017NF/167097s.jpg "Beautiful Pattern 3 D Embossing Folder [ 167097 ]")
![Fabulous Sayings Photopolymer Stamp Set (English) [ 167972 ]](https://assets1.tamsnetwork.com/images/EC042017NF/167972s.jpg "Fabulous Sayings Photopolymer Stamp Set (English) [ 167972 ]")
![Nested Essentials Dies [ 161597 ]](https://assets1.tamsnetwork.com/images/EC042017NF/161597s.jpg "Nested Essentials Dies [ 161597 ]")

![Easter Joy 12" X 12" (30.5 X 30.5 Cm) Specialty Designer Series Paper [ 166939 ]](https://assets1.tamsnetwork.com/images/EC042017NF/166939s.jpg "Easter Joy 12\" X 12\" (30.5 X 30.5 Cm) Specialty Designer Series Paper [ 166939 ]")
![Pleasant Patterns 12" X 12" (30.5 X 30.5 Cm) Specialty Designer Series Paper [ 166950 ]](https://assets1.tamsnetwork.com/images/EC042017NF/166950s.jpg "Pleasant Patterns 12\" X 12\" (30.5 X 30.5 Cm) Specialty Designer Series Paper [ 166950 ]")
![Easter Time Mix & Match Ephemera Pack [ 166984 ]](https://assets1.tamsnetwork.com/images/EC042017NF/166984s.jpg "Easter Time Mix & Match Ephemera Pack [ 166984 ]")

![Shy Shamrock 8 1/2" X 11" Cardstock [ 163795 ]](https://assets1.tamsnetwork.com/images/EC042017NF/163795s.jpg "Shy Shamrock 8 1/2\" X 11\" Cardstock [ 163795 ]")
![Textured Metallic 12" X 12" (30.5 X 30.5 Cm) Specialty Paper [ 163772 ]](https://assets1.tamsnetwork.com/images/EC042017NF/163772s.jpg "Textured Metallic 12\" X 12\" (30.5 X 30.5 Cm) Specialty Paper [ 163772 ]")
![Sweet Jar Bundle (English) [ 165507 ]](https://assets1.tamsnetwork.com/images/EC042017NF/165507s.jpg "Sweet Jar Bundle (English) [ 165507 ]")
![Smoky Slate Classic Stampin' Pad [ 147113 ]](https://assets1.tamsnetwork.com/images/EC042017NF/147113s.jpg "Smoky Slate Classic Stampin' Pad [ 147113 ]")
![Shy Shamrock Classic Stampin Pad [ 163808 ]](https://assets1.tamsnetwork.com/images/EC042017NF/163808s.jpg "Shy Shamrock Classic Stampin Pad [ 163808 ]")
![Unbounded Love Photopolymer Stamp Set (English) [ 163378 ]](https://assets1.tamsnetwork.com/images/EC042017NF/163378s.jpg "Unbounded Love Photopolymer Stamp Set (English) [ 163378 ]")
![Spotlight On Nature Dies [ 163580 ]](https://assets1.tamsnetwork.com/images/EC042017NF/163580s.jpg "Spotlight On Nature Dies [ 163580 ]")
![Shy Shamrock 3/8" (1 Cm) Bordered Ribbon [ 163787 ]](https://assets1.tamsnetwork.com/images/EC042017NF/163787s.jpg "Shy Shamrock 3/8\" (1 Cm) Bordered Ribbon [ 163787 ]")
![2024 2026 In Color™ Flat Pearls [ 165266 ]](https://assets1.tamsnetwork.com/images/EC042017NF/165266s.jpg "2024 2026 In Color™ Flat Pearls [ 165266 ]")
![Black & White & Gold Baker's Twine [ 166005 ]](https://assets1.tamsnetwork.com/images/EC042017NF/166005s.jpg "Black & White & Gold Baker's Twine [ 166005 ]")
![Very Vanilla 8 1/2" X 11" Cardstock [ 166784 ]](https://assets1.tamsnetwork.com/images/EC042017NF/166784s.jpg "Very Vanilla 8 1/2\" X 11\" Cardstock [ 166784 ]")
![Early Espresso 8-1/2" X 11" Cardstock [ 119686 ]](https://assets1.tamsnetwork.com/images/EC042017NF/119686s.jpg "Early Espresso 8-1/2\" X 11\" Cardstock [ 119686 ]")
![Cajun Craze 8-1/2" X 11" Cardstock [ 119684 ]](https://assets1.tamsnetwork.com/images/EC042017NF/119684s.jpg "Cajun Craze 8-1/2\" X 11\" Cardstock [ 119684 ]")
![Autumn Toile 12" X 12" (30.5 X 30.5 Cm) Designer Series Paper [ 165882 ]](https://assets1.tamsnetwork.com/images/EC042017NF/165882s.jpg "Autumn Toile 12\" X 12\" (30.5 X 30.5 Cm) Designer Series Paper [ 165882 ]")
![Nature Walk 12" X 12" (30.5 X 30.5 Cm) Designer Series Paper [ 166912 ]](https://assets1.tamsnetwork.com/images/EC042017NF/166912s.jpg "Nature Walk 12\" X 12\" (30.5 X 30.5 Cm) Designer Series Paper [ 166912 ]")
![Words Of Beauty Photopolymer Stamp Set (English) [ 167083 ]](https://assets1.tamsnetwork.com/images/EC042017NF/167083s.jpg "Words Of Beauty Photopolymer Stamp Set (English) [ 167083 ]")
![Early Espresso Classic Stampin' Pad [ 147114 ]](https://assets1.tamsnetwork.com/images/EC042017NF/147114s.jpg "Early Espresso Classic Stampin' Pad [ 147114 ]")
![To The Point Label Punch [ 164568 ]](https://assets1.tamsnetwork.com/images/EC042017NF/164568s.jpg "To The Point Label Punch [ 164568 ]")
![Label Me Grateful Dies [ 166111 ]](https://assets1.tamsnetwork.com/images/EC042017NF/166111s.jpg "Label Me Grateful Dies [ 166111 ]")
![Drusy Adhesive Backed Embellishments [ 164223 ]](https://assets1.tamsnetwork.com/images/EC042017NF/164223s.jpg "Drusy Adhesive Backed Embellishments [ 164223 ]")
