Botanicals

Hello, Lavender Fields

As promised, I’m back! Thanks for hanging with me as I worked to get my husband settled in back home for a few days before we head back to the hospital for the next big surgery. Hats off to all of the full-time caregivers out there — it’s definitely a big job!

I’m super excited to get back to scheduled programming and take a stroll through the hills and fields of flowers. I’m going to showcase some of my favorites from the current and soon-to-release Stampin’ Up! lineup. I hope you’ll plan to come along for the whole trip!

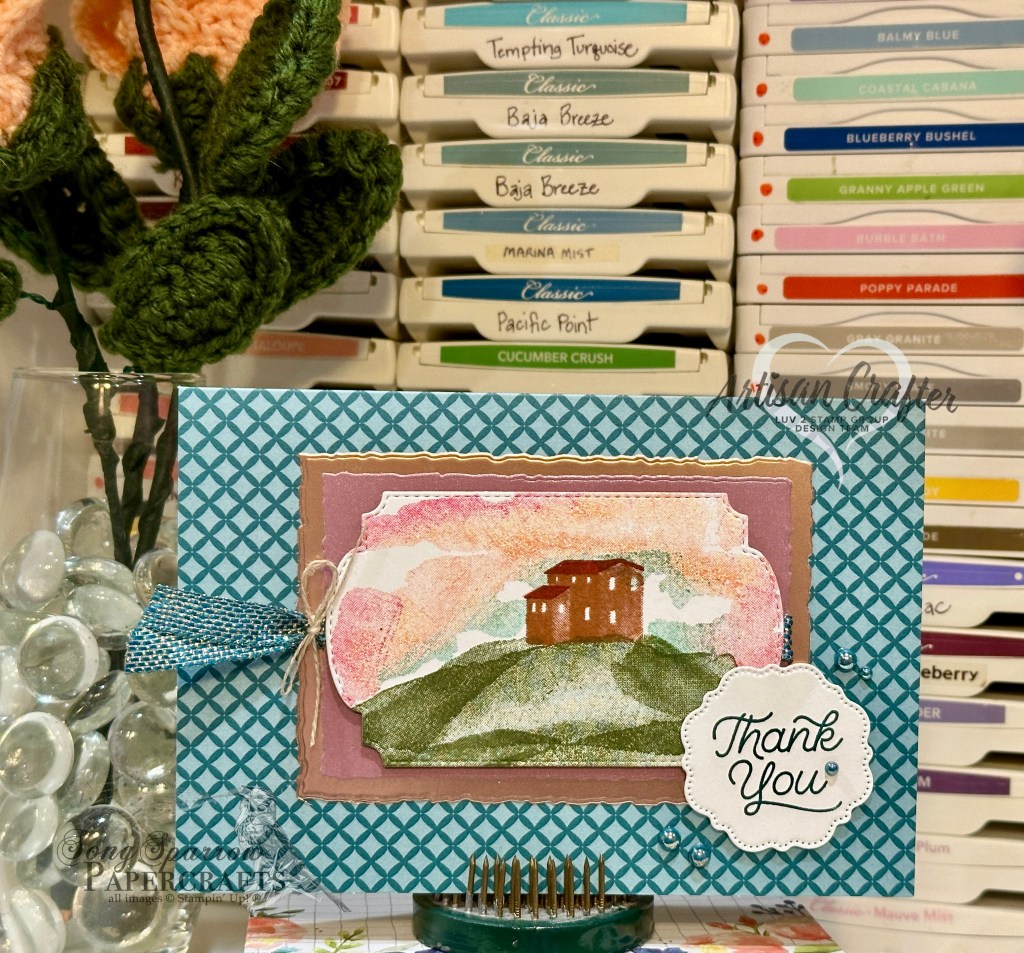
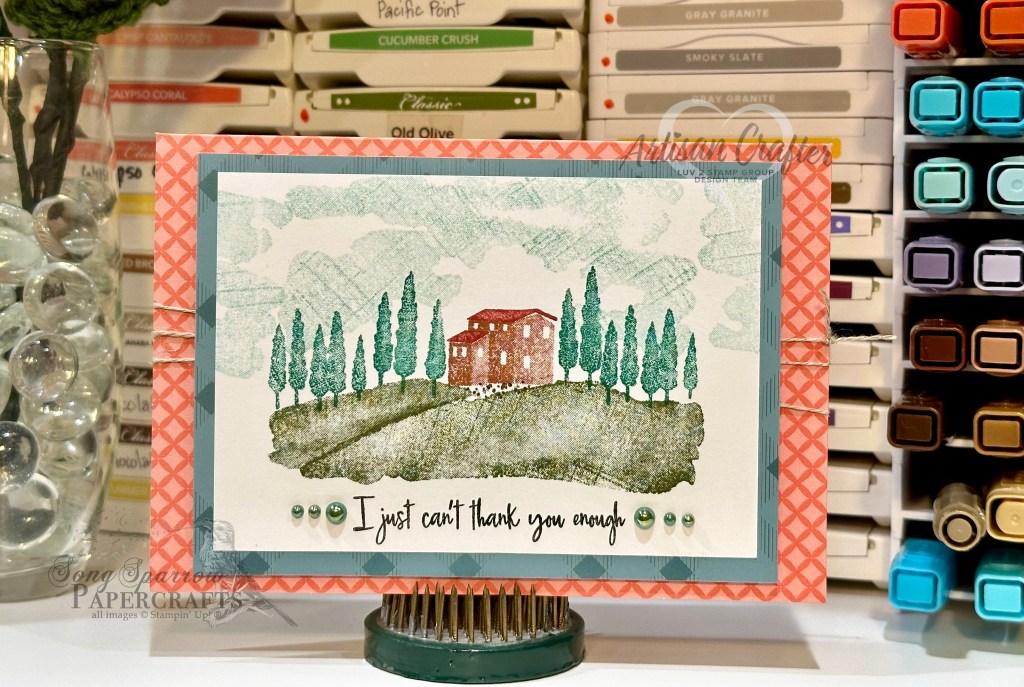
Today, we’re walking the Hills of Tuscany, using the stamp set by the same name. This lovely stamp set is on the Last Chance list, and I’m sad to see it go! But this is a set that will definitely be staying in my crafting stash for making beautiful landscape scenes.

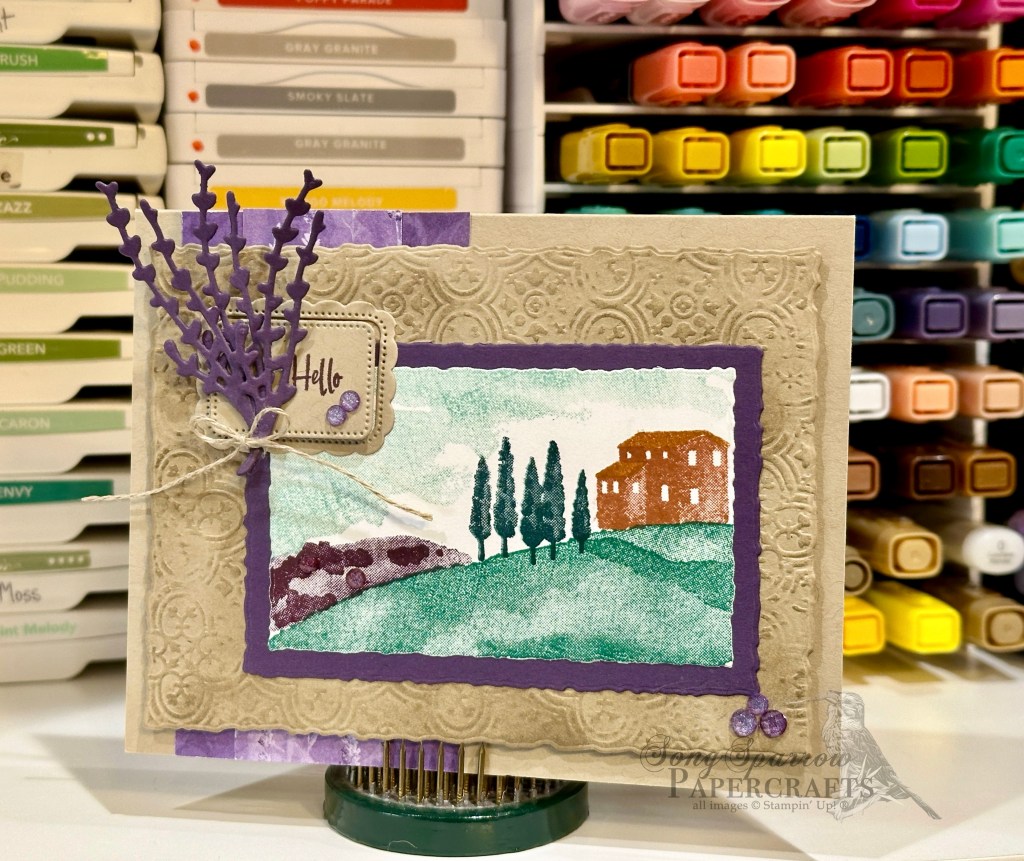
Now, let’s take a closer look at how today’s card came together. I chose to have a lavender theme for this landscape. We get started with a base of Crumb Cake cardstock. The back panel of the focal section of this card is a quarter-sheet of Crumb Cake that has been diecut with the largest Deckled Rectangles die and then machine embossed with the Distressed Tile embossing folder. To help the beautiful embossed detailing stand out a bit more, I gave it an aged look by sponging Crumb Cake ink over the top. It’s also elevated with dimensionals to give depth to the design. The focal panel mat is Gorgeous Grape cardstock that has been diecut with the Deckled Rectangles dies, while the focal panel is a sheet of white cardstock diecut with the nesting rectangle from the same set of dies. The focal panel landscape scene is stamped using the Hills of Tuscany stamp set.

The sentiment panel is diecut from Crumb Cake cardstock using the soon-to-release Unbounded Love dies. The lavender bunch is diecut from Gorgeous Grape using the Painted Lavender dies and tied together using linen thread. The frame is adhered directly to the focal panel, while the sentiment portion is popped up on dimensionals to ensure the sentiment isn’t lost in the scene.

Two strips of the Perennial Lavender designer series paper behind the focal panel finish off this design. They serve to begin the eye’s journey across the card front. Notice how the purple elements form a visual triangle across the card front as your eye passes from this strip of DSP to the sentiment panel to the field of lavender in the landscape to the gems in the bottom-right corner.

TIP: when you overlap stamped images from this stamp set, it creates darker areas that add depth and shading. Notice the darker green path in the hill that was created in this fashion. I still have a lot to learn when it comes to this technique, but I have enjoyed experimenting with the layering. Should we make this an episode of Terrific Tuesdays? I would love to know your thoughts!

Products used in today’s card:
Crumb Cake, Gorgeous Grape, Basic White cardstock
Perennial Lavender DSP
Hills of Tuscany stamps
Deckled Rectangles, Unbounded Love (coming soon!) dies
Distressed Tile embossing folder
Purple fine shimmer gems
Linen thread
Dimensionals
Adhesives

Luv 2 Stamp Artisan Design Team

Beautiful Thanks

While I’ve been away tending to my family, I’ve had many hours to sit and gather inspiration for some of my newer stamp sets. The Hills of Tuscany set is one I was drawn to in the new mini catalog, but once I had it in hand, I felt stumped. Do you ever have stamp sets like that? You love them when you see them but then you find yourself a little intimidated by them once they’re in your stash? One of the things I love about our Stampin’ Up! crafting community is the number of forums from where we can draw inspiration. From Pinterest to Facebook to Instagram to Demonstrator Planning Place (if you’re a demo), there are so many incredibly talented stampers out there!

For today’s card design, I drew from several talented stampers who used the Hills of Tuscany stamp set to create beautiful watercolor-looking scenes. Here, I wanted to create a Tuscan sunset with a chateau in the distance. I used the larger and smaller hillside stamps to create the hill on which the chateau sits. To create the sunset, I used the cloud-looking stamp and covered it with a number of different color inks before stamping it. While not perfect, I do love the look that I was able to achieve here. I experimented with stamping it multiple times but found that using multiple colors and stamping once worked better. To pull the colors of sunset from the image panel, I matted it with rose gold and Moody Mauve luster paper. I used Pretty Peacock for the ribbon, blooming pearls, and sentiment to pull everything together with the Sweet Thoughts Memories & More card base.

Products used:
Basic White cardstock
Rose Gold, Moody Mauve SP
Sweet Thoughts Memories & More
Hills of Tuscany, Circle Sayings stamps
Deckled Rectangles, Thoughtful Expressions dies
Blooming pearls
Pretty Peacock & gold metallic ribbon, linen thread
Dimensionals
Adhesives

All ads on this site are posted by WordPress.  Song Sparrow Papercrafts is not responsible for ad content.

Luv 2 Stamp Artisan Design Team

Can’t Thank You Enough

Thank you so much for your patience as I have been navigating a family medical emergency. I have spent the last month between Alaska and Texas in various hospitals. While things are certainly heading in the right direction, we still have a very long way to go to have this medical crisis behind us. I hope to be able to post more regularly as I am home more in between several major surgeries. I’m also trying to figure out how to bring you Terrific Tuesdays content during this time period, but I think it will be another week before I’m able to do so.

I had so much content planned for the period of time that I’ve been away. I’m so sad that I missed the end of Sale-a-Bration! There’s SO much wonderful product in the (now retired) Sale-a-Bration catalog. I hope you were able to swipe some of your favorites. While it’s a little late, I’m still planning to share projects using some of my favorite SAB products. So be watching for those.

Today, I’m sharing a thank-you card design. Being gone from home for a month has required a lot of support from family and friends, as you can imagine. So needless to say, you’ll be seeing a lot of designs that are thank-you or gratitude in theme.

For today’s design, I wanted to keep things simple and play with a new stamp set from the current mini catalog. I used a card base from the Sweet Thoughts Memories & More pack as the base for this design. I built this hillside scene on a piece of white cardstock using the Hills of Tuscany stamp set. To help the focal panel pop, I used a piece of the Lost Lagoon Tartain Foil specialty paper and popped up the entire panel using dimensionals. I twisted some linen thread behind the panel to bring in a nice neutral. The blooming pearls on either side of the sentiment help draw the eye across and down.

Some stamp sets really lend themselves to simple yet beautiful designs. The Hills of Tuscany is certainly one of those. There aren’t many products in this design, yet it really stands out as an eye-catching design. Things don’t have to be complicated to be lovely!

Products used in today’s design:
White cardstock
Tartain Foil DSP
Sweet Thoughts Memories & More card base
Hills of Tuscany stamps
Linen thread
Blooming pearls
Dimensionals
Adhesives

All ads on this site are posted by WordPress.  Song Sparrow Papercrafts is not responsible for ad content.