Botanicals

You Matter

As we are wrapping up our final two weeks of summer before the kiddo heads back to school, we’re squeezing in lots of last-minute fun. One of things we enjoy doing every summer is going to our local bowling alley. The USBC hosts a program known as Kids Bowl Free and our local bowling alley participates. For a one-time fee, you can enroll the whole family and get 2 free games every weekday. My son has taken a particular interest in bowling and is actually quite good at it. This summer, he has added the youth bowling league to his list of regular activities and is planning to continue for the fall league. Right now, his team is about midway in the pack as far as standings so he’s working hard to improve his game. As with any sport, this is adding up to new equipment and lessons and time, but we absolutely love how much he loves it! And I can think of far worse things to spend money on!

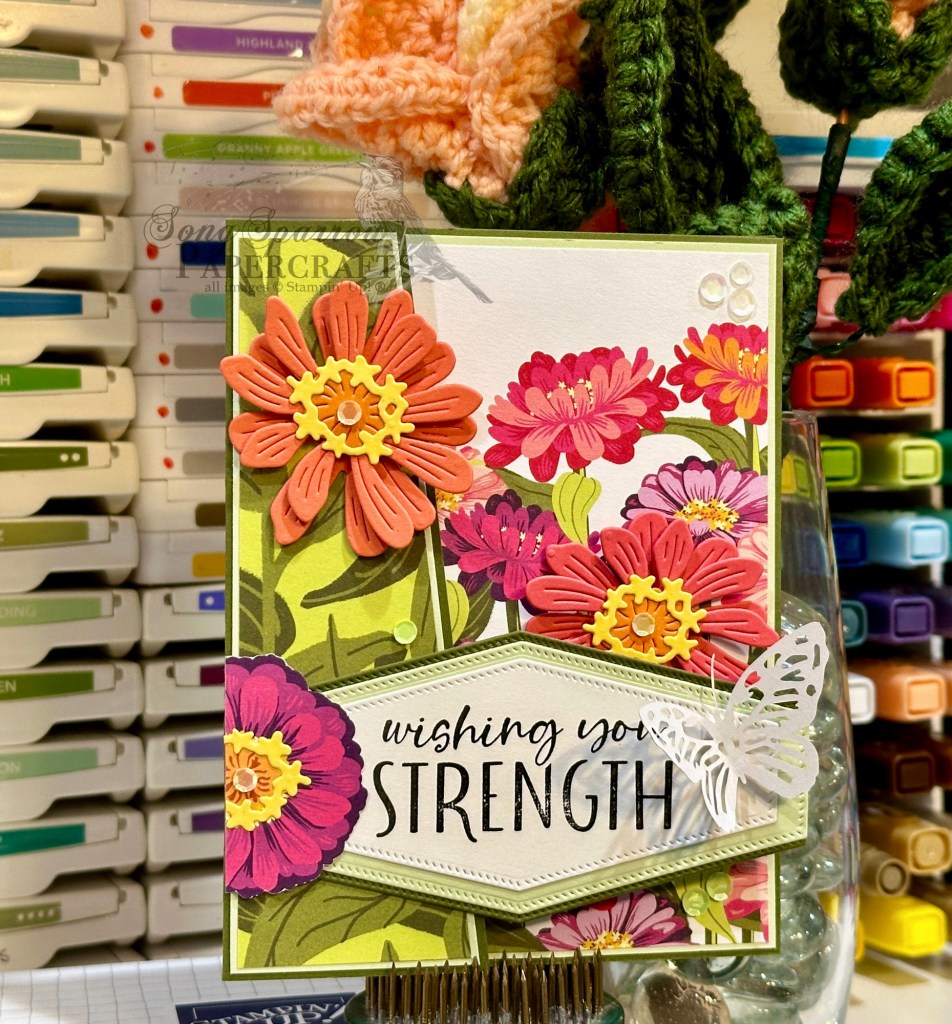
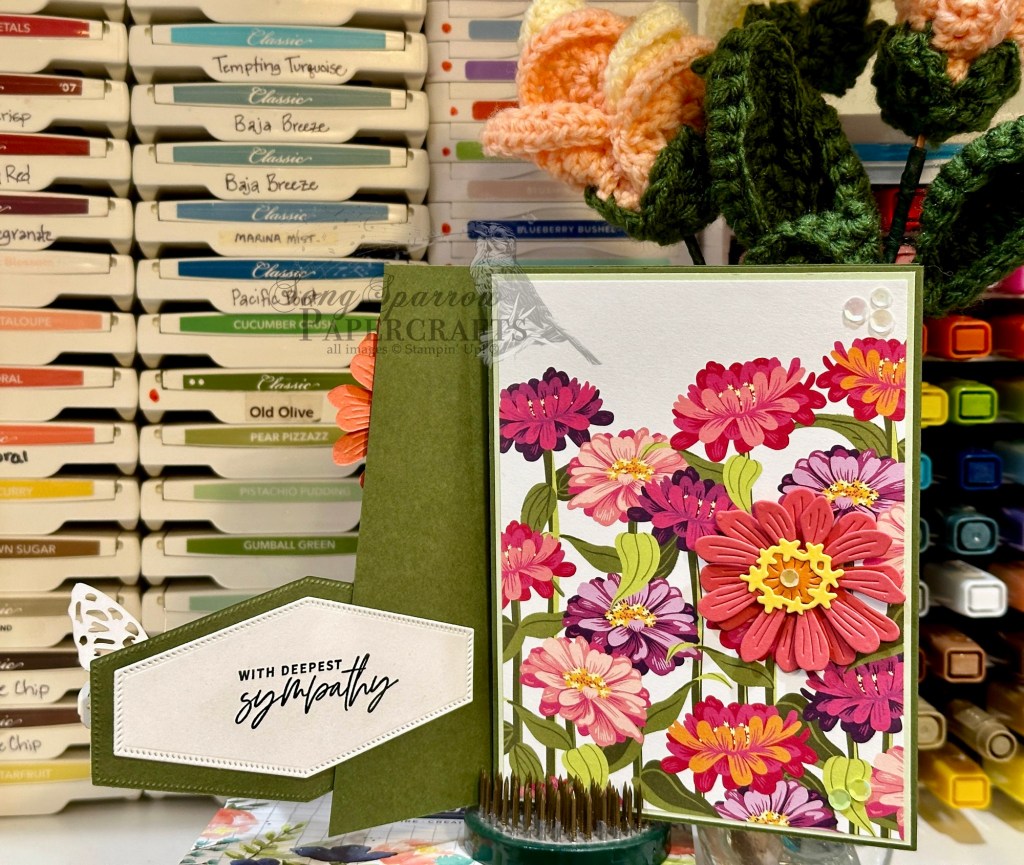
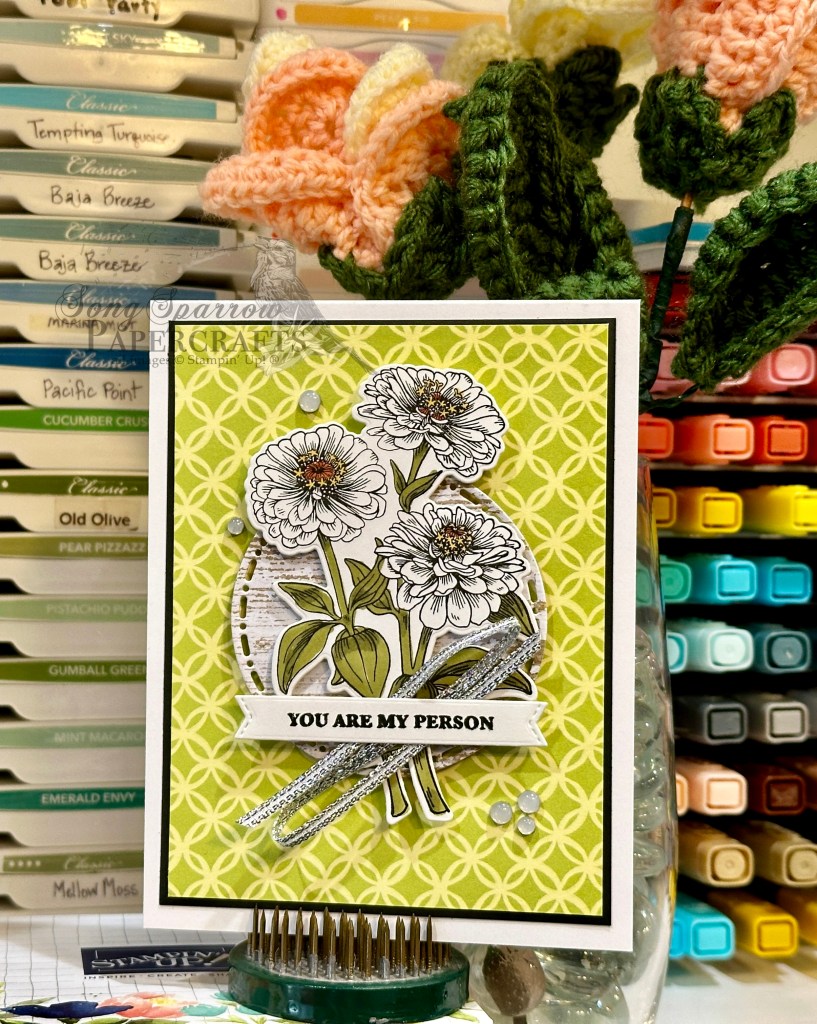
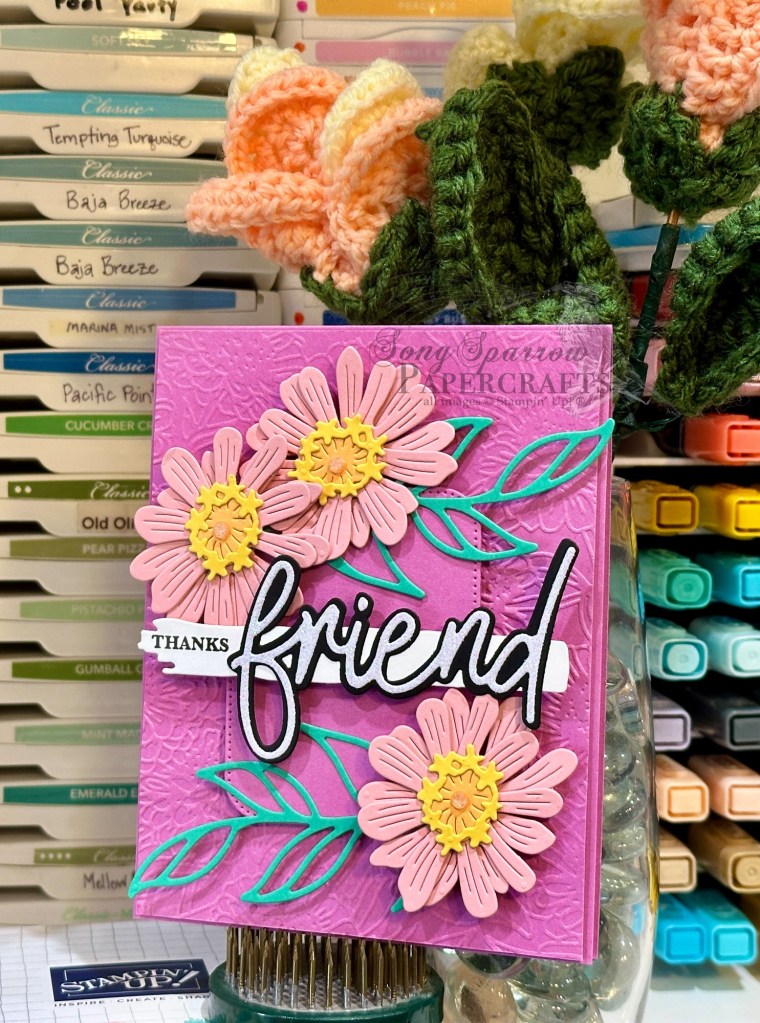
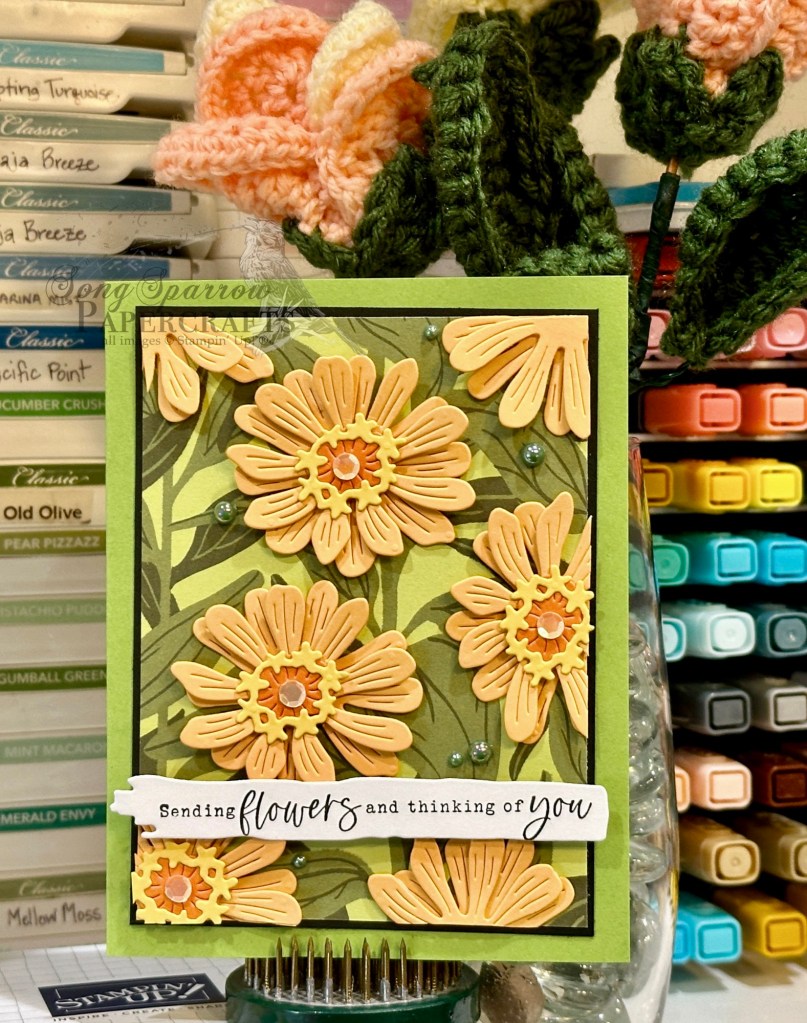
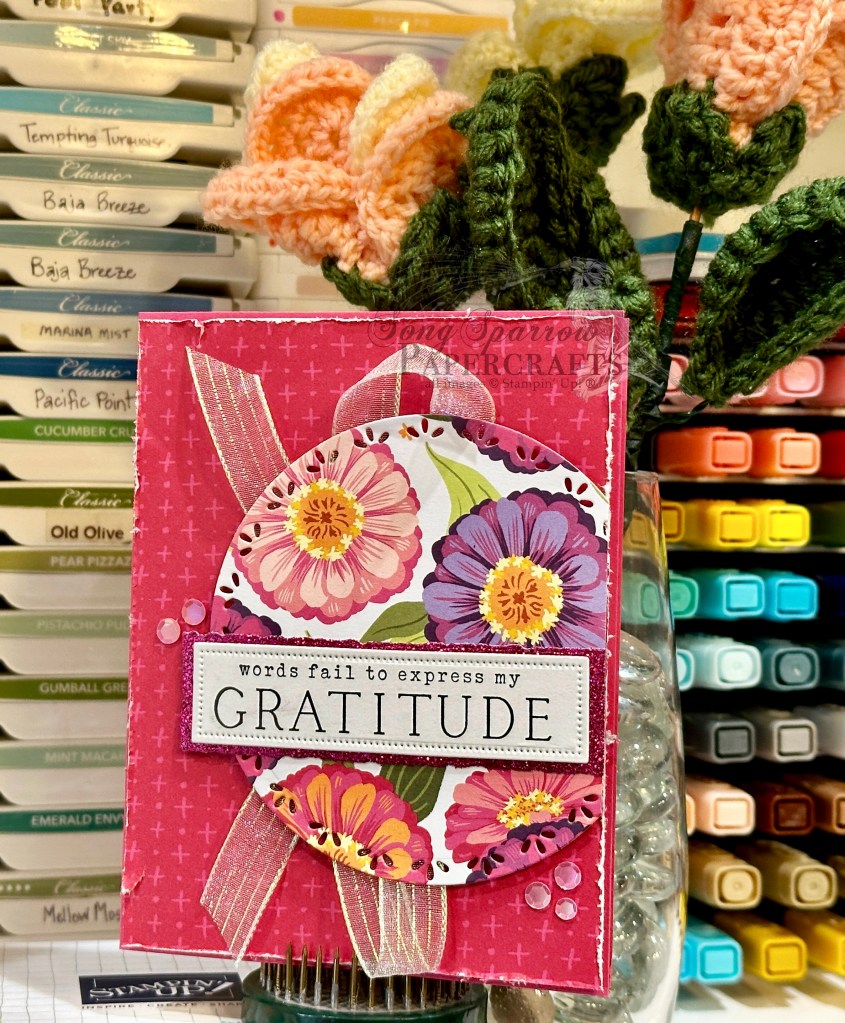
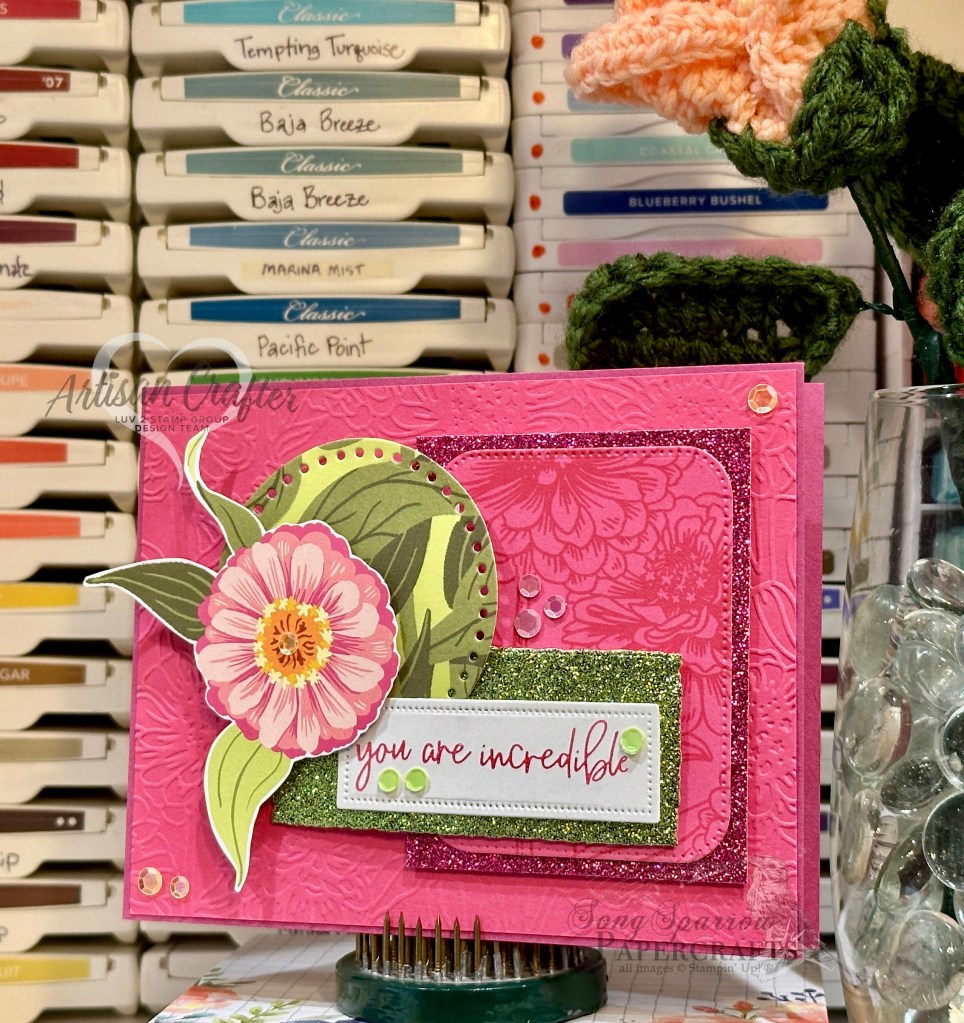
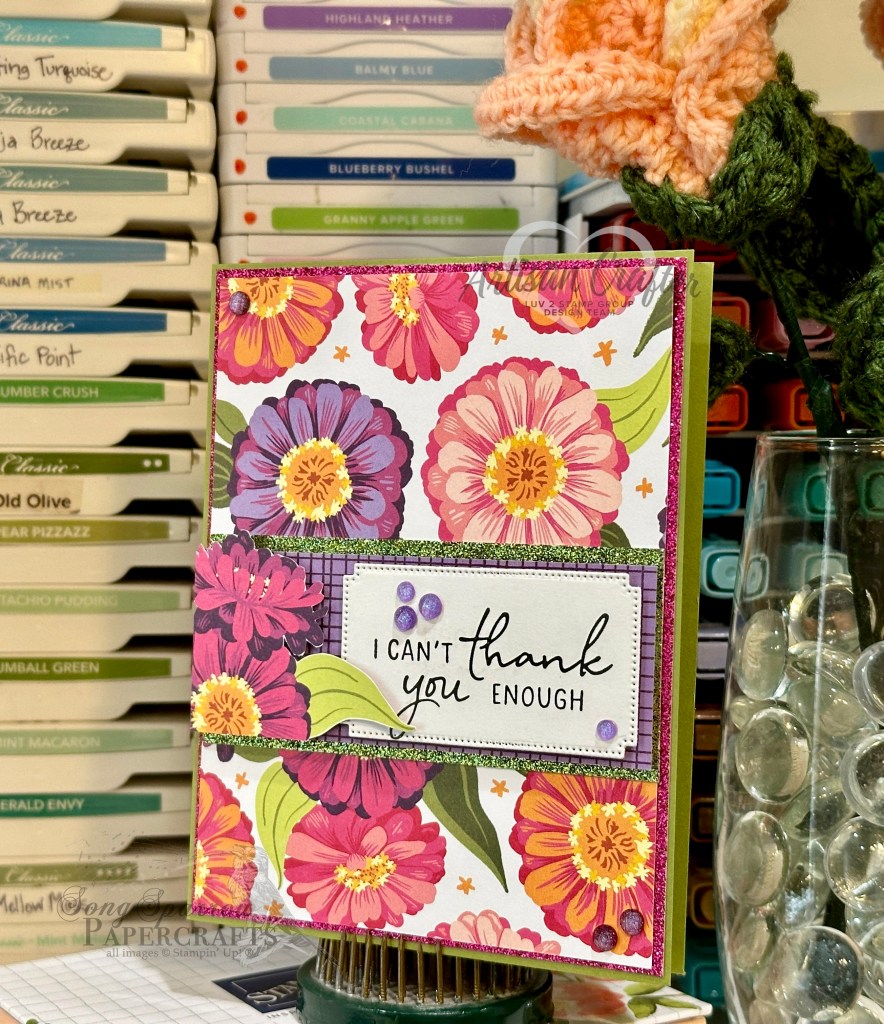
We’re continuing our series this week called In the Garden. And today, we’re making our way through the cut flowers. One of my absolute favorite summer flowers is the zinnia. They come in so many happy colors and their blooms just keep going and going. I also love that they’re fairly hard to kill. *wink* Stampin’ Up! has a wonderful bundle of products called Flowering Zinnias that includes paper, stamps, dies, and embellishments; and today’s card features a portion of those products.

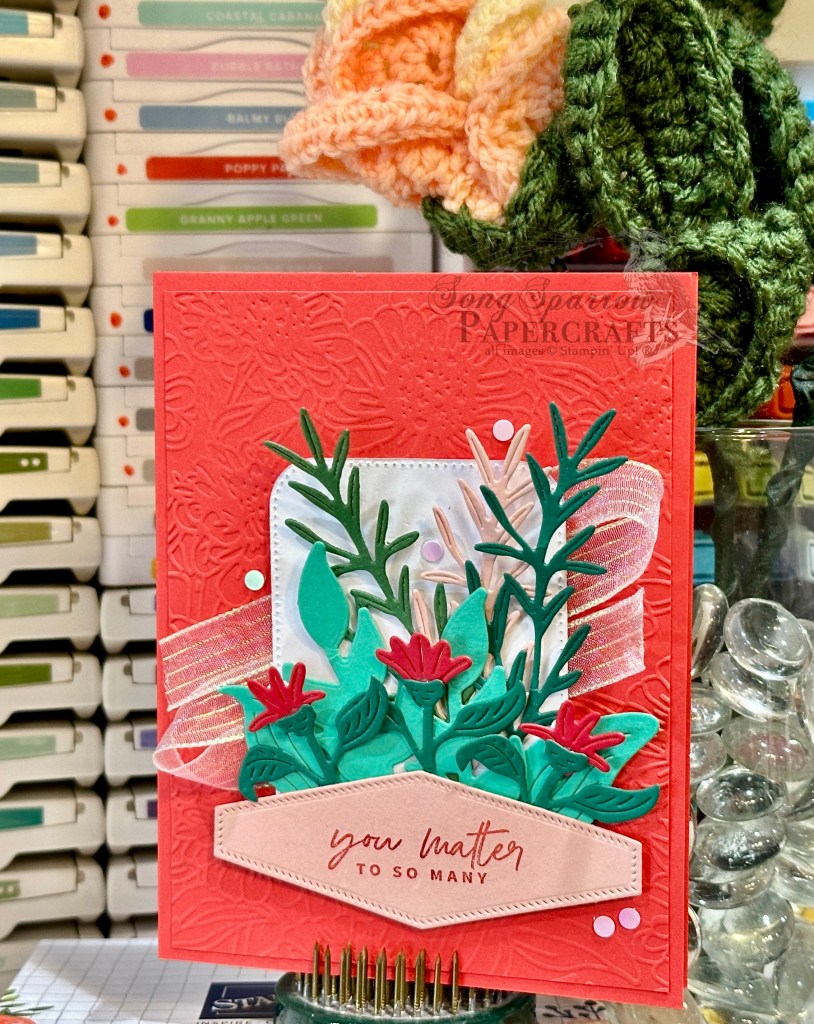
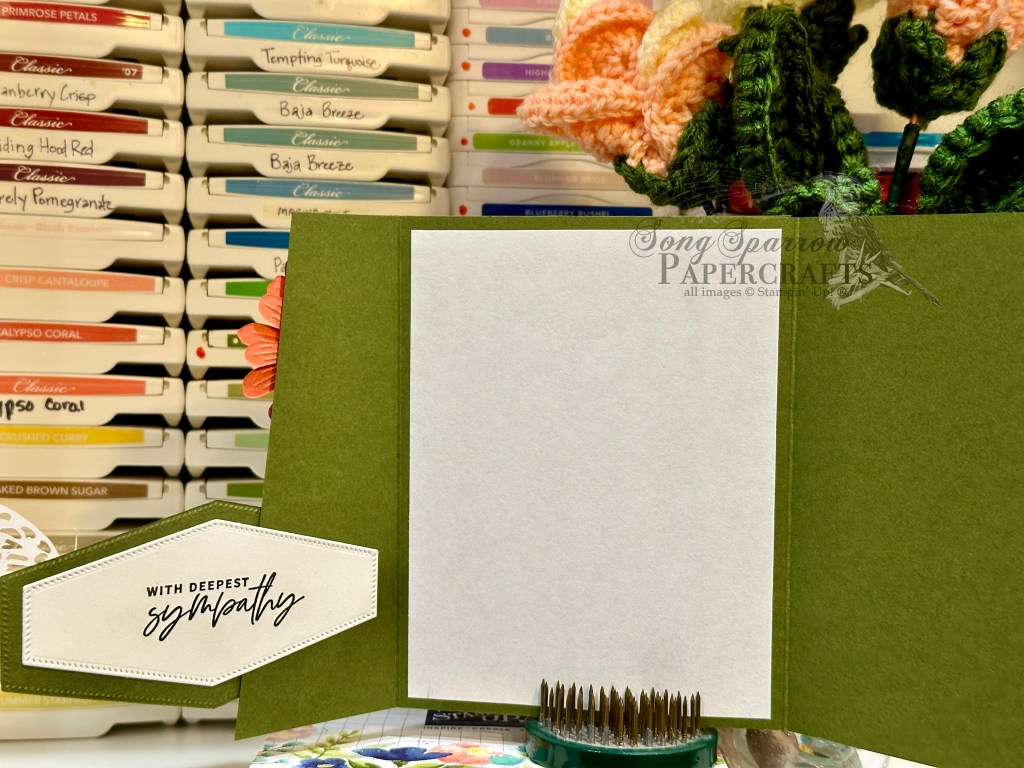
I recently saw a card by Stamp With Brenda that combined shades of red and light pink and just loved it, so that inspires our card today. We get started with a base of Poppy Parade cardstock. A quarter sheet of embossed Poppy Parade serves as our backdrop. It’s been cut down slightly and then machine embossed using the Zinnia embossing folder. Our focal panel has lots of beautiful layers. We get started by cutting a large square of white cardstock using the largest square from the Nested Essentials die set. Using the Painted Lavender and Simply Zinnia dies, we cut a combination of greenery stems. Our zinnia blooms are cut from Real Red cardstock to give a little contrast and help them pop against the busy backdrop. Our sentiment from the Something Fancy set is stamped in Poppy Parade on Petal Pink cardstock and then diecut using the smallest diamond die from the Nested Essentials set. This is all layered on top of a bit of iridescent striped trim and adhered to our card front with varying layers of dimensionals. A few iridescent discs are scattered on our card front to draw the eye to our focal section.

Tomorrow we’re going to look at several ways to use busy patterned paper to create stunning floral card designs. I hope you’ll drop by.

Products used in today’s card:
Poppy Parade, Shaded Spruce, Summer Splash, Mossy Meadow, Petal Pink, Real Red, Basic White cardstock
Something Fancy stamps
Deckled Rectangles, Painted Lavender, Simply Zinnia dies
Zinnia embossing folder
Iridescent striped trim
Iridescent discs
Dimensionals
Adhesives

Product List
Flowering Zinnias · Fun Folds · Shop the catalog

Wishing Strength

We’re finishing out this week’s tour of the Flowering Zinnias suite with a beautiful fun fold featuring the designer series paper. The paper in this suite is what initially caught my eye, but once it was all said and done, I ended up with all of the coordinating products after being inspired by what other crafters were able to do with the suite as a whole.

Today’s card design uses a double fold-over panel fun fold and showcases the Flowering Zinnias DSP. We’re using the coordinating Simply Zinnia dies to accentuate elements of the gorgeous paper.

We start this card with a standard base of Mossy Meadow cardstock, which is scored in the center. The front panel is cut diagonally to make a smaller fold-over panel in order to reveal more of the gorgeous designer paper on the fold-over panel underneath. This small panel is then covered with the leaves and stems patterned sheet from the Flowering Zinnias paper pack, which is matted with a piece of Soft Sea Foam cardstock. Each layer is 1/8-inch smaller than the next.

Next, we move to assembling the overlapping front sentiment panel. The base layer is Mossy Meadow cardstock that has been diecut with the second largest hexagon from the Nested Essentials die set. Cut an identical size hexagon from Soft Sea Foam and then cut a sliver from the center so that a small border of Mossy Meadow is exposed on either side at top and bottom when the two hexagons are adhered together. The sentiment panel is cut from white cardstock with the next-smallest nesting hexagon from the die set and the sentiment from the Inspiring Snapdragons stamp set is stamped in the center. All three layers are adhered together in one flat panel and adhered directly to the bottom of the front fold-over panel. I cut a second sentiment panel from white cardstock and stamped the sentiment from Something Fancy in the center. This is adhered to the back of the hexagon on the inside of the small fold-over panel.

Now we move to assembling the inside fold-over panel. This panel also begins with a base of Mossy Meadow cardstock, which is cut so that there is a 1-inch flap to adhere to the card base and serve as the hinge for this panel. The sheet of designer paper from the Flowering Zinnias pack is matted with a sheet of Soft Sea Foam and then adhered to the flap base. Each layer is 1/8-inch smaller than the one underneath. The inside message panel is a plain white sheet of paper that has been left blank for an extended message.

We finish off the card design by accentuating the zinnias in the patterned paper panel. Using the Simply Zinnia dies, I assembled two blooms. The petals are cut from Calypso Coral and Flirty Flamingo, while the flower centers are cut from Daffodil Delight and Pumpkin Pie. I also cut a single bloom from the edge of the sheet of blooms paper from the paper pack and adhered a flower center to the top to add that bit of realism to it, as well. The partial flower is adhered to the left side of the sentiment panel to cover the center seam of the Soft Sea Foam layer. The two diecut zinnia blooms are placed so that they give some life and realism to the two DSP panels—one over the stems and leaves flap and one nestled in the floral DSP panel just under the sentiment. Everything is finished off with sequins and a butterfly.

Click here to download the detailed PDF tutorial for today’s card. Don’t be intimidated by the number of steps! I break things up into bite-sized pieces to help ME not miss a step the next time I pull out my directions. *wink*

Tomorrow we’re (finally) going to get a look at those By Your Side Kit alternatives. I hope you’ll pop in to see how you can make a few little tweaks to kits to give them a fresh look.

Products used in today’s card design:
Mossy Meadow, Soft Sea Foam, Calypso Coral, Flirty Flamingo, Pumpkin Pie, Daffodil Delight, Basic White cardstock
Flowering Zinnias DSP
Simply Zinnia, Nested Essentials dies
Inspiring Snapdragons, Something Fancy stamps
Paper butterfly
Shiny sequins, sequins trio
Dimensionals
Adhesives

Flowering Zinnias · Shop the catalog

My Person

I really love a good sketch. A good sketch allows for so many different applications with a wide array of looks. Today’s card is based on a sketch that is in my go-to stash in the sketch book. Our product focus this week is the Flowering Zinnias suite of products and today we’re focusing on the largest image from the stamp and die bundle, as well as the designer paper. This card only has a few elements, but I love how it’s a show-stopper.

This card design is built on a base of Basic White cardstock. The focal panel base is sheet of lattice pattern from the Flowering Zinnias designer paper pack that is matted with Basic Black cardstock. The focal panel itself consists of the background circle panel cut from the white woodgrain sheet from the Country Woods designer paper pack using the middle circle size of the Spotlight on Nature dies and adhered using dimensionals. Our focal image is the largest image in the Simply Zinnia stamp set stamped on white cardstock and then diecut using the coordinating Simply Zinnia die. I used Stampin’ Blends to color the stems and zinnia centers, leaving the flowers themselves white. I originally intended to color the flowers but loved the look of the white flowers against the busy background of this design. The (partial) sentiment from Wonderful Thoughts is stamped on white cardstock and then diecut using the Happy Little Things banner die. A bit of silver and white trim behind the sentiment panel adds a little sparkle and works together with the transparent dots to draw the eye across the design to the sentiment.

Tomorrow we will be closing out our series featuring the Flowering Zinnias suite and our project is going to highlight the gorgeous designer series paper and show how you can use the coordinating dies to add dimension to patterned paper. I hope you’ll pop by to see the end result!

Products used in today’s card:
Basic White, Basic Black cardstock
Flowering Zinnias DSP
Simply Zinnia stamps & dies
Wonderful Thoughts stamps
Spotlight on Nature, Happy Little Things dies
Silver & white trim
Transparent dots
Dimensionals
Adhesives

Flowering Zinnias · Shop the catalog

Thanks, Friend

This week is all about the Stampin’ Up! Flowering Zinnias suite. And today we are looking at the Zinnia embossing folder and Simply Zinnia dies. What I think this card design illustrates so beautifully is how easily you can pair the Flowering Zinnias products with other gems from the Stampin’ Up! lineup, like the Friends for Life bundle featured here.

We get started with a card base of the new In Color Petunia Pop. I also cut a quarter-sheet and embossed using the Zinnia embossing folder. This embossed panel is cut 1/8-inch smaller than the card base and adhered with dimensionals. For the focal section of this card design, I diecut a square of Petunia Pop using the largest square die from the Nested Essentials die set and built the focal elements on top. The zinnias are diecut using the Simply Zinnia die set. The petals are cut from Pretty in Pink with each flower having Peach Pie and Lemon Lolly centers. The lovely foliage is cut from Shy Shamrock using the Friends for Life dies. Dimensionals help give a layered look to the zinnias. The sentiment panel base is white cardstock diecut using the banner die from Friends for Life. Thanks is stamped in black on one end of the panel using the Wonderful Thoughts stamp set. The word friend is mounted next to it. Friend is shadowed with black cardstock and a white glimmer paper helps the word sparkle and pop on the card front. The sentiment panel has extra layers of dimensionals to ensure it stands tall above the rest of the design and catches the eye.

Tomorrow we’re going to be keeping things simple. I hope you’ll pop in to see how a stamp, paper, and die can make a beautiful card in a snap.

Products used in today’s card design:
Petunia Pop, Pretty in Pink, Peach Pie, Lemon Lolly, Shy Shamrock, Basic Black, Basic White cardstock
Flowering Zinnias, glimmer DSP
Simply Zinnia, Friends for Life dies
Zinnia embossing folder
Wonderful Thoughts stamps
Shiny sequins
Dimensionals
Adhesives

Flowering Zinnias · Shop the catalog

Flower-filled Thoughts

We’re spending this week getting to know the Flowering Zinnias suite by Stampin’ Up! This suite includes designer series paper, stamps, coordinating dies, coordinating embossing folder, and a package of embellishments. (See the whole suite here.).

Today’s card combines the designer paper and coordinating dies. I saw a similar design layout posted by Mitosu Crafts and just fell in love and thought why didn’t I think of that! Do you ever have those lightbulb moments when you see a design you absolutely love? It just seems so obvious to put it together that way.

What I love about this layout is that I immediately feel like I’m standing in a garden row of zinnias. I may have mentioned before that zinnias are one of my favorite summer flowers. If I had room to have a whole section of my gardening space devoted to zinnias, I most certainly would!

We start this card design with a base of Granny Apple Green cardstock. I chose the leaf and stems patterned sheet from the Flowering Zinnias paper pack and mounted it with a very thin mat of Basic Black. This full panel is adhered directly to the card base. Building the beautiful zinnia blooms is snap with the coordinating dies for this suite. I chose to use the new In Color called Peach Pie — a soft, muted orange. The flower centers are a combination of Pumpkin Pie and Lemon Lolly. I used a single dimensional to adhere the two petal layers together and then a combination of glue dots and glue pen for the centers and then finished each flower with a Pumpkin Pie shiny sequin. Having flowers disappear from the frame gives the feeling of looking through a window or looking a snapshot, and I just love that effect here. The sentiment from the coordinating Simply Zinnia set is stamped on Basic White and diecut using the Friends for Life die. The sentiment is adhered with a layer of dimensionals so that it stands tallest in the overall design. A few carefully placed Garden Green Blooming Pearls draw the eye down and across the design so that the eye rests on the sentiment.

What I love about this suite of products is how you can create designs that look intricate and complicated but are actually a breeze to put together. TIP: when making a card with the zinnia blooms, cut extra pieces to make your next card come together in a snap. Make it even easier by having fully assembled flowers in your stash!

Tomorrow, the embossing folder takes center stage. I hope you’ll come check it out!

Products used in today’s card design:
Granny Apple Green, Peach Pie, Pumpkin Pie, Lemon Lolly, Basic Black, Basic White cardstock
Flowering Zinnias DSP
Simply Zinnia stamps & dies
Friends for Life dies
Shiny sequins, blooming pearls
Dimensionals
Adhesives

Flowering Zinnias · Shop the catalog

Words Fail

Howdy, everyone! The next two weeks are going to be pretty busy as my little wraps up another school year. How did a whole school year go by already?! It’s good to be back home and able to do a little crafting.

This week we’re going to focus on the Flowering Zinnias suite of products. When I first saw this product suite, I immediately fell in love with the designer paper, but I wasn’t really won over by the coordinating stamps and dies. But as I worked more with the paper, I realized what I was missing. So this week, I want to show you how much further you can take your designs with the coordinating stamp/die bundle.

For today’s design, we’re starting with a base of Melon Mambo. The two patterns of designer paper are both from the Flowering Zinnias paper pack. The background piece is cut 1/8-inch smaller than the card base and then I distressed the edges using paper snips. This piece is mounted to the card base using dimensionals. The zinnia pattern is diecut using the Spotlight on Nature dies and one small section is cut from the side for an off-set mount with dimensionals on the patterned background. I slipped some iridescent striped trim underneath to add sparkle and draw the eye. The sentiment from the Simply Zinnia set is stamped on white cardstock and then diecut using the Autumn Leaves dies using the extension method. I mounted the sentiment on Berry Burst glimmer paper that was diecut using the Deckled Rectangles set. I added Melon Mambo shiny sequins to finish things off.

Tomorrow we’re going to walk through the zinnia patch. I hope you’ll come along!

Products used in today’s card design:
Melon Mambo, Basic White cardstock
Berry Burst glimmer, Flowering Zinnias DSP
Simply Zinnia stamps
Spotlight on Nature, Autumn Leaves, Deckled Rectangles dies
Iridescent striped trim
Shiny sequins
Dimensionals
Adhesives

Luv 2 Stamp Artisan Design Team

Incredible

I’ve been so inspired by our monthly Luv 2 Stamp Team challenge to use our designer series paper. When I saw this week’s sketch by Freshly Made Sketches over on Instagram, I had so many ideas for incorporating my stash of DSP. So today, I’m starting with the Flowering Zinnias because …. well, I just love zinnias. *wink*

I’ve probably mentioned this before, but one of the things that I love about using design sketches is that you aren’t “stuck” with the layout as it is. It’s just a starting point for your design. So never be afraid to make adjustments to make it work for you. For example, for my take on this sketch, I started by laying out the papers and tools I wanted to use and intended to have the sketch work for me as-is. But as I got to work on my card, I needed to turn the card orientation and then shift the elements a little bit to work with the flower I fussy cut and felt was a must-have element for the design. That’s how I “made it work” for me. *grin*

Today’s card begins with a base of Berry Burst. I really liked the contrast of Berry Burst and Melon Mambo in the sheet of Flowering Zinnias DSP that I used as the square element, and so I played it up with the card base and embossed background layer. The background layer is a section of Melon Mambo that I embossed using the Zinnia embossing folder. To help the square of pink zinnia designer paper stand out against the embossed background, I matted it with some Berry Burst glimmer paper. The circle element from the sketch is a piece of the green zinnia stems and leaves pattern that is diecut using the Everyday Details dies. The sentiment from the Happy Little Things set is stamped on white cardstock and then diecut with the Everyday Details dies using the die extension method to make it long enough to fit the entire sentiment in one line. Because I really wanted the sentiment panel to stand out against the busy background and also to draw in some additional green elements, I matted the sentiment with some Old Olive glimmer paper diecut with the Deckled Rectangles dies using the extension method. I fussy cut a zinnia from a sheet of the Flowering Zinnias paper and rested it atop the circle and sentiment to tie together the full color palette. I added some shiny sequins across the card front to draw the eye across the card and add sparkles of interest.

I really love this week’s FMS sketch and am going to make a series of cards with it to showcase how you can use sketches to make designing cards both fast and fun! Tune in tomorrow for another take on Sketch 628!

Products used in today’s design:
Berry Burst, Melon Mambo, Basic White cardstock
Flowering Zinnias, Berry Burst & Old Olive glimmer DSP
Everyday Details, Everyday Essentials, Deckled Rectangles dies
Happy Little Things stamps
Shiny sequins
Dimensionals
Adhesives


All ads on this site are posted by WordPress.  Song Sparrow Papercrafts is not responsible for ad content.

Luv 2 Stamp Artisan Design Team

All About the Stripes

Our monthly Luv 2 Stamp Team challenge is to use all of the designer series paper that we’re collecting … uh, storing. *wink wink* In all seriousness, I do sometimes find it hard to bring myself to cut into a sheet of designer paper, particularly when I’m down to the last sheet of a favorite pattern. But what better way to spread kindness than to share it with a beautiful card?!

I know I’ve said this several times this week, but I just love the new Flowering Zinnias designer paper. As I was strolling through this paper pack for other designs, I made note of all of the lovely neutral patterns on the backsides of the floral sheets. Several patterns caught my eye and really got the ol’ idea wheel turning. When I pulled the green cross-stripe pattern, I remembered a similar pattern in the Lighter Than Air paper pack and I just knew that I had to try the two patterns together.

This card begins with a base of Lemon Lolly cardstock, which does an excellent job of highlighting the narrow striping in the Flowering Zinnias sheet, as well as pairing beautifully with the pastels in the Lighter Than Air sheet. To give a little eye relief between the two striped patterns, I matted the Lighter Than Air sheet with white glimmer paper. While the Lemon Lime Twist ribbon coordinates perfectly with both striped pattern sheets, it also further adds to the pattern relief in between. I loved the look of dark contrast between the paler patterns and the shaped mat behind the sentiment. This mat is diecut from Pretty Peacock glimmer paper using the Thoughtful Expressions dies. The sentiment from Trusty Tools is stamped on Lemon Lolly and then diecut using the Autumn Leaves dies. Pretty Peacock sequins draw the eye across the card front and help unify the design.

I think my favorite thing about our group challenge this month is the simple reminder that our craft supplies are meant to be shared! So let’s find all the ways that we can showcase the products that we love and spread the love with our friends and family!

Products used:
Lemon Lolly cardstock
Flowering Zinnias, glimmer DSP
Trusty Tools stamps
Thoughtful Expressions, Autumn Leaves dies
Sequins trio
Lemon Lime Twist ribbon duo
Adhesives

All ads on this site are posted by WordPress.  Song Sparrow Papercrafts is not responsible for ad content.

Luv 2 Stamp Artisan Design Team

Thank You Zinnias

Our monthly Luv 2 Stamp Team challenge is using our current designer series papers. If you struggle with this too, I encourage you to play along with us as we design cards that prominently feature some of our favorite designer series papers.

I just love the new Flowering Zinnias designer paper. For today’s card, I intentionally chose a pattern that would pair perfectly with the new glimmer specialty papers. What better way to have your designer paper shine than to mat it with gorgeous, sparkly paper!

We start with a base of Old Olive cardstock. The lovely zinnia patterned sheet is matted with Berry Burst glimmer paper. To create the perfect backdrop for the sentiment, I chose to mat the purple grid pattern from the Flowering Zinnias pack with a piece of Old Olive glimmer paper. The sentiment panel is white cardstock that has been diecut using the Autumn Leaves die. I used the expansion masking technique to make a longer shape from this die. The sentiment is from the Perennial Postage stamp set. To punch up the zinnia theme, I fussy cut a zinnia from the patterned sheet. Both the sentiment panel and zinnia element are popped up on dimensionals to ensure that they stand out against the beautifully busy background. The fine shimmer gems are placed so that the eye moves from corner to corner across the design.

The beauty of designer series paper is being able to share it with others. So let’s cut it up and make beautiful things to share!

Products used:
Basic White, Old Olive cardstock
Flowering Zinnias, glimmer DSP
Perennial Postage stamps
Autumn Leaves dies
Fine shimmer gems
Dimensionals
Adhesives

All ads on this site are posted by WordPress.  Song Sparrow Papercrafts is not responsible for ad content.

Luv 2 Stamp Artisan Design Team

Flowering Thanks

Our monthly Luv 2 Stamp Team challenge is to use our designer series papers. Do you ever find yourself just collecting pretty paper? Me too! But I’m getting much better about using all the pretty paper and you can too.

Today, I’m featuring the brand new Flowering Zinnias designer paper which is available as an Online Exclusive. I’ve selected 3 separate patterns from the pack for this card design. We begin with a base of Basic White cardstock, which really helps all of the busy patterns pop. I chose the pink zinnia sheet for the background panel and used two other patterns as the mat for the sentiment. To draw the eye to the center sentiment panel, I chose a strip of crinkled ribbon and natural wavy trim to serve as the center element. The sentiment is from the Softly Said stamp set. A combination of sequins and iridescent discs add a touch of sparkle and allow your eye to pass from corner to corner of the card.

Don’t be afraid to cut that beautiful cardstock! I find it much easier to do when I find great layouts to use for my card designs. Look for sketches or inspiration cards that have larger panels. That will get your creative juices flowing and make it easier to cut up that gorgeous paper!

Products used:
Basic White cardstock
Flowering Zinnias DSP
Softly Said stamps
Pool Party crinkle ribbon, natural wavy trim
Sequins trio, iridescent discs
Dimensionals
Adhesives

All ads on this site are posted by WordPress.  Song Sparrow Papercrafts is not responsible for ad content.