Luv 2 Stamp Artisan Design Team · sketches

Celebrate Spring

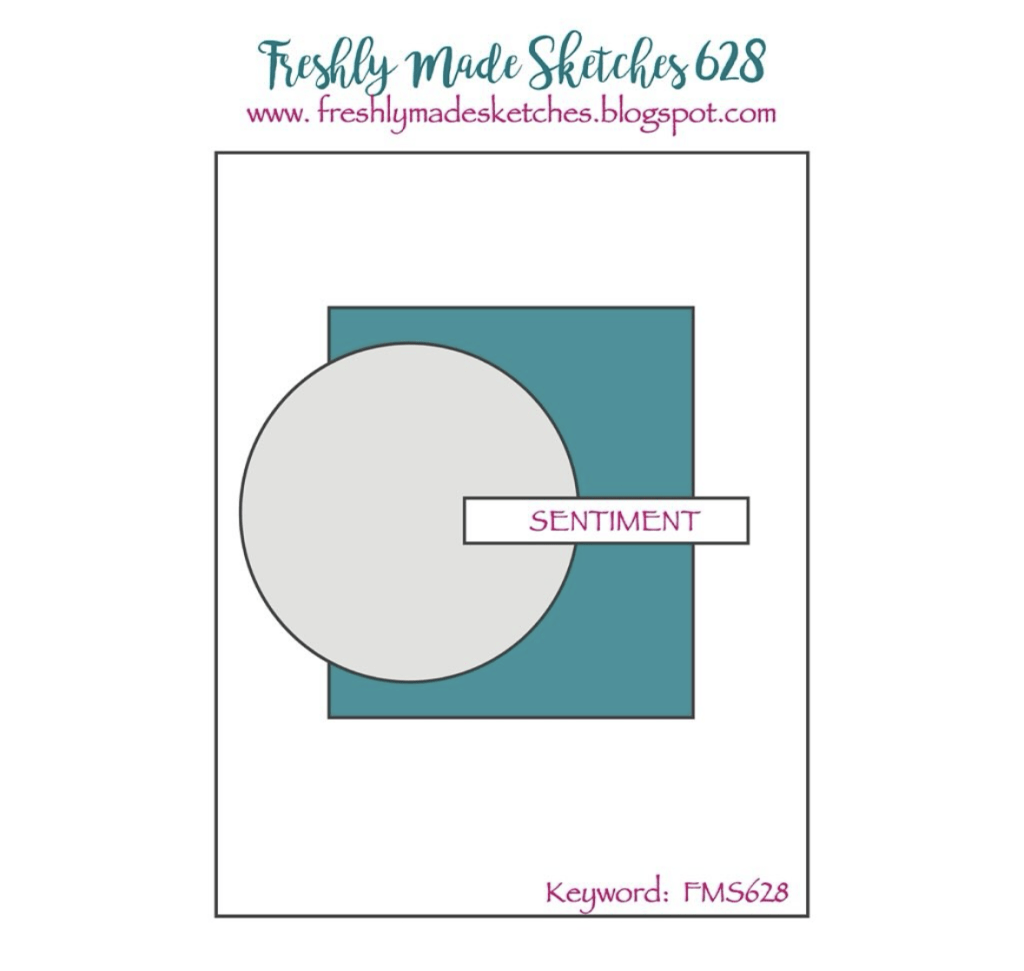
Sketches are such a great crafting tool. I turn to them often when looking for design inspiration. And you don’t have to follow them to the letter (I often don’t), but they give you a great place to get started. I’ve gotten a lot of mileage out of the latest sketch by the crew over at Freshly Made Sketches.
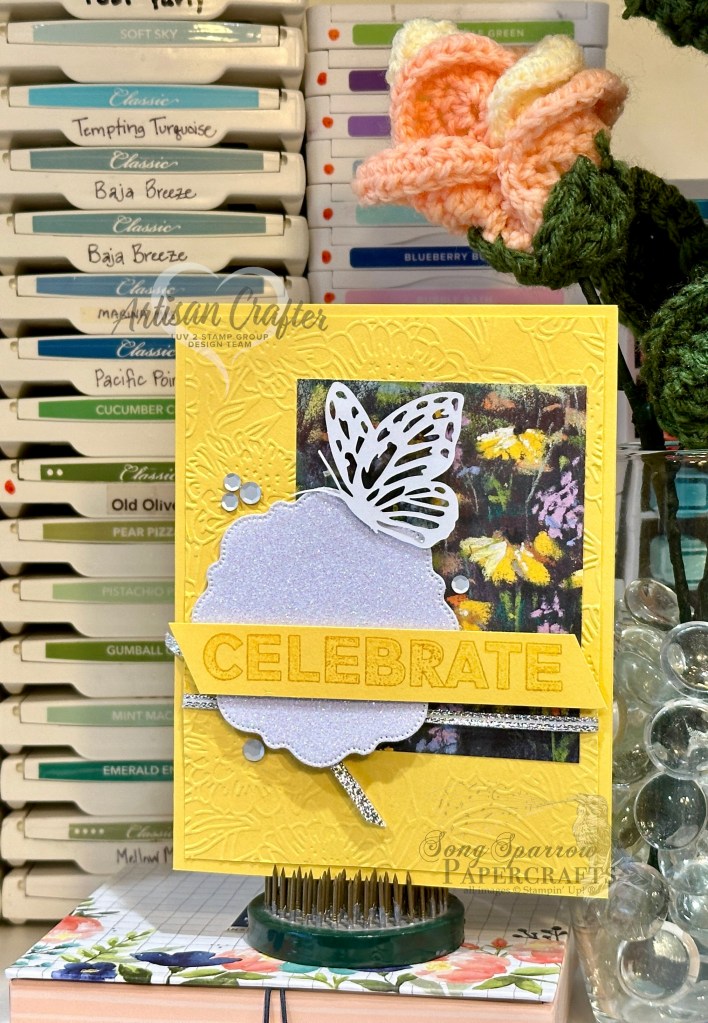
For today’s card, I pulled one of my favorite 6×6 paper packs called Meandering Meadow. This pack is full of beautiful watercolor, impressionistic-looking designs and there’s a color palette for everyone! I decided to get out of my comfort zone and try working with yellow. The sheet of black-eyed Susans in Meandering Meadow serves as the square element in the sketch. And I built the remainder of the design around it. A sheet of Daffodil Delight serves as the card base and as the background panel. The background panel has been machine embossed using the Zinnia embossing folder, which is currently available as an Online Exclusive. For the circle element, I diecut a sheet of the white glimmer paper using the Thoughtful Expressions dies. The sentiment from Happy Little Things is stamped in Crushed Curry on a strip of Daffodil Delight and then cut using the paper trimmer and snips. A strip of silver trim, along with some white sequins, help tie the white and sparkly details together. I finished off the design with a paper butterfly.

I don’t often use yellow as a focal color in my designs because, quite frankly, I find it a little intimidating and often very overwhelming to my eye. But I really love how this design came together. Sometimes you just need the right combination of products to make a “hard color” work for you.

We’re going to continue our look into using sketches as our go-to starting point for our designs this week. I hope you’ll follow along and maybe even give one or two a try!

Products used in today’s design:
Daffodil Delight cardstock
Meandering Meadow, white shimmer DSP
Happy Little Things stamps
Thoughtful Expressions dies
Zinnia embossing folder
Silver trim
Neutrals sequins
Paper butterfly
Dimensionals
Adhesives


All ads on this site are posted by WordPress.  Song Sparrow Papercrafts is not responsible for ad content.
Luv 2 Stamp Artisan Design Team

You Mean the World

One of my go-to design tools is a good sketch. If I run across a great card layout, whether it’s an actual card or just a sketch, it goes in my inspiration folder for reference later. Sketches are a great resource when you get in a creative rut, have zero ideas, or just want a quick way to turn out a lot of cards.

This week’s sketch from Freshly Made Sketches really resonated with me creatively and I quickly had a bunch of ideas for how I would use this sketch. Yesterday, I showed how I tweaked this sketch to work for the elements I wanted to use on the card I was making. Today, I’m sticking closer to the original sketch for this card.

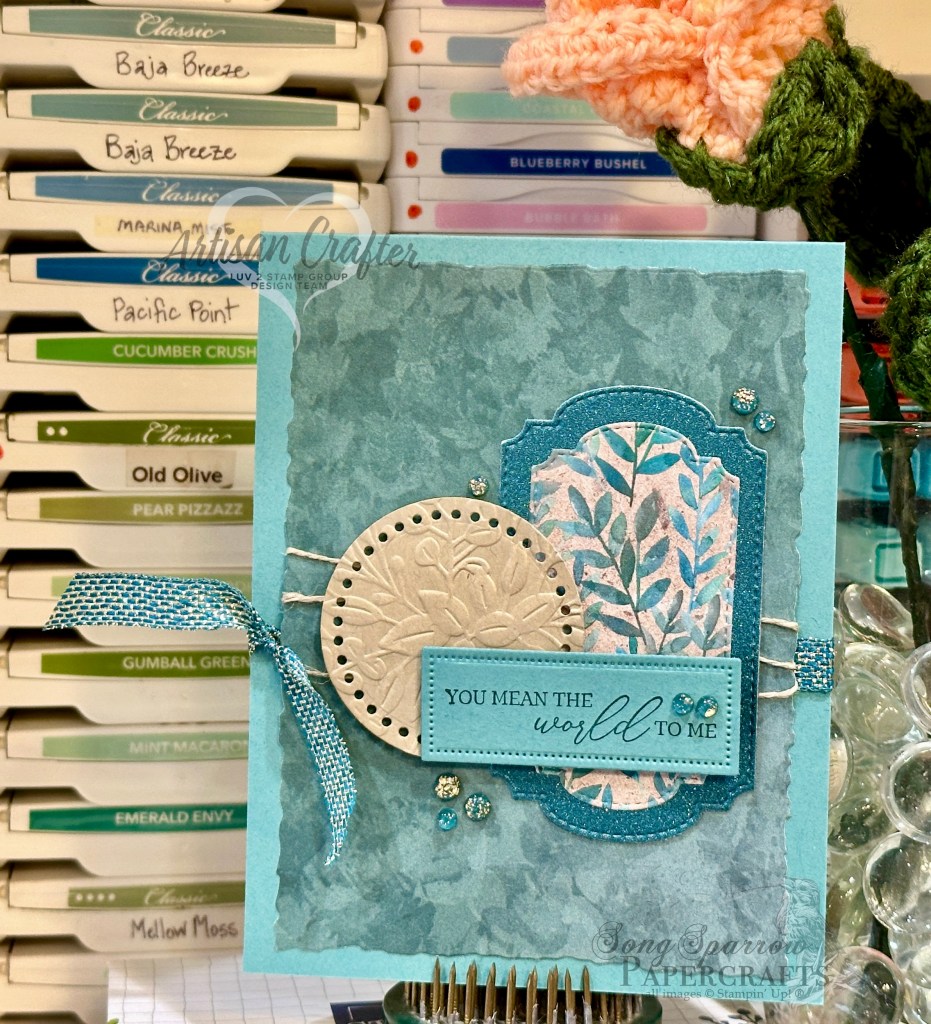
We get started with a base of Lost Lagoon cardstock. I used the Perennial Lavender designer paper for this design. The background panel from Perennial Lavender is diecut using the largest die in the Deckled Rectangles die set. For the square element of the sketch, I chose a mat of Pretty Peacock glimmer paper and a decorative sheet of the Perennial Lavender and diecut each with the nesting dies from Thoughtful Expressions. The circle element is diecut from Crumb Cake with Everyday Essentials and then dry embossed with Elegant Eucalyptus embossing folder. I felt this really helped make all of the patterns and color palette more cohesive. The sentiment from Botanical Layers is stamped on Lost Lagoon that has been diecut with the Everyday Essentials die. The ribbon and twine and foiled gems help draw the eye to the focal point in the center of the card and unite the color palette.

Products used in today’s design:
Lost Lagoon, Crumb Cake cardstock
Perennial Lavender, Pretty Peacock glimmer DSP
Pretty Peacock foiled gems
Pretty Peacock & gold metallic ribbon, linen thread
Dimensionals
Adhesives


All ads on this site are posted by WordPress.  Song Sparrow Papercrafts is not responsible for ad content.
Luv 2 Stamp Artisan Design Team

Incredible

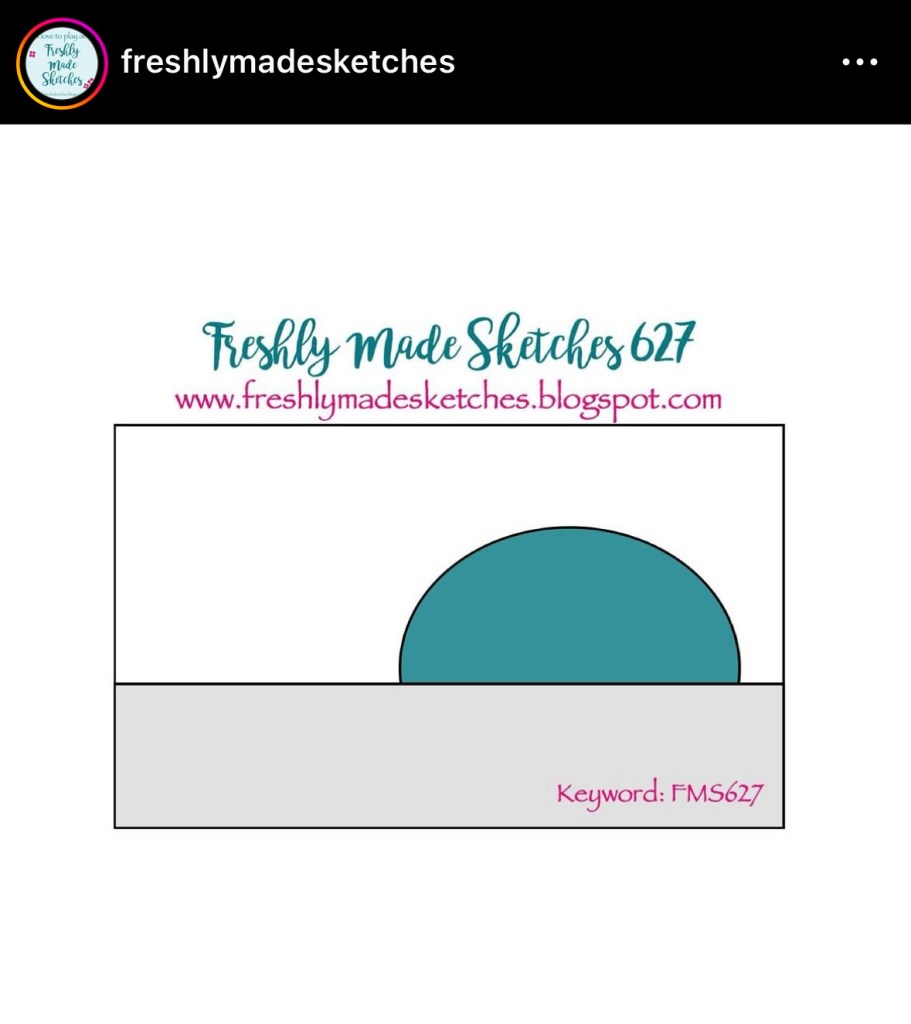
I’ve been so inspired by our monthly Luv 2 Stamp Team challenge to use our designer series paper. When I saw this week’s sketch by Freshly Made Sketches over on Instagram, I had so many ideas for incorporating my stash of DSP. So today, I’m starting with the Flowering Zinnias because …. well, I just love zinnias. *wink*

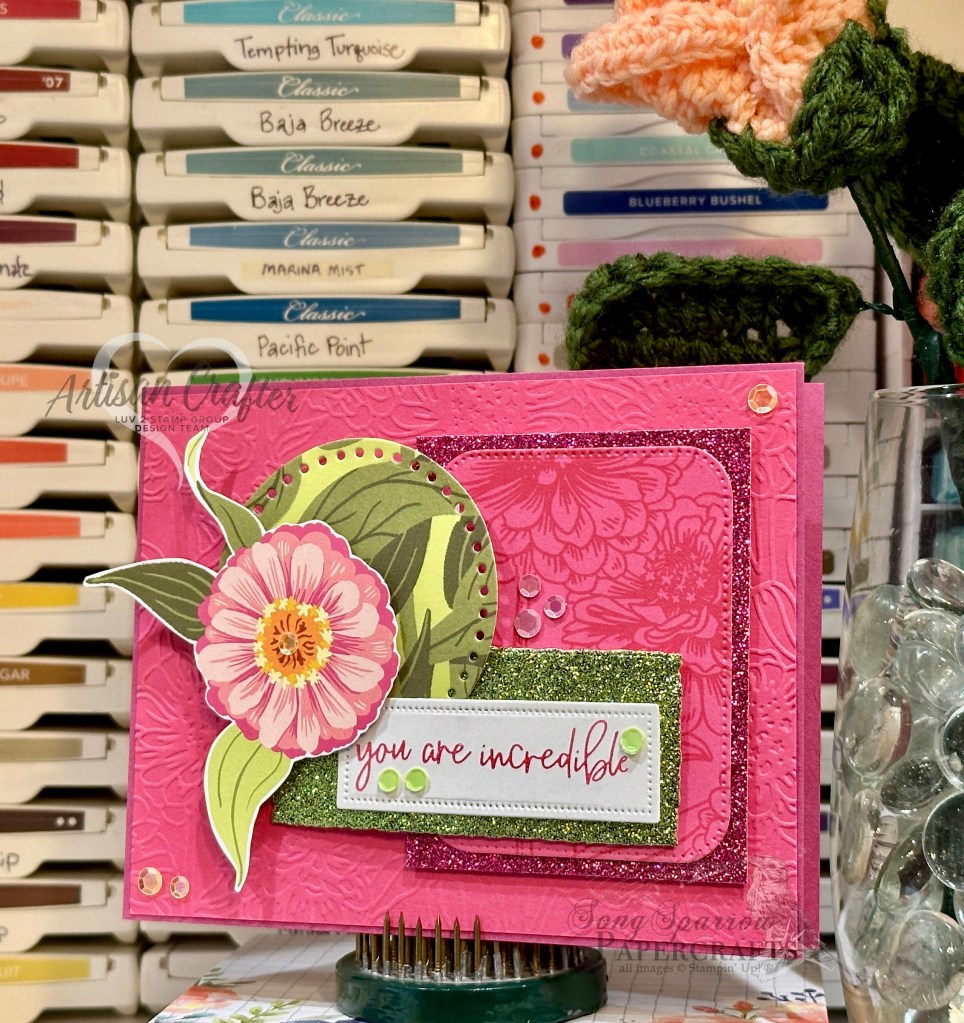
I’ve probably mentioned this before, but one of the things that I love about using design sketches is that you aren’t “stuck” with the layout as it is. It’s just a starting point for your design. So never be afraid to make adjustments to make it work for you. For example, for my take on this sketch, I started by laying out the papers and tools I wanted to use and intended to have the sketch work for me as-is. But as I got to work on my card, I needed to turn the card orientation and then shift the elements a little bit to work with the flower I fussy cut and felt was a must-have element for the design. That’s how I “made it work” for me. *grin*

Today’s card begins with a base of Berry Burst. I really liked the contrast of Berry Burst and Melon Mambo in the sheet of Flowering Zinnias DSP that I used as the square element, and so I played it up with the card base and embossed background layer. The background layer is a section of Melon Mambo that I embossed using the Zinnia embossing folder. To help the square of pink zinnia designer paper stand out against the embossed background, I matted it with some Berry Burst glimmer paper. The circle element from the sketch is a piece of the green zinnia stems and leaves pattern that is diecut using the Everyday Details dies. The sentiment from the Happy Little Things set is stamped on white cardstock and then diecut with the Everyday Details dies using the die extension method to make it long enough to fit the entire sentiment in one line. Because I really wanted the sentiment panel to stand out against the busy background and also to draw in some additional green elements, I matted the sentiment with some Old Olive glimmer paper diecut with the Deckled Rectangles dies using the extension method. I fussy cut a zinnia from a sheet of the Flowering Zinnias paper and rested it atop the circle and sentiment to tie together the full color palette. I added some shiny sequins across the card front to draw the eye across the card and add sparkles of interest.

I really love this week’s FMS sketch and am going to make a series of cards with it to showcase how you can use sketches to make designing cards both fast and fun! Tune in tomorrow for another take on Sketch 628!

Products used in today’s design:
Berry Burst, Melon Mambo, Basic White cardstock
Flowering Zinnias, Berry Burst & Old Olive glimmer DSP
Everyday Details, Everyday Essentials, Deckled Rectangles dies
Happy Little Things stamps
Shiny sequins
Dimensionals
Adhesives


All ads on this site are posted by WordPress.  Song Sparrow Papercrafts is not responsible for ad content.
Fun Folds · Luv 2 Stamp Artisan Design Team

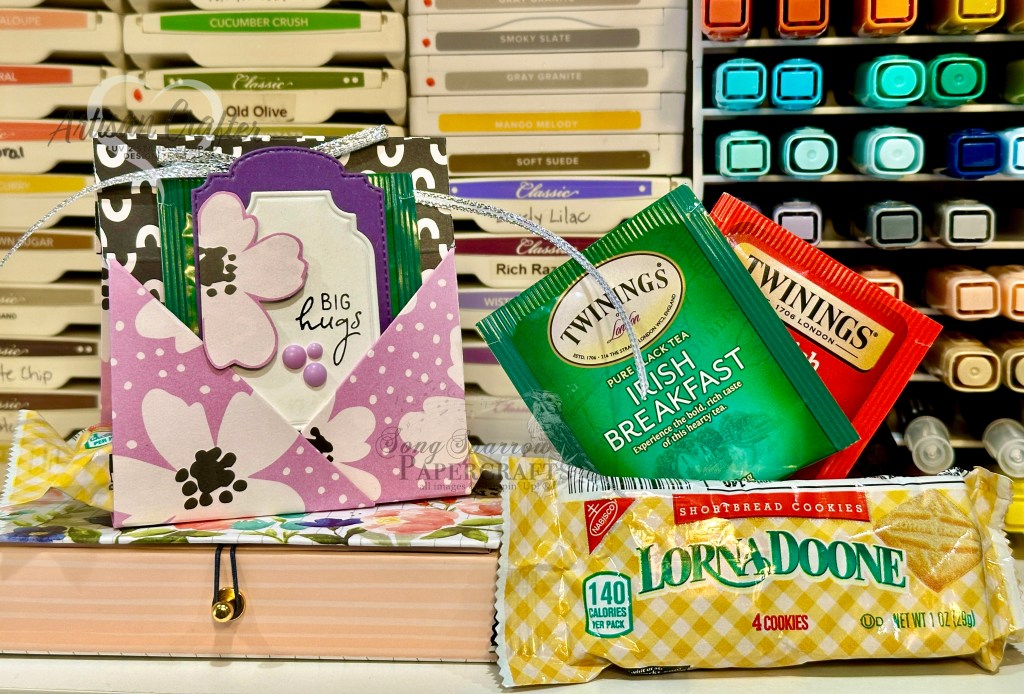
Big Hugs Giftie

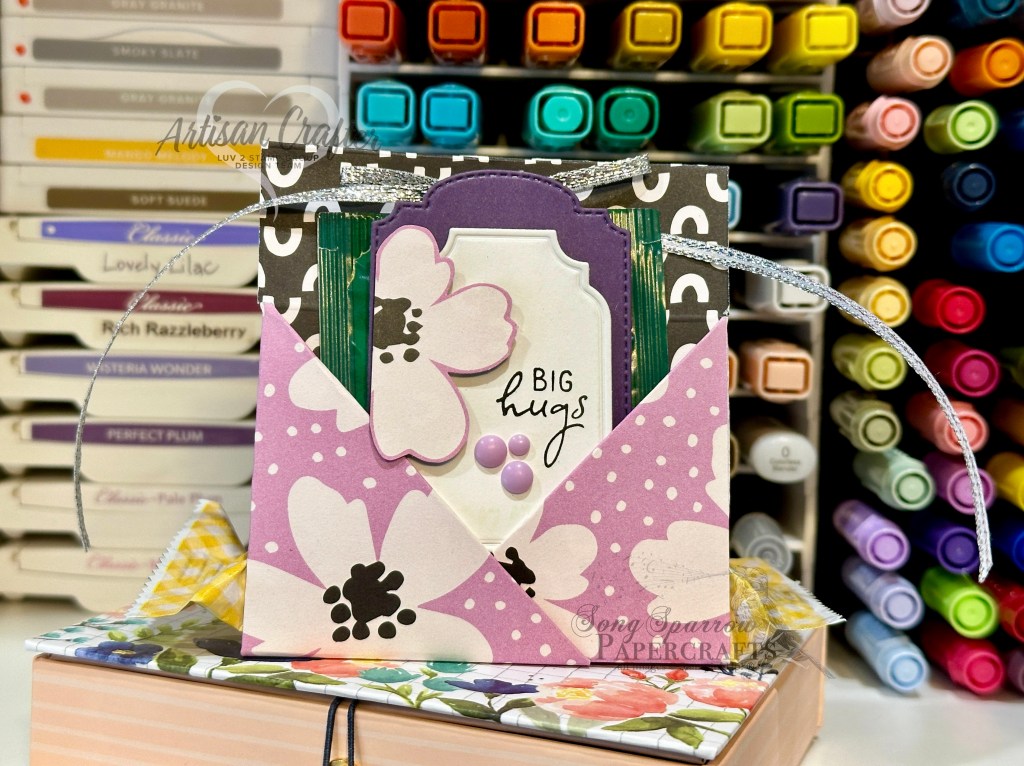
Our monthly Luv 2 Stamp Team challenge is using designer series paper and to include at least one 3D project in the mix. I decided to make a fun treat holder for my 3D project since I had just recently made a whole slew of this design for a craft fair.

What I love about this particular fun fold is that you can adapt it to numerous occasions based on what you stuff in all of the treat holder slots. For today’s design, I chose to focus more on afternoon tea time. But I’ve also used these little gifties to feature get well items, like a package of tissues, some tea and honey, and vitamin mixes. There’s really no limit to how you can tailor them to any occasion.

For today’s treat holder, I used a sheet of the Delightfully Eclectic designer paper. The decorative insert has a base of Gorgeous Grape diecut using the Thoughtful Expressions dies. The sentiment from Perennial Postage is stamped on white and then diecut using the All That dies. I cut a flower from the DSP to tie everything together. I hope to post a tutorial video tomorrow (cross your fingers) and will also share the PDF tutorial.

Products used:
Gorgeous Grape, Basic White cardstock
Delightfully Eclectic DSP
Perennial Postage stamps
Thoughtful Expressions, All That dies
Rainbow dots
Silver trim
Dimensionals
Adhesives

All ads on this site are posted by WordPress.  Song Sparrow Papercrafts is not responsible for ad content.
Luv 2 Stamp Artisan Design Team

Thanks in the Air

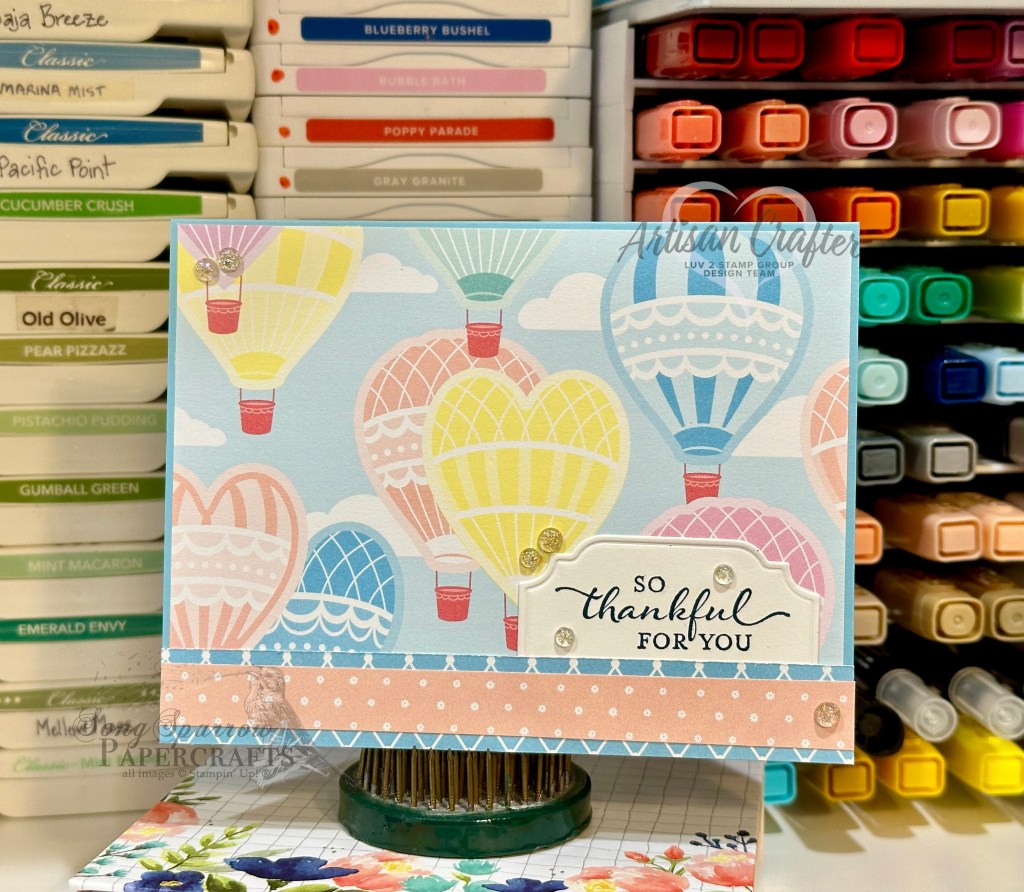
I’m thoroughly enjoying our Luv 2 Stamp Team Challenge this month to use all of that beautiful designer series paper we have in our stash. It’s really helped me look for unique pattern pairings and explore new layouts.

When I came across the most recent Freshly Made Sketches Insta post with this week’s layout, I wanted to give it a try with the Lighter Than Air designer paper. This card starts with a base of Balmy Blue. The sheet of balloons from the DSP pack serves as the star of the design. I chose two other coordinating designs from the paper pack for the bottom strip. I really liked having the bottom strip consist of two layers in order to tie together the colors in the balloon pattern. The sentiment from So Sincere is stamped on white cardstock and then diecut using the All That die. I used the iridescent foil gems to draw your eye across the card to the sentiment.

Sometimes your design inspiration starts with a sketch and others it starts with product. Either way, make something beautiful and share it with others! There’s just nothing like a handmade smile.

Products used:
Balmy Blue, Basic White cardstock
Lighter Than Air DSP
So Sincere stamps
Iridescent foil gems
Adhesives

All ads on this site are posted by WordPress.  Song Sparrow Papercrafts is not responsible for ad content.
Luv 2 Stamp Artisan Design Team

All About the Stripes

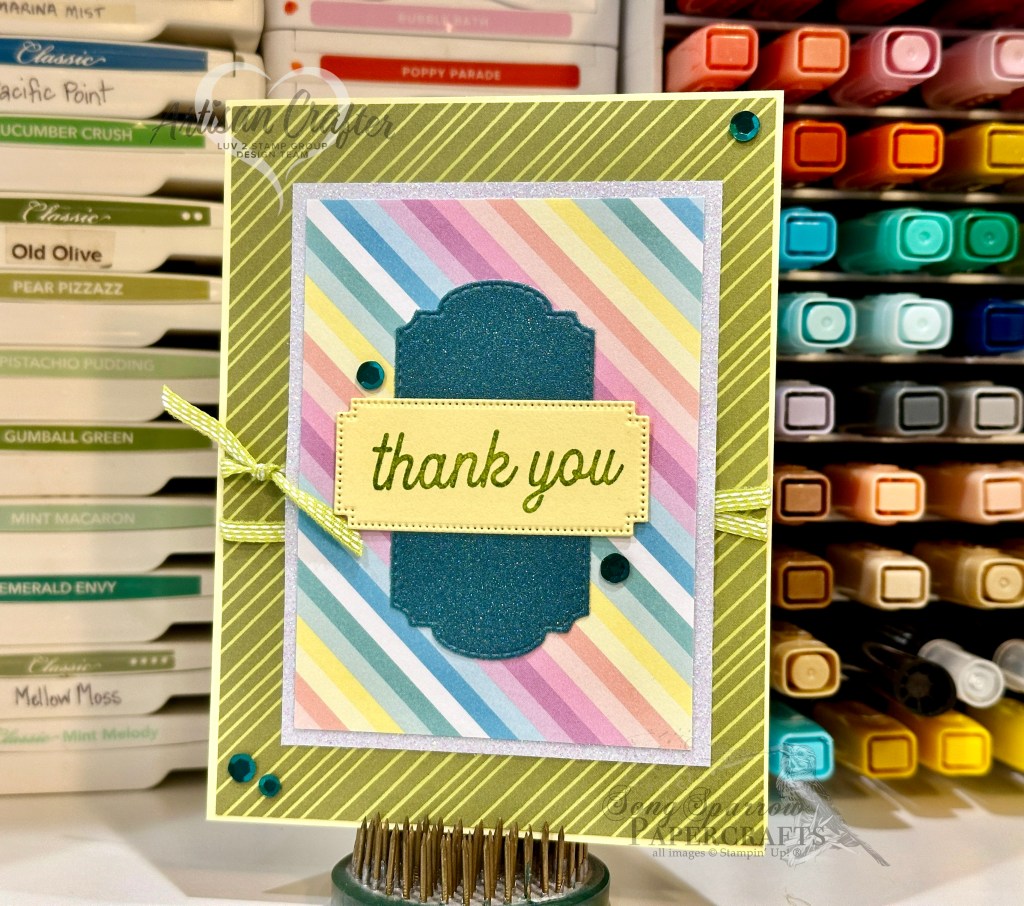
Our monthly Luv 2 Stamp Team challenge is to use all of the designer series paper that we’re collecting … uh, storing. *wink wink* In all seriousness, I do sometimes find it hard to bring myself to cut into a sheet of designer paper, particularly when I’m down to the last sheet of a favorite pattern. But what better way to spread kindness than to share it with a beautiful card?!

I know I’ve said this several times this week, but I just love the new Flowering Zinnias designer paper. As I was strolling through this paper pack for other designs, I made note of all of the lovely neutral patterns on the backsides of the floral sheets. Several patterns caught my eye and really got the ol’ idea wheel turning. When I pulled the green cross-stripe pattern, I remembered a similar pattern in the Lighter Than Air paper pack and I just knew that I had to try the two patterns together.

This card begins with a base of Lemon Lolly cardstock, which does an excellent job of highlighting the narrow striping in the Flowering Zinnias sheet, as well as pairing beautifully with the pastels in the Lighter Than Air sheet. To give a little eye relief between the two striped patterns, I matted the Lighter Than Air sheet with white glimmer paper. While the Lemon Lime Twist ribbon coordinates perfectly with both striped pattern sheets, it also further adds to the pattern relief in between. I loved the look of dark contrast between the paler patterns and the shaped mat behind the sentiment. This mat is diecut from Pretty Peacock glimmer paper using the Thoughtful Expressions dies. The sentiment from Trusty Tools is stamped on Lemon Lolly and then diecut using the Autumn Leaves dies. Pretty Peacock sequins draw the eye across the card front and help unify the design.

I think my favorite thing about our group challenge this month is the simple reminder that our craft supplies are meant to be shared! So let’s find all the ways that we can showcase the products that we love and spread the love with our friends and family!

Products used:
Lemon Lolly cardstock
Flowering Zinnias, glimmer DSP
Trusty Tools stamps
Thoughtful Expressions, Autumn Leaves dies
Sequins trio
Lemon Lime Twist ribbon duo
Adhesives

All ads on this site are posted by WordPress.  Song Sparrow Papercrafts is not responsible for ad content.
Luv 2 Stamp Artisan Design Team

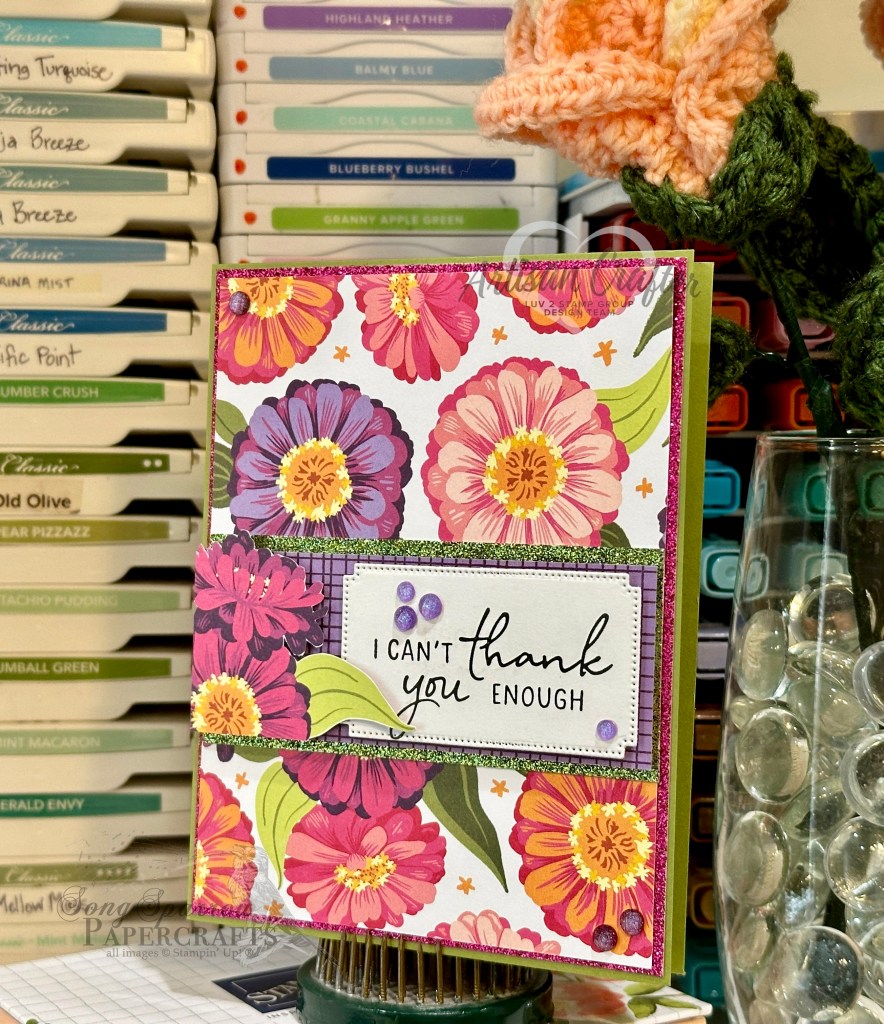
Thank You Zinnias

Our monthly Luv 2 Stamp Team challenge is using our current designer series papers. If you struggle with this too, I encourage you to play along with us as we design cards that prominently feature some of our favorite designer series papers.

I just love the new Flowering Zinnias designer paper. For today’s card, I intentionally chose a pattern that would pair perfectly with the new glimmer specialty papers. What better way to have your designer paper shine than to mat it with gorgeous, sparkly paper!

We start with a base of Old Olive cardstock. The lovely zinnia patterned sheet is matted with Berry Burst glimmer paper. To create the perfect backdrop for the sentiment, I chose to mat the purple grid pattern from the Flowering Zinnias pack with a piece of Old Olive glimmer paper. The sentiment panel is white cardstock that has been diecut using the Autumn Leaves die. I used the expansion masking technique to make a longer shape from this die. The sentiment is from the Perennial Postage stamp set. To punch up the zinnia theme, I fussy cut a zinnia from the patterned sheet. Both the sentiment panel and zinnia element are popped up on dimensionals to ensure that they stand out against the beautifully busy background. The fine shimmer gems are placed so that the eye moves from corner to corner across the design.

The beauty of designer series paper is being able to share it with others. So let’s cut it up and make beautiful things to share!

Products used:
Basic White, Old Olive cardstock
Flowering Zinnias, glimmer DSP
Perennial Postage stamps
Autumn Leaves dies
Fine shimmer gems
Dimensionals
Adhesives

All ads on this site are posted by WordPress.  Song Sparrow Papercrafts is not responsible for ad content.
Luv 2 Stamp Artisan Design Team

Field of Thanks

Our monthly Luv 2 Stamp Team challenge is to use all of our beautiful DSP — love it, chop it! As soon as I saw the beautiful Perennial Lavender designer series paper in the current mini catalog, it went in my cart. It’s just stunning in every possible way. It works well standing alone and pairs stunningly with the other products in the Perennial Lavender Suite.

For today’s card design, I opted to let the beautiful Perennial Lavender designer paper stand on its own. And I borrowed the corner fold-down technique from upline Patty Bennett to add a little interest and allow both sides of this gorgeous paper be able to shine on one design. A sheet of Blackberry Bliss cardstock serves as the base for this lovely card. I chose to mat the sheet of designer paper with a sheet of Pretty Peacock soft shimmer paper for a little added sparkle, particularly in the exposed corner. I thought the exposed corner was the perfect place to feature a paper butterfly from the Perennial Lavender Suite and help tease forward the little butterflies from the designer paper. The sentiment is stamped on white cardstock to coordinate with the white paper butterfly and then diecut using the Thoughtful Expressions dies. The Pretty Peacock & gold metallic ribbon provides the perfect backdrop for the sentiment and, along with the fine shimmer gems, brings sparkle to the bottom of the design, allowing the eye to pass easily diagonally across the card.

If you love beautiful cardstock as much as I do and also have a hard time cutting it, try finding layouts that allow the designer paper to take center stage. It makes using it the highlight of your crafting time!

Products used:
Blackberry Bliss, Basic White cardstock
Perennial Lavender, Soft shimmer DSP
Botanical Leaves stamps
Thoughtful Expressions dies
Paper butterflies
Fine shimmer gems
Pretty Peacock & gold metallic ribbon
Dimensionals
Adhesives

All ads on this site are posted by WordPress.  Song Sparrow Papercrafts is not responsible for ad content.
Luv 2 Stamp Artisan Design Team

Beautiful Thanks

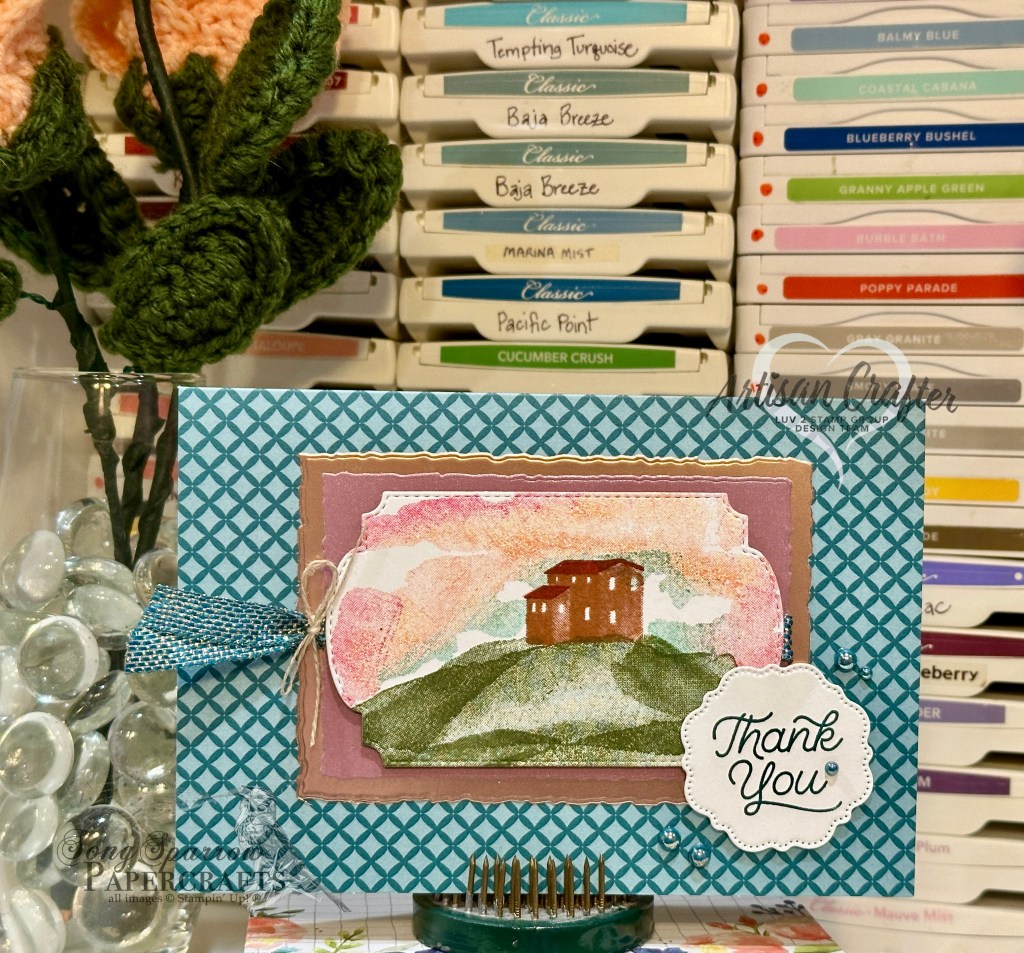
While I’ve been away tending to my family, I’ve had many hours to sit and gather inspiration for some of my newer stamp sets. The Hills of Tuscany set is one I was drawn to in the new mini catalog, but once I had it in hand, I felt stumped. Do you ever have stamp sets like that? You love them when you see them but then you find yourself a little intimidated by them once they’re in your stash? One of the things I love about our Stampin’ Up! crafting community is the number of forums from where we can draw inspiration. From Pinterest to Facebook to Instagram to Demonstrator Planning Place (if you’re a demo), there are so many incredibly talented stampers out there!

For today’s card design, I drew from several talented stampers who used the Hills of Tuscany stamp set to create beautiful watercolor-looking scenes. Here, I wanted to create a Tuscan sunset with a chateau in the distance. I used the larger and smaller hillside stamps to create the hill on which the chateau sits. To create the sunset, I used the cloud-looking stamp and covered it with a number of different color inks before stamping it. While not perfect, I do love the look that I was able to achieve here. I experimented with stamping it multiple times but found that using multiple colors and stamping once worked better. To pull the colors of sunset from the image panel, I matted it with rose gold and Moody Mauve luster paper. I used Pretty Peacock for the ribbon, blooming pearls, and sentiment to pull everything together with the Sweet Thoughts Memories & More card base.

Products used:
Basic White cardstock
Rose Gold, Moody Mauve SP
Sweet Thoughts Memories & More
Hills of Tuscany, Circle Sayings stamps
Deckled Rectangles, Thoughtful Expressions dies
Blooming pearls
Pretty Peacock & gold metallic ribbon, linen thread
Dimensionals
Adhesives

All ads on this site are posted by WordPress.  Song Sparrow Papercrafts is not responsible for ad content.

Terrific Tuesdays

You’re Amazing

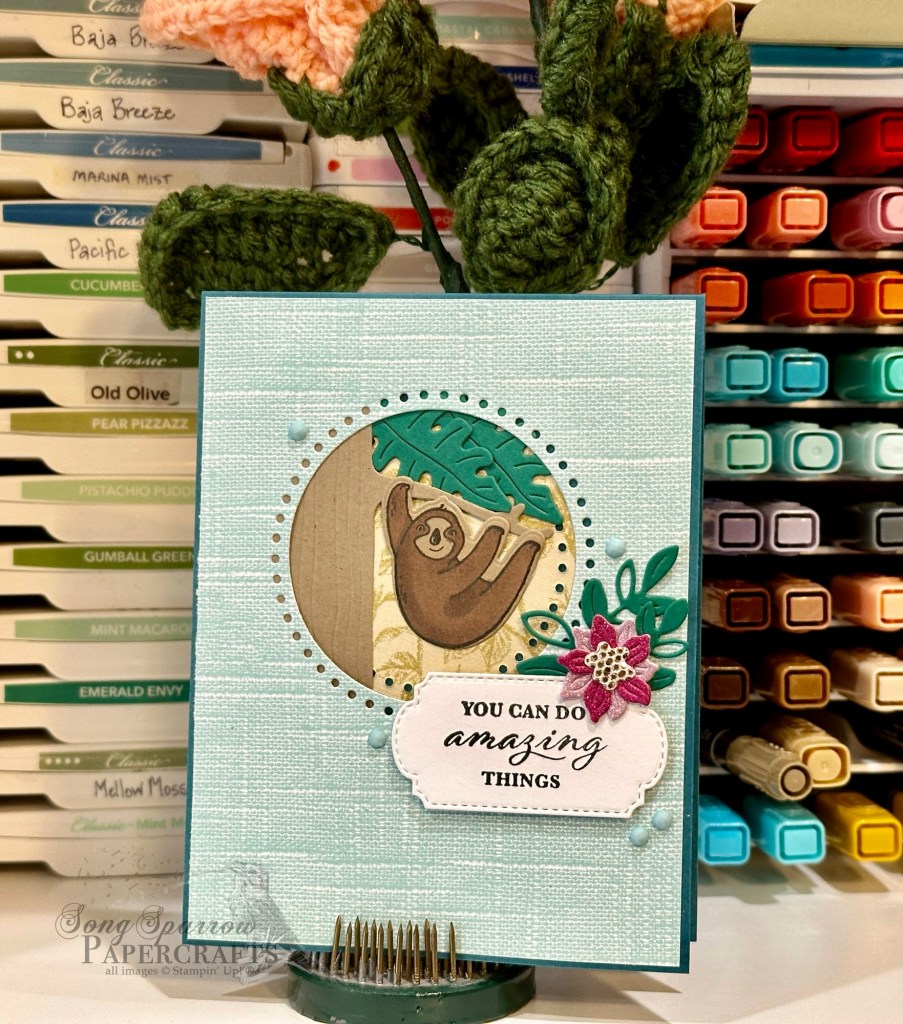
Today we’re continuing to look at the Jungle Pals stamps and dies, which are currently available in the Sale-a-Bration catalog through the end of February. I love all of the cute jungle critters in this set, but is there anything cuter than a sloth?!

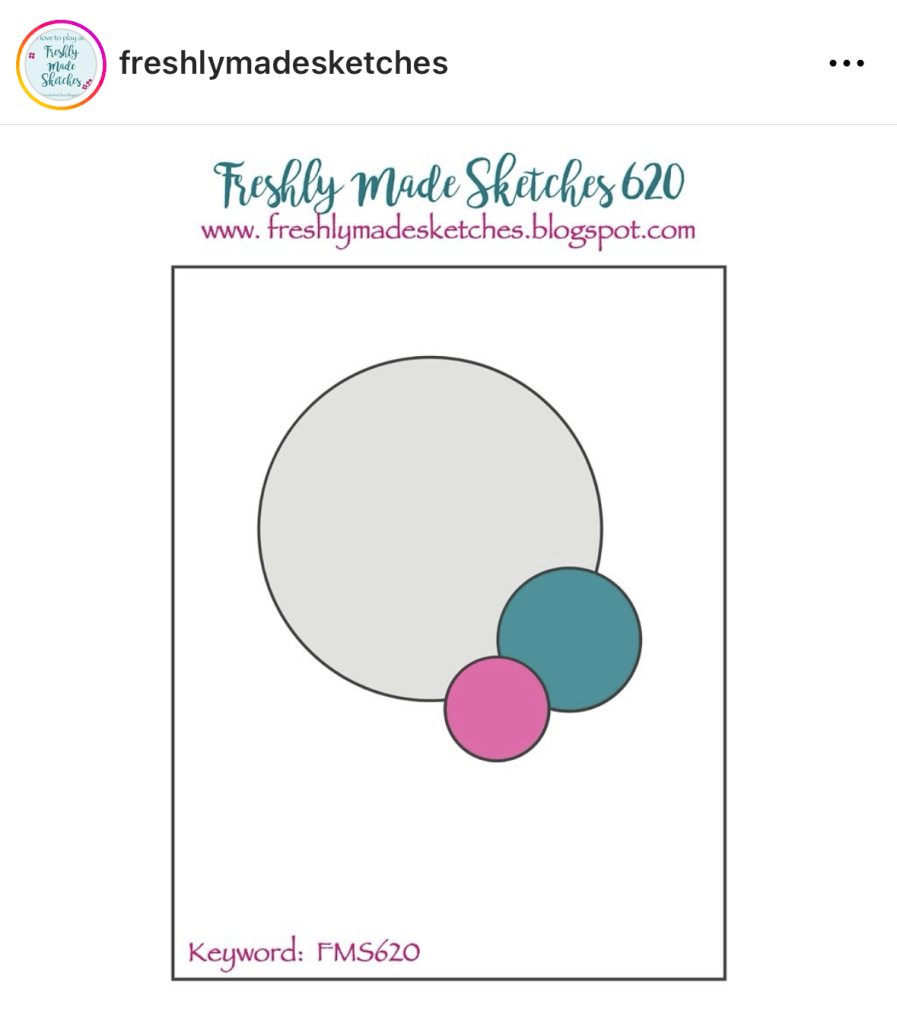
For today’s card, I wanted to create a window design. When I noticed that the backside of a sheet of Softly Stippled designer paper had a jungle leaf pattern on the back, I knew I wanted to incorporate it as the background for my sloth scene in the window. I used Sketch 620 from Freshly Made Sketches for the layout.

We begin with a base of Pretty Peacock. The focal panel base is the Pool Party linen patterned sheet from the Softly Stippled paper pack. I began by choosing my window size and shape and diecutting it from the patterned paper. I chose the Everyday Essentials circle that cut both the larger and smaller portions at one time.

I used the reverse side of the smaller circle with the jungle leaf pattern on it to serve as the base for the window portion. I diecut my tree and sloth from Crumb Cake cardstock using the Jungle Pals dies. The sloth is colored using Stampin’ Blends. The tree leaves are diecut from Shaded Spruce.

The sentiment panel is diecut from white cardstock using the Thoughtful Expressions dies and stamped the sentiment from Wonderful Thoughts in the center. The flowers are diecut from soft shimmer paper and More Dazzle paper using the Jungle Pals dies, which the stems behind are diecut from Shaded Spruce using the Thoughtful Expressions dies. Opaque faceted gems are placed so that your eye naturally flows diagonally across the card.

Products used in today’s design:
Pretty Peacock, Shaded Spruce, Basic White cardstock
Softly Stippled, Melon Mambo fine shimmer, Bubble Bath fine shimmer DSP
Jungle Pals, Wonderful Thoughts stamps
Jungle Pals, Everyday Essentials, Thoughtful Expressions dies
Opaque faceted gems
Dimensionals
Adhesives

All ads on this site are posted by WordPress.  Song Sparrow Papercrafts is not responsible for ad content.