This week, we’re designing around the theme of nature. And I can’t think of a better way to reflect nature than with a mountain scene! The beautiful Grove collections (In the Grove and Grassy Grove) by Stampin’ Up! are perfect for creating beautiful scenic panels like this one.
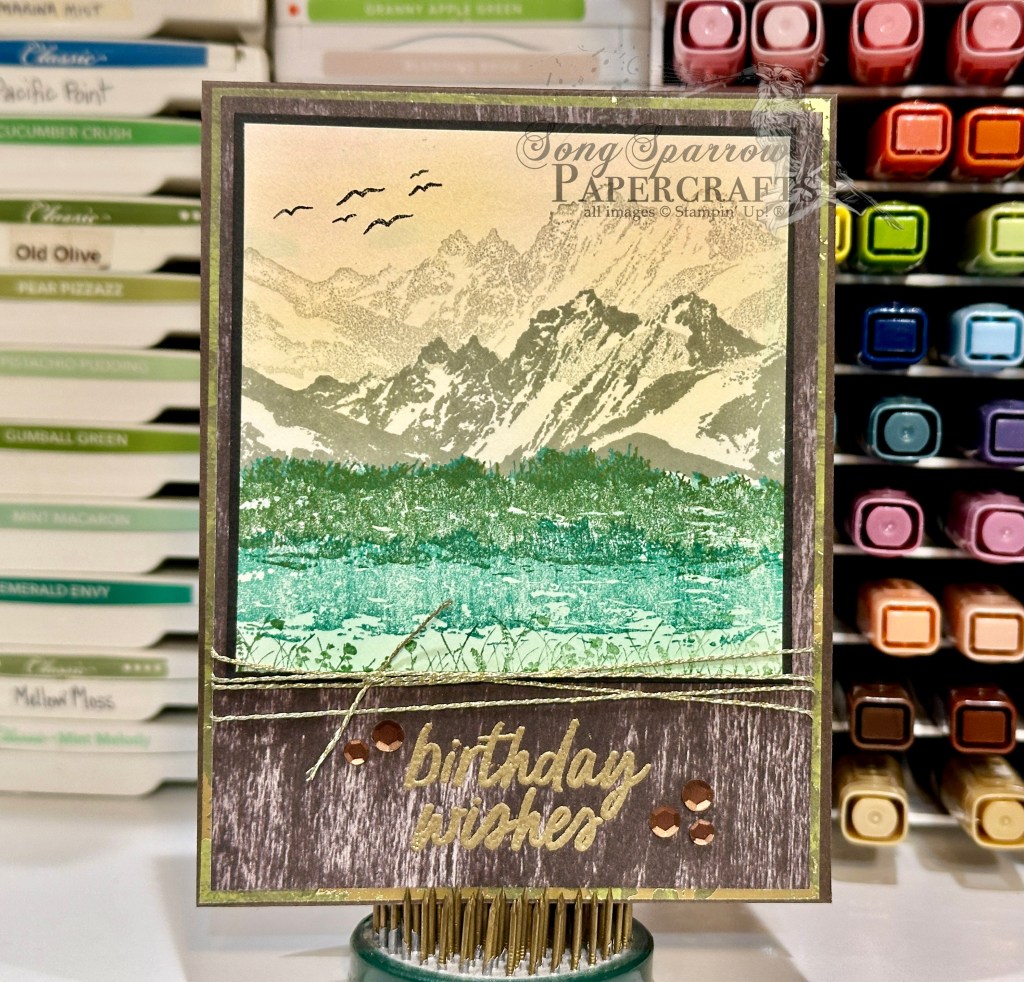
We get started with a base of Early Espresso cardstock. The background panel of the darker woodgrain sheet from the Country Woods paper pack is matted with a sheet of the Old Olive Season of Elegance paper. The sentiment from Simply Said is heat embossed in gold centered underneath the focal panel. The mountain scene is stamped on Very Vanilla cardstock using a combination of gray and green shades. The mountain stamp is from In the Grove, while the grasses are a combination of In the Grove and Grassy Grove stamps. I filled in the shading of the sky and grass with a combination of blending brushes but chose to simply use them as they sat in my storage bin for an even subtler shading effect. I used the birds from the all-too-fun Friendly Seagulls stamp set to add realism to the sky above the mountain range. The scenic panel is mounted on Basic Black cardstock and then affixed to the background panel. I wrapped some gold thread around the panel before affixing it to the card base. A few copper sequins from the neutrals set add a touch of sparkle to draw the eye to the sentiment.
This is one design that didn’t need a single dimensional. And if you’ve followed me for any length of time, you know how rarely that happens! *snicker* This is the perfect design for a quick masculine design and could be suitable for any number of occasions.
I hope you’ll pop in tomorrow to check out an ode to spring!
Product List


 Specialty Designer Series Paper")
 Designer Series Paper")

")
")
")


 Designer Series Paper")
 Designer Series Paper")

 Glimmer Specialty Paper")

")


 Bordered Ribbon")
 Trim Combo Pack")


 Designer Series Paper")
 Specialty Designer Series Paper")
 Glimmer Paper")


 Metallic Ribbon")
 Satin Ribbon")


")


 Specialty Designer Series Paper")

")


 Designer Series Paper")
 Specialty Paper")
 Specialty Designer Series Paper")
")


 Designer Series Paper")
 Designer Series Paper & Sticker Sheet (English)")


 Specialty Paper")
")


 Faux Velvet Ribbon")


")
")


 Woven Ribbon")


