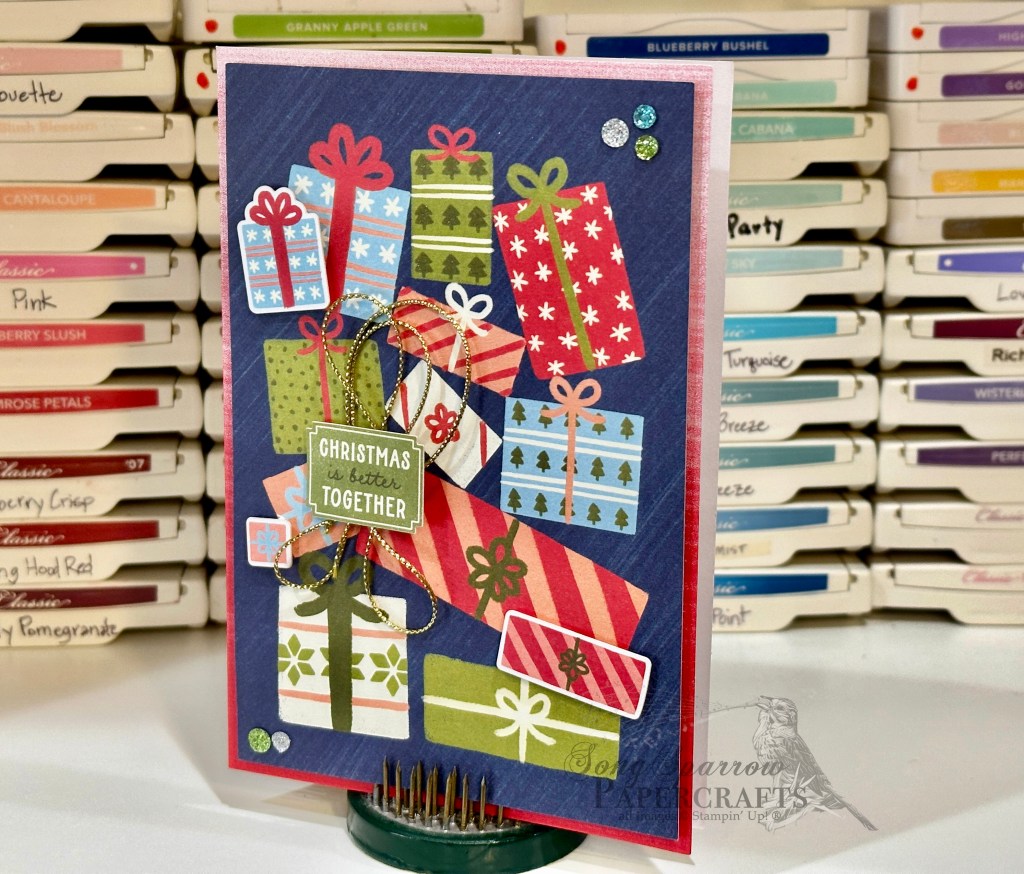
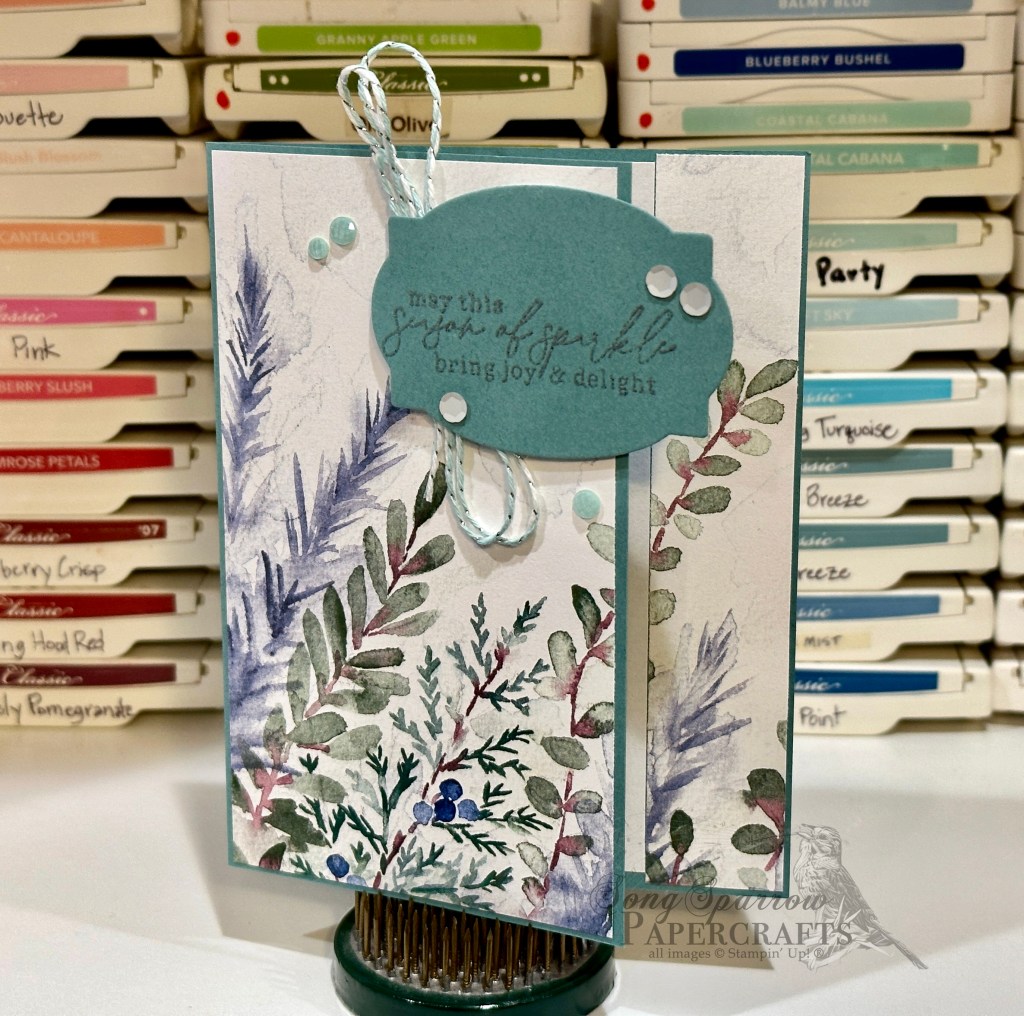
We’re wrapping up our week of winter-themed designs today with a simple fun fold card. This peek-through design uses the Stampin’ Up! Online Exclusive bundle called Sophisticated Sled paired with the Winter Meadow patterned paper. I have to give credit to Create With Christy for the idea to transform the sled into a window pane. Absolutely brilliant! So let’s dive in and take a closer look at today’s card.
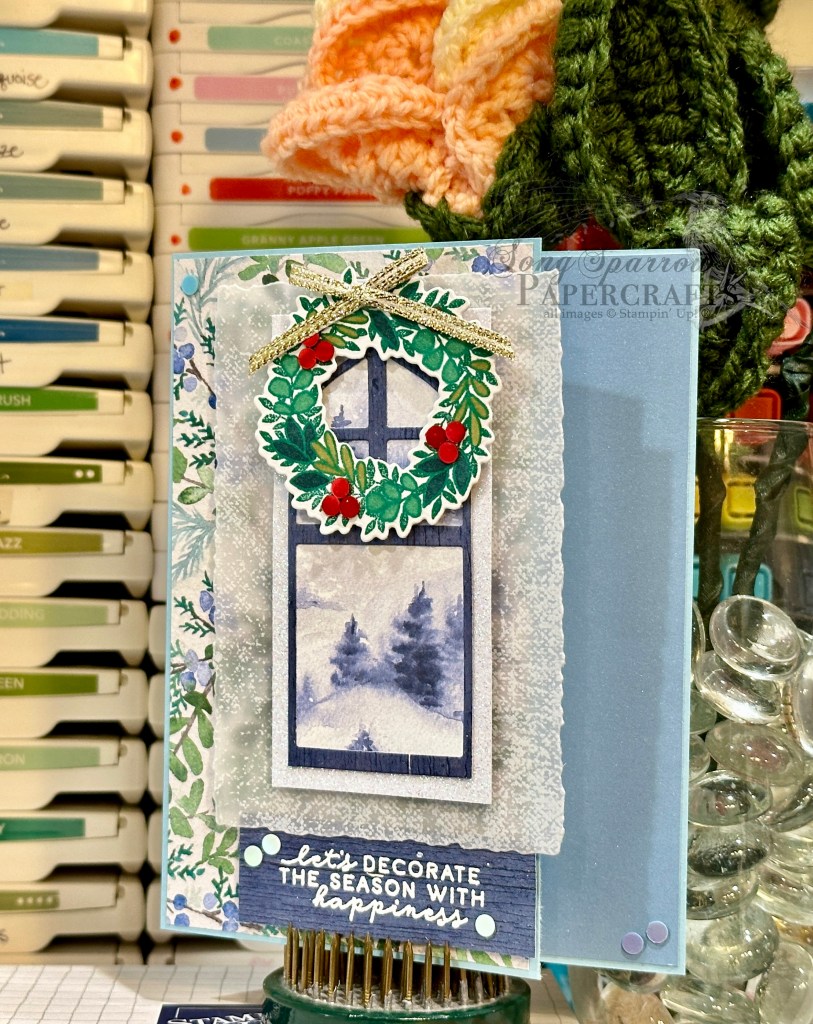
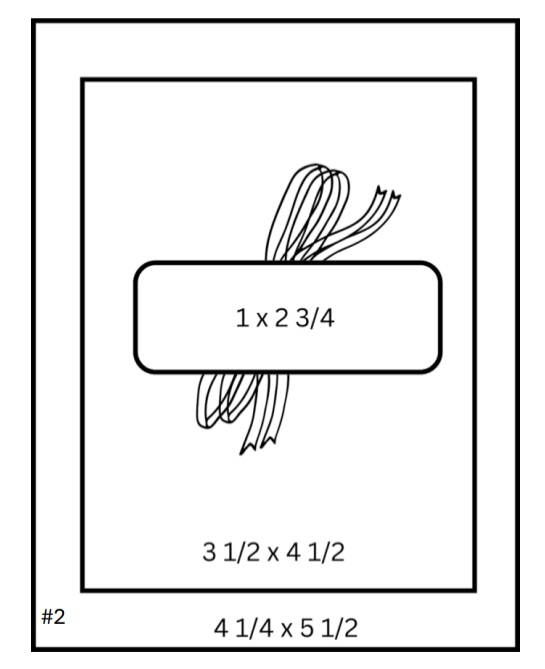
We get started with a base of Balmy Blue cardstock. This is a standard sized card base. To create our peek-through panel, we cut a one-inch section from the card front to allow our inside message panel to “peek through” to the card front. A sheet of berry and greenery patterned paper serves as our base panel on the card front, while a strip of Boho Blue luster paper peeks through from the inside panel. Our focal panel sits on a base of snowy vellum from the Graceful Greenery vellum pack that has been diecut using the Deckled Rectangles dies. Our window pane is built from three different papers. The molding is a sheet of white glimmer specialty paper. The paning is blue woodgrain paper from the Country Woods paper pack that has been diecut using the sled die in the Sophisticated Sled die set. The bottom rungs have been removed to give it a truer window pane look. The window pane is mounted over a snowy pattern from the Winter Meadow paper pack, which has been cut to size. These three layers are adhered together and then adhered to the vellum panel with dimensionals. Our decorative wreath from Sophisticated Sled is stamped on white cardstock, colored with Stampin’ Blends, and then diecut using the coordinating die. A few red iridescent discs add some sparkle to the berries on our wreath. A ribbon of gold twine adds the finishing touch. The wreath is adhered to the top of our window pane with dimensionals. The sentiment from Sophisticated Sled is heat embossed in white on a piece of blue woodgrain from the Country Woods paper pack. The sentiment is adhered to the card front with dimensionals and our focal panel is then adhered over it using an additional layer of dimensionals. We finish things off with a scattering of iridescent discs across the card front to help draw the eye across the design.
Next week, we’re heading to the garden. I hope you’ll drop in and check it out!
Products used in today’s card:
Product List

 Designer Series Paper")
 Designer Series Paper")
 Luster Specialty Paper")
 Glimmer Specialty Paper")
 Specialty Designer Series Paper")
")


 Trim Combo Pack")


 Specialty Designer Series Paper")

")


")
")