
Welcome to a new week, friends! I don’t know about you, but the weekend went by in a blur. And now here we are at the beginning of a brand new school year. It’s a big transition year for us as the kiddo starts his freshman year of high school. When they tell you time flies, they are not kidding!
This week brings about a new design theme as we take things outside. Sometimes I like having a broad, open-ended theme because it leaves a lot of possibilities for inspiration. And today’s card was inspired by the Hot Foil Craft Class. I really loved this card layout and knew it would easily adapt to fit this week’s theme. I loved having the opportunity to play with the new hot foil goodies in my stash this weekend, and today’s design uses the Classic Greetings and Butterfly Flight bundles.
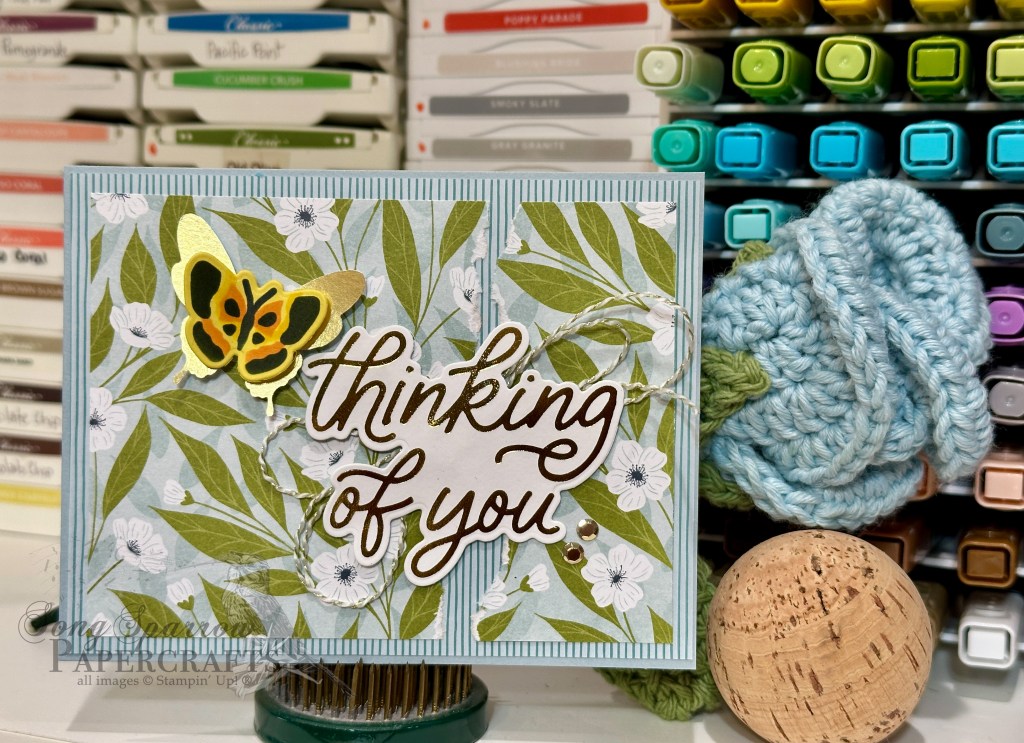
So we get started with a base of Cloud Cover cardstock. The striped pattern from the Everyday Essentials paper pack serves as our backdrop. I chose the sheet of white florals from the Lovely Blossoms paper pack that provided the perfect amount of blue contrast against the striped backdrop. This panel is torn to leave a rough-edged section on the right-hand side. Because I had a particular recipient in mind when making this card, I chose the thinking of you sentiment from the Classic Greetings sentiment set and hot foiled it in gold on white cardstock and then cut it out with the coordinating die. It’s adhered over a double bow of gold & white baker’s twine right over our fissure section. The double-layered butterfly is a combination of a gold gilded wing butterfly and a small butterfly created with the Butterfly Flight masks. I used a sheet of Crushed Curry as the base and then blended a combination of Crushed Curry, Timid Tiger, and Secret Sea inks to create the smaller butterfly. We finish things off with a few metallic gems to give a nice diagonal of gold elements.
I just love the little pop of contrast the butterfly provides. It’s the perfect eye-catcher for the sentiment. This layout is one that can truly be used for a whole host of color and pattern combinations, as well as a myriad of occasions.
Tomorrow’s design might bring in some of our other senses as we continue our trek in the great outdoors. I hope you’ll drop by!
Product List![Cloud Cover 8 1/2" X 11" Cardstock [ 165621 ]](https://assets1.tamsnetwork.com/images/EC042017NF/165621s.jpg "Cloud Cover 8 1/2\" X 11\" Cardstock [ 165621 ]")
![Everyday Essentials Mix & Match 12" X 12" (30.5 X 30.5 Cm) Designer Series Paper [ 167702 ]](https://assets1.tamsnetwork.com/images/EC042017NF/167702s.jpg "Everyday Essentials Mix & Match 12\" X 12\" (30.5 X 30.5 Cm) Designer Series Paper [ 167702 ]")
![Lovely Blossoms 12" X 12" (30.5 X 30.5 Cm) Designer Series Paper [ 167168 ]](https://assets1.tamsnetwork.com/images/EC042017NF/167168s.jpg "Lovely Blossoms 12\" X 12\" (30.5 X 30.5 Cm) Designer Series Paper [ 167168 ]")
![Butterfly Flight Bundle [ 170065 ]](https://assets1.tamsnetwork.com/images/EC042017NF/170065s.jpg "Butterfly Flight Bundle [ 170065 ]")
![Classic Greetings Hot Foil Dies [ 170042 ]](https://assets1.tamsnetwork.com/images/EC042017NF/170042s.jpg "Classic Greetings Hot Foil Dies [ 170042 ]")
![Gold Stampin' Hot Foil Rolls [ 170066 ]](https://assets1.tamsnetwork.com/images/EC042017NF/170066s.jpg "Gold Stampin' Hot Foil Rolls [ 170066 ]")
![Secret Sea Classic Stampin' Pad [ 165285 ]](https://assets1.tamsnetwork.com/images/EC042017NF/165285s.jpg "Secret Sea Classic Stampin' Pad [ 165285 ]")
![Timid Tiger Classic Stampin' Pad [ 165278 ]](https://assets1.tamsnetwork.com/images/EC042017NF/165278s.jpg "Timid Tiger Classic Stampin' Pad [ 165278 ]")
![Crushed Curry Classic Stampin' Pad [ 147087 ]](https://assets1.tamsnetwork.com/images/EC042017NF/147087s.jpg "Crushed Curry Classic Stampin' Pad [ 147087 ]")
![Small Blending Brushes [ 160518 ]](https://assets1.tamsnetwork.com/images/EC042017NF/160518s.jpg "Small Blending Brushes [ 160518 ]")
![Gilded Wings Accents [ 169953 ]](https://assets1.tamsnetwork.com/images/EC042017NF/169953s.jpg "Gilded Wings Accents [ 169953 ]")
![Black & White & Gold Baker's Twine [ 166005 ]](https://assets1.tamsnetwork.com/images/EC042017NF/166005s.jpg "Black & White & Gold Baker's Twine [ 166005 ]")
![Adhesive Backed Metallic Gems [ 163780 ]](https://assets1.tamsnetwork.com/images/EC042017NF/163780s.jpg "Adhesive Backed Metallic Gems [ 163780 ]")
![Mini Stampin' Dimensionals [ 144108 ]](https://assets1.tamsnetwork.com/images/EC042017NF/144108s.jpg "Mini Stampin' Dimensionals [ 144108 ]")
![Stampin' Hot Foil System Na & Craft Class [ 170009 ]](https://assets1.tamsnetwork.com/images/EC042017NF/170009s.jpg "Stampin' Hot Foil System Na & Craft Class [ 170009 ]")
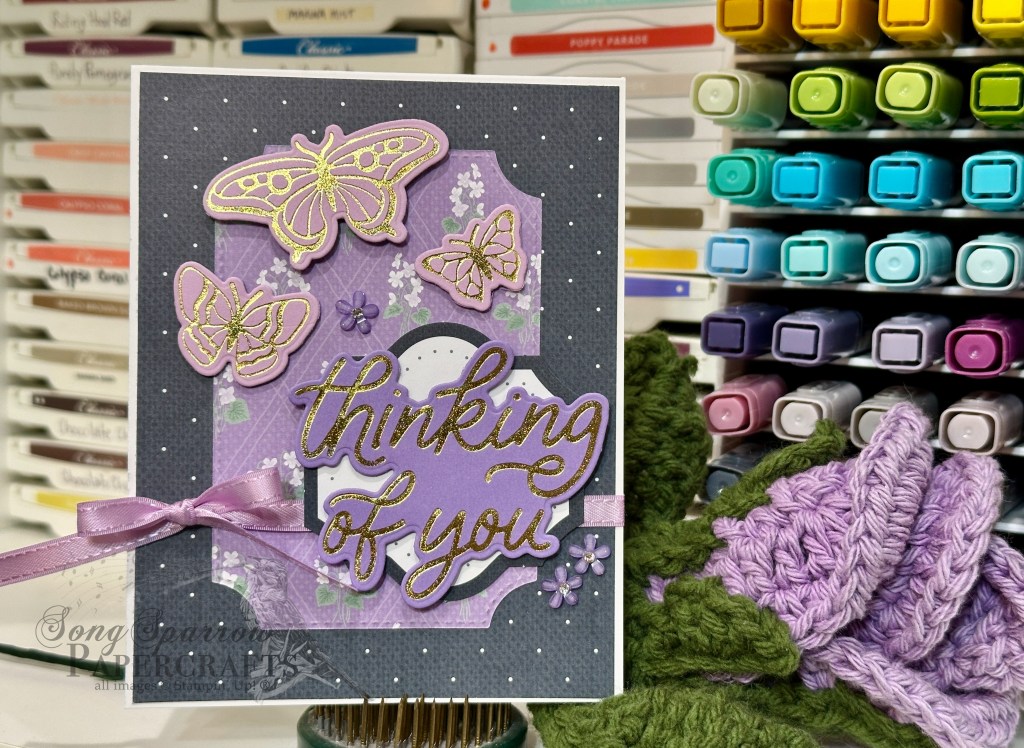
![Basic White 8 1/2" X 11" Cardstock [ 166780 ]](https://assets1.tamsnetwork.com/images/EC042017NF/166780s.jpg "Basic White 8 1/2\" X 11\" Cardstock [ 166780 ]")
![Fresh Freesia 8 1/2" X 11" Cardstock [ 155613 ]](https://assets1.tamsnetwork.com/images/EC042017NF/155613s.jpg "Fresh Freesia 8 1/2\" X 11\" Cardstock [ 155613 ]")
![Highland Heather 8-1/2" X 11" Cardstock [ 146986 ]](https://assets1.tamsnetwork.com/images/EC042017NF/146986s.jpg "Highland Heather 8-1/2\" X 11\" Cardstock [ 146986 ]")
![Violet Dreams 12" X 12" (30.5 X 30.5 Cm) Specialty Designer Series Paper [ 168186 ]](https://assets1.tamsnetwork.com/images/EC042017NF/168186s.jpg "Violet Dreams 12\" X 12\" (30.5 X 30.5 Cm) Specialty Designer Series Paper [ 168186 ]")
![Branching Out Dies [ 165775 ]](https://assets1.tamsnetwork.com/images/EC042017NF/165775s.jpg "Branching Out Dies [ 165775 ]")
![Butterfly Flight Hot Foil Dies [ 170045 ]](https://assets1.tamsnetwork.com/images/EC042017NF/170045s.jpg "Butterfly Flight Hot Foil Dies [ 170045 ]")
![Fresh Freesia 1/4" (6.4 Mm) Satin Ribbon [ 168199 ]](https://assets1.tamsnetwork.com/images/EC042017NF/168199s.jpg "Fresh Freesia 1/4\" (6.4 Mm) Satin Ribbon [ 168199 ]")
![Adhesive Backed Blooms [ 168198 ]](https://assets1.tamsnetwork.com/images/EC042017NF/168198s.jpg "Adhesive Backed Blooms [ 168198 ]")
![Stampin' Dimensionals [ 104430 ]](https://assets1.tamsnetwork.com/images/EC042017NF/104430s.jpg "Stampin' Dimensionals [ 104430 ]")

