Howdy, everyone, and happy Saturday! We are officially to the weekend. We’re counting down the last week of summer break over here, so there are lots of things on the to-do list to be sure the kiddo is ready for his first week of 8th grade! What about you? What will your weekend plans have you doing?
Here in the craft room, we’re wrapping up our full week of fun fold designs. And today, I’m giving you a sneak peek of a full suite of products that will be available in the Holiday Mini catalog on September 3rd. We’re using the Peaceful Garden Suite to create a 4-Panel Accordion Fold. Demos were able to purchase this suite early as part of the special Creativity Now event in June, and I’ve saved using it until we got closer to the official release date for customers.
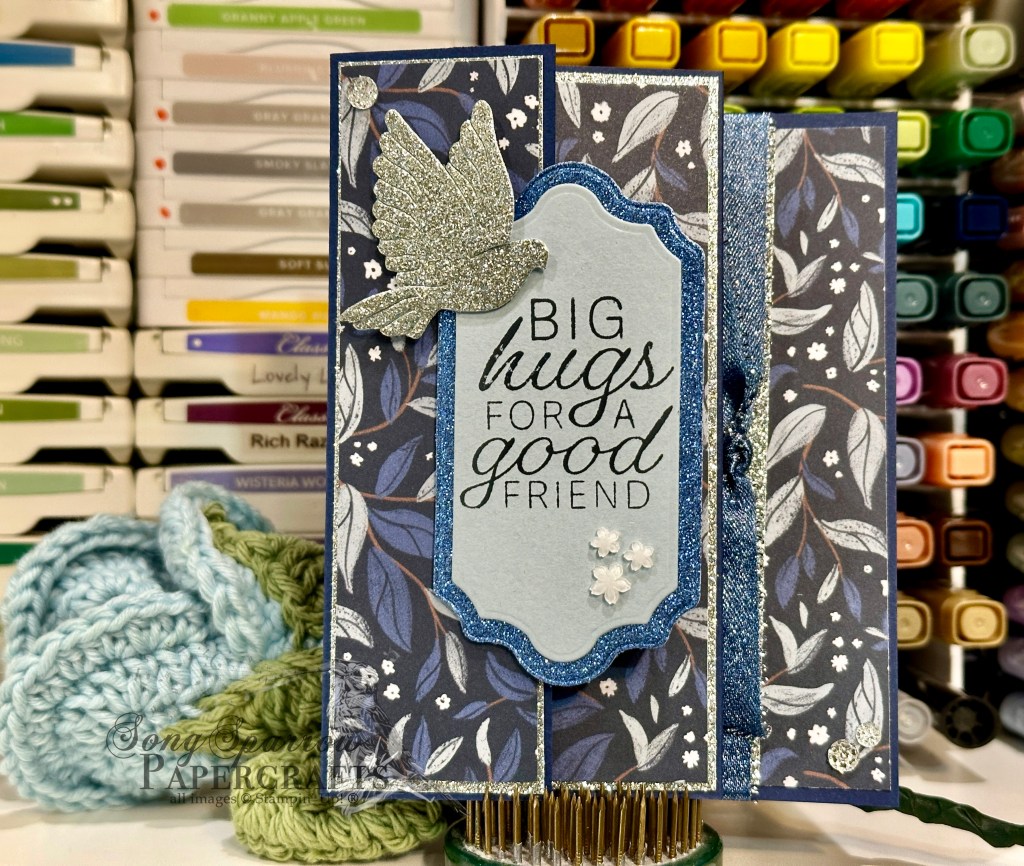
We get started by cutting down a 12×12 piece of Night of Navy cardstock and then score it to create the accordion base. I chose the leaf and vine patterned sheet from the Peaceful Garden paper pack as my focal paper and then matted these strips with the coordinating silver glimmer paper. The sentiment panel is created using the Peace on Earth stamp & die bundle included in the Peaceful Garden suite. I finished things off with a few Hues of Blue flowers and Misty Moonlight trim from the suite, along with a few drusy embellishments.
I dressed this fun fold up a bit by adding mats for each of the patterned paper panels. When you’re using heavier glimmer paper, like the sheets from Peaceful Garden, this will add some extra weight to your card. You could simplify this by omitting the extra mats or using lighter weight glimmer paper.
How would you like to give the 4-panel accordion fold a try? You can download the free PDF tutorial here.
It’s been a lot of fun learning some new fun folds this week. And there are quite a few that will be going into my more regular rotation. Do you have a favorite from this week’s fun fold series? Tell me in the comments!
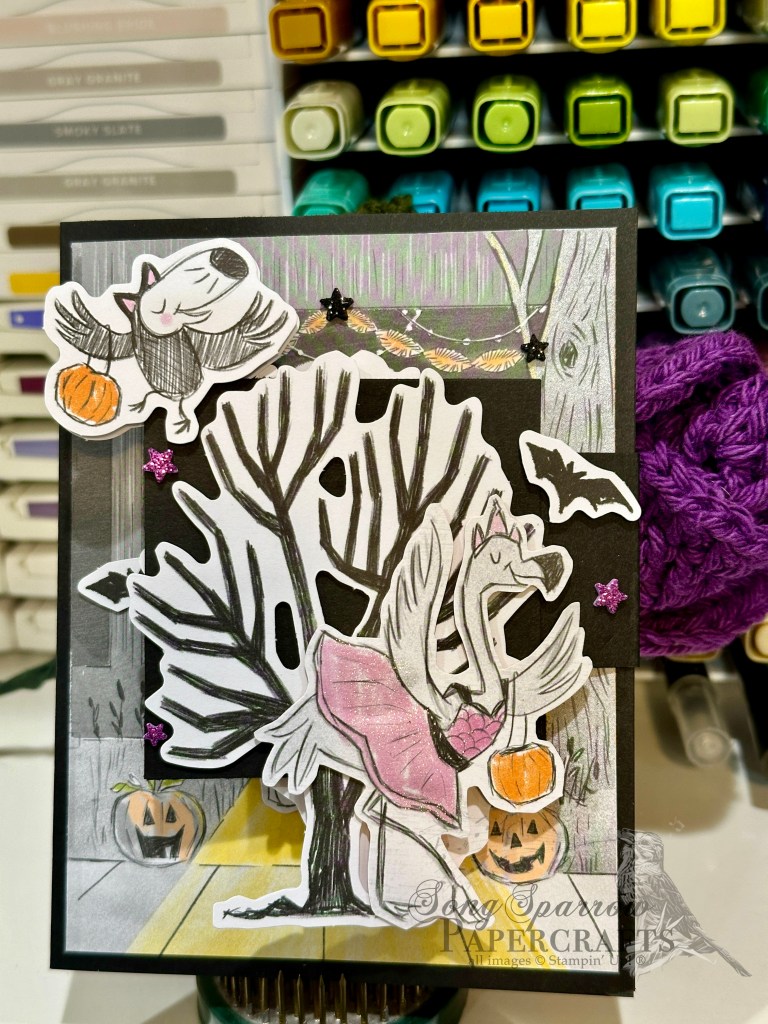
Next week, we’re going to be exploring a super fun stamp bundle called Sweet Jar that has a new coordinating holiday stamp set called Jar of Joy. I hope you’ll pop in and see all of the fun things we can do with these cute stamps & punch!
Products used in today’s card:
Night of Navy, Cloud Cover, Basic White cardstock
Peaceful Garden, Peaceful Garden glimmer DSP (coming in September!)
Peace on Earth stamp & die bundle (coming in September!)
Misty Moonlight & silver edged ribbon (coming in September!)
Hues of blue flowers (coming in September!), Drusy embellishments
Dimensionals
Adhesives
![Basic Black 12" X 12" (30.5 X 30.5 Cm) Cardstock [ 166786 ]](https://assets1.tamsnetwork.com/images/EC042017NF/166786s.jpg "Basic Black 12\" X 12\" (30.5 X 30.5 Cm) Cardstock [ 166786 ]")
![Spooky Sweet 12" X 12" (30.5 X 30.5 Cm) Specialty Designer Series Paper [ 166191 ]](https://assets1.tamsnetwork.com/images/EC042017NF/166191s.jpg "Spooky Sweet 12\" X 12\" (30.5 X 30.5 Cm) Specialty Designer Series Paper [ 166191 ]")
![Clear Wink Of Stella Glitter Brush [ 141897 ]](https://assets1.tamsnetwork.com/images/EC042017NF/141897s.jpg "Clear Wink Of Stella Glitter Brush [ 141897 ]")
![Shimmer Star Foam Stickers [ 166202 ]](https://assets1.tamsnetwork.com/images/EC042017NF/166202s.jpg "Shimmer Star Foam Stickers [ 166202 ]")
![Mini Glue Dots [ 103683 ]](https://assets1.tamsnetwork.com/images/EC042017NF/103683s.jpg "Mini Glue Dots [ 103683 ]")
![Stampin' Dimensionals [ 104430 ]](https://assets1.tamsnetwork.com/images/EC042017NF/104430s.jpg "Stampin' Dimensionals [ 104430 ]")
![Mini Stampin' Dimensionals [ 144108 ]](https://assets1.tamsnetwork.com/images/EC042017NF/144108s.jpg "Mini Stampin' Dimensionals [ 144108 ]")


![Mossy Meadow 8-1/2" X 11" Cardstock [ 133676 ]](https://assets1.tamsnetwork.com/images/EC042017NF/133676s.jpg "Mossy Meadow 8-1/2\" X 11\" Cardstock [ 133676 ]")
![Cloud Cover 8 1/2" X 11" Cardstock [ 165621 ]](https://assets1.tamsnetwork.com/images/EC042017NF/165621s.jpg "Cloud Cover 8 1/2\" X 11\" Cardstock [ 165621 ]")
![Smoky Slate 8-1/2" X 11" Cardstock [ 131202 ]](https://assets1.tamsnetwork.com/images/EC042017NF/131202s.jpg "Smoky Slate 8-1/2\" X 11\" Cardstock [ 131202 ]")
![Floral Delight 12" X 12" (30.5 X 30.5 Cm) Designer Series Paper [ 164700 ]](https://assets1.tamsnetwork.com/images/EC042017NF/164700s.jpg "Floral Delight 12\" X 12\" (30.5 X 30.5 Cm) Designer Series Paper [ 164700 ]")
![2024–2026 In Color™ Glimmer 12" X 12" (30.5 X 30.5 Cm) Specialty Paper [ 163771 ]](https://assets1.tamsnetwork.com/images/EC042017NF/163771s.jpg "2024–2026 In Color™ Glimmer 12\" X 12\" (30.5 X 30.5 Cm) Specialty Paper [ 163771 ]")
![More Messages Bundle (English) [ 165473 ]](https://assets1.tamsnetwork.com/images/EC042017NF/165473s.jpg "More Messages Bundle (English) [ 165473 ]")
![Smoky Slate Classic Stampin' Pad [ 147113 ]](https://assets1.tamsnetwork.com/images/EC042017NF/147113s.jpg "Smoky Slate Classic Stampin' Pad [ 147113 ]")
![Daffodil Delight 1/8" (3.2 Mm) Satin Ribbon [ 164715 ]](https://assets1.tamsnetwork.com/images/EC042017NF/164715s.jpg "Daffodil Delight 1/8\" (3.2 Mm) Satin Ribbon [ 164715 ]")
![Drusy Adhesive Backed Embellishments [ 164223 ]](https://assets1.tamsnetwork.com/images/EC042017NF/164223s.jpg "Drusy Adhesive Backed Embellishments [ 164223 ]")
![Tear & Tape Adhesive [ 154031 ]](https://assets1.tamsnetwork.com/images/EC042017NF/154031s.jpg "Tear & Tape Adhesive [ 154031 ]")


![Pool Party 8-1/2" X 11" Cardstock [ 122924 ]](https://assets1.tamsnetwork.com/images/EC042017NF/122924s.jpg "Pool Party 8-1/2\" X 11\" Cardstock [ 122924 ]")
![Basic White 8 1/2" X 11" Cardstock [ 166780 ]](https://assets1.tamsnetwork.com/images/EC042017NF/166780s.jpg "Basic White 8 1/2\" X 11\" Cardstock [ 166780 ]")
![Wildflower Birthday 12" X 12" (30.5 X 30.5 Cm) Specialty Designer Series Paper [ 164591 ]](https://assets1.tamsnetwork.com/images/EC042017NF/164591s.jpg "Wildflower Birthday 12\" X 12\" (30.5 X 30.5 Cm) Specialty Designer Series Paper [ 164591 ]")
![Textured Notes Dies [ 165555 ]](https://assets1.tamsnetwork.com/images/EC042017NF/165555s.jpg "Textured Notes Dies [ 165555 ]")
![Spotlight On Nature Dies [ 163580 ]](https://assets1.tamsnetwork.com/images/EC042017NF/163580s.jpg "Spotlight On Nature Dies [ 163580 ]")
![The Right Words Cling Stamp Set (English) [ 165316 ]](https://assets1.tamsnetwork.com/images/EC042017NF/165316s.jpg "The Right Words Cling Stamp Set (English) [ 165316 ]")
![Pool Party Classic Stampin' Pad [ 147107 ]](https://assets1.tamsnetwork.com/images/EC042017NF/147107s.jpg "Pool Party Classic Stampin' Pad [ 147107 ]")
![Gold Striped 3/8" (1 Cm) Mesh Ribbon [ 165599 ]](https://assets1.tamsnetwork.com/images/EC042017NF/165599s.jpg "Gold Striped 3/8\" (1 Cm) Mesh Ribbon [ 165599 ]")