Everyday Skies

Starry Thoughts

Whew, today turned out to be just as busy as I thought it might be, but it was a successful day nonetheless. The kiddo scored an “excellent” on his euphonium solo and bowled above his average for his league games today. We took advantage of the glorious sunshine and perfect temps here in North Texas and rode our bikes around the park and played ball outside. And to top it all off, I got to steal a few moments in the craft room to bring you our last card of our Everyday Skies design series for this week.

We’re keeping things simple with a clean layout using the reverse sides of the Everyday Skies paper, which we have paired with the ever-lovely With You in Mind stamp set. And as a bonus, we’re getting a sneak peek of the new Textured Notes dies that will release next week. If you’re like me, you were crushed when Stampin’ Up! retired the Deckled Rectangles dies and wondered what you would ever do without them. Well, we’re all in luck as this lovely set of textured-edge dies hits the shelves in just a few days!

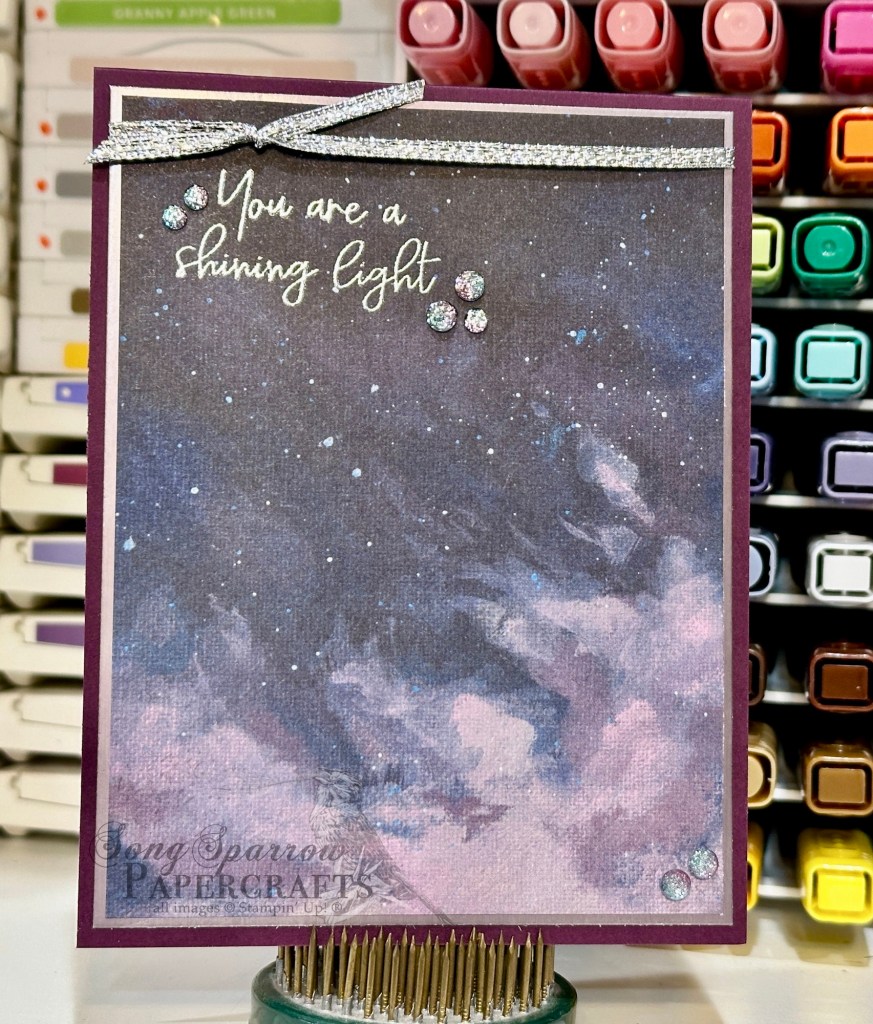
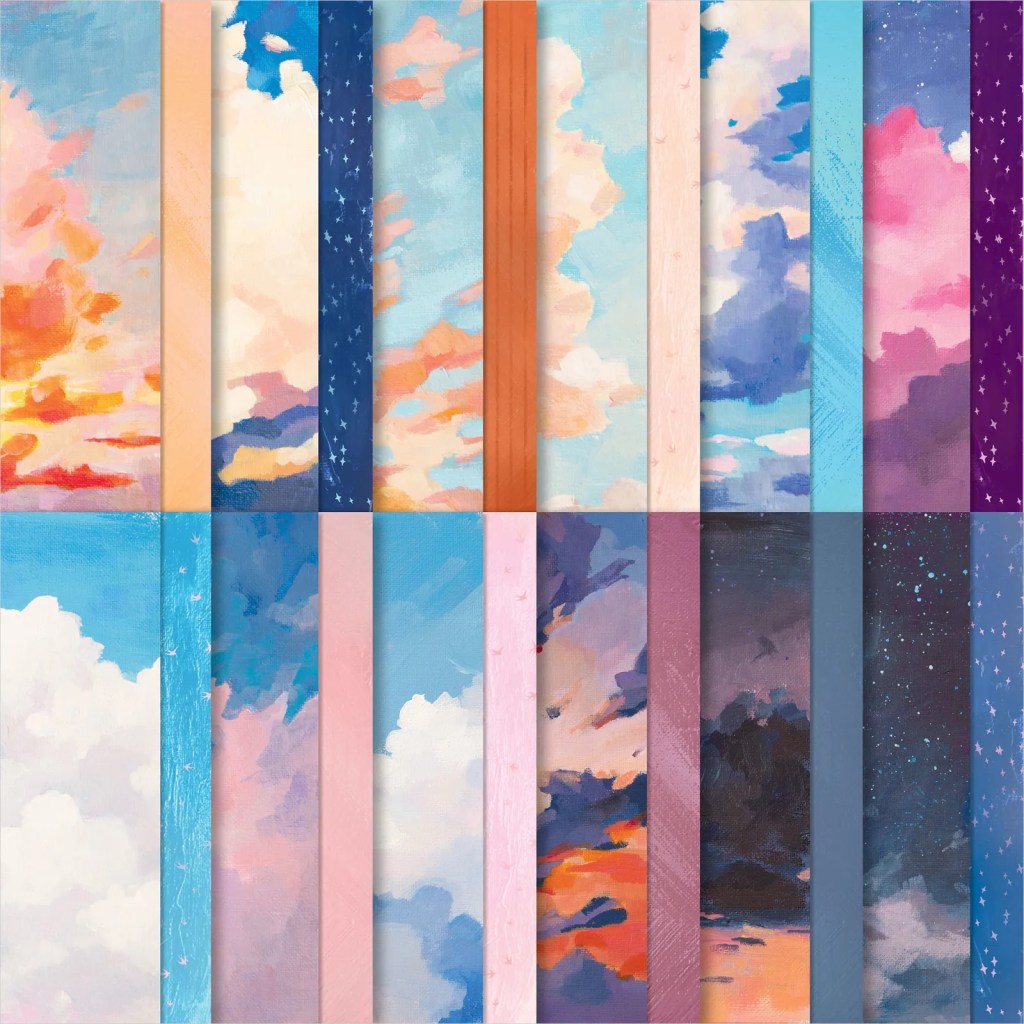
We get started with a base of Night of Navy cardstock. I chose the navy starry night pattern from the Everyday Skies paper pack and used the Textured Notes dies to cut our panel. I stamped the sentiment from With You in Mind in Misty Moonlight on a coordinating sheet of a lighter blue patterned sheet from the paper pack. I wrapped one end with some Misty Moonlight natural tones linen thread and tied a small bow and affixed the panel to our focal panel before adhering everything to the card base with dimensionals. I added a few silver stars just above and on one end of the sentiment panel. The stars are cut from silver foil using the two small dies from the Merriest Trees stamp set. A few rhinestones add that last little bit of twinkle.

This clean and simple layout is very versatile and allows you to make a whole variety of cards for a number of different occasions in no time. And as you can see, the patterns in the Everyday Skies paper pack allow for a lot of versatility, as well.

Next week, we start a new design series using the brand new Thankful Garden suite. You’re going to love it!

Product List
Everyday Skies · Sketchy Fridays

Sketchy Fridays: Family You Choose

Happy Friday, everyone. It was a very busy but productive week around here. And the weekend is shaping up to be pretty busy too with the kiddo’s various activities. But we’re excited for some nice weather in store for tomorrow before the rainy spring(ish) season kicks in here in North Texas.

But let’s go down to the real business – Sketchy Fridays! For those of you who are new here, Sketchy Fridays is a weekly series where we’re using a card sketch to design our featured card. Right now, we’re working through a full series of designs using the card sketches found in current Stampin’ Up! catalogs.

This week’s card is based on Sketch #11 from the Stampin’ Up! Annual Catalog. Today, we’re pairing up the Everyday Skies patterned paper with the new Online Exclusive stamp set called Pattern of Friendship (that releases next week!).

I just love this sentiment from the new Pattern of Friendship stamp set. It truly resonates with me because we certainly couldn’t have made it through the difficulties we faced in 2024 without our circle of friends who stepped in and helped our family!

This card gets started with a base of Blackberry Bliss cardstock. I used Fresh Freesia as the background for our focal panel which is made up of scraps of the reverse side patterns of the Everyday Skies papers. I stamped the sentiment from Pattern of Friendship in Blackberry Bliss on a striped sheet of Everyday Skies and adhered it on a strip with a swallow pattern. Blackberry Bliss transparent dots give us some pops of interest to draw our eye to the center sentiment. This is a very clean & simple design that literally came together in 5 minutes (once I picked my papers, that is).

We’ll be closing out our design series using Everyday Skies tomorrow. And we’ll be using the patterns on the backsides to create another quick, clean & simple card. I hope you’ll pop in.

Product List
Everyday Skies

Shining Light

Welcome to the midpoint of this week! Our design focus this week is on the gorgeous Everyday Skies designer series paper by Stampin’ Up!, where just about every beautiful sky is represented. And today we turn to the night sky for our card design. This is a clean and simple card that you can make in 5 minutes or less.

We start with a base of Blackberry Bliss cardstock. I chose a retired piece of specialty paper from a silver foil pack that really brings out the lighter purples in our night sky background panel. I loved the light shimmer of this sheet of metallic paper, but you could easily substitute the Fresh Freesia glimmer paper from the current Three Color Glimmer pack. I decided to stamp the sentiment from You Are Beautiful directly onto the focal panel. I used silver embossing powder to bring out the twinkling stars in our background paper and tied a simple knot of silver trim above the heat embossed sentiment. The two tone sparkle gems are the perfect sparkly addition here with their combination of blue and purple glimmer.

I love having clean and simple card designs with a wow factor in the stash, and the Everyday Skies paper makes it super easy to do just that! Tomorrow we’re Instahopping with the Luv 2 Stamp Group crew, and I can’t wait to show you the super cool fun fold I’ve created with the Hot Air Balloon bundle. I hope you’ll float by and check it out!

Product List
Everyday Skies

Brighter Skies

This week we’re highlighting the lovely Everyday Skies paper in our designs. Each of the skies featured in this paper pack is like a work of art all on its own. Today’s design is using one of the more ominous skies to create an encouragement card using the Bright Skies stamps and dies.

We begin with a base of Basic Black cardstock. The Everyday Skies pattern serves as the backdrop and main focal panel. I wrapped a combination of Blackberry Bliss & Gold ribbon and Petal Pink diagonal trim around the bottom of the panel before adhering to the card base. Using the Brighter Skies dies, I cut two smaller clouds from Blackberry Bliss and a larger cloud from black. I heat embossed the sentiment from Bright Skies in black. The clouds are adhered to the focal panel with varying layers of dimensionals to give lots of depth to our scene. I added some Blackberry Bliss foil dots and two tone sparkle gems to draw the eye to our sentiment.

When you have wonderful product at hand, it doesn’t take much to make a lovely card. And the Everyday Skies paper certainly does the heavy lifting in today’s design! Tune in tomorrow for a clean and simple design.

Product List
Everyday Skies

Hi in the Sky

Here we are, finding ourselves at another Monday — another week of opportunities to spread some joy and handmade kindness! This week, our product focus is the lovely Everyday Skies paper by Stampin’ Up!

I love how this paper captures so many different beautiful skies — from sunrise to moonrise and everything in between. And this week, I’ll be highlighting many of these lovely skies by pairing this paper pack with some current SU! products. And we won’t forget the gorgeous backsides of this paper either!

Let’s get our new design series started with the Adventurous Sky stamp & die bundle.

Our card gets started with a base is Balmy Blue cardstock. I chose a sunny day high in the clouds as the sky background here. The plane consists of two pieces cut with the Adventurous Sky dies — I used red festive glimmer paper and silver foil to give a more realistic metallic look to the plane’s exterior. I also cut propellers from silver foil and a disc of vellum with the Spotlight in Nature die to give the look of spinning propeller blades. An industrial trinket serves as the propeller hub in the center. I colored a few of the smaller iridescent faceted gems with my black Stampin’ Blend to serve as the hubcaps on the wheels. The plane is adhered to the sky background with dimensionals. I stamped the sentiment from the Adventurous Sky set in Balmy Blue in the upper left corner. I wanted the plane to look like it’s flying in between banks of clouds and so I cut another sheet of the background, going around just the clouds on the left. I adhered this layer with double dimensionals on top so that this cloud layer is on top. I added a few of the white sequins from the sequins trio pack as little glimmers in the clouds.

This card is so fun and whimsical — definitely sure to bring a small to a recipient’s face! Tomorrow we’re going to be making a pick-me-up with Bright Skies. I hope you’ll drop in and check it out.

Product List