Christmas

Let it Snow

Today we’re taking a look at another card that I was able to make using Memories and More products from Stampin’ Up! This adorable set is called Beary Christmas. By pairing the cards and envelopes and the mini kit card pack, I was quickly able to finish up my Christmas cards over the weekend.

This card design is built on a blue card base from the Memories and More cards and envelopes. The adorable bear scene is a notecard from the Memories and More card pack. The sentiment is cut from a smaller notecard from the card pack and mounted on dimensionals. A strip of silver and white sheer ribbon is twisted behind the sentiment panel for interest and sparkle.

Card designs don’t have to be complicated. And when you’re pressed for time, the Memories and More products allow for adorable designs that come together in a flash.

Products used:
Beary Christmas Memory and More cards and envelopes
Beary Christmas Memory and More card pack
Silver & white sheer ribbon
Glitter sequins
Dimensionals
Adhesives

All ads on this site are posted by WordPress and are based on personal browsing history.  Song Sparrow Papercrafts is not responsible for ad content.

Christmas

Christmas Together

Have you gotten all of your Christmas cards made and in the mail? I was able to put the last batch in the mail over the weekend. I was able to quickly put together the last batch by using a tried-and-true shortcut method — a Stampin’ Up! mini kit called Beary Christmas. I paired the Memories and More card pack and cards and envelopes for some super cute quick and easy designs. You can find all of the coordinating Beary Christmas products here. Over the next day or two, we’ll be taking a look at a few of the cute designs that came together from this suite of products.

The base of this card design is the blue card base from the Memory and More card and envelope pack. The snowflake background is a full notecard from the Memories and More card pack. The polar bear scene is fussy cut from the notecard and then popped up on dimensionals to stand out above the snowflake background. The remaining sentiment section is cut to break up the words of the sentiment and then adhered with dimensionals across the card front. A few glitter sequins and some gold cord add sparkle and help the eye move across the design.

Stampin’ Up! has an excellent selection of kits and mini kits that allow you to assemble a whole set of adorable cards in no time flat. If you’re in a time crunch but still want to have the personal touch of a handmade card, kits are the way to go!

Products used:
Beary Christmas Memory and More cards and envelopes
Beary Christmas Memory and More card pack
Gold cord
Glitter sequins
Dimensionals
Adhesives

All ads on this site are posted by WordPress and are based on personal browsing history.  Song Sparrow Papercrafts is not responsible for ad content.

Christmas · Inspiration · No Stamp Design

More Than Cards

One of the fun things about the art of papercrafting is that it is so much more than just cards or scrapbooks or gift packaging. You can also create beautiful 3D projects using the supplies you already have in your crafting stash. Today’s designs are just 2 of the most recent projects I’ve created with current Stampin’ Up! products.

I love a good opportunity to get out of my comfort zone, and sometimes all you need is a little prompting to get the wheels turning. For me, that came in the form of a team event. I needed an ornament and a 3D project for our team Bingo event, so I got to work looking for inspiration on Pinterest.

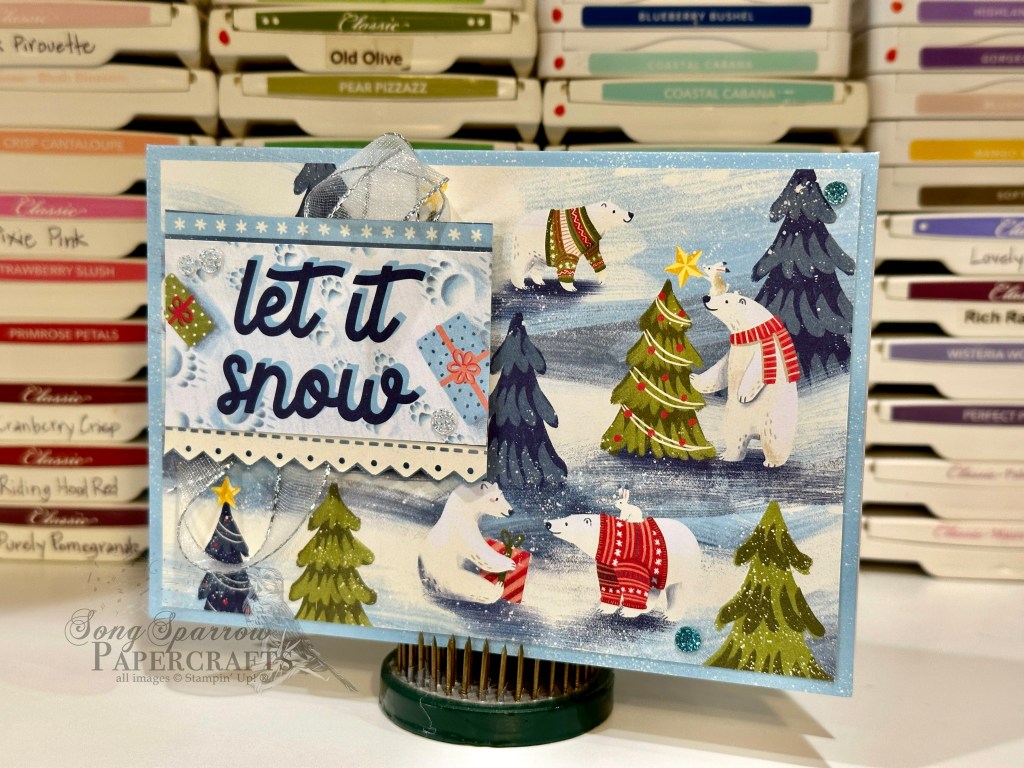
After seeing a lot of different ornament designs where circles were layered to created an ornament, that got me thinking about the dies I had in my stash that could be layered in the same way. On the left is a super fun Christmas ornament I put together using the Joy of Christmas designer series paper and the Merriest Trees die set. I used a repeating pattern of 2 different patterns from the Joy of Christmas paper pack. I really liked the look of the green plaid with the sheet of evergreen branches. I used a combination of red festive pearls and green iridescent discs as ornaments. The star tree topper is diecut from Crumb Cake cardstock.

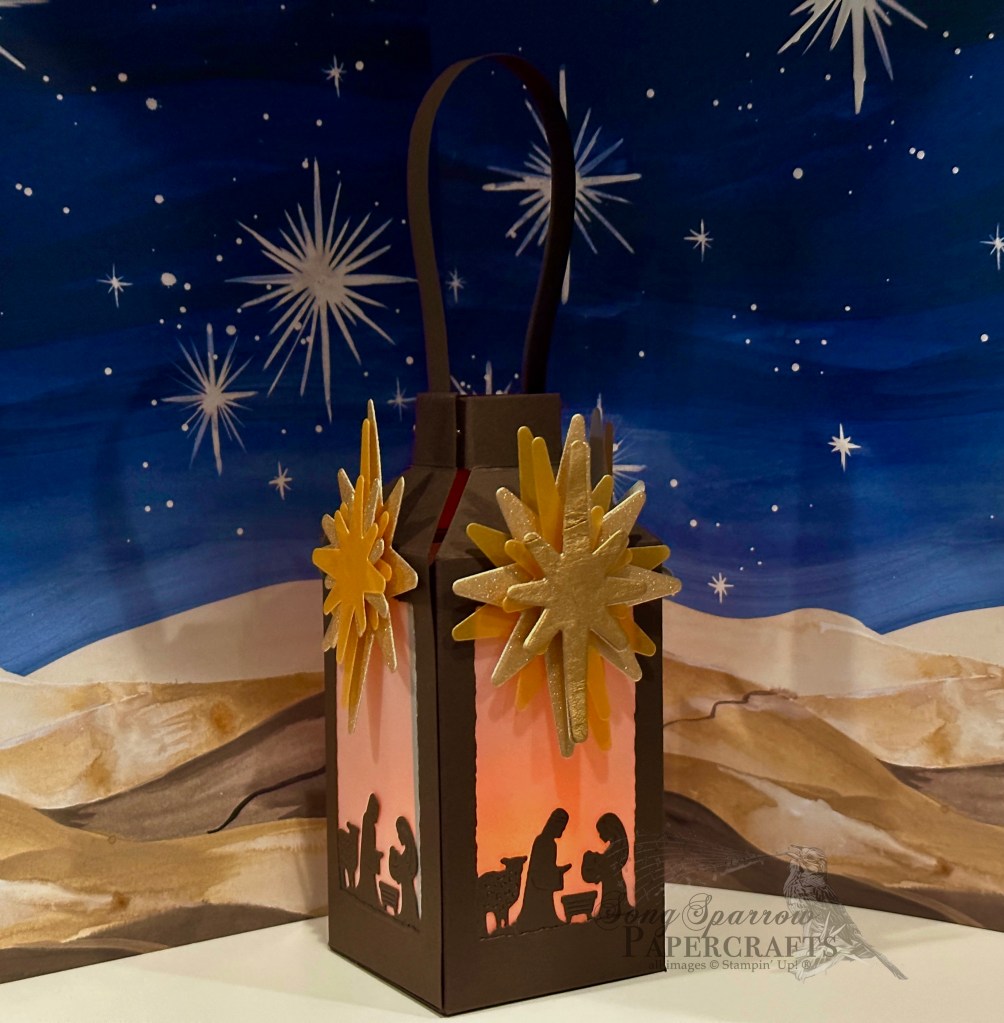
For my 3D project, I knew that I had an upcoming Advent Tea for which I volunteered to create table decorations. I knew I wanted the design to be elegant to fit the occasion. The lantern I created was inspired by a small votive box ornament that our team made together during a recent craft-together. I decided a tabletop lantern would be more appropriate for my tea, and I was able to find a tutorial created by Rick Adkins. This beautiful lantern was created with the O Holy Night suite of dies. I substituted current products from my stash to meet the theme of the tea. The lantern and window elements are constructed of Early Espresso cardstock, and a layer of vellum in each window provides the backdrop for the ethereal glow of the tealight. Don’t you just love it?!

What do you have coming up that could be accomplished with your craft stash rather than a trip to the store? I would love to see what you create!

Products used for today’s projects:

Christmas ornament
Joy of Christmas DSP
Crumb Cake cardstock
Merriest Trees dies
Festive pearls
Iridescent discs
Gold trim
Adhesives

Christmas lantern
Early Espresso, distressed gold cardstock
Gold shimmer paper
Vellum
Night Divine, Stars at Night dies
Dimensionals
Adhesives

All ads on this site are posted by WordPress and are based on your personal browsing history. I do not control ad content.

Christmas

Wonderful Counselor

Would you consider yourself to be an adventuresome person? It’s fair to say that I have a particular paper crafting style, but I’d like to think that I can do things differently every now and then. Today’s design is a good example. I love the angled Z-fold. And as a general rule, I would say I turn to this fold more for fun designs rather than more serious or thoughtful ones. But the angled Z-fold really lends itself well to all occasions.

This card begins with a base of Night of Navy cardstock. Shining Brightly designer paper provides the beautiful sparkle on the two front-facing panels. The front focal panel is a piece of vellum diecut using the Deckled Rectangles dies and the sentiment is then heat embossed in gold in the center. I tied a piece of gold twine at the top and adhered the vellum to the front card panel using my adhesive runner, allowing the top of the diecut panel to overhang at the top. I really liked the emphasis I felt this put on the focal sentiment. The inside center panel is left blank for a personal message, while the back panel has a small vellum Deckled Rectangle with a gold heat-embossed sentiment. I created a visual triangle around the sentiment on the bottom base panel with the gold sequins.

Wanna give the angled Z-fold a try? Hop over here for a PDF tutorial.

Products used:
Night of Navy, vellum, white cardstock
Shining Brightly DSP
Night Divine stamps
Gold embossing powder
Gold twine
Adhesive-backed sequins

All ads on this site are posted by WordPress and are based on your personal browsing history. I do not control ad content.

Christmas

Fear Not

As I was recently preparing for a craft show, and specifically designing Christmas cards, I realized that I had a few older sets that hadn’t seen any ink yet. Do you ever have that happen, where you purchase a lovely stamp set that somehow gets lost in your stash?

Today’s design began with the stamp set called God’s Peace. Because the image and sentiments are so lovely, I wanted them to take center stage so the overall design of this card is quite simple. The card base is Cherry Cobbler and the sentiment panel is Basic White cardstock. The advent wreath image is stamped in black ink and colored using the Stampin’ Blends markers, and the sentiment is heat embossed in gold. I added Wink of Stella to the glow of the candles and a few sequins in opposing corners for added drama and sparkle. The entire focal panel is elevated on dimensionals to draw the eye and add interest.

I love the simplicity of this design and intend to incorporate it in my personal Christmas card designs this year!

Products used:
Cherry Cobbler, white cardstock
God’s Peace stamps (retired)
Stampin’ Blends markers
Wink of Stella
Adhesive-backed sequins
Dimensionals

All ads on this site are posted by WordPress and are based on your personal browsing history. I do not control ad content.

Christmas

Peace on Earth

I love a clean and simple design, and today’s card fits the bill in every way. When preparing for craft shows or even for my own personal mailings, clean and simple designs can help speed production without sacrificing the grace and beauty of handmade designs.

Today’s card showcases another “lost” stamp set I recently found in my craft room. Nature’s Peace is a stunning set, and it’s hard to imagine that it’s gone uninked in my stash! I decided to keep the color palette simple — red and cream. I used Cherry Cobbler cardstock for the card base (scored at the top rather than left) and focal panel base. The focal image of this card design is a single stamp. The stamped image is heat embossed with pearl embossing powder. The focal panel is elevated on dimensionals with natural finish ribbon running behind the focal panel and around the base on the inside. A small piece of Cherry Cobbler twine holds the ribbon together and in place. I finished the design with a shimmer spray so that the entire card front sparkles, which is unfortunately impossible to capture in photos.

I just love how this turned out and am excited to get started on a full set of these for part of my Christmas mailing list this year.

Products used:
Cherry Cobbler cardstock
Nature’s Peace stamps (retired)
Pearl embossing powder
Natural finish trim
Twine
Dimensionals

All ads on this site are posted by WordPress and are based on your personal browsing history. I do not control ad content.

Christmas

In the Trees

I ran across a super cute layout by Stamp It Up With Jaimie on one of my recent strolls through my Instagram feed. I loved the funky layout and how she brought out the Old Olive in the tree pattern from A Walk in the Forest designer paper. And isn’t there something about imitation is the best form of flattery?

I changed up a few of the elements from the inspiration design to fit with the supplies in my stash. I started with a card base of basic white cardstock. The Old Olive is cut to cover the entirety of the card front and is embossed using a retired snowflake embossing folder. The tree pattern is matted by Pretty Peacock while the evergreen pattern is mounted on white. The sentiment is embossed in gold on a white panel diecut using the All That dies and the panel sits atop a folded bunch of natural finish ribbon. A few faceted gems scattered about give a pop of sparkle and complete the visual triangle around the focal point of the card design.

This particular layout is out of my wheelhouse, but I really love it and hope to incorporate it in some future designs to mix up my usual style. What do you think — is this layout a winner?

Products used:
Old Olive, Pretty Peacock, white cardstock
A Walk in the Forest DSP
All That dies
Gold embossing powder
Faceted gems
Magical Meadow stamps
Winter Snow embossing folder (retired)
Natural finish ribbon
Adhesives

All ads on this site are posted by WordPress and are based on your personal browsing history. I do not control ad content.

Christmas

We Wish You a Merry Christmas

During a recent stroll through the Instagram feed, I saw a lovely card design by LoritaMarie Crafts and immediately added it to the inspiration folder. It was the perfect combination of patterns and colors. I made a few modifications to paper selections and this design is the end result.

The card base is Mossy Meadow, which helps draw out the shades of green in the evergreen branches in the greenery panel. The evergreen panel is matted by Cherry Cobbler cardstock and mounted on dimensionals. The tree is diecut using the Merriest Trees dies and the sentiment is heat embossed in gold in the center of the tree. To keep the tree topper more delicate, I placed a star trinket at the top. The gold trim is tucked behind the elevated focal panel and gold pearls are scattered on the focal panel for visual interest. My favorite part of this design is the Christmas tree. What is yours?

My son helped me place a few of the elements, including the tree topper. We both decided that the end result is a really nice design that will be included in those that we personally send out to our holiday mailing list.

Products used:
Mossy Meadow, Cherry Cobbler, vellum cardstock
A Walk in the Forest DSP
Merriest Trees stamps & dies
Gold trim
Star trinkets
Gold pearls
Gold embossing powder
Dimensionals
Adhesives

All ads on this site are posted by WordPress and are based on your personal browsing history. I do not control ad content.

Christmas

Christmas Holly

I always find it funny when I can take an inspiration design and then have the end product look nothing like it! That’s definitely the case for today’s card. And all I did was tweak the look of the sentiment panel to achieve a completely different look.

A base of Cherry Cobbler provides the festive backdrop for the holly designer paper. The inspiration design had a solid sentiment panel with a diecut holly wreath. Because I wanted to see more of the beautiful foiled designer paper, I used a sheet of vellum for the sentiment panel and chose to stamp the holly wreath and nestle the sentiment in the center. Rather than placing the bow atop the wreath, I chose to use it as a design element along the side of the wreath instead.

As I was looking at the completed design, it seemed to be missing a little something. And if I had it to do over, the sentiment needs to be heat embossed in red rather than stamped. That would help it to have the *pop* it deserves. What do you think? Embossed sentiment or no?

Products used:
Cherry Cobbler, vellum cardstock
Shining Christmas DSP
Come to Bethlehem stamps (retired)
Bells & Boughs stamps (retired)
Adhesive-backed sequins
Faux linen ribbon (retired)
Dimensionals
Adhesives

All ads on this site are posted by WordPress and are based on your personal browsing history. I do not control ad content.

Christmas

Beary Happy Christmas

Did you know that even seasoned stampers look for inspiration? Sometimes designs just come to you and other times you have to look high and low for them! I actually stumbled across this design by Susan Campfield in my daily stroll through my Facebook feed and knew it needed to go in the Inspiration file. It can easily be adapted to so many different occasions, which makes it a design you can turn to again and again.

I love how the buffalo plaid is reminiscent of a warm winter flannel, making it a perfect design element for this holiday card. The base of the card is black cardstock and the plaid paper is matted by a sheet of Cherry Cobbler and black cardstock. The bear is punched from black cardstock using the Beary Cute punch. The red and white gingham ribbon allows the sentiment panel to function visually as a banner across the focal panel. If you’re making a set of cards, you can alternate the direction of the bear for some added interest. The sentiment panel is diecut from white cardstock using the Nested Essentials die and then the sentiment is stamped in Real Red using the Merriest Trees stamps. The adhesive hexagons help draw the eye across this playful design.

I just love the rustic feel of this card. It reminds me of a homey cabin in the snowy woods. Don’t you think?

Products used:
Cherry Cobbler, Basic Black and White cardstock
A Walk in the Forest DSP
Merriest Trees stamps
Beary Cute punch
Real Red and White gingham ribbon (retired)
Adhesive hexagons (retired)
Adhesives

All ads on this site are posted by WordPress and are based on your personal browsing history. I do not control ad content.