Wishing you all a very Merry Christmas! May you be surrounded by the warmth and laughter of family or friends. And may God surround you with His love and grace.
I will be taking a little holiday break but will see you all next week for a brand new episode of Terrific Tuesdays!
All ads on this site are posted by WordPress. Song Sparrow Papercrafts is not responsible for ad content.
I just love finding great design shortcuts, don’t you? Stampin’ Up!’s Memories and More product line is just one way that I’ve found to make quick work of adorable handmade cards. I finished up our Christmas cards over the weekend and was able to make a boatload of cards in no time flat using the Beary Christmas Memories and More products.
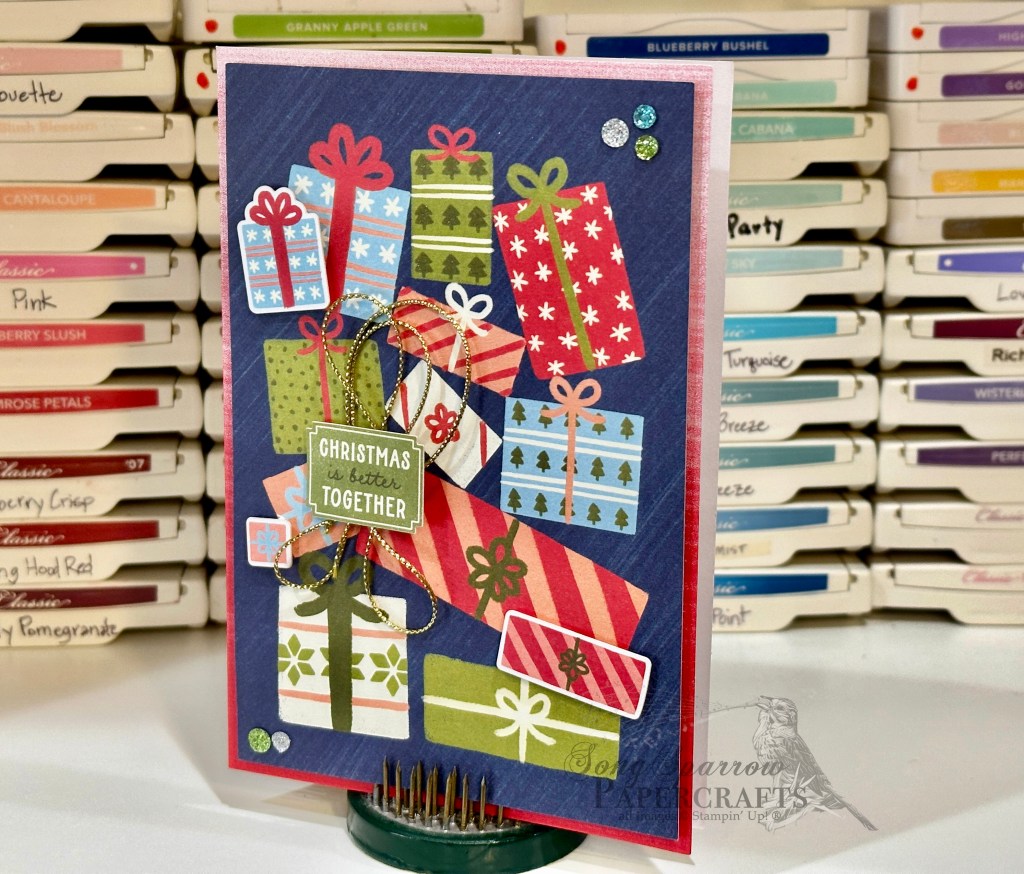
Today’s card begins with the red card base from the Memories and More cards and envelopes pack. The adorable present background is a notecard from the Memories and More card pack. I chose coordinating package stickers from the sticker sheet included in the card pack and popped them up with dimensionals. I nestled each package next to its coordinating counterpart on the notecard background and just love the effect. The sentiment is yet another sticker from the sticker sheet. I used gold cord to draw the eye to the sentiment since it’s a smaller element than I would have ordinarily chosen. A few glitter sequins in opposing corners really allow the eye to make the diagonal movement over the card design.
I’m looking forward to trying some of the other Memories and More products when I need to create a bunch of cards in short order.
Products used: Beary Christmas Memory and More cards and envelopes Beary Christmas Memory and More card pack Gold cord Glitter sequins Dimensionals Adhesives
All ads on this site are posted by WordPress and are based on personal browsing history. Song Sparrow Papercrafts is not responsible for ad content.
Today we’re taking a look at another card that I was able to make using Memories and More products from Stampin’ Up! This adorable set is called Beary Christmas. By pairing the cards and envelopes and the mini kit card pack, I was quickly able to finish up my Christmas cards over the weekend.
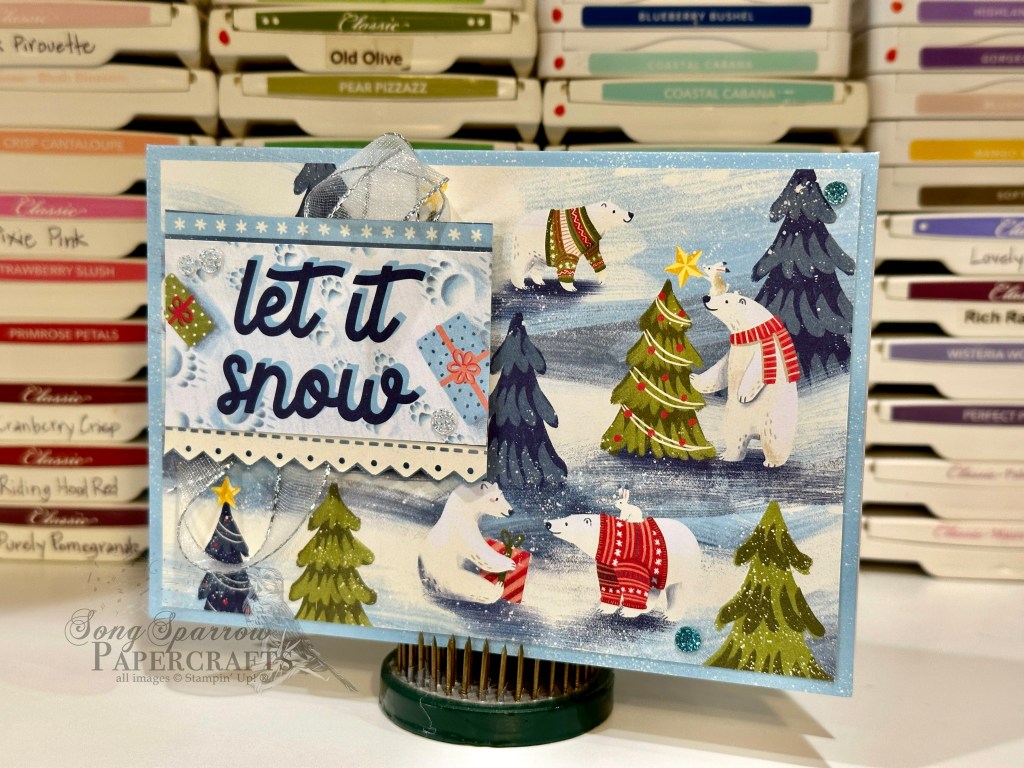
This card design is built on a blue card base from the Memories and More cards and envelopes. The adorable bear scene is a notecard from the Memories and More card pack. The sentiment is cut from a smaller notecard from the card pack and mounted on dimensionals. A strip of silver and white sheer ribbon is twisted behind the sentiment panel for interest and sparkle.
Card designs don’t have to be complicated. And when you’re pressed for time, the Memories and More products allow for adorable designs that come together in a flash.
Products used: Beary Christmas Memory and More cards and envelopes Beary Christmas Memory and More card pack Silver & white sheer ribbon Glitter sequins Dimensionals Adhesives
All ads on this site are posted by WordPress and are based on personal browsing history. Song Sparrow Papercrafts is not responsible for ad content.
Have you gotten all of your Christmas cards made and in the mail? I was able to put the last batch in the mail over the weekend. I was able to quickly put together the last batch by using a tried-and-true shortcut method — a Stampin’ Up! mini kit called Beary Christmas. I paired the Memories and More card pack and cards and envelopes for some super cute quick and easy designs. You can find all of the coordinating Beary Christmas products here. Over the next day or two, we’ll be taking a look at a few of the cute designs that came together from this suite of products.
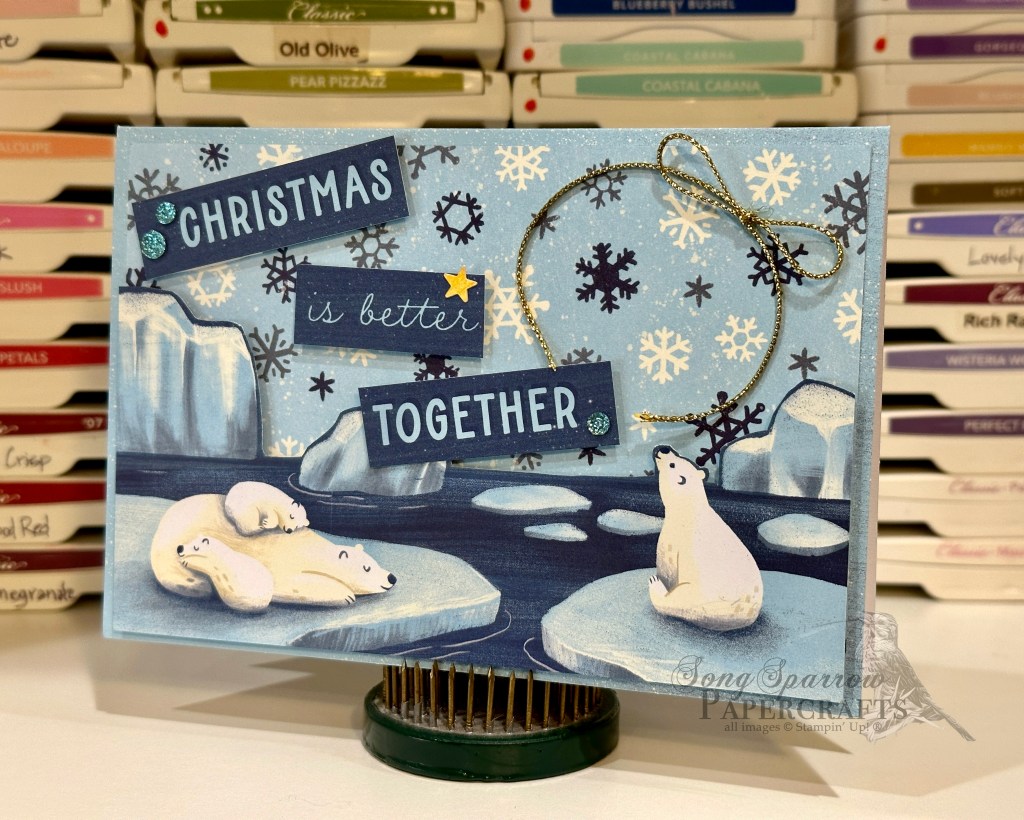
The base of this card design is the blue card base from the Memory and More card and envelope pack. The snowflake background is a full notecard from the Memories and More card pack. The polar bear scene is fussy cut from the notecard and then popped up on dimensionals to stand out above the snowflake background. The remaining sentiment section is cut to break up the words of the sentiment and then adhered with dimensionals across the card front. A few glitter sequins and some gold cord add sparkle and help the eye move across the design.
Stampin’ Up! has an excellent selection of kits and mini kits that allow you to assemble a whole set of adorable cards in no time flat. If you’re in a time crunch but still want to have the personal touch of a handmade card, kits are the way to go!
Products used: Beary Christmas Memory and More cards and envelopes Beary Christmas Memory and More card pack Gold cord Glitter sequins Dimensionals Adhesives
All ads on this site are posted by WordPress and are based on personal browsing history. Song Sparrow Papercrafts is not responsible for ad content.
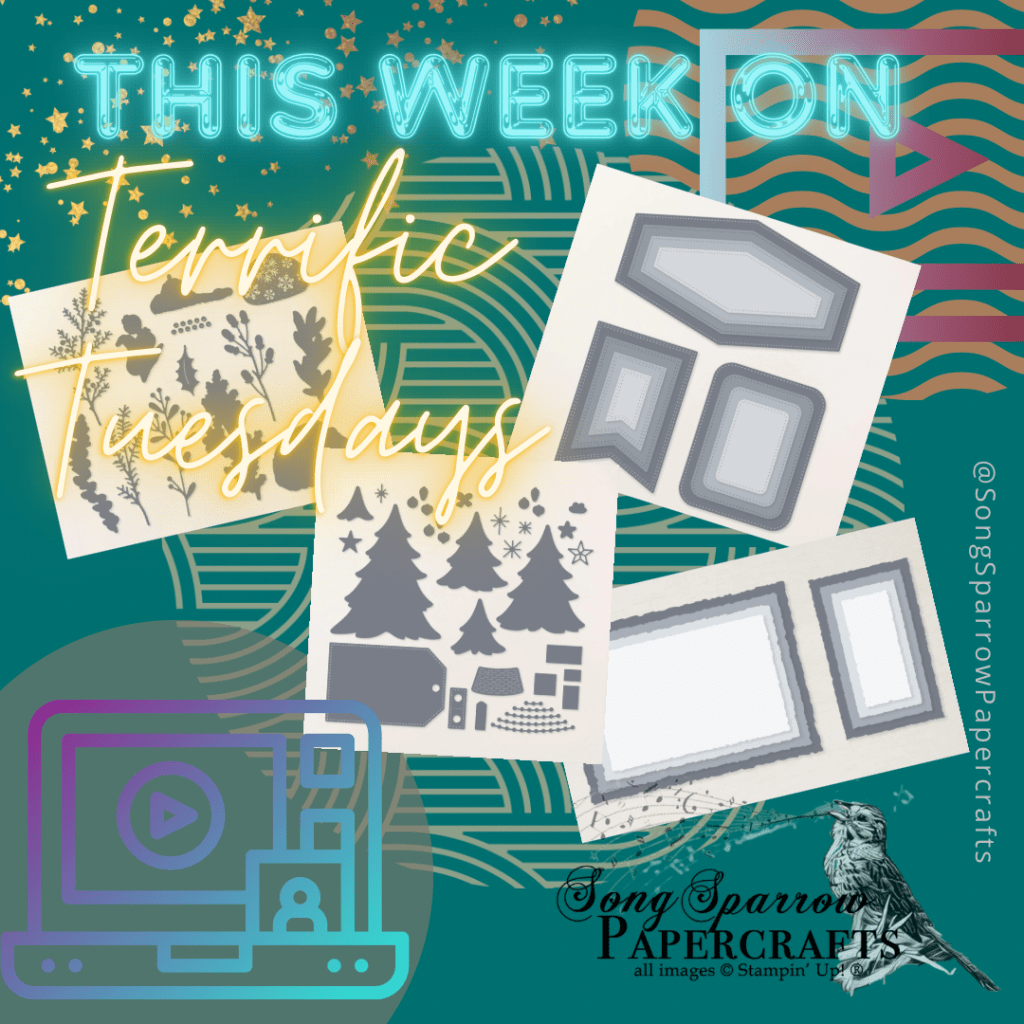
Welcome to a new episode of Terrific Tuesdays! Each Tuesday at 10 AM CST, I’ll be launching a new video where I’ll share at least three fun projects with you using current Stampin’ Up! products. Each week you’ll have the opportunity to receive a Kit to Go for FREE, and each Kit to Go will include the supplies needed to complete the week’s projects.
This week’s episode of Terrific Tuesdays focuses on the paper scraps on our craft tables and several sets of Stampin’ Up die sets, including Magical Meadow, Nested Essentials, Deckled Rectangles, and Merriest Trees. Watch today’s video to see how you can use your paper scraps and dies to create a whole set of holiday gift tags.
How do I get a FREE Kit to Go?
To receive a FREE kit, simply place an order of at least $25 in my online store (excluding tax and shipping) — no host code required. Simply click the link below to get started:
In order to qualify for this week’s free Kit to Go, all orders must be placed by Sunday, December 31, 2023 at 11:59 PM CST.
Each Kit to Go will be a mystery packet that will include a varied selection of Stampin’ Up! products to make 10 gift tags. Kits contents will vary. Kits will ship no later than Wednesday, January 3rd.
All ads on this site are posted by WordPress and are based on personal browsing history. Song Sparrow Papercrafts is not responsible for ad content.
Join me TODAY at 10 AM CST for a new episode of Terrific Tuesdays, where I’ll be sharing some super fun projects using the scraps on your craft tale and some of the latest Stampin’ Up! products. You don’t want to miss out!
Don’t forget… TODAY is the last day to place your order to receive this week’s Terrific Tuesdays Kit to Go! All orders must be placed by 11:59 PM CST and must use this week’s host code. Remember, if your order meets or exceeds $150, do NOT use the host code and you’ll still get this week’s Kit to Go for free!
This week, we made 3 lovely winter cards using the Magical Meadow bundle. To receive this week’s Kit to Go, simply place an order of at least $40 in my online store (excluding tax and shipping) using host code SAZWG2S4 at checkout OR click on the link below to start shopping now with the host code:
Each Kit to Go will make 6 projects (2 each of 3 designs) and includes the cardstock or designer paper required for the week’s projects. If a die, punch, or embossing folder is part of the week’s featured bundle, those pieces will not be included in the kit. However, any punched, diecut, or machine embossed element outside of the week’s featured bundle will be provided in the kit. Per Stampin’ Up! policy, I do not include any stamped images in the Kit to Go.
For this week’s projects, you’ll need the following items in addition to the kit to complete the projects as instructed. You are free to make substitutions for any of the supplies listed below for items that you already own.
STAMPS: Magical Meadow
DIES/PUNCHES/EMBOSSING FOLDERS: Magical Meadow
INK: Pretty Peacock, Lost Lagoon, Pool Party, Smoky Slate or metallic silver
EMBELLISHMENTS/TOOLS: Glitter sequins, dimensionals, tear-n-tape, tape runner, paper snips
In order to qualify for this week’s free Kit to Go, all orders must be placed by 11:59 PM CST TONIGHTand must use the host code.
Did you miss this week’s episode of Terrific Tuesdays? You can watch it here:
Products used for today’s card design: Balmy Blue, Lost Lagoon, Pretty Peacock Winter Meadow DSP Winter Meadow stamps Winter Meadow, Autumn Leaves dies Silver & white sheer ribbon Glitter sequins Dimensionals Adhesives
All ads on this site are posted by WordPress and are based on your personal browsing history. I do not control ad content.
We have been exploring all of the wonderful ways we can use the Winter Meadow suite this week. If you were able to watch this week’s episode of Terrific Tuesdays, you watched this design come together, but I didn’t give the backstory. Today’s card design is based on a fellow team member’s card design. I always love being reminded of ways to use our stamps, and in this case, my fellow demonstrator’s design reminded me of the age-old technique of making your own designer paper.
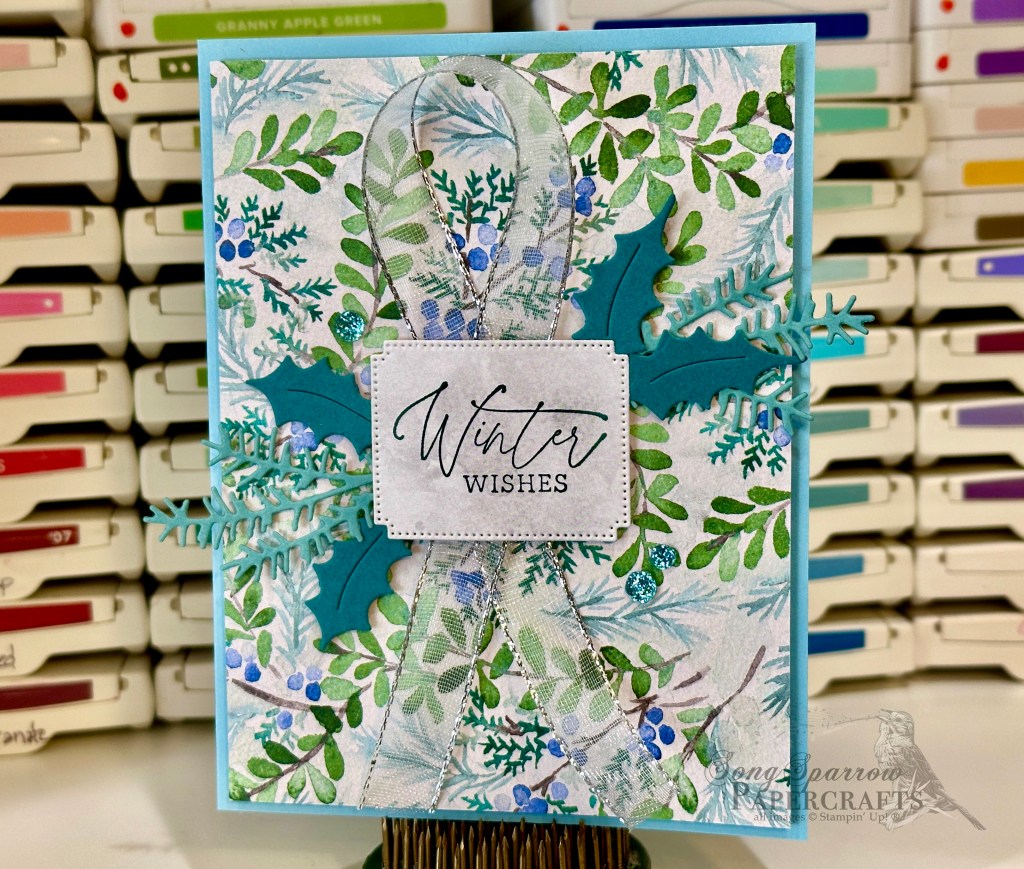
For today’s card, we begin with a base of Pretty Peacock. I created a patterned paper using the Magical Meadow stamps using various shades of blue-green and I mixed in some metallic silver ink for a bit of sparkle. The silver and white sheer ribbon serves as a shimmery base for the sentiment panel, while still allowing the stamped pattern to shine through. The sentiment, also from the Magical Meadow stamp set, is stamped on a shimmer white base that has been diecut using the Autumn Leaves die. I added a sparkly mat of Pretty Peacock fine shimmer paper diecut using the larger Autumn Leaves sentiment die. A bow of iridescent white ribbon at the top of the sentiment panel adds extra shine and draws the eye to the sentiment. I added a few glitter sequins on opposing corners of the sentiment panel to complete the visual triangle with the sparkly bow.
This card is even more stunning in person as all of the elements really catch the light. It’s the perfect combination of color and sparkle to be reminiscent of a magical wintery day.
Would you like to see all of the projects we made during this week’s Terrific Tuesdays episode? Check out the full video here:
Tune in the rest of the week to see more projects you can create using this gorgeous suite of Stampin’ Up! products.
Products used in today’s design: Pretty Peacock, Basic White, Pretty Peacock fine shimmer, shimmer white cardstock Magical Meadow stamps Autumn Leaves dies Silver & white sheer ribbon Iridescent white ribbon Glitter sequins Dimensionals Adhesives
All ads on this site are posted by WordPress and are based on personal browsing history. Song Sparrow Papercrafts is not responsible for ad content.
This week we’re working with the Winter Meadow suite of products from Stampin’ Up! All of these products are part of the winter seasonal sale, so it’s a great time to buy if you’ve had your eye on them. All of the products currently part of the seasonal sale are set to be retired at the end of the year and will no longer be available for purchase come January.
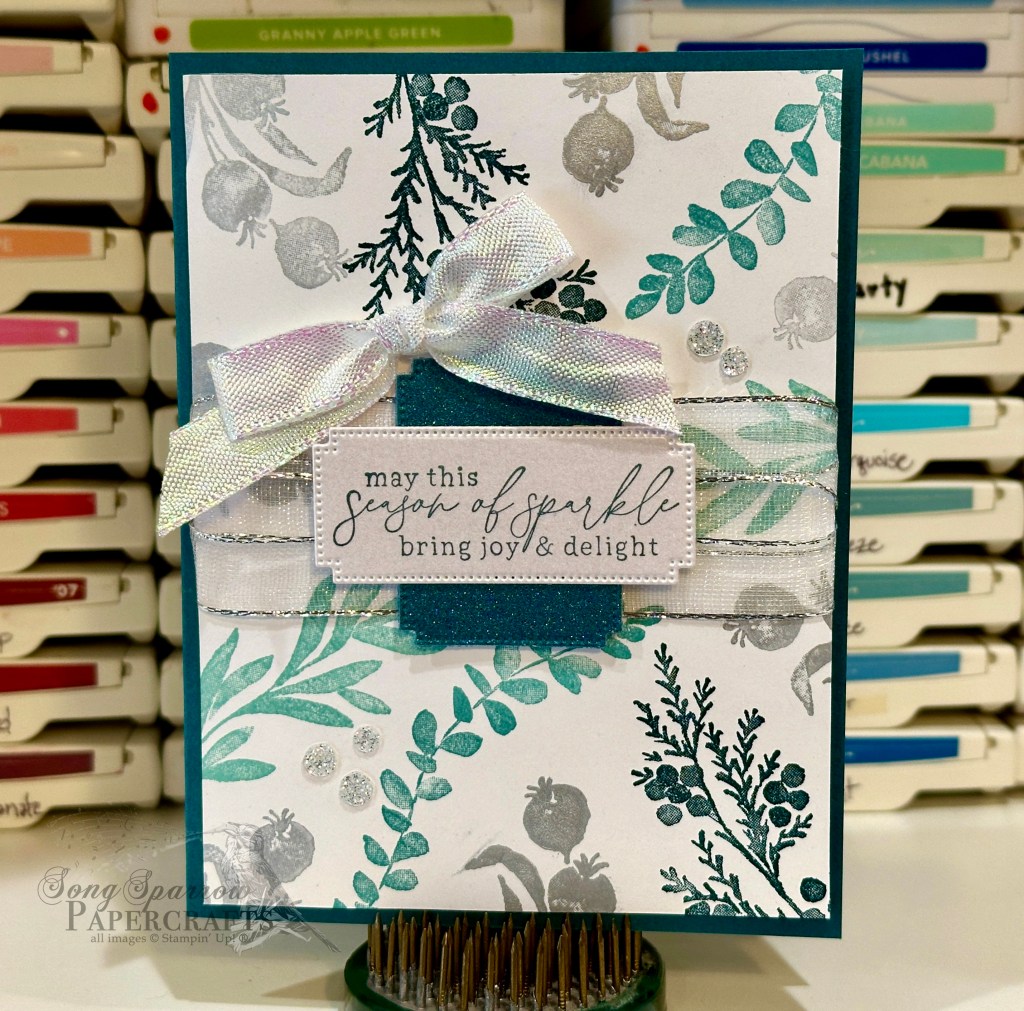
Today’s card design, although quite simple to put together, really packs a lot of punch. The design sits on a base of Lost Lagoon cardstock. The sheet of Snowflake Magic specialty paper is matted with a sheet of Lost Lagoon soft shimmer paper for a bit of added sparkle. The greenery is diecut from Silver Foiled specialty paper using the Magical Meadow dies. The sentiment from the Magical Meadow stamp set is stamped in Lost Lagoon ink on white cardstock, which is then diecut using the Nested Essentials banner die. The silver adhesive-backed sequins and bow from the silver and white sheer ribbon add additional sparkle to the sentiment panel, which is elevated using dimensionals.
This card is even more stunning in person as all of the elements really catch the light. It’s the perfect combination of color and sparkle to be reminiscent of a magical wintery day.
Would you like to see the projects we made during this week’s Terrific Tuesdays episode? Check out the full video here:
Tune in the rest of the week to see more projects you can create using this gorgeous suite of Stampin’ Up! products.
Products used in today’s design: Lost Lagoon, Basic White cardstock Winter Meadow, Snowflake Magic (sold out), Soft Shimmer, Silver Foiled DSP Magical Meadow stamps & dies Silver & white sheer ribbon Glitter sequins Dimensionals Adhesives
All ads on this site are posted by WordPress and are based on personal browsing history. Song Sparrow Papercrafts is not responsible for ad content.
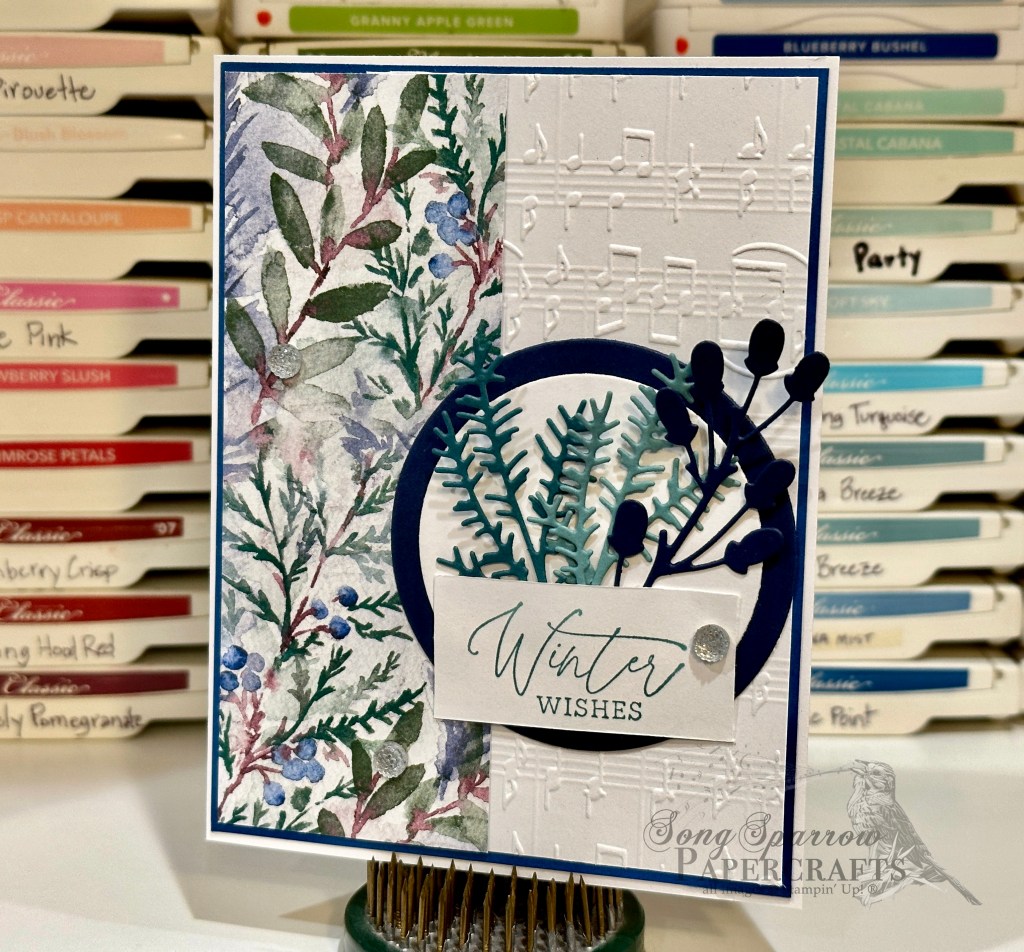
This week we’re focusing on the Magical Meadow suite of products. Today, we’re combining the gorgeous Winter Meadow designer series paper with embossing and diecuts to create a beautiful winter card. This design is inspired by fellow Luv 2 Stamp team member Allison Duvani at Allison’s Creative Greetings. I love how just a few elements can work together to make a stunning card.
This card design is built on a base of Basic White cardstock. A sheet of Blueberry Bushel serves as the mat for the designer paper and embossed panel. I chose the winter branches pattern from the Winter Meadow paper pack and paired it with a sheet of white cardstock embossed using the Merry Melody embossing folder. The sentiment panel is matted with a Night of Navy and white cardstock circle. The greenery is diecut from Pretty Peacock, Lost Lagoon, and Night of Navy using the Magical Meadow dies. The sentiment from the Magical Meadow stamp set is stamped on white cardstock and then mounted at the bottom of the panel over the stems of the greenery. A few simple faceted gems add a bit of sparkle and draw the eye across the card to the sentiment.
Would you like to see the designs from this week’s Terrific Tuesdays episode? Check out the full video here:
Tune in the rest of the week to see more projects you can create using this gorgeous suite of Stampin’ Up! products.
Products used in today’s design: Blueberry Bushel, Night of Navy, Pretty Peacock, Lost Lagoon, Basic White cardstock Winter Meadow DSP Faceted gems trio Adhesives
All ads on this site are posted by WordPress and are based on personal browsing history. Song Sparrow Papercrafts is not responsible for ad content.