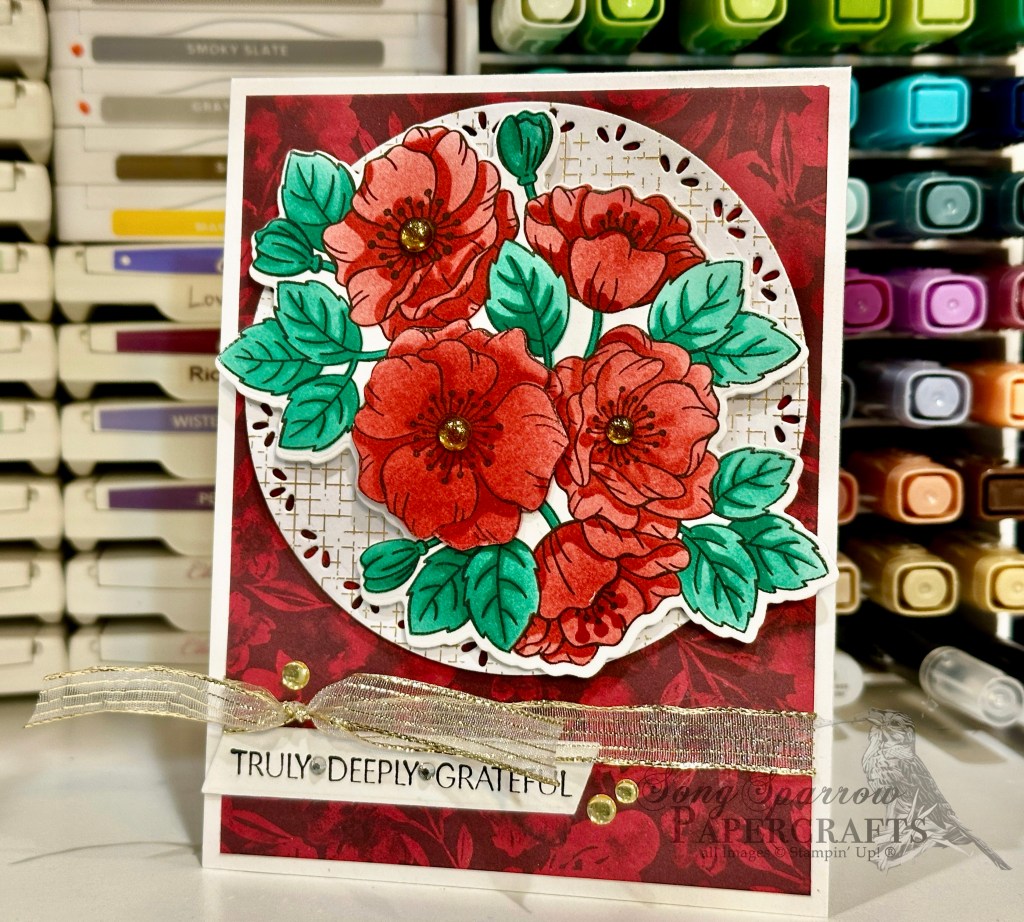
Were you able to check out all of the crafty goodness that the Luv 2 Stamp Group brought during our Instahop on Thursday? It’s totally worth checking out! Link in my post from Thursday. Meanwhile, it’s been a busy couple of days here and that has totally cramped my crafty time, as you may have noticed by my absence yesterday. But sometimes we just have to roll with the punches and go with the flow. And that’s okay.
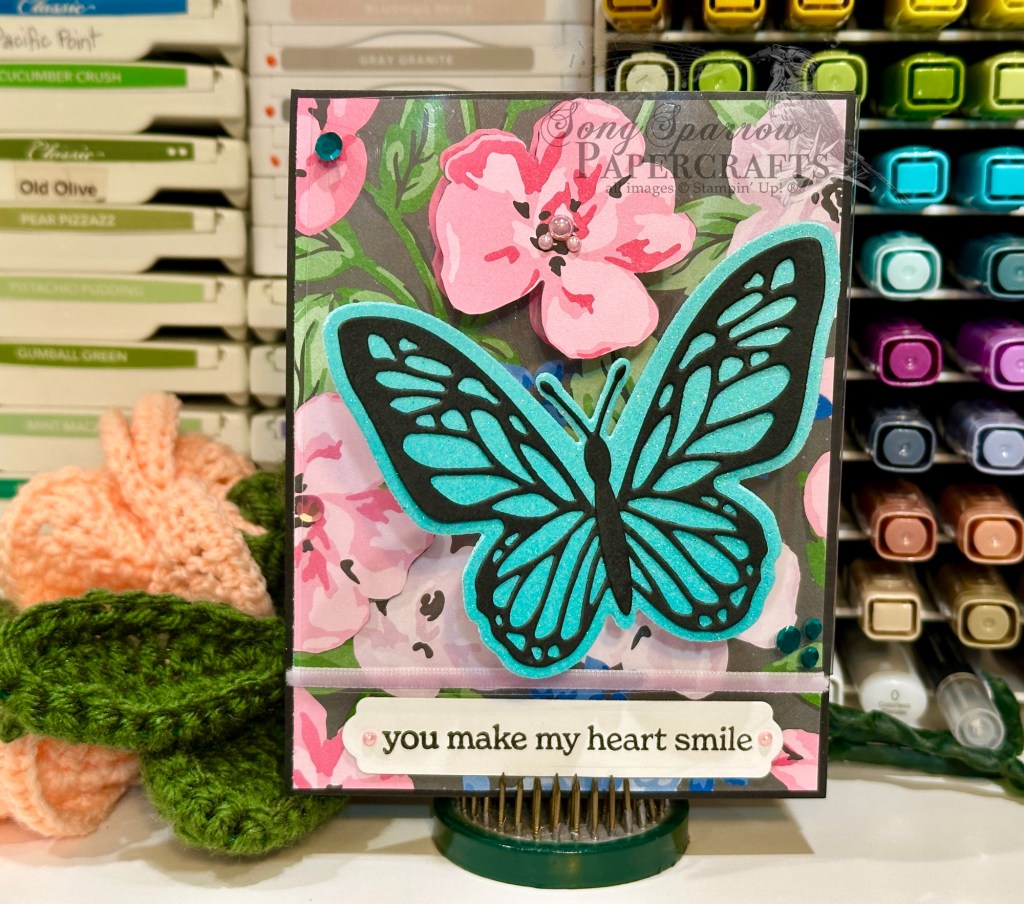
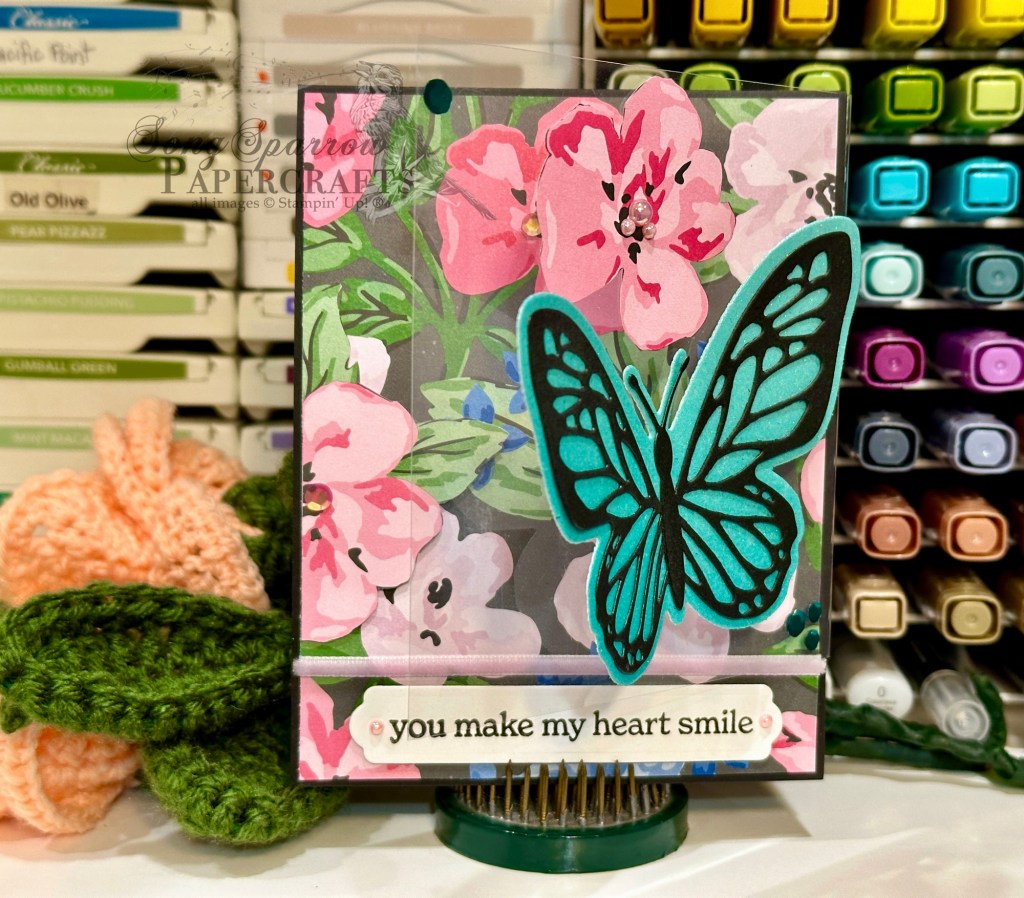
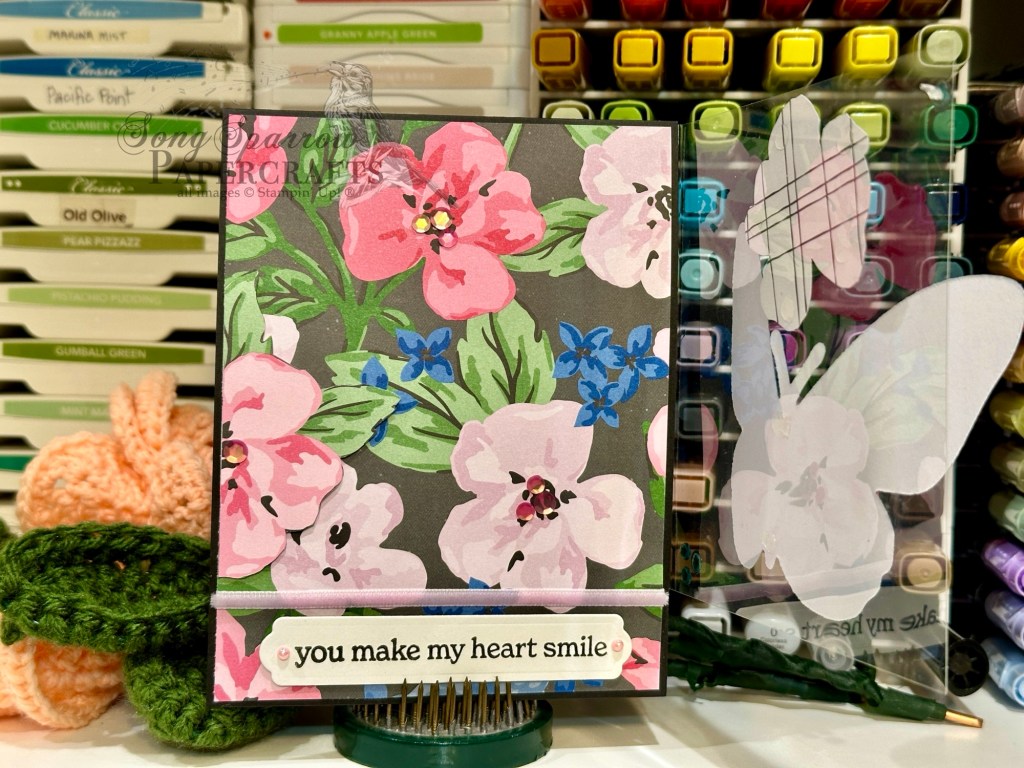
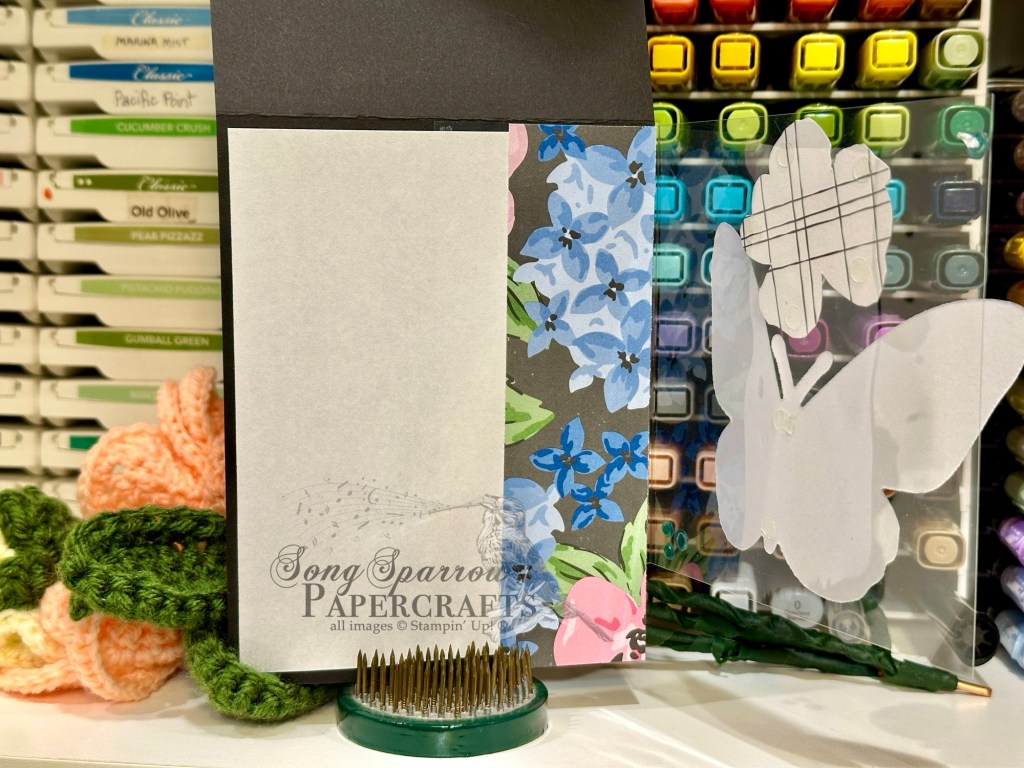
This week, we’re making our way through the garden and today we’re stopping to enjoy the spring wildflowers. We’re keeping it super simple with today’s card design by using the Mixed Media Florals Memories & More pack. Here in Texas, the strips of grass along a lot of the major highways are beginning to be covered in wildflowers. This is all thanks to Ladybird Johnson’s wildflower project back in the 1970s, and I must say that I just love her for it! And I love that the State has worked hard to maintain all of the wildflower seedlings from year to year with their carefully timed mowing (or lack thereof, as appropriate) to ensure that the flowers reseed. So if you’ve ever wondered why Texas has some of the prettiest right-of-ways in the country, you can tip your hat to Ladybird!

Our design today starts with a base of Basic Black cardstock. The focal panel is one of the notecards from the Mixed Media Florals Memories & More. I wrapped some natural tones linen thread and Daffodil Delight satin ribbon around the top to bring out the greens and yellows in our focal panel. The sentiment is from the Wanted To Say die set and is cut from black cardstock and red glimmer paper from the Festive pack. I added a ladybug from the sticker sheet and a few yellow and white Starburst sequins to complete our scene and tie all of the colors in the design together.
Tomorrow we’re going to wrap up our garden series with a trip to the country and I hope you’ll come along!
Product List![Basic Black 8-1/2" X 11" Cardstock [ 121045 ]](https://assets1.tamsnetwork.com/images/EC042017NF/121045s.jpg "Basic Black 8-1/2\" X 11\" Cardstock [ 121045 ]")
![Festive 12" X 12" (30.5 X 30.5 Cm) Glimmer Paper [ 164106 ]](https://assets1.tamsnetwork.com/images/EC042017NF/164106s.jpg "Festive 12\" X 12\" (30.5 X 30.5 Cm) Glimmer Paper [ 164106 ]")
![Mixed Media Florals Memories & More Card Pack [ 164657 ]](https://assets1.tamsnetwork.com/images/EC042017NF/164657s.jpg "Mixed Media Florals Memories & More Card Pack [ 164657 ]")
![Wanted To Say Dies [ 161594 ]](https://assets1.tamsnetwork.com/images/EC042017NF/161594s.jpg "Wanted To Say Dies [ 161594 ]")
![Natural Tones Linen Thread [ 164071 ]](https://assets1.tamsnetwork.com/images/EC042017NF/164071s.jpg "Natural Tones Linen Thread [ 164071 ]")
![Daffodil Delight 1/8" (3.2 Mm) Satin Ribbon [ 164715 ]](https://assets1.tamsnetwork.com/images/EC042017NF/164715s.jpg "Daffodil Delight 1/8\" (3.2 Mm) Satin Ribbon [ 164715 ]")
![Starburst Sequins [ 165539 ]](https://assets1.tamsnetwork.com/images/EC042017NF/165539s.jpg "Starburst Sequins [ 165539 ]")
![Fine-Tip Glue Pen [ 138309 ]](https://assets1.tamsnetwork.com/images/EC042017NF/138309s.jpg "Fine-Tip Glue Pen [ 138309 ]")
![Mini Stampin' Dimensionals [ 144108 ]](https://assets1.tamsnetwork.com/images/EC042017NF/144108s.jpg "Mini Stampin' Dimensionals [ 144108 ]")
![Basic White 8 1/2" X 11" Cardstock [ 166780 ]](https://assets1.tamsnetwork.com/images/EC042017NF/166780s.jpg "Basic White 8 1/2\" X 11\" Cardstock [ 166780 ]")
![Lovely Garden 12" X 12" (30.5 X 30.5 Cm) Designer Series Paper [ 165524 ]](https://assets1.tamsnetwork.com/images/EC042017NF/165524s.jpg "Lovely Garden 12\" X 12\" (30.5 X 30.5 Cm) Designer Series Paper [ 165524 ]")
![Pastel Ombre Glimmer 12" X 12" (30.5 X 30.5 Cm) Specialty Paper [ 164851 ]](https://assets1.tamsnetwork.com/images/EC042017NF/164851s.jpg "Pastel Ombre Glimmer 12\" X 12\" (30.5 X 30.5 Cm) Specialty Paper [ 164851 ]")
![Window Sheets [ 142314 ]](https://assets1.tamsnetwork.com/images/EC042017NF/142314s.jpg "Window Sheets [ 142314 ]")
![Beautiful Butterflies Bundle (English) [ 164615 ]](https://assets1.tamsnetwork.com/images/EC042017NF/164615s.jpg "Beautiful Butterflies Bundle (English) [ 164615 ]")
![Layers Of Beauty Photopolymer Stamp Set (English) [ 163514 ]](https://assets1.tamsnetwork.com/images/EC042017NF/163514s.jpg "Layers Of Beauty Photopolymer Stamp Set (English) [ 163514 ]")
![Jet Black Stāzon Ink Pad [ 101406 ]](https://assets1.tamsnetwork.com/images/EC042017NF/101406s.jpg "Jet Black Stāzon Ink Pad [ 101406 ]")
![Blooming Pearls [ 162238 ]](https://assets1.tamsnetwork.com/images/EC042017NF/162238s.jpg "Blooming Pearls [ 162238 ]")
![Adhesive Backed Sequins Trio [ 161206 ]](https://assets1.tamsnetwork.com/images/EC042017NF/161206s.jpg "Adhesive Backed Sequins Trio [ 161206 ]")
![Fresh Freesia 1/8" (3.2 Mm) Faux Velvet Ribbon [ 165540 ]](https://assets1.tamsnetwork.com/images/EC042017NF/165540s.jpg "Fresh Freesia 1/8\" (3.2 Mm) Faux Velvet Ribbon [ 165540 ]")
![Stampin' Dimensionals [ 104430 ]](https://assets1.tamsnetwork.com/images/EC042017NF/104430s.jpg "Stampin' Dimensionals [ 104430 ]")
![Mini Glue Dots [ 103683 ]](https://assets1.tamsnetwork.com/images/EC042017NF/103683s.jpg "Mini Glue Dots [ 103683 ]")

![Blackberry Bliss 8-1/2" X 11" Cardstock [ 133675 ]](https://assets1.tamsnetwork.com/images/EC042017NF/133675s.jpg "Blackberry Bliss 8-1/2\" X 11\" Cardstock [ 133675 ]")
![Layers Of Beauty Bundle (English) [ 163519 ]](https://assets1.tamsnetwork.com/images/EC042017NF/163519s.jpg "Layers Of Beauty Bundle (English) [ 163519 ]")
![Fresh Freesia Classic Stampin' Pad [ 155611 ]](https://assets1.tamsnetwork.com/images/EC042017NF/155611s.jpg "Fresh Freesia Classic Stampin' Pad [ 155611 ]")
![Blackberry Bliss Classic Stampin' Pad [ 147092 ]](https://assets1.tamsnetwork.com/images/EC042017NF/147092s.jpg "Blackberry Bliss Classic Stampin' Pad [ 147092 ]")
![Shy Shamrock Classic Stampin Pad [ 163808 ]](https://assets1.tamsnetwork.com/images/EC042017NF/163808s.jpg "Shy Shamrock Classic Stampin Pad [ 163808 ]")
![Pretty Peacock Classic Stampin’ Pad [ 150083 ]](https://assets1.tamsnetwork.com/images/EC042017NF/150083s.jpg "Pretty Peacock Classic Stampin’ Pad [ 150083 ]")
![Versamark Pad [ 102283 ]](https://assets1.tamsnetwork.com/images/EC042017NF/102283s.jpg "Versamark Pad [ 102283 ]")
![Basics Wow! Embossing Powder [ 165679 ]](https://assets1.tamsnetwork.com/images/EC042017NF/165679s.jpg "Basics Wow! Embossing Powder [ 165679 ]")
![Small Blending Brushes [ 160518 ]](https://assets1.tamsnetwork.com/images/EC042017NF/160518s.jpg "Small Blending Brushes [ 160518 ]")
![Paper Butterfly Accents [ 162612 ]](https://assets1.tamsnetwork.com/images/EC042017NF/162612s.jpg "Paper Butterfly Accents [ 162612 ]")
![Two Tone Sparkle Gems [ 164633 ]](https://assets1.tamsnetwork.com/images/EC042017NF/164633s.jpg "Two Tone Sparkle Gems [ 164633 ]")
![Rhinestone Basic Jewels [ 144220 ]](https://assets1.tamsnetwork.com/images/EC042017NF/144220s.jpg "Rhinestone Basic Jewels [ 144220 ]")
![Pretty Peacock & Gold 3/8" (1 Cm) Metallic Ribbon [ 162588 ]](https://assets1.tamsnetwork.com/images/EC042017NF/162588s.jpg "Pretty Peacock & Gold 3/8\" (1 Cm) Metallic Ribbon [ 162588 ]")
![Blackberry Bliss & Gold 1/2" (1.3 Cm) Textured Ribbon [ 164039 ]](https://assets1.tamsnetwork.com/images/EC042017NF/164039s.jpg "Blackberry Bliss & Gold 1/2\" (1.3 Cm) Textured Ribbon [ 164039 ]")


![Crushed Curry 8-1/2" X 11" Cardstock [ 131199 ]](https://assets1.tamsnetwork.com/images/EC042017NF/131199s.jpg "Crushed Curry 8-1/2\" X 11\" Cardstock [ 131199 ]")
![Nature's Sweetness 12" X 12" (30.5 X 30.5 Cm) Specialty Designer Series Paper [ 162616 ]](https://assets1.tamsnetwork.com/images/EC042017NF/162616s.jpg "Nature's Sweetness 12\" X 12\" (30.5 X 30.5 Cm) Specialty Designer Series Paper [ 162616 ]")
![Textured Metallic 12" X 12" (30.5 X 30.5 Cm) Specialty Paper [ 163772 ]](https://assets1.tamsnetwork.com/images/EC042017NF/163772s.jpg "Textured Metallic 12\" X 12\" (30.5 X 30.5 Cm) Specialty Paper [ 163772 ]")
![Thankful Garden Bundle (English) [ 165534 ]](https://assets1.tamsnetwork.com/images/EC042017NF/165534s.jpg "Thankful Garden Bundle (English) [ 165534 ]")
![Enduring Beauty Photopolymer Stamp Set (English) [ 162670 ]](https://assets1.tamsnetwork.com/images/EC042017NF/162670s.jpg "Enduring Beauty Photopolymer Stamp Set (English) [ 162670 ]")
![Mixed Labels Dies [ 164652 ]](https://assets1.tamsnetwork.com/images/EC042017NF/164652s.jpg "Mixed Labels Dies [ 164652 ]")
![Daffodil Delight Classic Stampin' Pad [ 147094 ]](https://assets1.tamsnetwork.com/images/EC042017NF/147094s.jpg "Daffodil Delight Classic Stampin' Pad [ 147094 ]")
![Gold Twisted Thread [ 164603 ]](https://assets1.tamsnetwork.com/images/EC042017NF/164603s.jpg "Gold Twisted Thread [ 164603 ]")
![Gold Textured Adhesive Backed Dots [ 164027 ]](https://assets1.tamsnetwork.com/images/EC042017NF/164027s.jpg "Gold Textured Adhesive Backed Dots [ 164027 ]")
![Regal Winter 12" X 12" (30.5 X 30.5 Cm) Designer Series Paper [ 164156 ]](https://assets1.tamsnetwork.com/images/EC042017NF/164156s.jpg "Regal Winter 12\" X 12\" (30.5 X 30.5 Cm) Designer Series Paper [ 164156 ]")
![Enduring Beauty Bundle (English) [ 162674 ]](https://assets1.tamsnetwork.com/images/EC042017NF/162674s.jpg "Enduring Beauty Bundle (English) [ 162674 ]")
![Hope You Know Cling Stamp Set (English) [ 161409 ]](https://assets1.tamsnetwork.com/images/EC042017NF/161409s.jpg "Hope You Know Cling Stamp Set (English) [ 161409 ]")
![Spotlight On Nature Dies [ 163580 ]](https://assets1.tamsnetwork.com/images/EC042017NF/163580s.jpg "Spotlight On Nature Dies [ 163580 ]")
![Something Fancy Dies [ 160424 ]](https://assets1.tamsnetwork.com/images/EC042017NF/160424s.jpg "Something Fancy Dies [ 160424 ]")
![Real Red Classic Stampin' Pad [ 147084 ]](https://assets1.tamsnetwork.com/images/EC042017NF/147084s.jpg "Real Red Classic Stampin' Pad [ 147084 ]")
![Shaded Spruce Classic Stampin' Pad [ 147088 ]](https://assets1.tamsnetwork.com/images/EC042017NF/147088s.jpg "Shaded Spruce Classic Stampin' Pad [ 147088 ]")
![Low Profile Dots [ 164658 ]](https://assets1.tamsnetwork.com/images/EC042017NF/164658s.jpg "Low Profile Dots [ 164658 ]")


![2024–2026 In Color™ Glimmer 12" X 12" (30.5 X 30.5 Cm) Specialty Paper [ 163771 ]](https://assets1.tamsnetwork.com/images/EC042017NF/163771s.jpg "2024–2026 In Color™ Glimmer 12\" X 12\" (30.5 X 30.5 Cm) Specialty Paper [ 163771 ]")
![Shy Shamrock 8 1/2" X 11" Cardstock [ 163795 ]](https://assets1.tamsnetwork.com/images/EC042017NF/163795s.jpg "Shy Shamrock 8 1/2\" X 11\" Cardstock [ 163795 ]")
![Country Woods 12" X 12" (30.5 X 30.5 Cm) Designer Series Paper [ 163393 ]](https://assets1.tamsnetwork.com/images/EC042017NF/163393s.jpg "Country Woods 12\" X 12\" (30.5 X 30.5 Cm) Designer Series Paper [ 163393 ]")
![Gold Mercury Vellum 12" X 12" (30.5 X 30.5 Cm) Specialty Designer Series Paper [ 164142 ]](https://assets1.tamsnetwork.com/images/EC042017NF/164142s.jpg "Gold Mercury Vellum 12\" X 12\" (30.5 X 30.5 Cm) Specialty Designer Series Paper [ 164142 ]")
![Smoky Slate Classic Stampin' Pad [ 147113 ]](https://assets1.tamsnetwork.com/images/EC042017NF/147113s.jpg "Smoky Slate Classic Stampin' Pad [ 147113 ]")
![Petunia Pop Classic Stampin Pad [ 163811 ]](https://assets1.tamsnetwork.com/images/EC042017NF/163811s.jpg "Petunia Pop Classic Stampin Pad [ 163811 ]")
![Faith Collection Bundle (English) [ 164796 ]](https://assets1.tamsnetwork.com/images/EC042017NF/164796s.jpg "Faith Collection Bundle (English) [ 164796 ]")
![Countryside Corners Dies [ 161471 ]](https://assets1.tamsnetwork.com/images/EC042017NF/161471s.jpg "Countryside Corners Dies [ 161471 ]")
![Beautiful Butterflies Hybrid Embossing Folder [ 164614 ]](https://assets1.tamsnetwork.com/images/EC042017NF/164614s.jpg "Beautiful Butterflies Hybrid Embossing Folder [ 164614 ]")
![Pattern Of Friendship Die [ 165384 ]](https://assets1.tamsnetwork.com/images/EC042017NF/165384s.jpg "Pattern Of Friendship Die [ 165384 ]")
![2024–2026 In Color™ Shimmer Gems [ 163781 ]](https://assets1.tamsnetwork.com/images/EC042017NF/163781s.jpg "2024–2026 In Color™ Shimmer Gems [ 163781 ]")
![Purple Adhesive Backed Sequins [ 164970 ]](https://assets1.tamsnetwork.com/images/EC042017NF/164970s.jpg "Purple Adhesive Backed Sequins [ 164970 ]")
![Iridescent 1/2" (1.3 Cm) Striped Trim [ 163299 ]](https://assets1.tamsnetwork.com/images/EC042017NF/163299s.jpg "Iridescent 1/2\" (1.3 Cm) Striped Trim [ 163299 ]")
![Everyday Skies 6" X 6" (15.2 X 15.2 Cm) Designer Series Paper [ 164622 ]](https://assets1.tamsnetwork.com/images/EC042017NF/164622s.jpg "Everyday Skies 6\" X 6\" (15.2 X 15.2 Cm) Designer Series Paper [ 164622 ]")
![Thoughtful Journey 6" X 6" (15.2 X 15.2 Cm) Designer Series Paper [ 163303 ]](https://assets1.tamsnetwork.com/images/EC042017NF/163303s.jpg "Thoughtful Journey 6\" X 6\" (15.2 X 15.2 Cm) Designer Series Paper [ 163303 ]")
![Unbounded Love Photopolymer Stamp Set (English) [ 163378 ]](https://assets1.tamsnetwork.com/images/EC042017NF/163378s.jpg "Unbounded Love Photopolymer Stamp Set (English) [ 163378 ]")
![Faith Collection Dies [ 164795 ]](https://assets1.tamsnetwork.com/images/EC042017NF/164795s.jpg "Faith Collection Dies [ 164795 ]")
![Grove Dies [ 157844 ]](https://assets1.tamsnetwork.com/images/EC042017NF/157844s.jpg "Grove Dies [ 157844 ]")
![In The Grove Dies [ 163511 ]](https://assets1.tamsnetwork.com/images/EC042017NF/163511s.jpg "In The Grove Dies [ 163511 ]")
![Autumn Leaves Dies [ 162185 ]](https://assets1.tamsnetwork.com/images/EC042017NF/162185s.jpg "Autumn Leaves Dies [ 162185 ]")

![Mossy Meadow 8-1/2" X 11" Cardstock [ 133676 ]](https://assets1.tamsnetwork.com/images/EC042017NF/133676s.jpg "Mossy Meadow 8-1/2\" X 11\" Cardstock [ 133676 ]")
![Pretty Peacock 8-1/2" X 11" Cardstock [ 150880 ]](https://assets1.tamsnetwork.com/images/EC042017NF/150880s.jpg "Pretty Peacock 8-1/2\" X 11\" Cardstock [ 150880 ]")
![Unbounded Love Bundle (English) [ 163384 ]](https://assets1.tamsnetwork.com/images/EC042017NF/163384s.jpg "Unbounded Love Bundle (English) [ 163384 ]")
![Early Espresso Classic Stampin' Pad [ 147114 ]](https://assets1.tamsnetwork.com/images/EC042017NF/147114s.jpg "Early Espresso Classic Stampin' Pad [ 147114 ]")
![Winterly Tree Tops Dies [ 164065 ]](https://assets1.tamsnetwork.com/images/EC042017NF/164065s.jpg "Winterly Tree Tops Dies [ 164065 ]")
![Unbounded Love Dies [ 163383 ]](https://assets1.tamsnetwork.com/images/EC042017NF/163383s.jpg "Unbounded Love Dies [ 163383 ]")
![Season Of Elegance 12" X 12" (30.5 X 30.5 Cm) Specialty Designer Series Paper [ 164144 ]](https://assets1.tamsnetwork.com/images/EC042017NF/164144s.jpg "Season Of Elegance 12\" X 12\" (30.5 X 30.5 Cm) Specialty Designer Series Paper [ 164144 ]")
![Textured Notes Dies [ 165555 ]](https://assets1.tamsnetwork.com/images/EC042017NF/165555s.jpg "Textured Notes Dies [ 165555 ]")
![Metallics Wow! Embossing Powder [ 165678 ]](https://assets1.tamsnetwork.com/images/EC042017NF/165678s.jpg "Metallics Wow! Embossing Powder [ 165678 ]")
![Purple Fine Shimmer Gems [ 162611 ]](https://assets1.tamsnetwork.com/images/EC042017NF/162611s.jpg "Purple Fine Shimmer Gems [ 162611 ]")
